Make Your First Power Apps Canvas Component

When developing Power Apps I always follow the motto “don’t repeat yourself.” It means if I have already built a feature that I need I should re-use the same code rather make it again from scratch. Power Apps Canvas components allow makers to build a set of custom controls and use them across several apps. Re-using components has personally saved me hundreds of hours of work and reduced the number of bugs in my apps. In this article I will show you how to make your first Power Apps canvas component.
Introduction: The Fahrenheit To Celsius Conversion Component
The Fahrenheit to Celsius Conversion Component takes a temperature reading in fahrenheit and calculates the equivalent temperature in celsius.

Create A New Power Apps Canvas Component
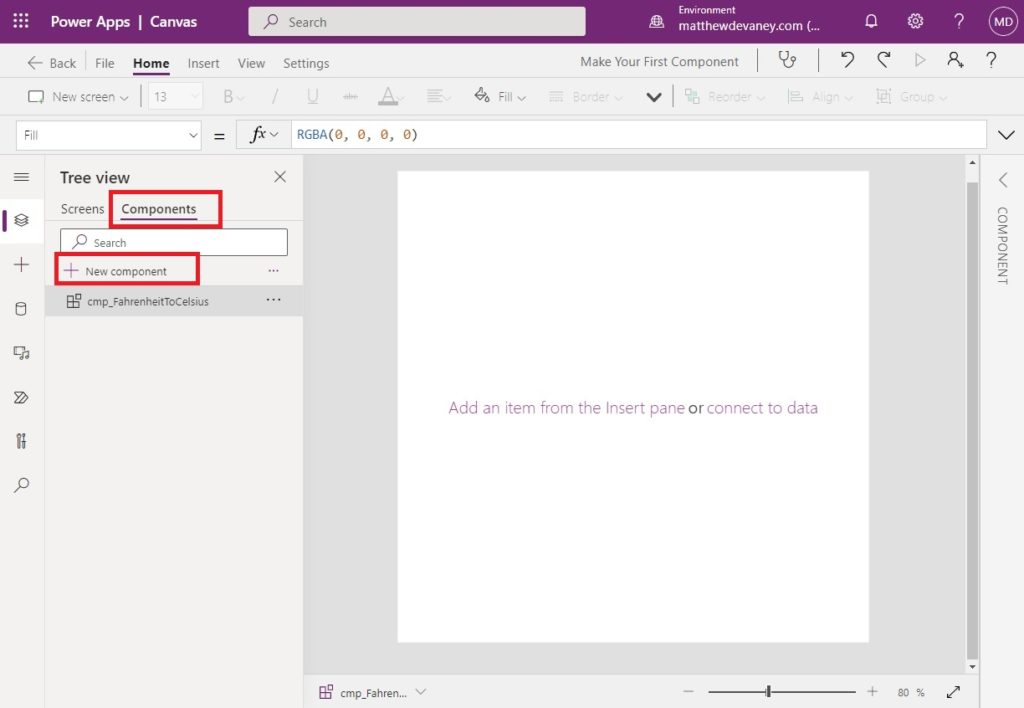
Open Power Apps Studio and create a new app from blank. Select Components from the Tree View then click New Component. Name the component cmp_FahrenheitToCelsius.
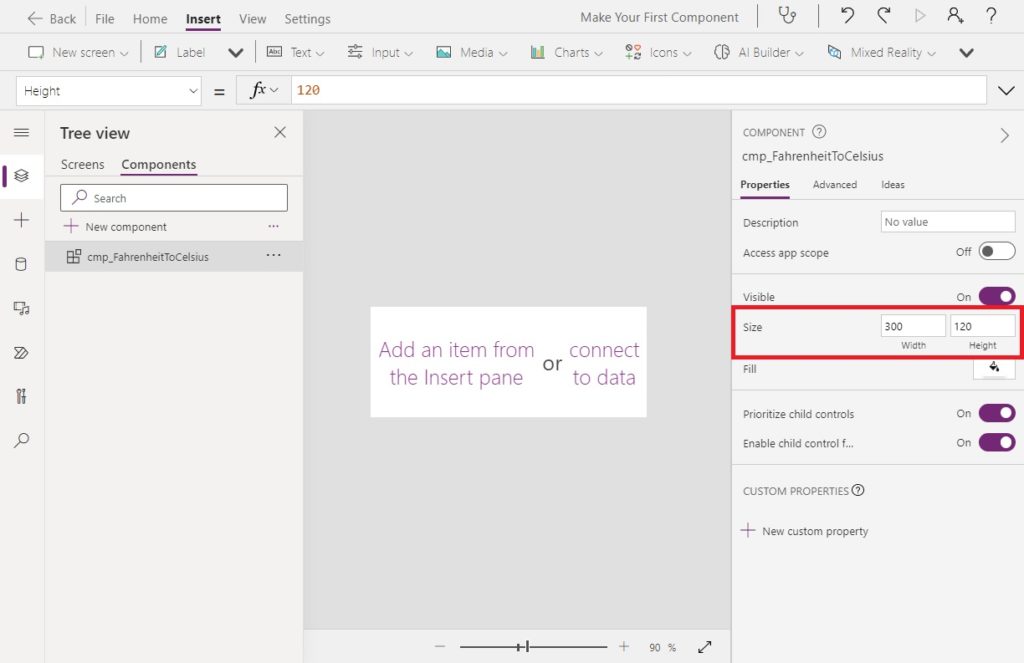
Change the Width property of the component to 300 and the Height property to 120.
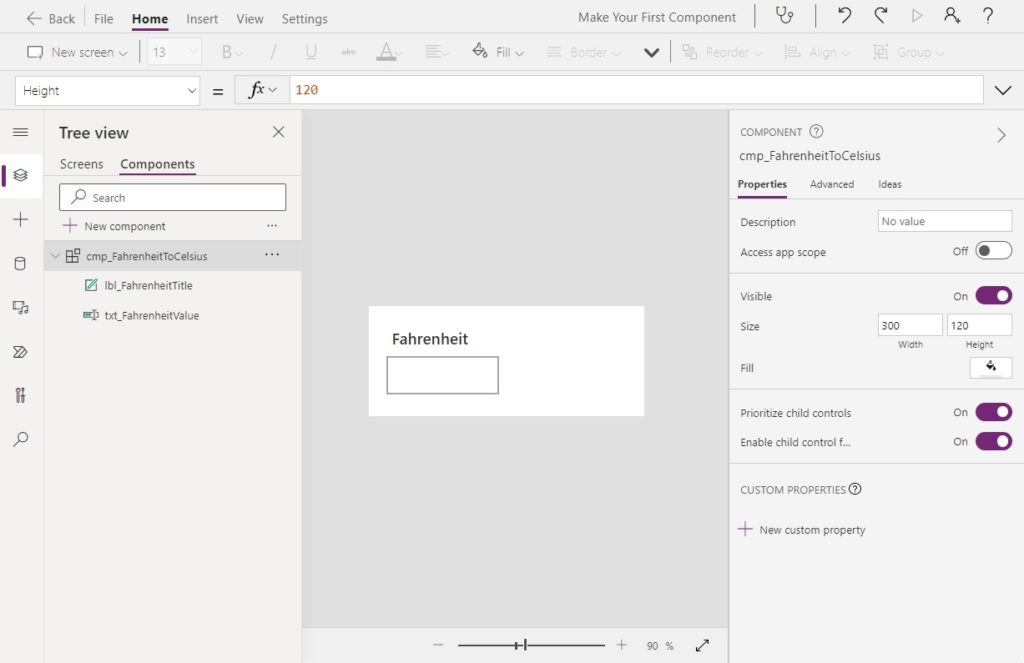
Next we will add controls to the component to capture user input. Insert a text input onto the left side of the component and place a label on top of it with the word “Fahrenheit.”
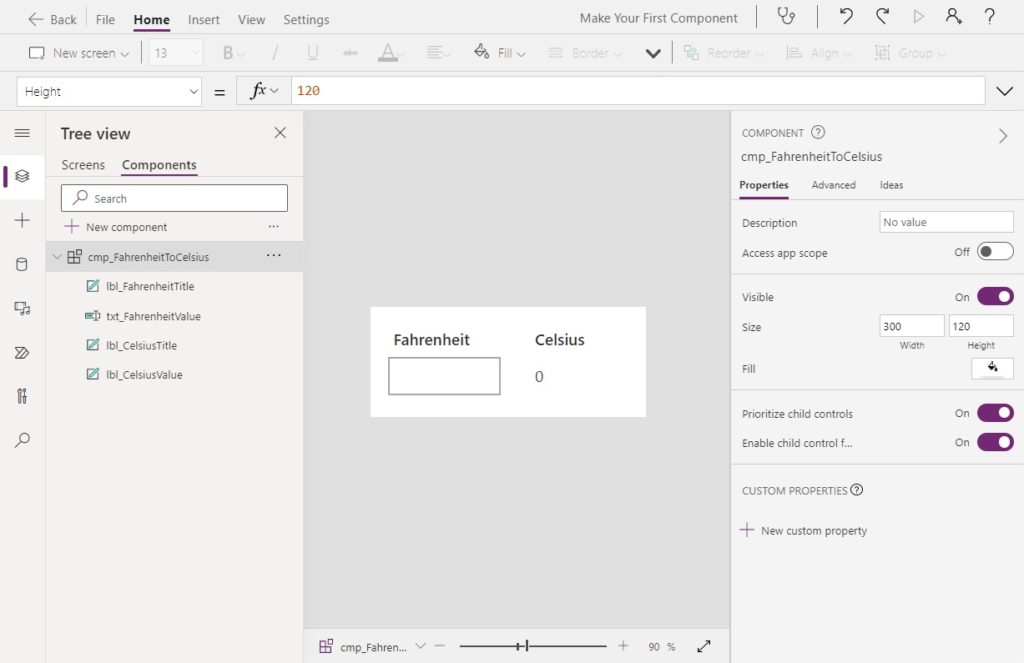
Then on the right-side of the component we will show the result of the fahrenheit to celsius calculation. Insert a new label with the text “Celsius” to serve as a title and another label below it with a text property showing 0.
Add An Input Property To A Power Apps Component
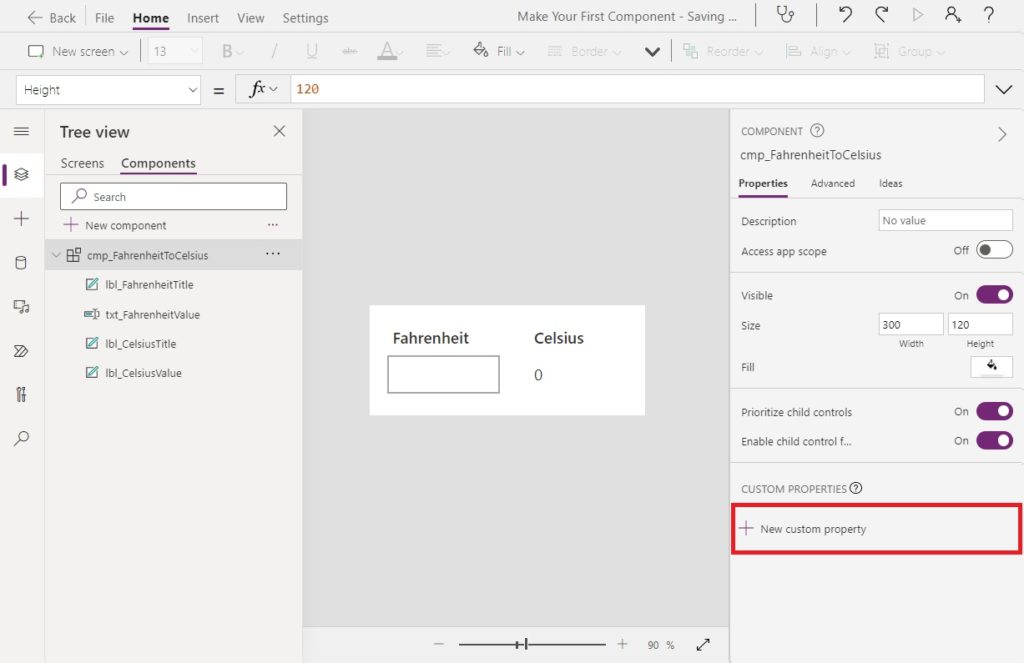
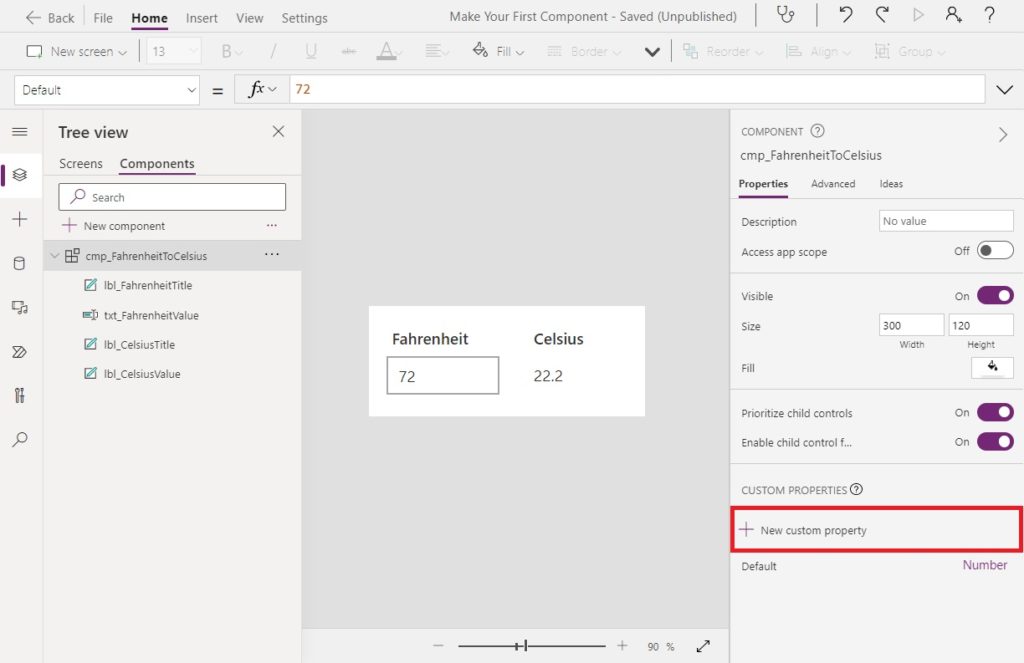
All controls in Power Apps have properties to define how they should behave on the screen. For Power Apps components we need to create those properties for ourselves. Select the component from the Tree View and select new custom property from the right-pane.
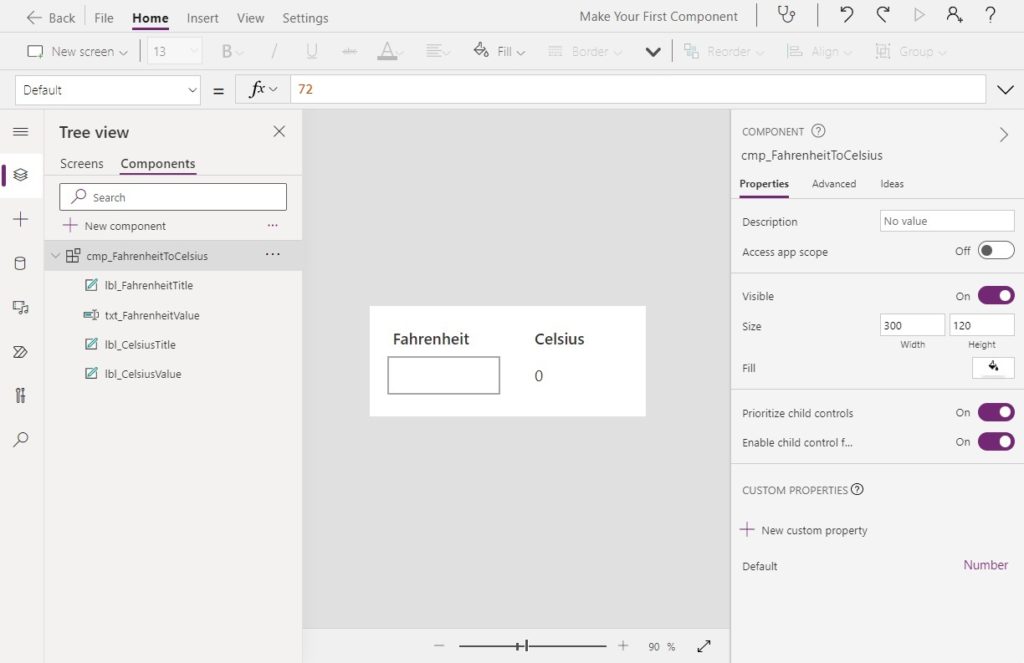
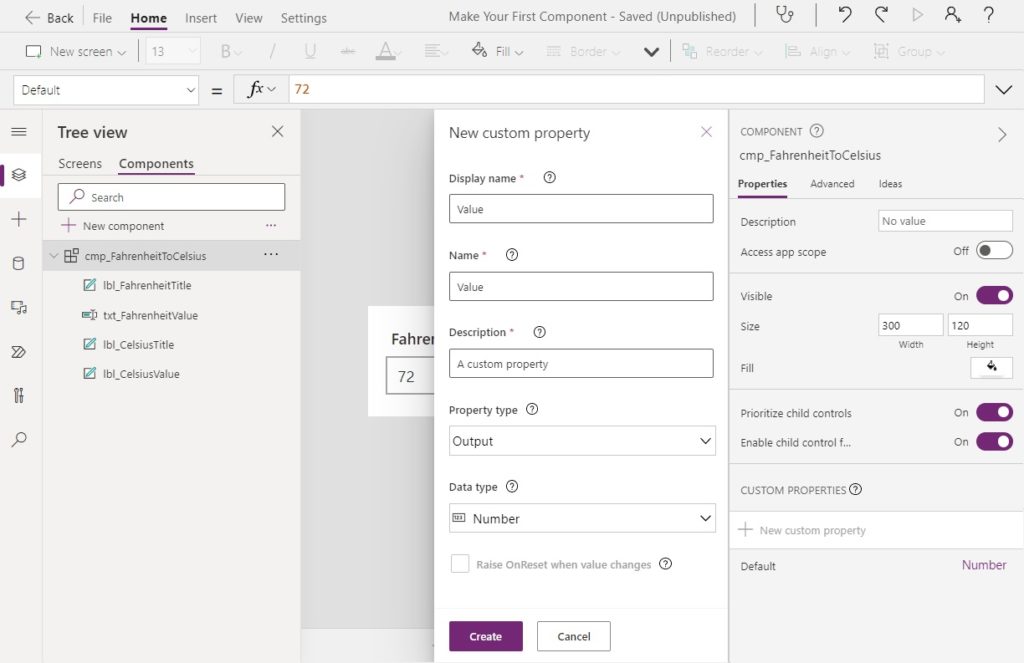
We want to make an input property called Default to supply a default value to the fahrenheit text input. Write the word “Default” in the Display Name and Name fields. Choose the property type Input and select the data type Number. Then click Create. The input property Default will appear in the right-menu.

Next we’ll load the component input property with a value. Choose the Default property of the default component and enter the number 72.
To show the value in the text input we must link it to the component’s Default property.
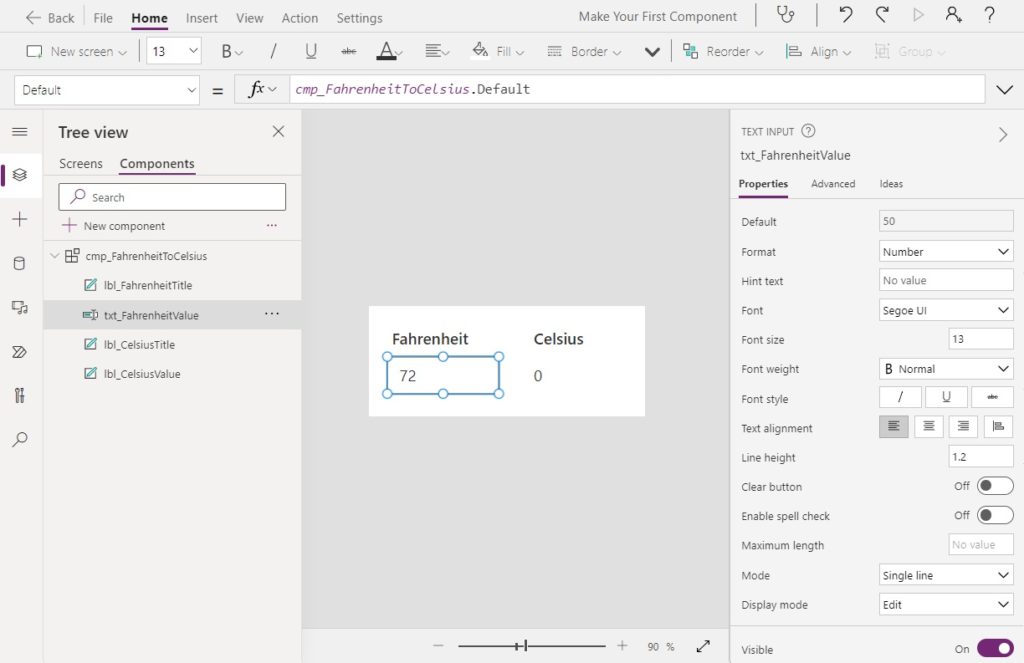
Write this code in the Default property of the text input
cmp_FahrenheitToCelsius.DefaultCode language: CSS (css)
Calculate The Fahrenheit To Celsius Conversion
Power Apps components are great for taking an input value, doing some operation on that value and outputting the result. In our component, we want to read-in a value in fahrenheit, convert it to celsius and then display the result to the user.
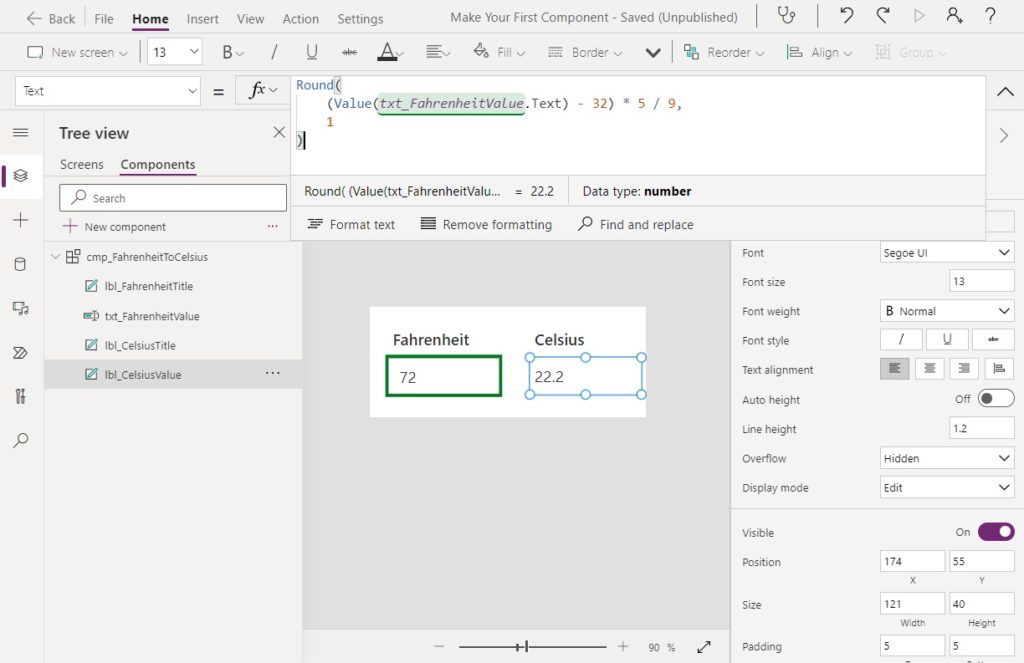
Use this code in the Text property of the celsius value label to perform the conversion from fahrenheit to celsius.
Round(
(Value(txt_FahrenheitValue.Text) - 32) * 5 / 9,
 1
)
Add An Output Property To A Power Apps Component
Our component is now displaying the the value in Celsius. But what if we wanted to reference the celsius value in a canvas app? To do this, we need to create an output property.
Select new custom property from the right-menu.
Set the custom property Display Name and the Name to Value, choose the Property Type Output and make the Data Type Number. Then click Create. The new output property will appear in the right-side menu.
Then we select the component from the Tree View and define the Value output property we just created.
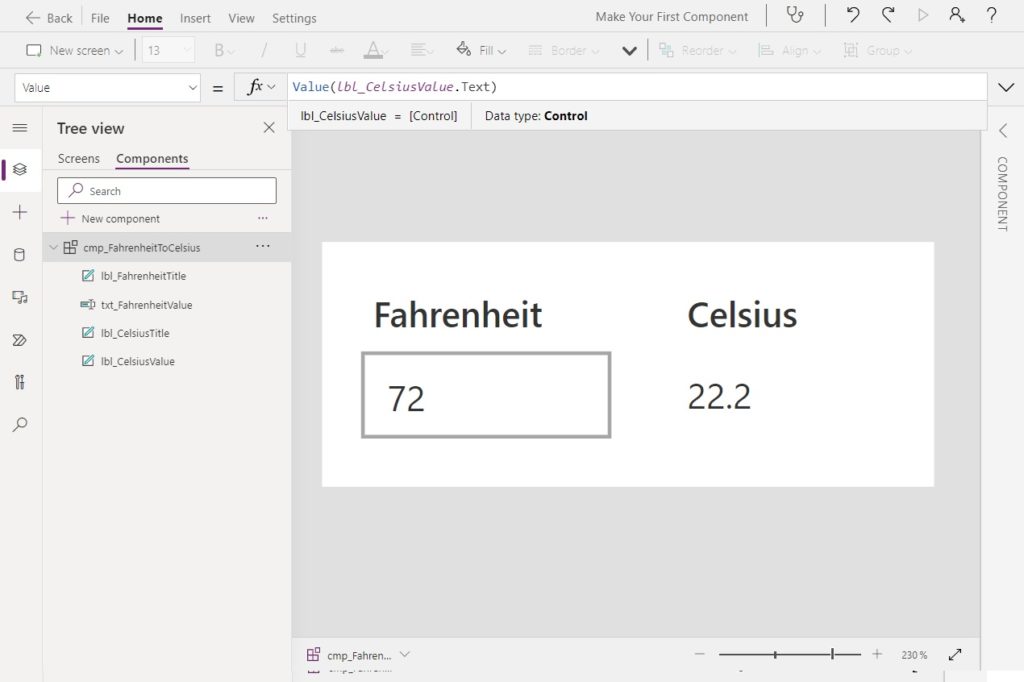
Write this code in the the Value property of the component.
Value(lbl_CelsiusValue.Text)Code language: CSS (css)
Define The Component’s OnReset Behaviour
New component makers and experience veteran’s alike often forget to define how to reset the component and what should happen when the component becomes reset. We won’t make that same mistake.
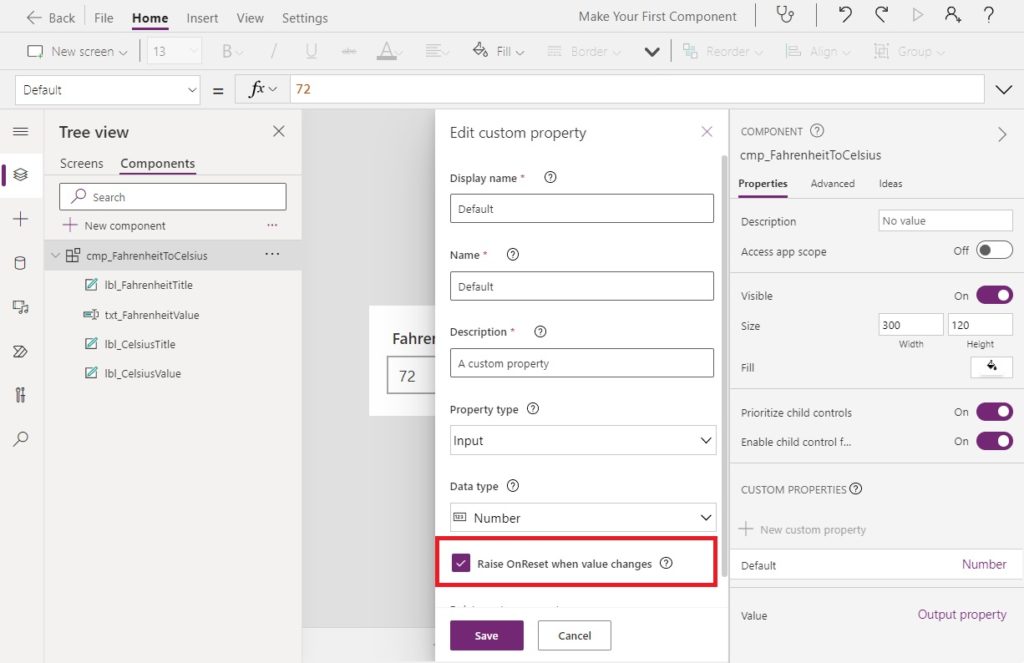
When a maker inputs a new value into the Default property our component should be reset to reflect the change. Open the Default property and check the box beside Raise OnReset when value changes. Then click Save.
Then highlight the component and navigate to the OnReset property.
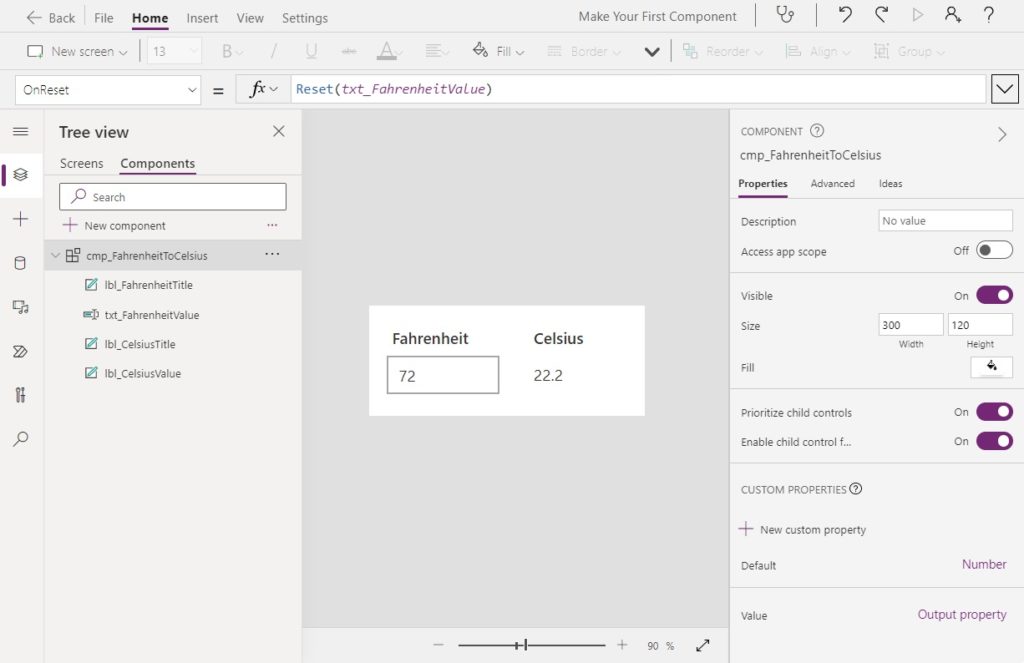
Write this code in the OnReset property of the component to update the the fahrenheit text input with a new value.
Reset(txt_FahrenheitValue)
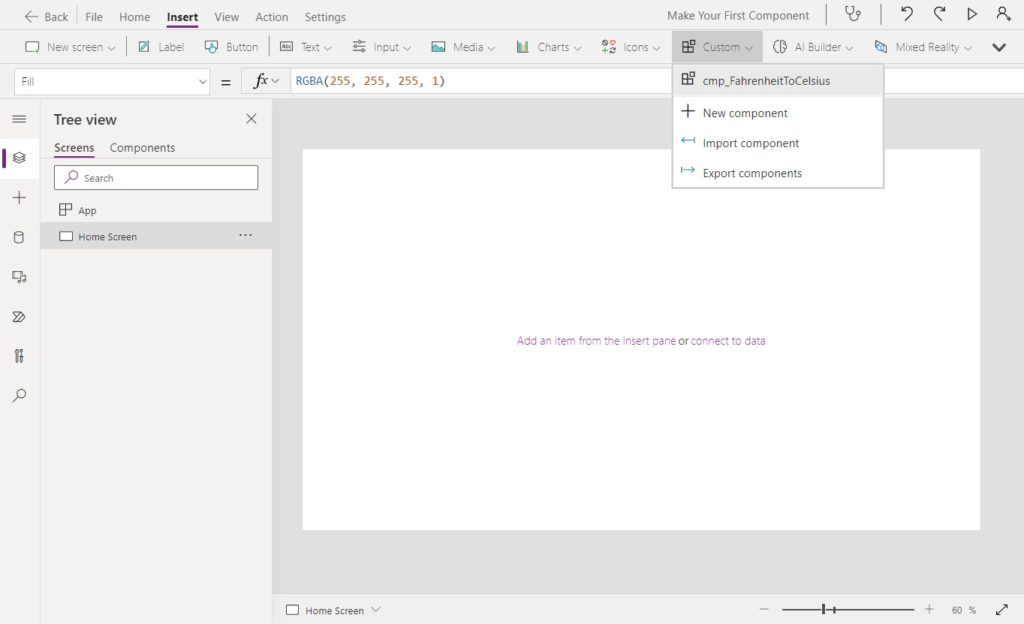
Insert A Power Apps Component Into A Canvas App
Our Power Apps Canvas Component to convert fahrenheit to celsius is complete. Now let’s import it into a canvas app. Go the Screens tab in the Tree View and select the component from the Custom menu.
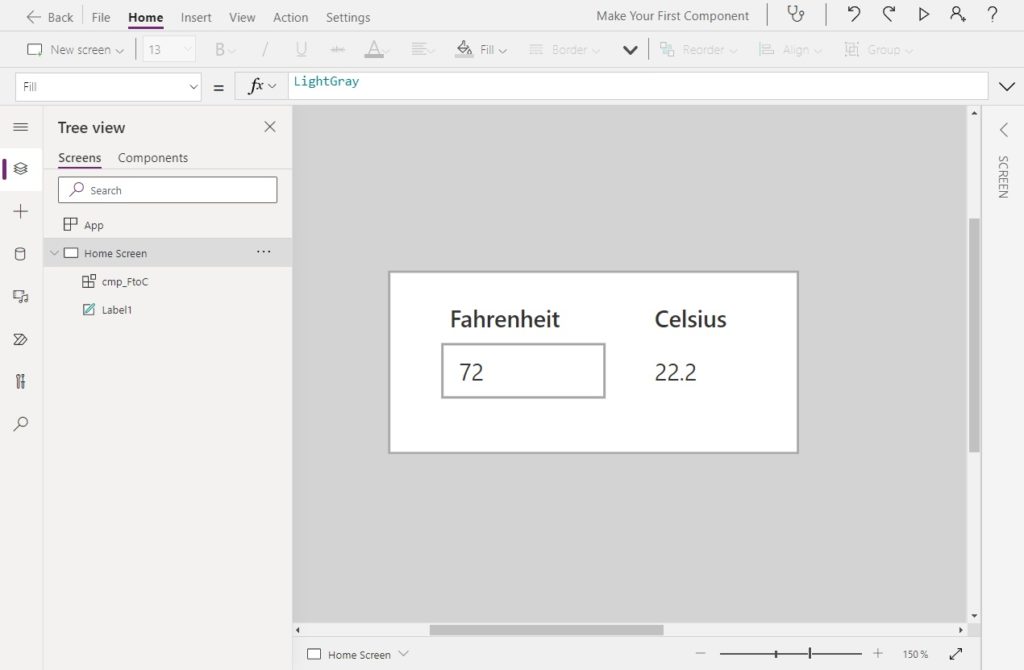
The component is now included on the screen.
Want To Learn More About Power Apps Canvas Components?
This tutorial is part of a free online course called Learn Power Apps Canvas Components By Making 5 Components. The best way to learn isn’t by watching videos, or by reading articles. The best way to master Power Apps canvas components is by building real-world projects. So that’s exactly what we’ll do. Go ahead and get started on the other lessons below. I know you’re going to get alot of this free course.
Did You Enjoy This Article? 😺
Subscribe to get new Copilot Studio articles sent to your inbox each week for FREE
Questions?
If you have any questions about Make Your First Power Apps Canvas Component please leave a message in the comments section below. You can post using your email address and are not required to create an account to join the discussion.


Hi Matt, This is great! quick note though the value property code to copy is Value(txt_CelsiusValue.Text) but it should use lbl. e.g. Value(lbl_CelsiusValue.Text)
Andrew,
Thanks for letting me know about this small issue with the tutorial. I’ve now made the fix and it will appear as soon as my website cache refreshes 🙂
Hello Mr Devaney,
I was experimenting with a component Library to store the SVG logo’s from my company.
When using the component in an app it seems the image in the component is not responsive. When I change the with and/or height of the component the image size stays the same. For the image component in the component itself I tried parent.height/width and ComponentName.Height/Width.
Steven,
Have you tried setting the ImagePosition to ‘Fit’?
Yes I did. In the component itself changing the image image size rescales the SVG perfectly. Using the component in an other app changing the size of the component the SVG image is static and not complete visible when resizing.
Thank you for your reply in the first place.
I found the issue. I overlooked the image size settings. those where hard coded. setting them to parent.height and parent.width solved my issue.
Sorry for the inconvenience.
Hey Matthew, I would like to create a canvas component where the component size hugs its content. For example, a button that dynamically sizes to its Text width. The only way I’ve found to do this is to create an output property for the size of the button in the component and then set the components width to its output property. I am afraid this could lead to some performance issues. Is there another way other than PCF?
Raymond,
I wrote an article on how to make an auto-width label manually.
https://www.matthewdevaney.com/how-to-make-a-power-apps-auto-width-label/
You could also use the label control from the Power Apps Creator Kit which comes with an auto-width property built-in.
Hey Matt,
I cannot use this method with the latest changes to the enhanced component properties
https://powerapps.microsoft.com/en-us/blog/enhanced-component-properties/
I have tried a few options but cannot seem to replicate the functionality outlined above, I have a component with a button in it and I want to be able to complete an ‘OnSelect’ action but it does not work. I can’t even get it to Navigate
Have you had any luck with this after the latest changes?
Thanks
Very nice. Now how to use in power pages (PP). I think an article on how to use the PCF comp in a power pages page would be valuable. Because power apps editor is stronger than the PP editor. Quicker making, more functionality, full use of FX functions.
Douglas,
I have no plans to blog Power Pages but I am starting to build my own PCF controls and I am considering videos about it 🙂
Hi Matt,
Do you happen to know how to add components to a PowerApps canvas form? I’ve created a great component, but now I can’t figure out how to add it to the form. No matter how I try, it just doesn’t show up.