Make A Power Apps Component Library To Share And Reuse Components

Power Apps component libraries are now the recommended way to store several components in one place. I was caught by surprise earlier this week when I tried to use a canvas component made in an earlier app and found the import button was missing! Now that the old method of importing components is deprecated we need to learn a new way of doing things. In this article I will show you how to make a Power Apps component library.
Table of Contents:
Why Use A Power Apps Component Library?
Add A New Component Library
Import An Existing Component From An App To A Library
Get A Component From A Component Library
Make Changes To A Component In A Component Library
Update A Component Already Inside An App
Why Use A Power Apps Component Library?
Components can be stored inside a component library or inside in an app. Most times you will want to choose a component library for these 3 reasons:
- Available To Use In Other Apps – Any component in a component library can used in other apps whereas a component stored inside an app cannot. The main benefit of components is to save time by re-using them in as many places as possible.
- Ease Of Updating Across Many Apps – When a changes are made to a component inside a component library the developer can open any app where it is being used a prompt will appear to ask whether it should be updated.
- Share With Others – By saving components in a component library they will be easier for others to find. Component libraries have their own menu separate from apps. This makes them more discoverable.
Add A New Component Library
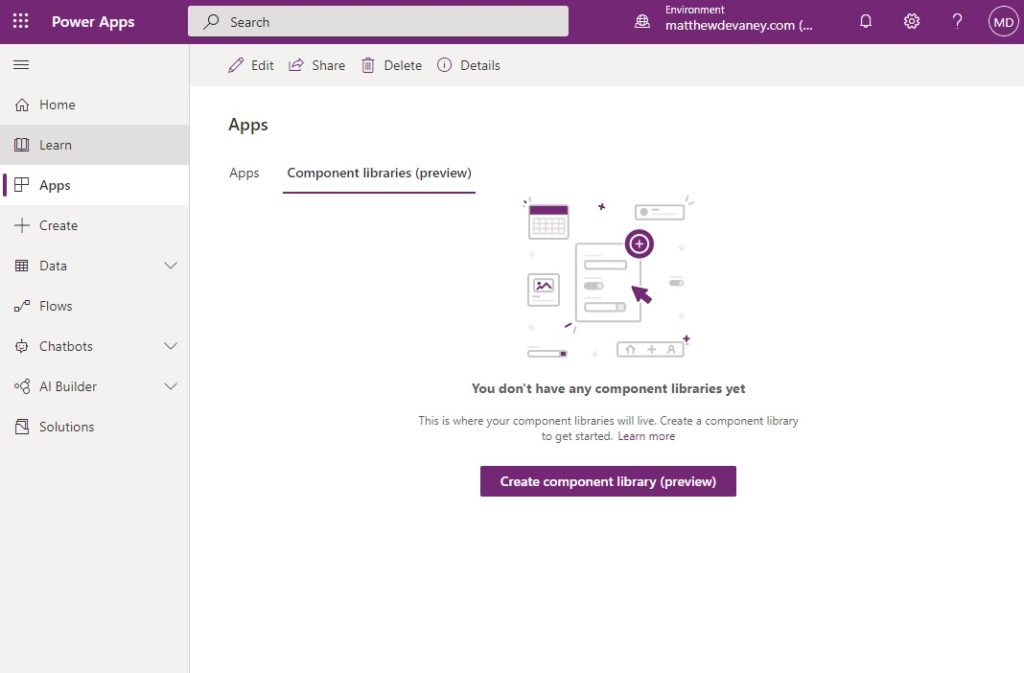
To create a new component library go to the Apps section of make.powerapps.com and choose Component Libraries. Select the create component library button.
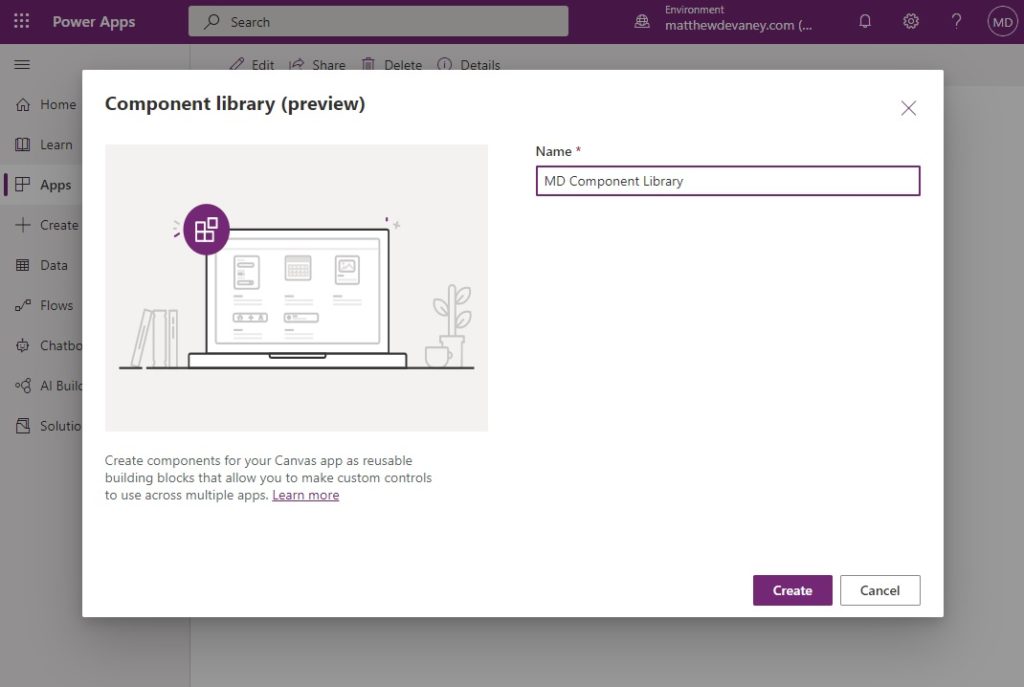
Give the component library a name then click Create.
When the component library opens in studio mode it loads directly into the components tab. Now we are ready to create a component for use in other apps.
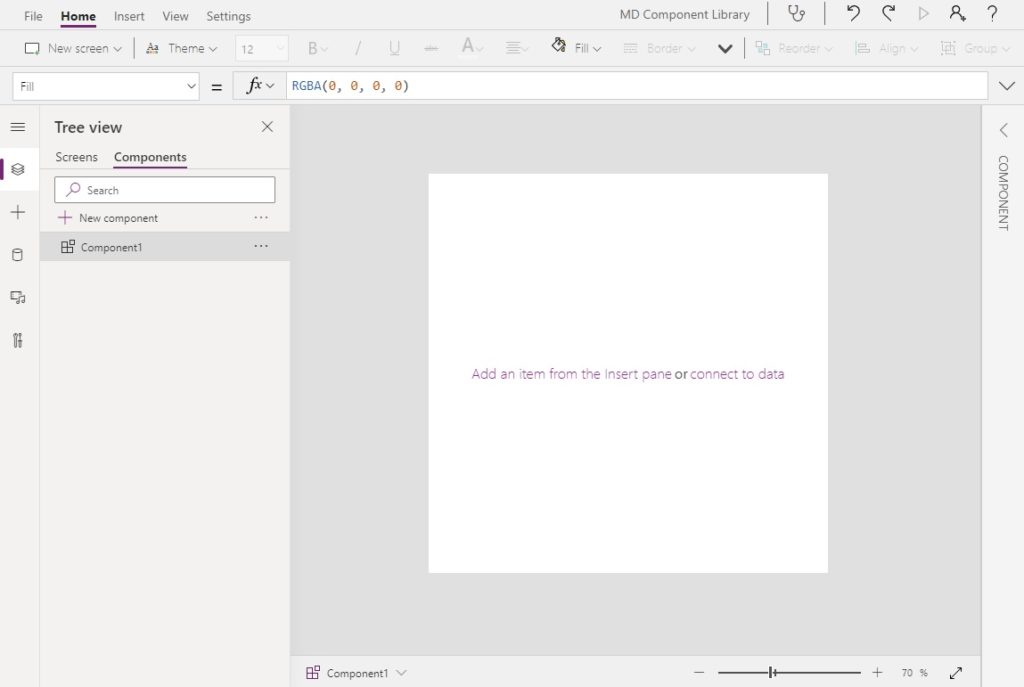
You might notice that that component libraries have all of the same features as a normal app. We can make screens and insert our components into them for testing purposes. But be careful, if we accidentally create an app inside of a component library it cannot be run by other users. A component library can only be used to store components.
Import An Existing Component From An App To A Library
Once we create the component library the next step is to make some new components. But what if we already made some components inside of other apps. There is no obvious way to import them! Fortunately, we can still re-enable the import components feature that was retired. Go to File on the top menu and choose Settings. Then select Upcoming Features, click on the Retired tab and turn on Export and import components.
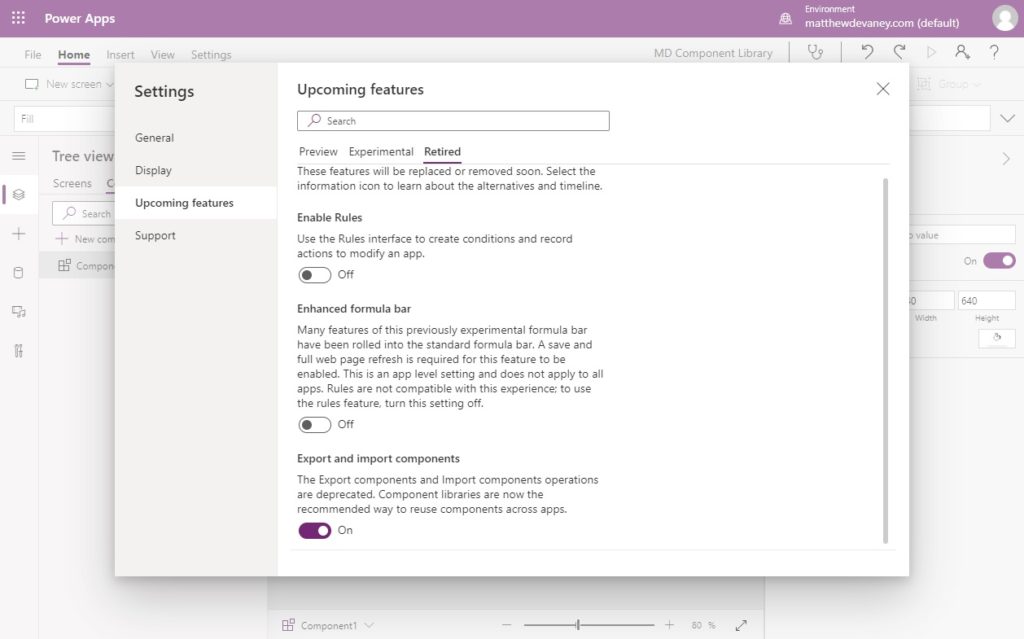
The 3 dots symbol will now appear beside the new component button. Click on the dots and select import components.
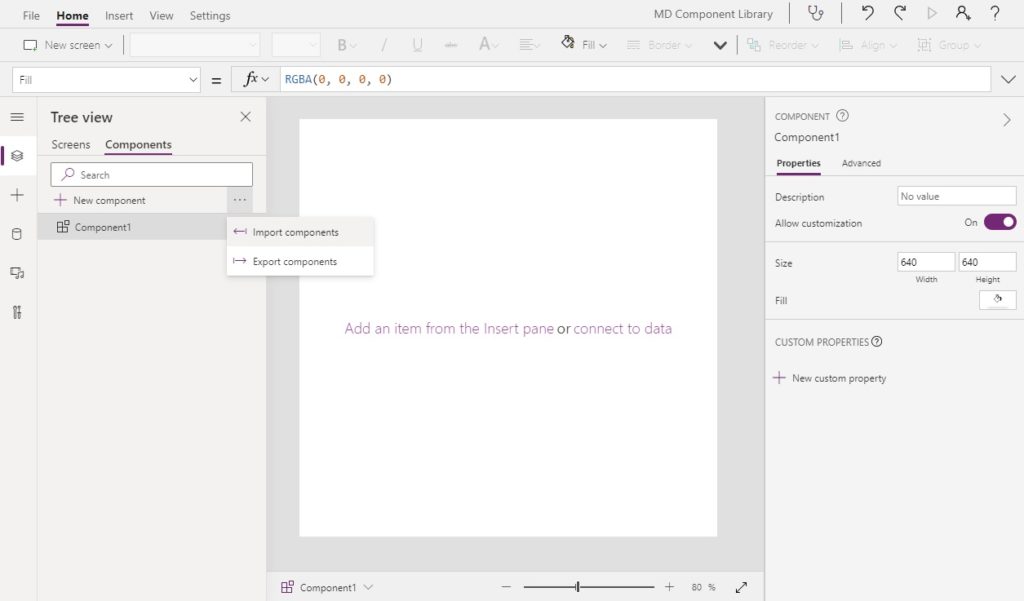
Pick the app where the components we want to import are stored. In this example I am importing a navigation menu component I built in a previous article.
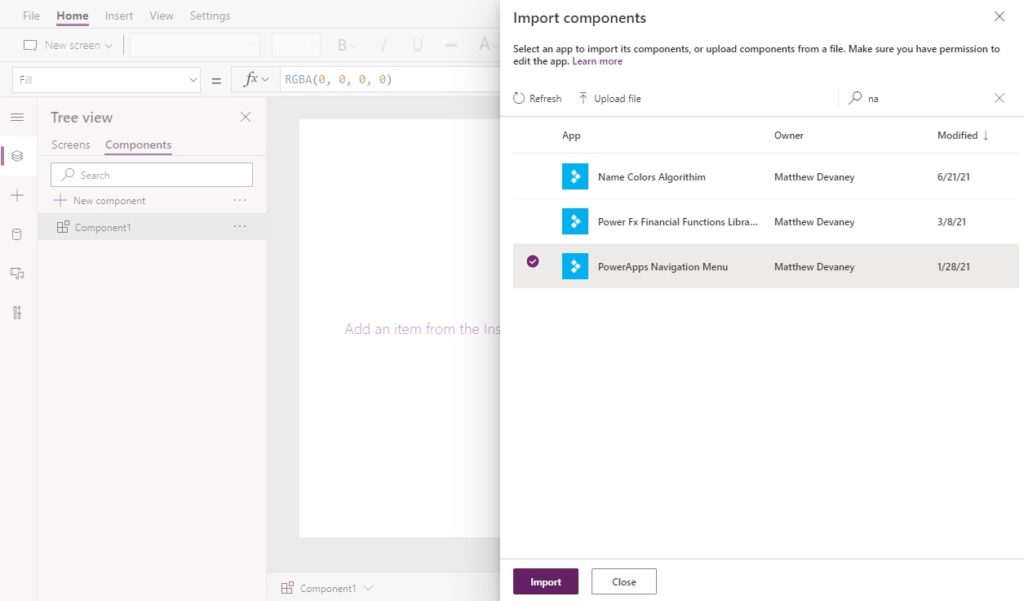
Now the navigation menu component is included in the component library. Repeat this process as many times as you like until all components you want have been imported then save the library.
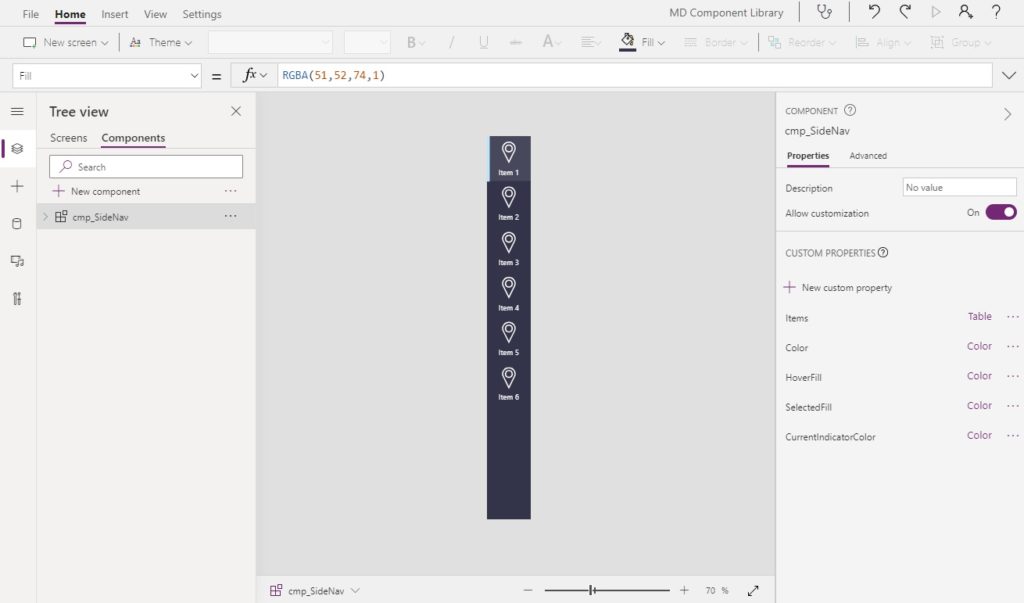
Get A Component From A Component Library
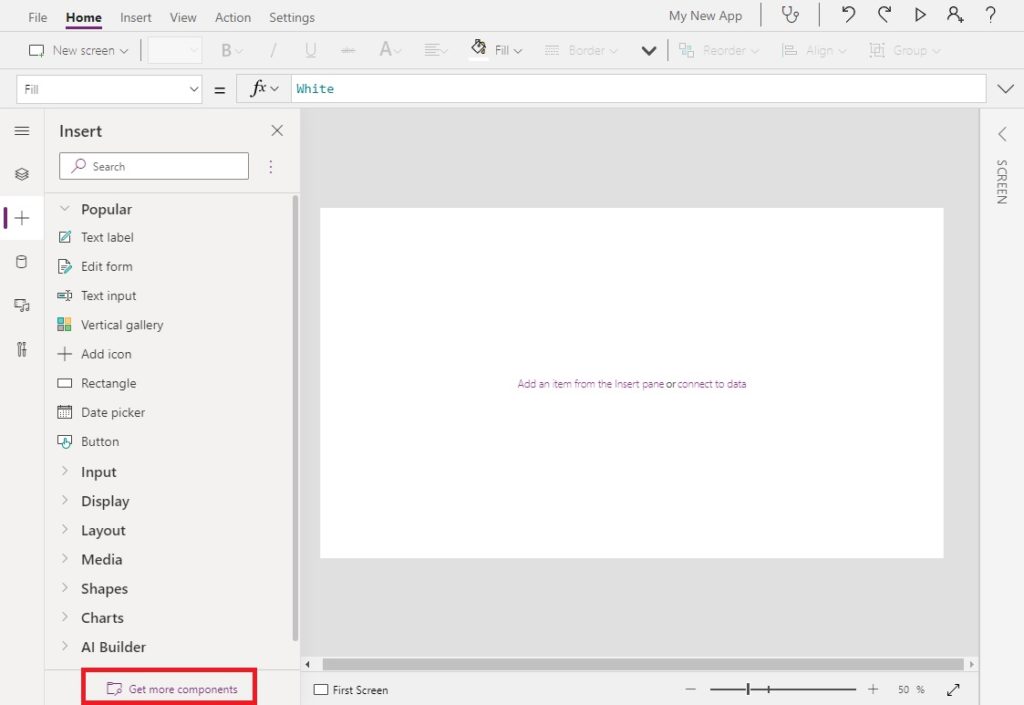
We can now import components from the library into any app. Go to make.powerapps.com and create a new app from blank called My New App. Select the Insert icon from the left menu and click Get More Components.
The component library will appear in the Import Components screen. Choose the navigation menu component and click Import.

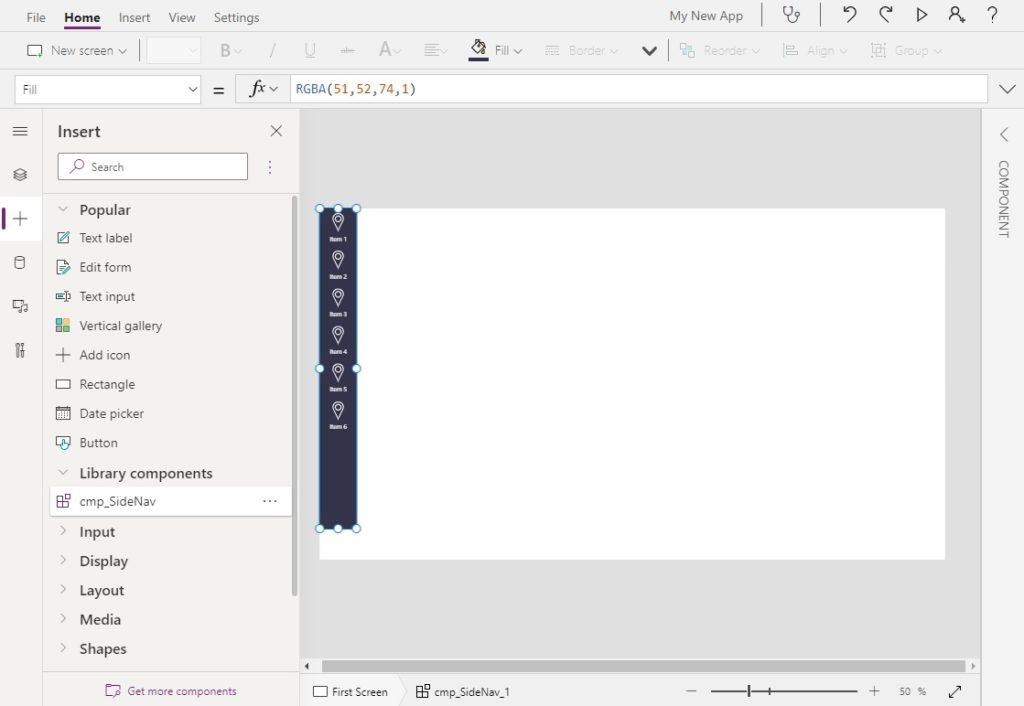
The component will appear on the first screen of our app. If we need to use navigation menu on another screen we can find it in the Library components section of the Insert menu.
Make Changes To A Component In A Component Library
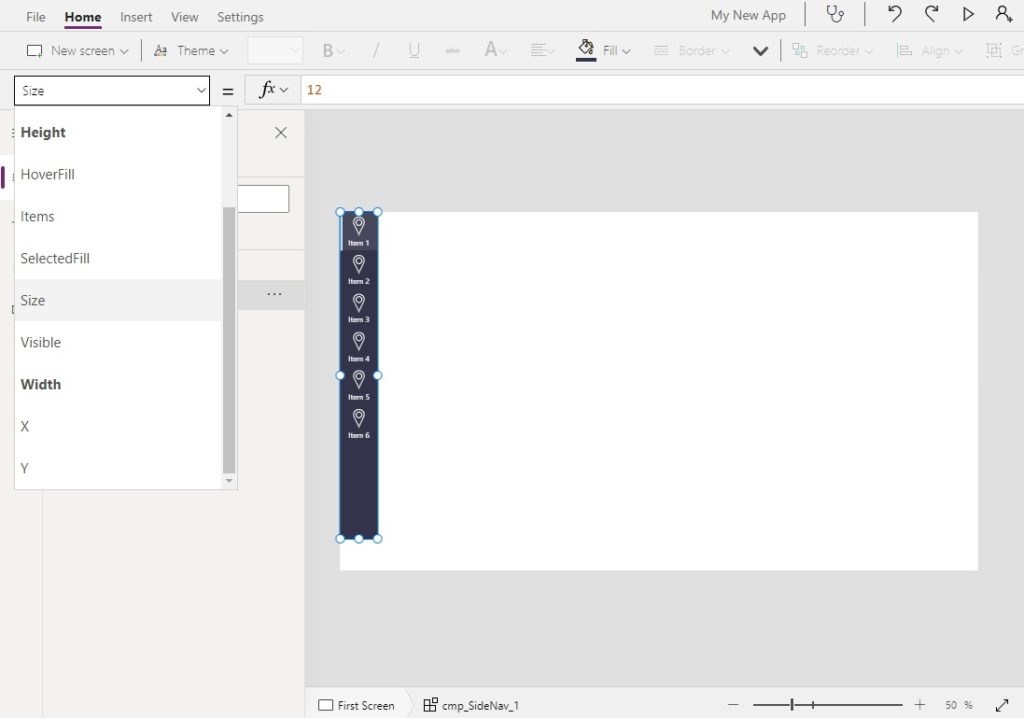
A component library allows developers to make changes to components and quickly load a new version of the component into any apps currently using it. We can make a small update to the navigation menu to test this feature out. Select the navigation menu and add a new custom property called Size as shown below.
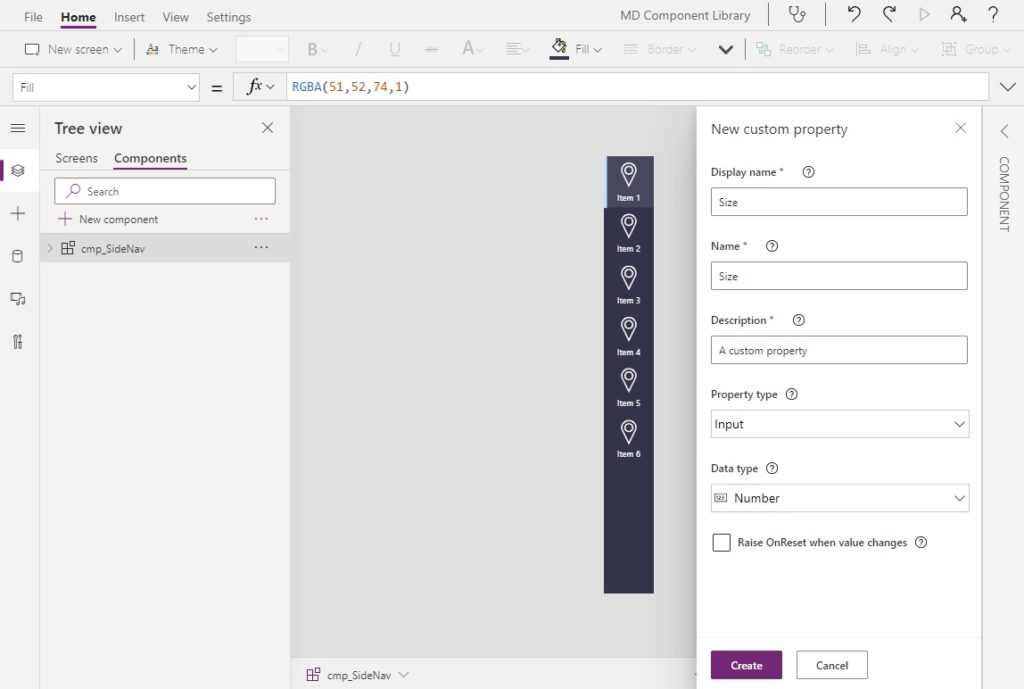
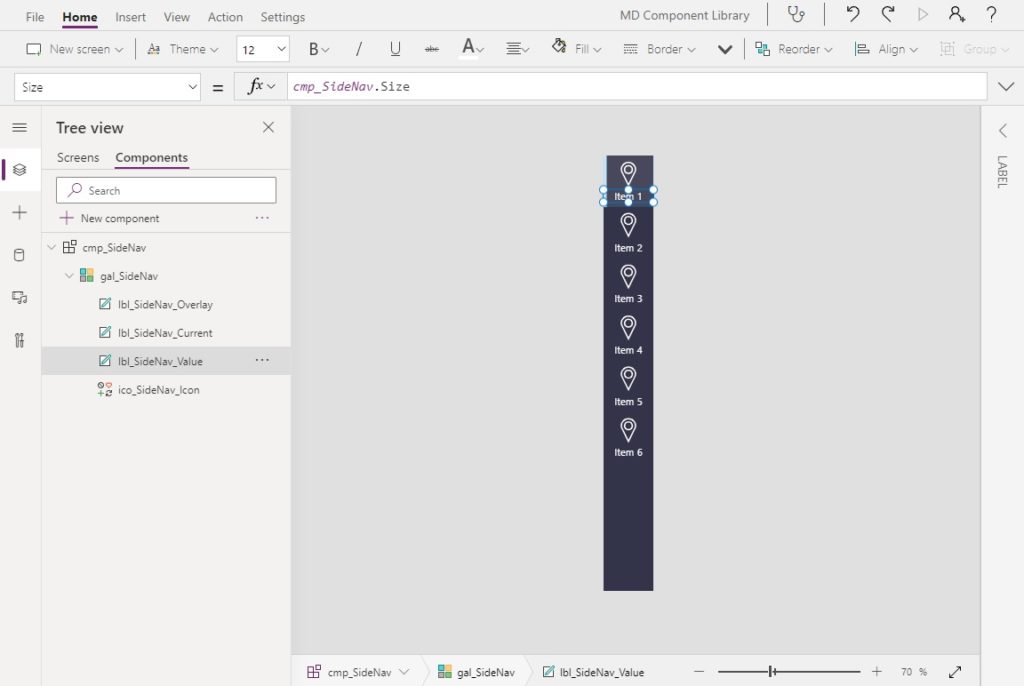
The purpose of Size is to control the size of any text in the menu. Select the label lbl_SideNav_Value and change the Size property to cmp_SideNav.Size. Test the changes by inputting a new number in the size property of the component.
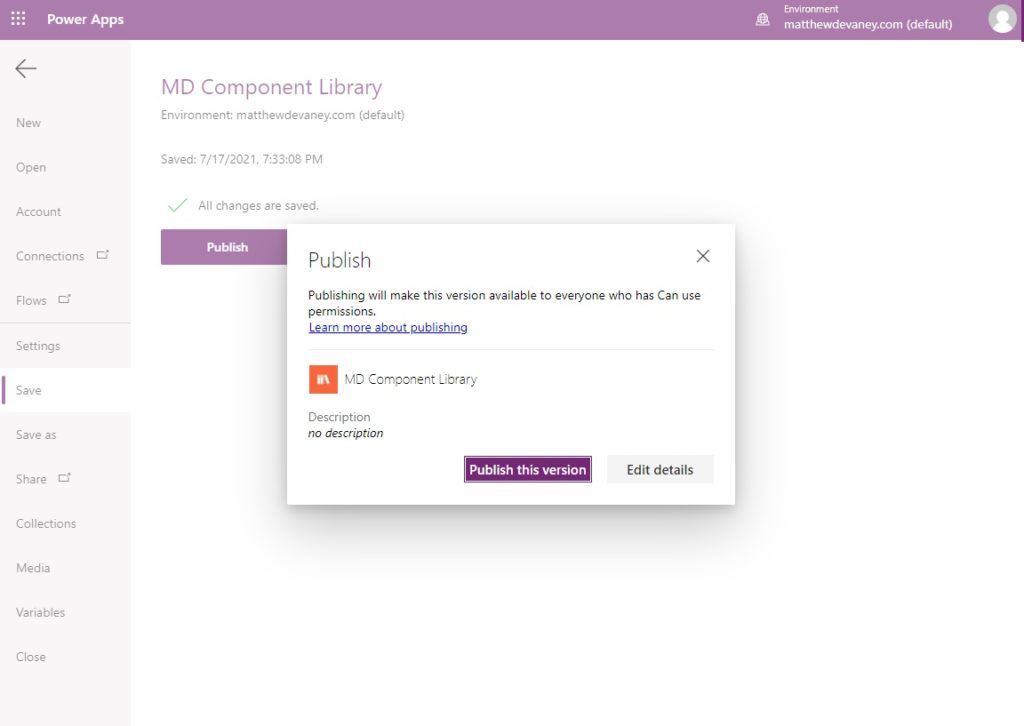
Once finished save and publish the component library.
Update A Component Already Inside An App
A prompt will appear the next time you open the app containing the component. We can make it show by closing and re-opening My New App. To update the component click the Review button.
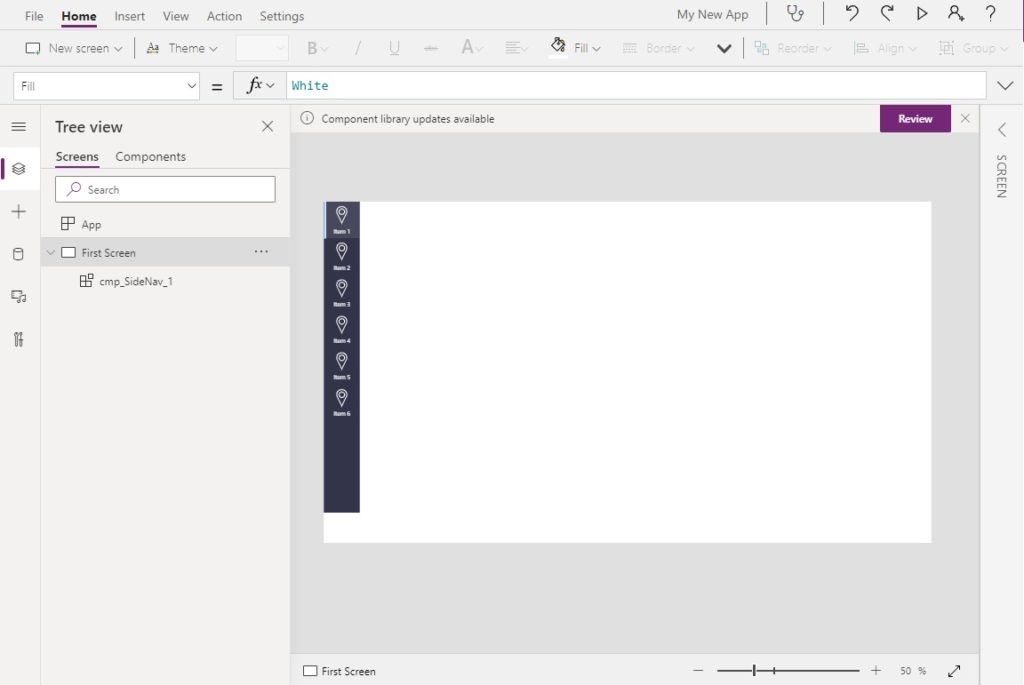
A list of component libraries used by the app will appear with the modified date. Select the component library we changed and click Update.

A new version of the navigation menu component will replace any instances of the previous version in our app. We now can use the Size property we added while in the component library.
Want To Learn More About Power Apps Canvas Components?
This tutorial is part of a free online course called Learn Power Apps Canvas Components By Making 5 Components. The best way to learn isn’t by watching videos, or by reading articles. The best way to master Power Apps canvas components is by building real-world projects. So that’s exactly what we’ll do. Go ahead and get started on the other lessons below. I know you’re going to get alot of this free course.
Did You Enjoy This Article? 😺
Subscribe to get new Power Apps articles sent to your inbox each week for FREE
Questions?
If you have any questions or feedback about Make A Power Apps Component Library To Share And Reuse Components please leave a message in the comments section below. You can post using your email address and are not required to create an account to join the discussion.


Hi Matt,
Is there a way to import a component library from one tenant to a component library in another tenant?
Suresh,
Add a component library to an unmanaged ‘solution’, export the solution from the source environment and import it into the target environment.
Hi Matt
Does this work in Teams ? I can import a component library as part of a Solution, but once imported, it disappears although the Components are still in the App.
Thanks
Nigel
Hi Matthew, great blog post as ever. I have three environments and was wondering if it’s possible to have one component library that I can keep up to date that is then available across all environments? I’ve seen some posts online about adding a component library to a solution and importing it to the other environments but so far haven’t got this to work
Gareth,
Sorry, but no. You must import it to another environment 🙁
Hi Matthew,
amazing post. I have a little doubt here, it is normal that when i import a single component from a Component Library it gets me all the images, flows and whatever it has the component Library? it’s a bug? an option? i’m bit confused about that.
Thanks.
Thank you Matthew , this was really helpful as usual.
Hi Matt.
I built an app with several components. Now, I need to move the components to a library (simple enough with import components).
What is the best way to update the existing app to remove the components from the app and use the components from the library? Do you have to recreate everything???
Thanks.
Hey Matt – do you know about licensing for Component libraries?
We use app passes and I wonder what count as app pass consumption…
Thanks!