Create An Excel File And Add Rows Using Power Automate

This is the pattern I use to create a new Excel file with Power Automate and add rows. It can take data from any datasource (SharePoint, Dataverse, SQL, etc.). And the file is dynamically generated so it is not necessary to know the column names in advance. The code can be copied and pasted into any flow where you need to create an Excel report.
Setup The SharePoint List
Create a new SharePoint list named Project Bid Opportunities with the following columns and types:
- Title – single-line text
- Bid Date – date-only
- Bid Result – choice column (submitted, won, lost)
- Amount – number
Then populate the list with this data:
| Title | Bid Date | Bid Result | Amount |
| Office Tower 123 River Ave. | 9/3/2023 | Won | 13,500,000 |
| Strip Mall 1st St. N. | 9/10/2023 | Lost | 2,300,000 |
| Big Box Store 734 Thames St | 9/16/2023 | Won | 1,700,000 |
| Office Building 789 Reading Ave. | 9/20/2023 | Won | 8,900,000 |
| Condo Tower 1003 Main St. | 9/24/2023 | Lost | 5,600,000 |
| Fast Food Restaurant 423 2nd Ave. | 9/30/2023 | Lost | 2,500,000 |
| Big Box Store 123 Erie St. | 10/2/2023 | Submitted | 1,300,000 |
| Duplex Condo 532 Fay St. | 10/7/2023 | Submitted | 630,000 |
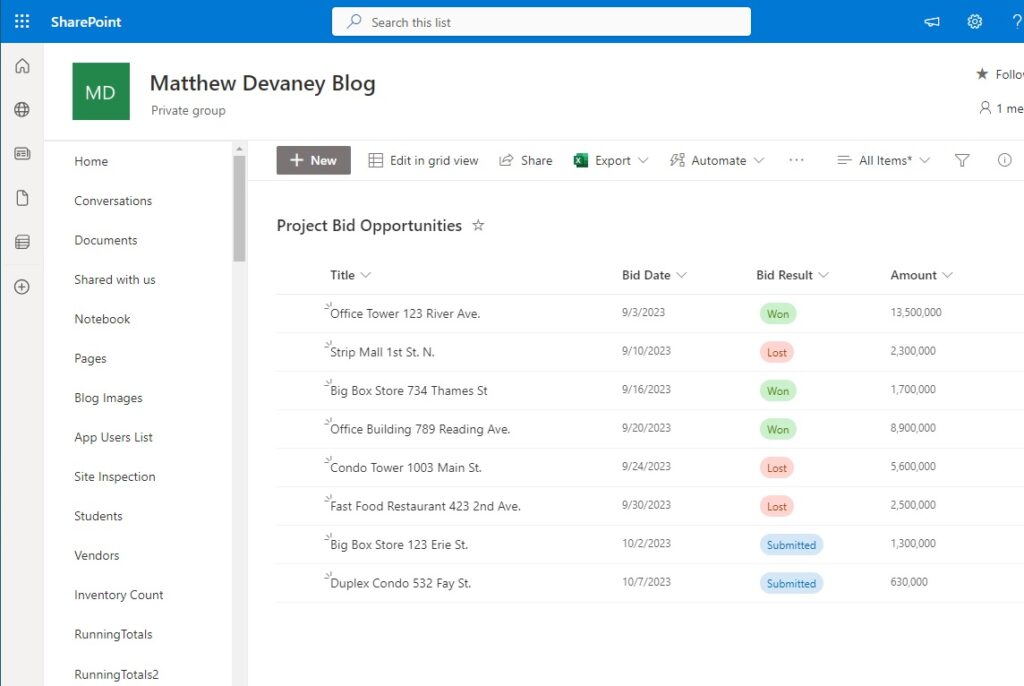
Once completed the Project Bid Opportunities SharePoint list will look like this.
Create An Array Of Values To Export To Excel
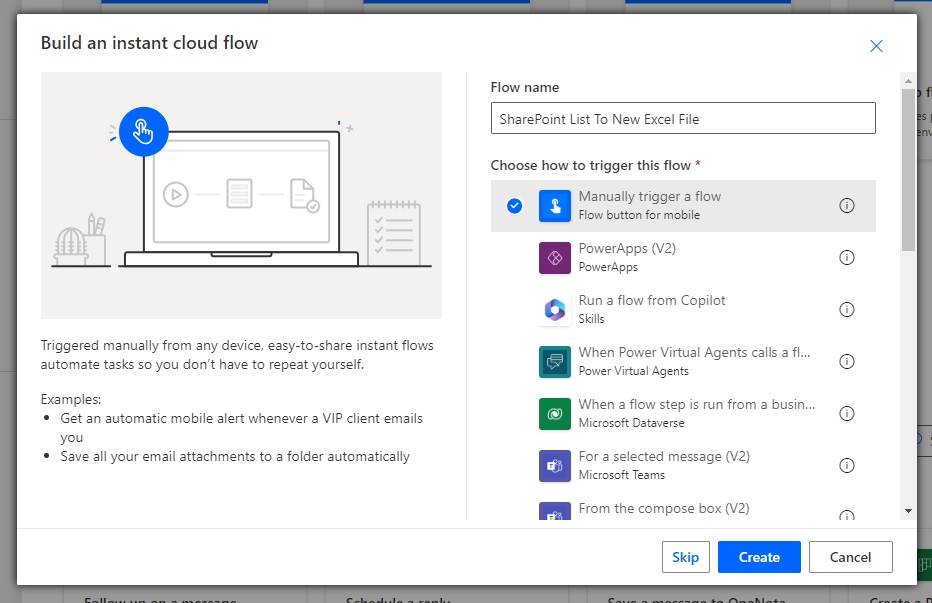
Our first goal is to get the list of items from SharePoint and build an array that can be exported into an Excel table. Create a new Power Automate flow named SharePoint List To New Excel file and use an instant trigger.
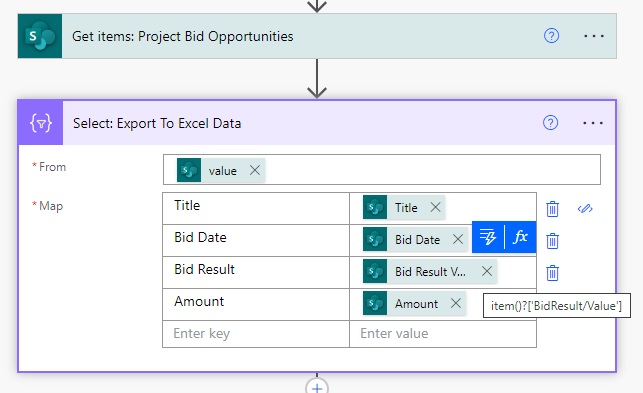
Make the first flow action SharePoint – Get Items. Point the action to the Project Bid Opportunities list.

Use the Data Operations – Select action to keep only 4 columns we want to include in the Excel file and drop the rest:
- Title
- Bid Date
- Bid Result
- Amount
When the Select flow action is run it will generate the array below. Note that we must only use simple data types in our array such as text, number, date times and true/false values when exporting to Excel. A complex data type such as object or array will make this process fail.

Generate A Blank Excel File
A blank excel file must be created before we can begin to populate it with data. Start by assigning a filename with a Data Operations – Compose action.
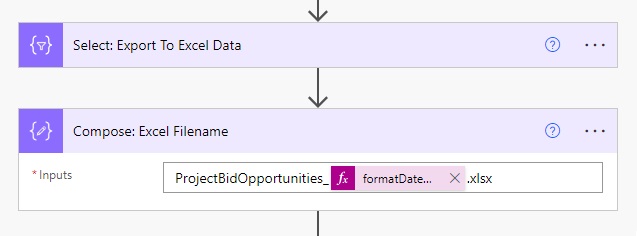
Use the formatDateTime function to ensure a unique filename is generated everytime. A non-unique filename can lead to failures when the flow attempts over overwrite a locked file.
formatDateTime(utcNow(),'yyyy-MM-dd_hhmmss')Code language: JavaScript (javascript)
For the next step we must know the location of the SharePoint document library the Excel file will created within. In this example we will use the Documents folder included with every SharePoint site.
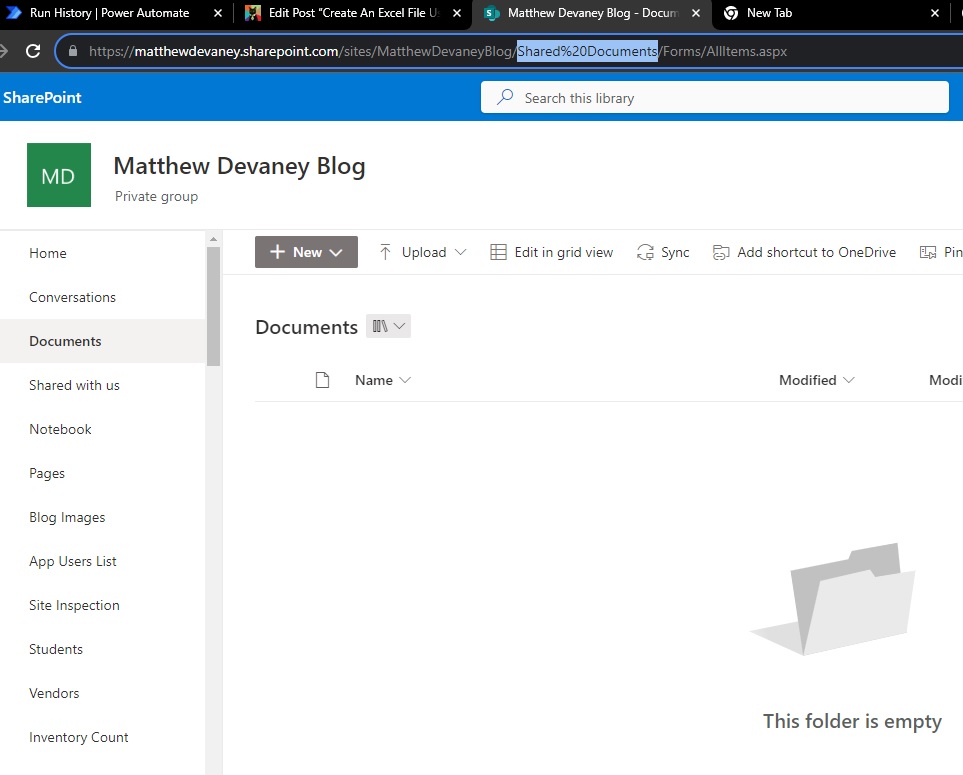
The path to the folder can be found in the document library URL as shown below.

To create a new Excel file we will use the SharePoint Rest API. Add the SharePoint – Send An HTTP Request action to the flow.
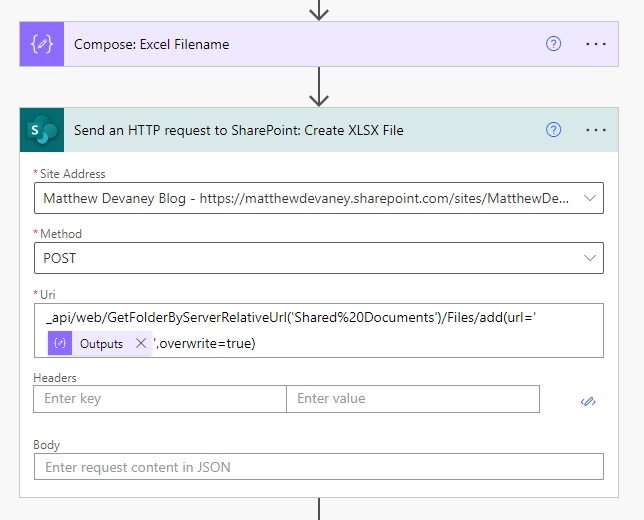
Add this API endpoint code to generate the blank Excel file inside the Documents library. Notice that the Documents library path is used inside the brackets for GetFolderByServerRelativeUrl.
_api/web/GetFolderByServerRelativeUrl('Shared%20Documents')/Files/add(url='@{outputs('Compose:_Excel_Filename')}',overwrite=true)Code language: JavaScript (javascript)
Insert A Table Into The Excel File
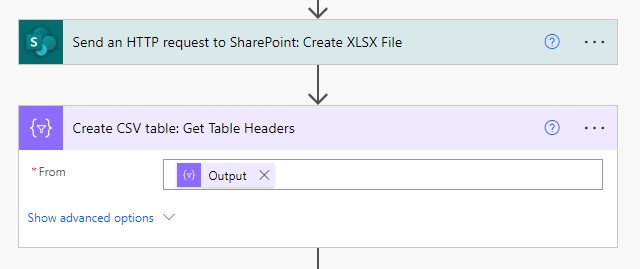
To write data into the Excel file requires a table. The first step is to determine the table column names. We will convert the output of the Select – Export To Excel Data action to a CSV table and extract the column names from the first row.
Add a Data Operations – Create CSV Table action to the flow.
Then insert an Excel – Create Table action. Point the action to the Documents Document Library. Then set the Table Range as A1 and the Table Name as tblProjectOpportunities.
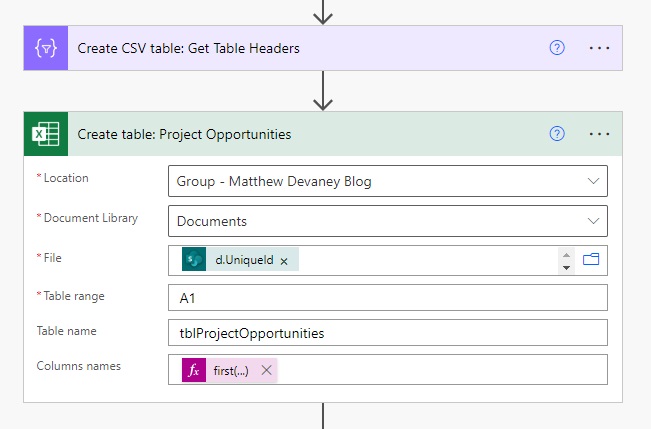
The File property of the action requires the unique identifier of the Excel file. We can get this from the SharePoint – Send an HTTP request to SharePoint action.
body('Send_an_HTTP_request_to_SharePoint:_Create_XLSX_File')['d']['UniqueId']Code language: JavaScript (javascript)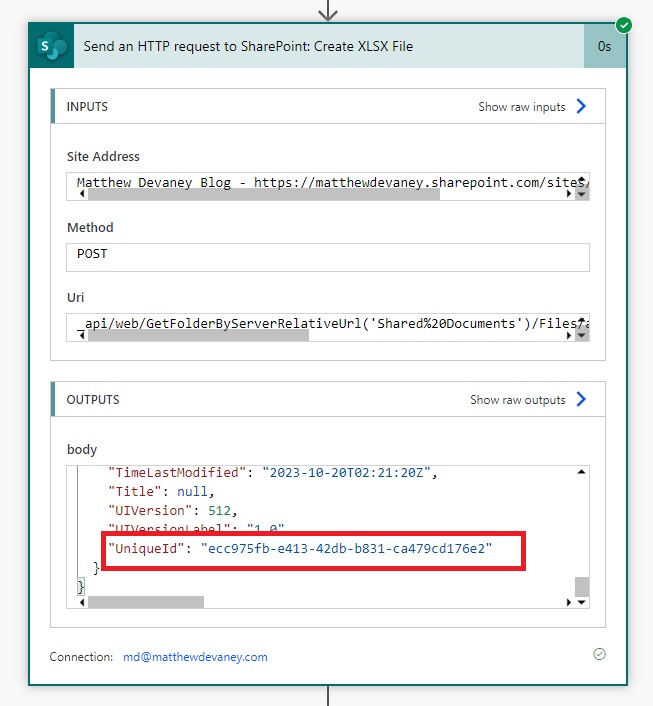
The column headers can be found in the first row of the Data Operations – Create CSV table action. Use this expression to split the CSV file by each new row and extract the first row. The new line character is represented by %0A in the decodeUriComponent function.
first(split(body('Create_CSV_table:_Get_Table_Headers'), decodeUriComponent('%0A')))Code language: JavaScript (javascript)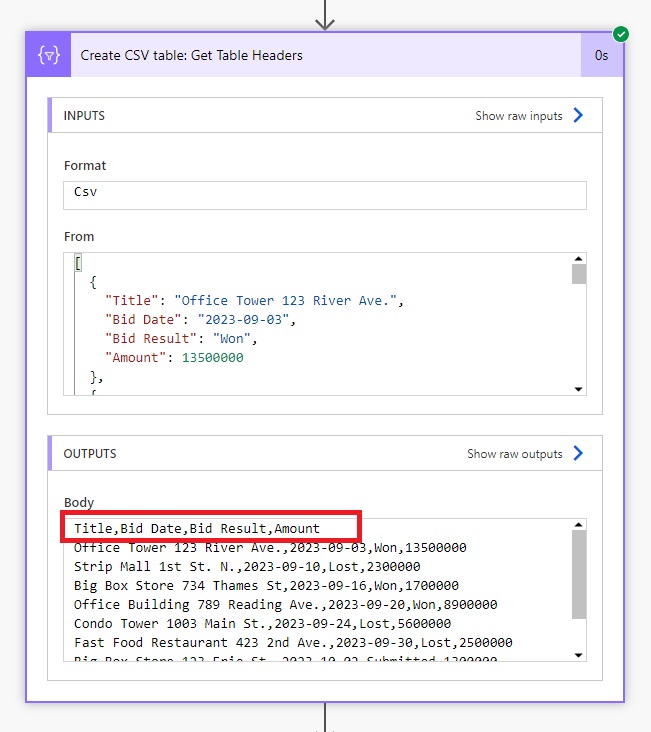
Add Rows To A Table In The Excel File
Now we can populate the Excel table with the items from our Project Bid Opportunities SharePoint list. Add a Control – Apply To Each action to the flow and place the Excel – Add A Row Into A Table action inside of it.
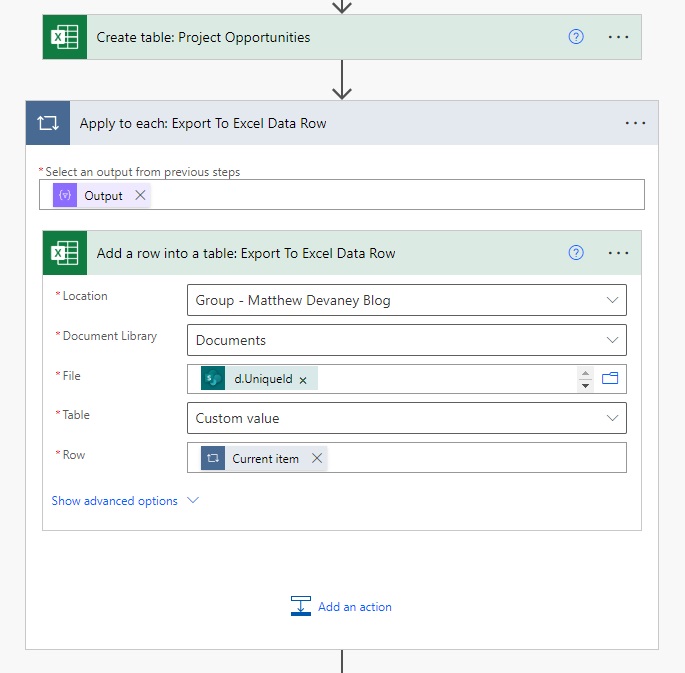
Use the output of the Select – Export To Excel Data action in the Apply To Each action.
body('Select:_Export_To_Excel_Data')Code language: JavaScript (javascript)
Then supply the File field with the unique identifier of the Excel file.
body('Send_an_HTTP_request_to_SharePoint:_Create_XLSX_File')['d']['UniqueId']Code language: JavaScript (javascript)
The Table custom value should use the name field from the Excel – Create Table action.

And finally define the Row as the Current Item of the Apply to Each loop.
Run The Flow To Create A New Excel File In The SharePoint Document Library
We are now finished building the flow. Run the flow to try it out.
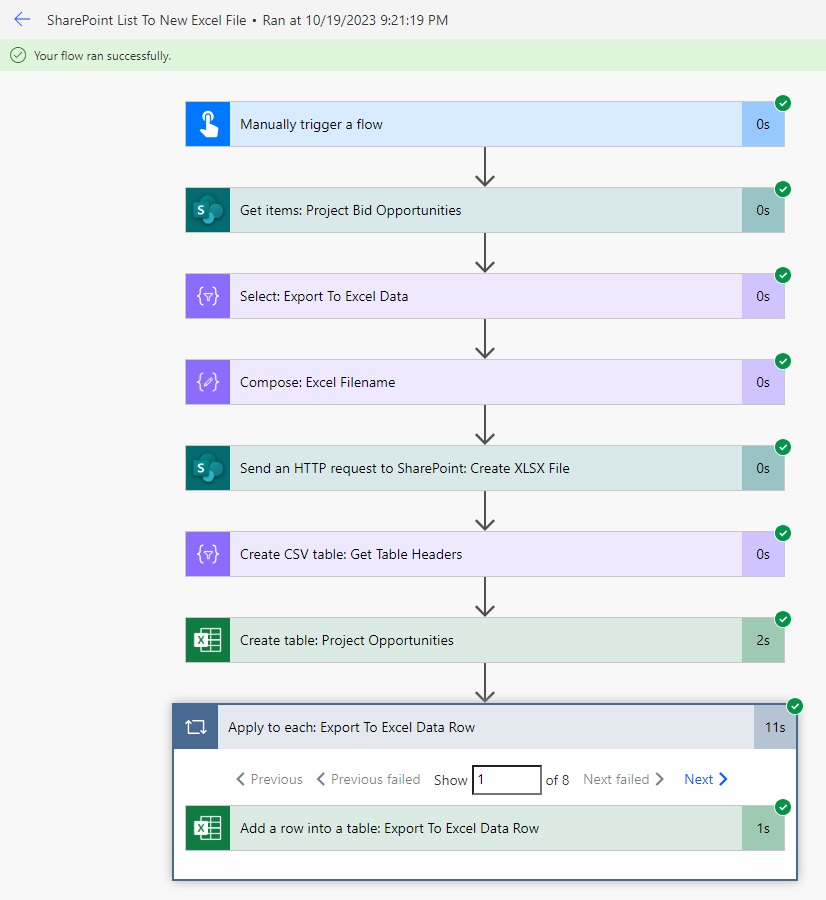
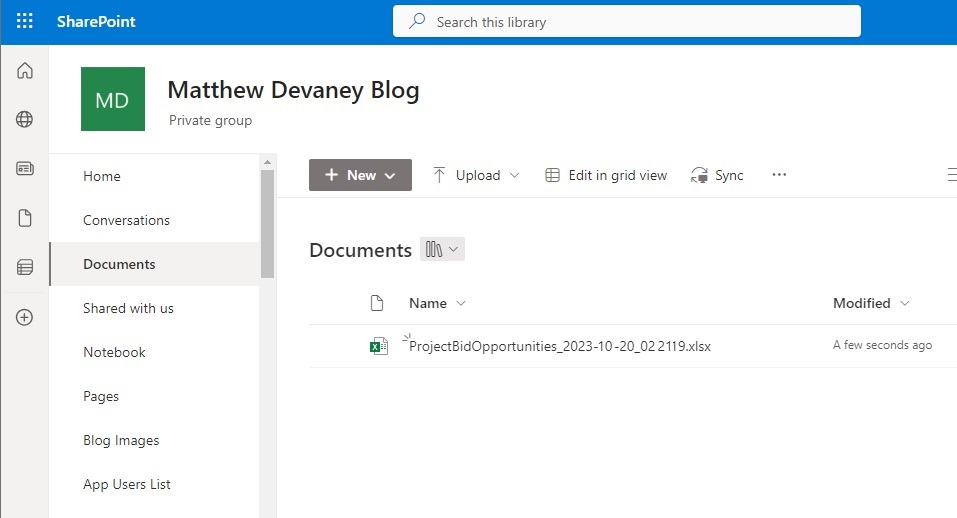
A new Excel file is created in the Documents SharePoint Document Library.
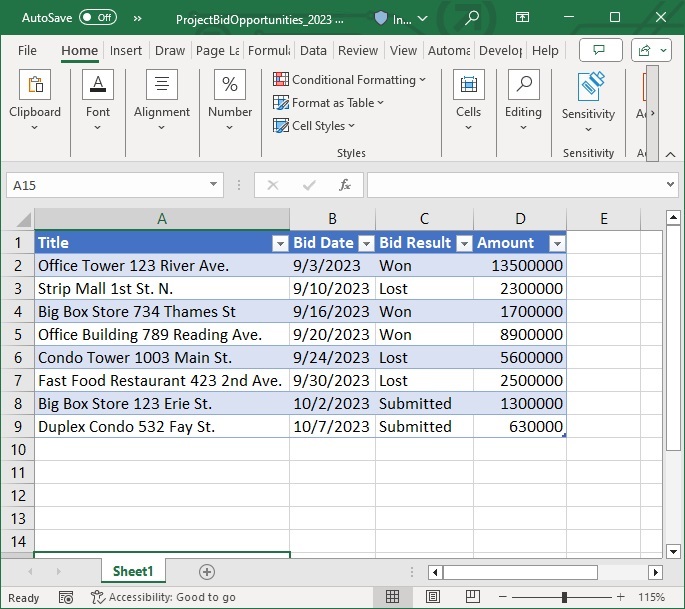
When we open the Excel file we can see the SharePoint list items are found in a table.
Did You Enjoy This Article? 😺
Subscribe to get new Copilot Studio articles sent to your inbox each week for FREE
Questions?
If you have any questions or feedback about Create An Excel File And Add Rows Using Power Automate please leave a message in the comments section below. You can post using your email address and are not required to create an account to join the discussion.


Thanks for this, Matt! Can I just point out the issue with the file name, mm is for minutes and MM for months (2023-21-20 is not a valid date). Not too important here as it’s just a name, but obviously would be if it needs date manipulation 🙂
Adi,
Got it! Thanks for being one a few people who reached out to have me correct the error ❤
This guide was really helpful for me.
I found I needed to change the hours to be 24hour time as well.
HH instead of hh
formatDateTime(utcNow(),’yyyy-MM-dd_HHmmss’)
You have MM and mm reversed in the formatDateTime call.
Matt,
I’ve fixed it now. Thanks for pointing me to the issue 😊
I think you got your MM for Month and mm for minutes swapped.
Uppercase “M” = Month.
Lowercase “m” = Minute.
Reference:
How to customize or format Date and Time values in a flow – Power Automate | Microsoft Learn
Carlos,
I appreciate you leaving me a comment. Some quick edits in MS Paint and no one will ever know. 😉
Hey Matthew, do you have instructions on how to do this when using a Dataverse backend?
Hi Matthew,
Thanks for providing this logic. Could you please also share the logic to generate the new excel for the input data with complex data type like Object.
I have below schema of input
{
“type”: “object”,
“properties”: {
“USER_ID”: {
“type”: “string”
},
“CORP_ID”: {
“type”: “string”
},
“AGGR_ID”: {
“type”: “string”
},
“URN”: {
“type”: “string”
},
“ACCOUNTNO”: {
“type”: “string”
},
“Record”: {
“type”: “array”,
“items”: {
“type”: “object”,
“properties”: {
“CHEQUENO”: {
“type”: “string”
},
“TXNDATE”: {
“type”: “string”
},
“REMARKS”: {
“type”: “string”
},
“AMOUNT”: {
“type”: “string”
},
“BALANCE”: {
“type”: “string”
},
“VALUEDATE”: {
“type”: “string”
},
“TYPE”: {
“type”: “string”
},
“TRANSACTIONID”: {
“type”: “string”
}
},
“required”: [
“CHEQUENO”,
“TXNDATE”,
“REMARKS”,
“AMOUNT”,
“BALANCE”,
“VALUEDATE”,
“TYPE”,
“TRANSACTIONID”
]
}
}
}
}
Hi,
Thanks for sharing this guide. I’ve followed it all the way to the end but I’m getting an error message on the Create Excel Table action after it takes 10 minutes to process. The message says something about a ‘Bad Gateway’. Am I forgetting something?
Webweaver,
Are you building the exact same flow in the tutorial of are you adding different steps for your own use case?
Me too facing the same issue
Hi guys! I just stumbled across this same error recreating the steps and it was because with the text: body(‘Send_an_HTTP_request_to_SharePoint:_Create_XLSX_File’)[‘d’][‘UniqueId’]
The body is referencing the step “Send an HTTP request to Sharepoint: Create XLSX File” but I left my step name as “Send an HTTP request to Sharepoint” which caused me to run into the error until I fixed the name on my HTTP request step to match the name in this article.
When you run into ‘Bad Gateway’ check the code view of the HTTP Post action.
It seems copying the uri from above has some formatting at the end causing this issue.
See the ‘\n’ at the end.
“parameters/uri”: “_api/web/GetFolderByServerRelativeUrl(‘Shared%20Documents’)/Files/add(url=’@{outputs(‘Compose_Excel_File_Name’)}’,overwrite=true)\n”
In my case I also had to add a ‘/’ before _api/web/GetFolderByServerRelativeUrl….
Thank a lot you are awesome…
Michal,
Well, thank you sir! You made my day 🙂
Thanks, this is a great post. When I try the “Create table” step under the File is that an expression you add or dynamic content? See below, as it appears in your screenshot green (There is nothing I can pick under dynamic content for Send an HTTP request..)
body('Send_an_HTTP_request_to_SharePoint:_Create_XLSX_File')['d']['UniqueId']When I create an excel file using the method described it can be opened in the web but when trying to open it in the desktop app I get an error.
I tried creating a word document using the same API call and it opened fine in the app and in the web editor.
Does something more need to be done to make this excel file ‘valid’ to the desktop app?
Phil,
I can’t say I’ve had this problem. Worked fine for me on both web and desktop.
If you are using the new Power Automate editor go back to classic. The new editor causes many strange issues.
Hi Matthew I dont have access to SharePoint. Is there a version of this blog for Onedrive ? I think I just need to change creation of the Excel spreadsheet. Regards Nigel
For the create table step, are you entering the unique identifier code into the expression area? Based on the Sharepoint logo I’m assuming not but I can’t seem to figure out what you did.
Rachel,
No, it is the unique id of the Excel file. The code to obtain it is included within the article.
I don’t know where to put this code so I can get d.UniqueId dynamic content to put it in the Create table action, please help me
The only output I get from “Send an HTTP request to SharePoint: Create XLSX File” is the dynamic content “body”
I ran into this exact problem (and the one mentioned by Freya and Isaac).
I know very little about Power Automate but I couldn’t get the method as described to work, since adding the code as expression didn’t work and pulling the dynamic content from Send HTTP request had different syntax. Whilst thinking about it, it also seemed odd to use the unique id of a previous file as seems to be shown, as the new file created will have a different unique id. It didn’t help that I had input the file ending incorrectly so not sure whether that contributed to my problems, and a couple of times whilst messing about my expression code did start to display with the green sharepoint icon (once after switching in and out of new designer). Still didn’t work though.
I managed to find a way to get it work though, but probably not very elegant.
Immediately after the Send HTTP request, I used a Parse JSON command using the body output from the HTTP request (since I noticed that the relative URL path is included in it). For the schema I copied and pasted an output from the HTTP request from a test run which seemed to allow it to identify all the separate parts.
I then inserted a compose action using the split command to extract the part of the relative file path I needed to add under File in Create Table, with the following syntax (where /Partial/File/Path was the file path AFTER the Location/Document Library entries in Create Table;
split(body(‘Parse_JSON’)?[‘d’]?[‘ServerRelativeUrl’],’/Partial/File/Path’)[1]
Hi Mathew, this was a great and really helpful blog. Do you know what the reason could be for the Send HTTP Request step taking so long to run? and then the flow run times out.
I’m getting an error when I add rows to the Excel table: A value must be provided for item.
clientRequestId: 7182901c-7571-49a7-a220-8ee0ad0652e1. I’ve been searching for a solution, but no luck. At the moment, I have an Excel file in my document library that contains a header row, but no content.
I got the same error, the issue was the name of my Collums in the Select action, for example I was using Part Number# instead of just Part Number
UPDATE: Just kidding! I figured it out. Thanks!
Thanks for creating such an incredible article! My only question…. how would you go about having the file be saved or moved into a folder within the documents library?
Thanks for any help!
Garrett,
There’s a SharePoint – Move File flow action that can help do this:
https://learn.microsoft.com/en-us/connectors/sharepointonline/#move-file
Great tutorial, though I have this concern, is there a way to check if the excel contents is already complete? I noticed that the file was created, but after 15 to 20 seconds, another row was added.
Hello Matthew, Thank you for the guide, I also have the same question regarding create the table name which using the unique ID, “body(‘Send_an_HTTP_request_to_SharePoint:_Create_XLSX_File’)[‘d’][‘UniqueId’]”, i can find the Uniqueid, but anyhow, The field just allow me to use the Dynamic content or Expression, and from the Dynamic content only can select the Send an Http request to Sharepoint body, Can you kindly specify this part? thanks
Hi,
Thanks for posting this. Quick question: On the Create XLSX step, the URL for the SharePoint site is truncated. Do you include the /Shared%20Documents/Forms… or does it end at Shared%20Document/ or Shared%20Document (no /). I can’t see the end of the URL.
Thanks in advance for clarifying.
It took me a while but I got the idea finally! Thank you for this incredible solution Matthew! You are a true Power Automate magician!
Can this be used with the AI Builder ‘extract information from forms’ action and if so how would that change your flow design?
Hello Matthew Devaney,
I have a question with the flow. If i m using the same kinda flow for the larger database and export to excel in .xlsx format its taking a long time to export as u can see even in your collection Apply to each column is consuming 11 sec for such small data. i hope u can think about how much time it takes to export for larger data