How To Make A Power Apps Auto-Width Label

An auto-width property would be useful to have for several Power Apps control types including labels and buttons etc. For example, with auto-width, we could easily create a breadcrumbs UX. Each breadcrumb is a different size and is not known in advance. In this article, I’ll give two solutions on how to make a Power Apps auto-width label. You can either build your own or download a pre-made one.
Option #1: Make Your Own Power Apps Auto-Width Label
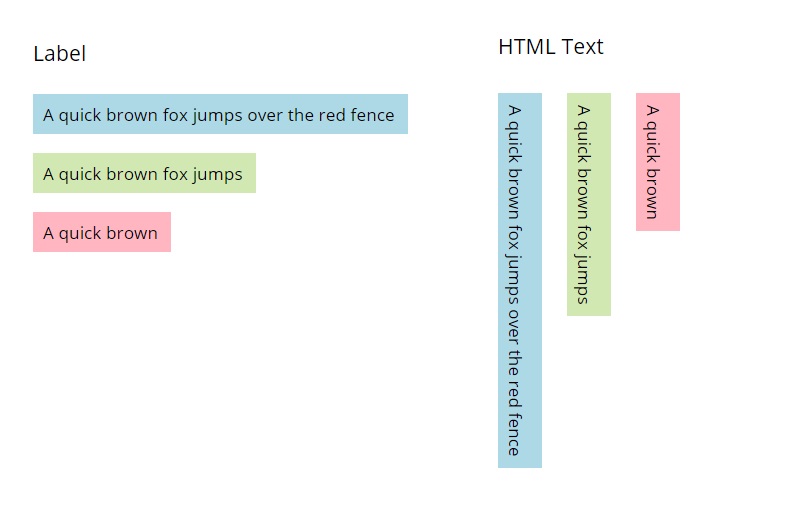
This approach uses a clever technique to determine what the width of the label should be. We will create an HTML control with same text as the label, the same font and the same text size. Then we will rotate the text 90 degrees and set the HTML text control’s AutoHeight property to true. The height of the HTML control will tell us the length of the auto-width label.
I first saw this solution posted on Twitter by Robin Rosengrün (@power_r2) and Jake Siskon (@JakeSiskon).
Create A New Label In Canvas App
Open Power Apps studio and create a new app from blank. Insert a blank label onto the screen.

Write these words in the Text property of the label.
"The quick brown fox jumps over the lazy dog"Code language: JSON / JSON with Comments (json)
Also apply these properties to the new label:
Font: Font.'Open Sans'
Size: 13
PaddingBottom: 0
PaddingLeft: 0
PaddingRight: 0
PaddingTop: 0Code language: HTTP (http)
Insert An HTML Text Control With AutoHeight Enabled
Create an HTML text control and place it on the screen.
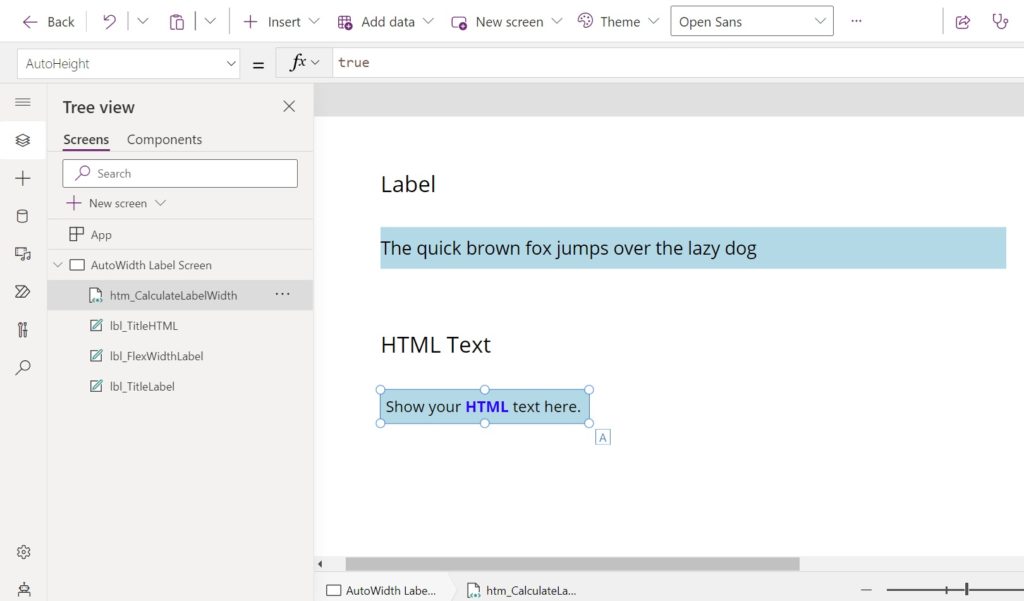
Set the AutoHeight property of the HTML text control to true. This makes the height of the HTML control expand to fit the text inside it.
trueCode language: JavaScript (javascript)
Apply these values to the HTML text control properties as well to ensure it uses the same formatting as the label.
Font: lbl_FlexWidthLabel.Font
Size: lbl_FlexWidthLabel.Size
PaddingBottom: 0
PaddingLeft: 0
PaddingRight: 0
PaddingTop: 0Code language: HTTP (http)
We will use HTML and CSS code to rotate the text and make its starting position the top left corner of the control.
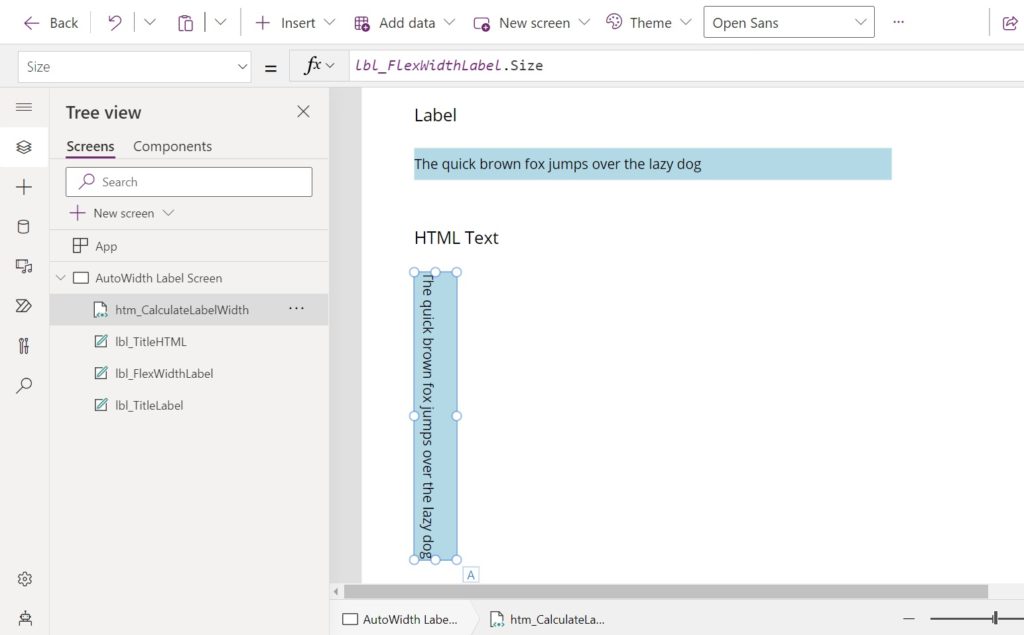
Copy and paste this code into the HTMLText property of the HTML text control. The code below uses Power Fx $-string notation. Ensure the label referenced between the { } brackets matches the name of the label in the app.
$"<div style='
    display: inline-block;
    margin: 0px 30px;
    position: relative;
    transform: rotate(90deg);
    transform-origin: top left;
    white-space: nowrap;
    '
>
    {lbl_FlexWidthLabel.Text}
</div>"Code language: HTML, XML (xml)
Set Label Width Equal To Height Of HTML Text Control
We can assume the width of the auto-width label should be equal to the height of the HTML text control.
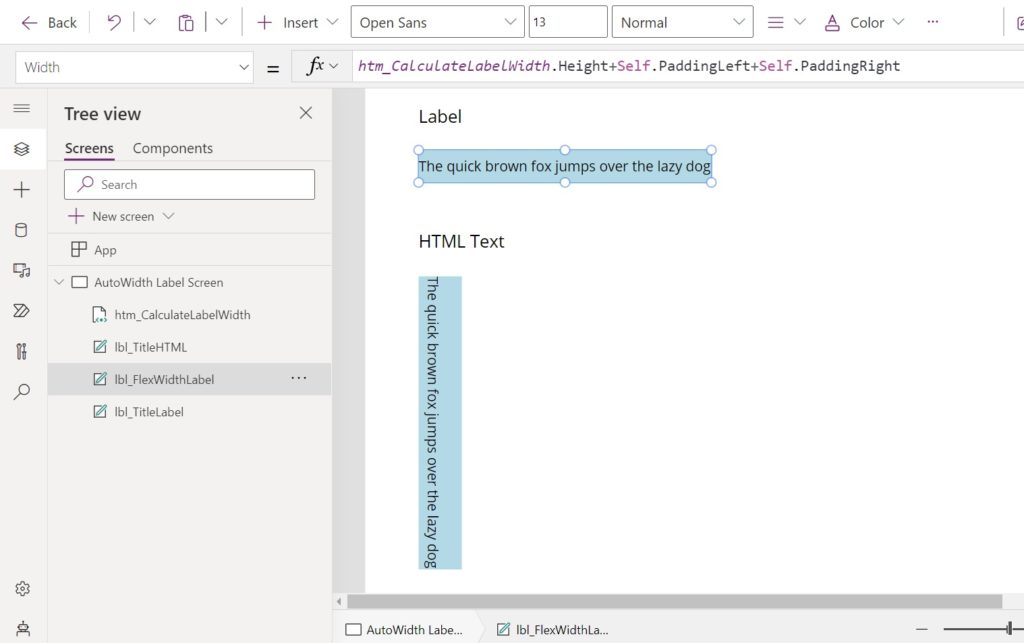
Use this code in the Width property of the auto-width label. A reference to the padding properties of the label are also included in case we want to add extra space on the left or right.
htm_CalculateLabelWidth.Height+Self.PaddingLeft+Self.PaddingRightCode language: CSS (css)
Option #2: Download A Pre-Made Power Apps Auto-Width Label
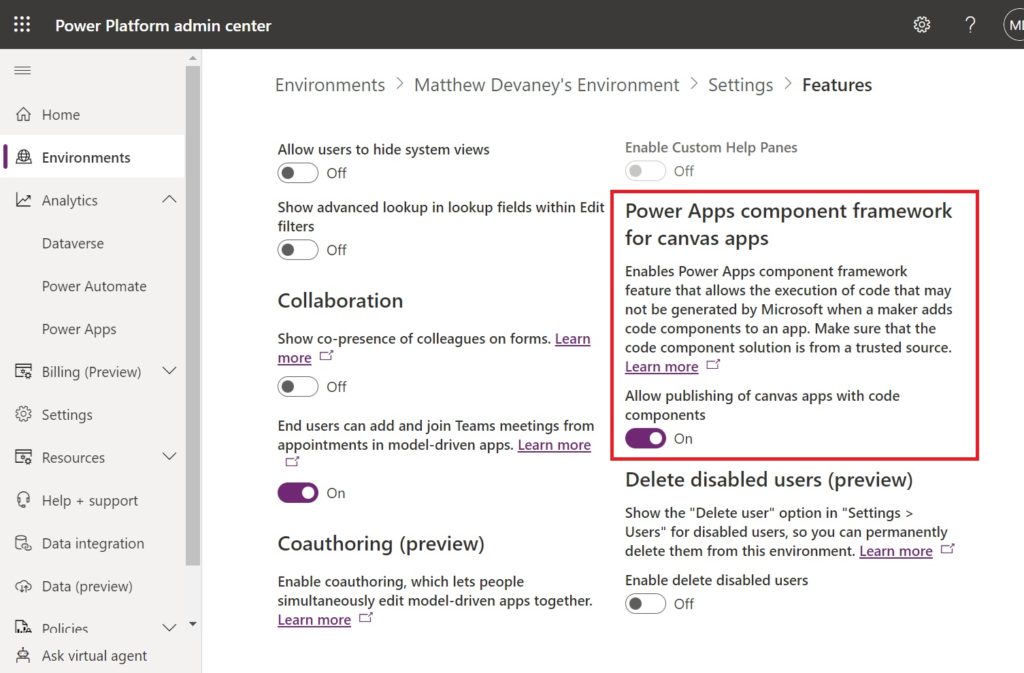
In this approach, we will download and import an auto-width label component published by Microsoft. To do this, the ability to use code components in an environment must be enabled by a system administrator.

Install The Power Apps Creator Kit
Go to the Power Apps Creator Kit page on the Microsoft Learn website and download the Creator Kit.
After the Power Apps Creator Kit is downloaded, ask an administrator to check if the Power Platform environment where it will be used has the Power Apps component framework for canvas apps setting enabled. This menu where this setting is found in the Power Platform Admin Center is located at the path Environments > (Enivornment Name) > Settings > Features.
Go to make.powerapps.com and import the solution into the desired environment.
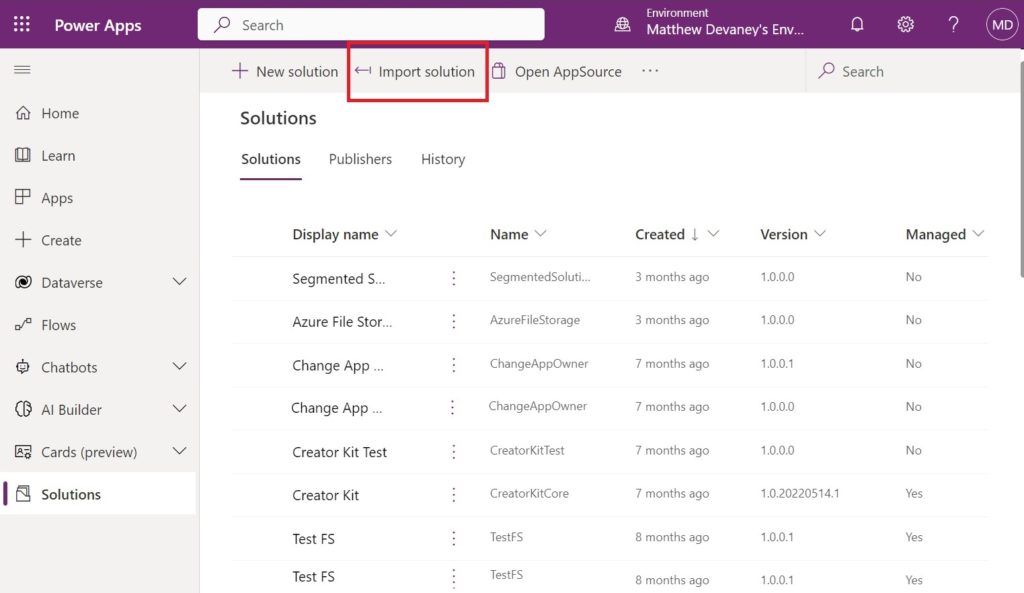
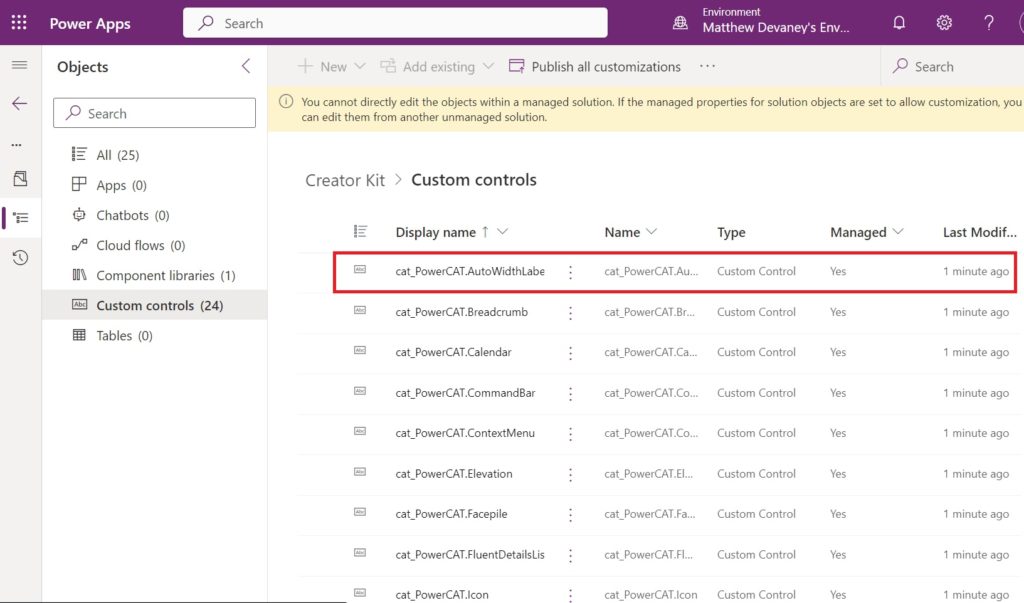
Open the solution once it has been imported. The auto-width label will appear under the custom controls group.
Import The Auto-Width Label Into A Canvas App
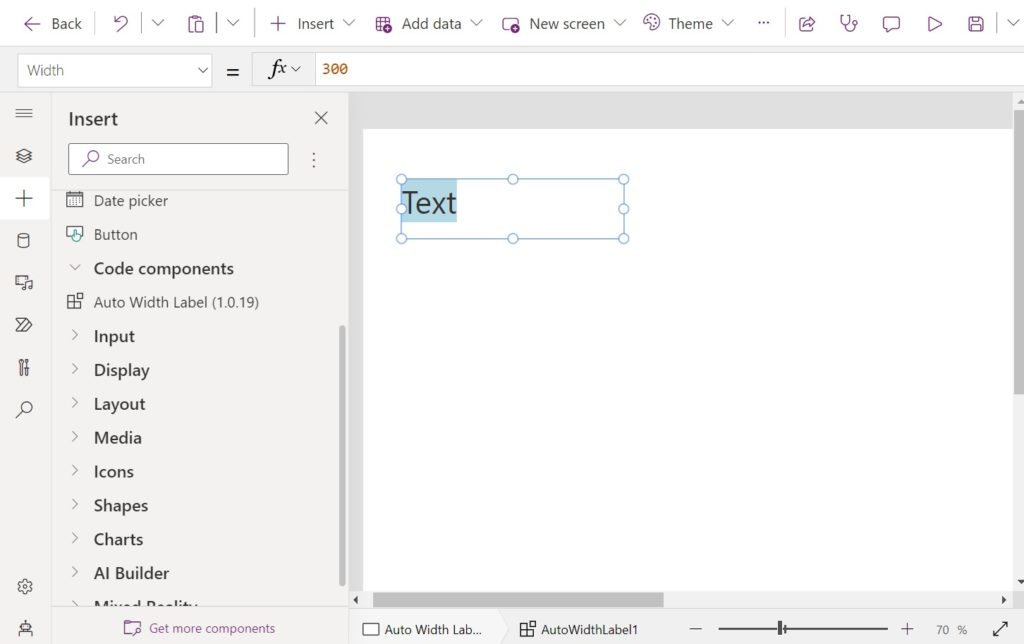
Open Power Apps studio and create a new canvas app from blank. Go to the Insert menu on the left-navigation bar. Scroll to the bottom of the menu and choose Get more components.

Choose the Code tab and select the Auto Width Label. Click Import.

Expand the code components group in the insert menu to reveal the Auto Width Label. Add an auto-width label to the screen.
The auto-width label needs one additional step to configure. It does not stretch to fit the text within it by default.
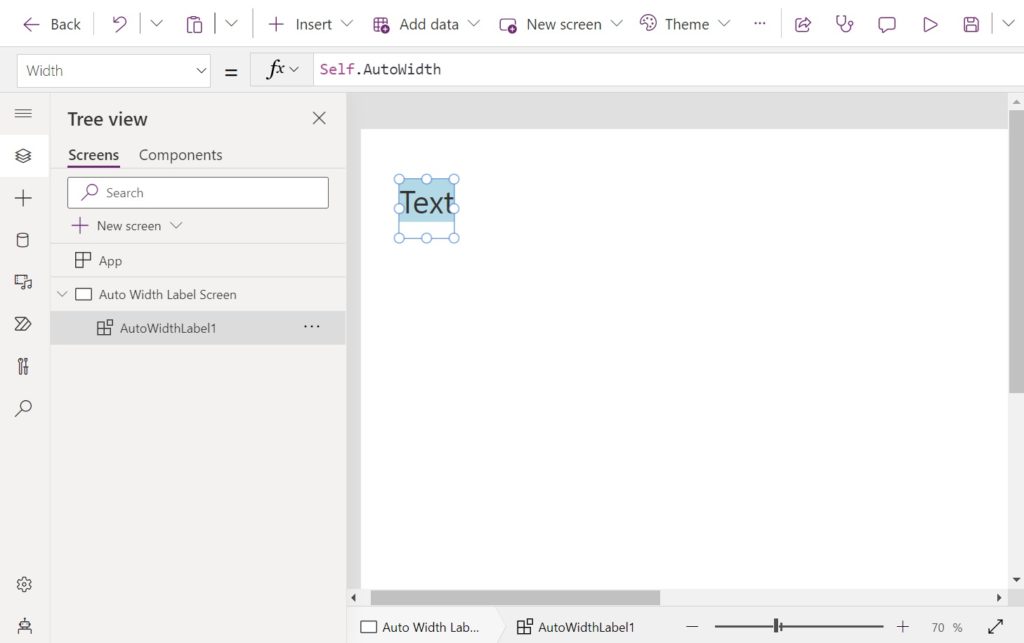
Set the width of the auto-width label to this code to automatically size it.
Self.AutoWidthCode language: CSS (css)Did You Enjoy This Article? 😺
Subscribe to get new Copilot Studio articles sent to your inbox each week for FREE
Questions?
If you have any questions about How To Make A Power Apps Auto-Width Label please leave a message in the comments section below. You can post using your email address and are not required to create an account to join the discussion.


The CSS rotation solutions is clever but what’s missing from the guidance is where the HTML label would best be “hidden” so it can be used to calculate for the auto-width.
Would the solution work if the HTML label was set to not visible? I’m told placing it on another hidden screen is a poor choice but I’ve used this approach before for other solutions without significant overhead.
Jason,
Yes, the HTML label can be set to invisible. I 100% agree that this should be included in my guidance and will update my article soon. Thank you for the suggestion.
Suggest hiding the invisible HTML Text controls in the top-right corner of the screen so they can extend to the greatest length possible.
It seems the auto-width dosen’t work if you set the HTMLText control to invisible. @Jason you can try this on the x property of the HTMLText control: -Self.width.
This will keep it just to the left of the canvas and always out of view
David,
From my testing, I have found auto-width works even when the HTML control is invisible. But thank you for sharing a workaround.
I had the same trouble than David, however I solved it by setting the font to transparent in my personal component.
Also I wanted to signal that adding the font-weigh into the HTML code is an important element, especially with large labels. An example:
font-weight: {lbl_FlexWidthLabel.FontWeight};
It will be great to have an upper-bound width so that the text would not over flow it’s parent (screen or container)
Thank you for this really good trick ! I added the font weight and italic option, because they count in width change.
I made a component with all these settings and I added the paddings, the alignment, and last but not least a max width. The auto width is then computed with the min between autowidth and maxwidth.
Alexsolex,
Good idea to make a component for easy re-usability 🙂
I had the same thought. Out of curosity, how’d you structure you Parameters and Properties on the component?
I figured set up a component to act as a calculator, accepting a Control as it’s input, and outputting a value for the calculated
Width(as ‘AutoWidth’). This way I can place an instance of the component in the app (call it something like “FancyMath”), and then in a Control’s, such as a Label,Widthproperty, I can place:Struggling to pull it together though.
Hi Matthew,
Great idea you have found and thanks for making this a nice simple guide.
Is this possible to use in a Gallery situation?
Thanks
Mike,
Yes you can use it in a gallery.
Oh really? I had a go but couldn’t get it to work correctly. It seemed to have just kept the same with throughout the rows on the gallery.
thanks
Doesn’t seem to work in a gallery. It always keeps the width of the first calculated element.
Alex,
Good note. I hadn’t tested that!
You are just amazing, Mathew !!
Anku,
I appreciate you telling me this 🙂
Len(lbl_AppName.Text) * lbl_AppName.Size this worked for me
exactly!
Thanks devaney, the imported component does not have the properties to bold the label.
I tryed a simpler solution, just counting character with len() function, then width = len()*font size
The downside to using the Microsoft component is that most of the fields do not accept standard values like every other field type.