Easiest Way To Generate A PDF In Power Apps (No HTML)

With Power Apps you can take the data entered into a form and use it to create PDF. This feature is not available out-of-the-box but I can show you how to build it. To do this we will build a basic form in Power Apps. Then we will design a Word document template and use Power Automate to fill and convert it to PDF. From there you either store the PDF in a SharePoint document library or sent in as an email attachment. In this article I will reveal the simplest way to generate a PDF form in Power Apps.
Word Document Template Method vs HTML Document Method
There are are two popular methods to generate a pdf document in Power Apps. The first is to create a fillable Word document template, populate the fields using Power Automate and convert to PDF. The second is to write code for an HTML template directly in Power Apps and use Power Automate to convert HTML to PDF. Here’s why I believe the Word Document template method is best:
Word Document Template Benefits:
- No-code is required to make a Word document template.
- Headers, footers and page numbers can used in a Word document template.
- Text and images will never be cut-off at a page break in a Word document.
Word Document Template Drawbacks:
- The Word Online connector is a premium connector in Power Automate. However, most organizations have at least one per user license for their Power Platform service account and in my opinion paying to generate PDFs is well worth the price.
- A repeating section with images is not possible with a word document template. For this feature you will need to use HTML.
Introduction: The Restaurant Inspection App
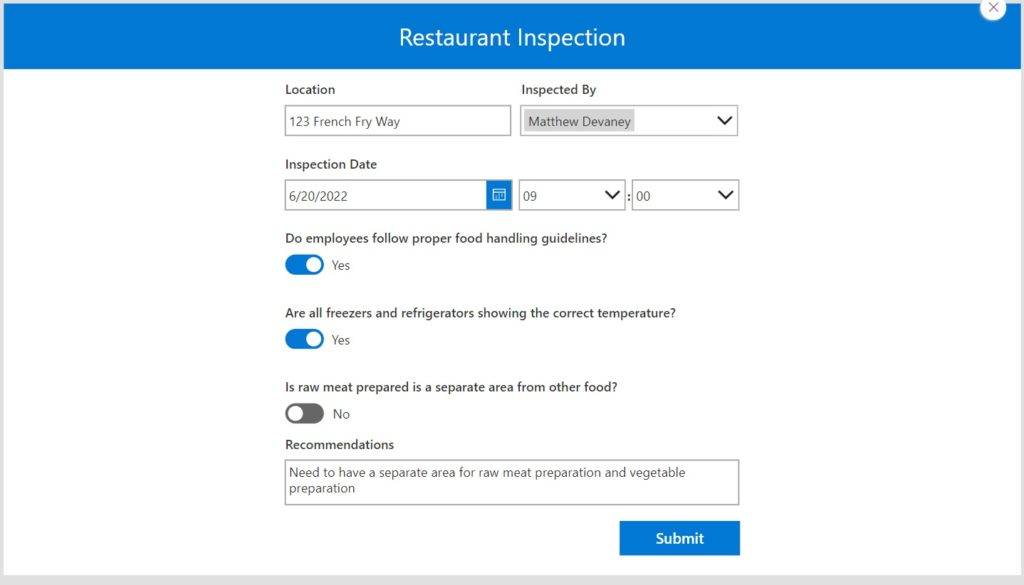
Staff at a restaurant chain use the Restaurant Inspection App to record the results of a food safety inspection.

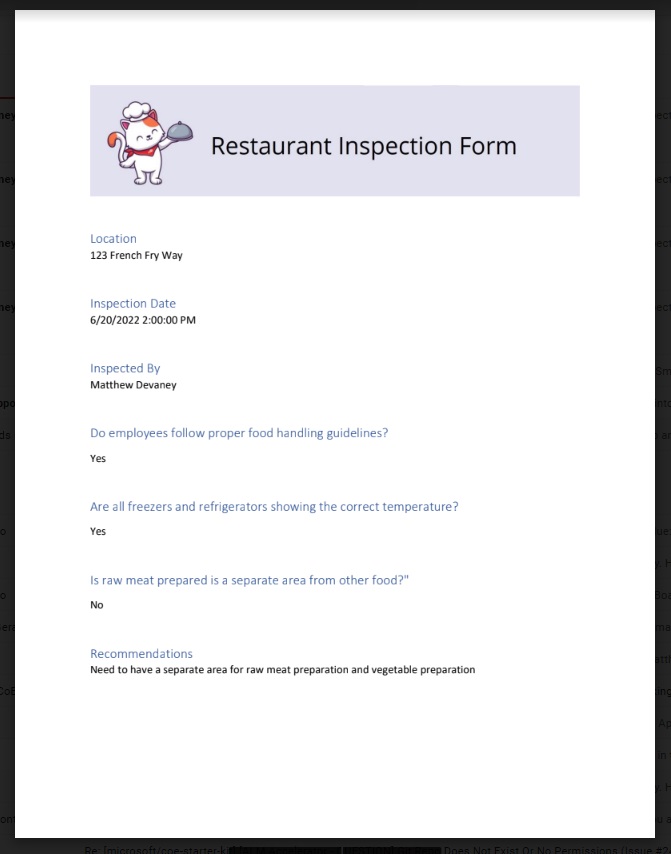
When the form above is submitted A PDF showing the inspection results is created and gets sent to the restaurant manager.
Setup The SharePoint List
Create a SharePoint List called Inspections with the following
- Location (single-line text)
- InspectionDate (date & time type)
- InspectedBy (person type)
- Question1 (yes/no type)
- Question2 (yes/no type)
- Question3 (yes/no type)
- Recommendations (single-line text)

Create A Restaurant Inspection Form
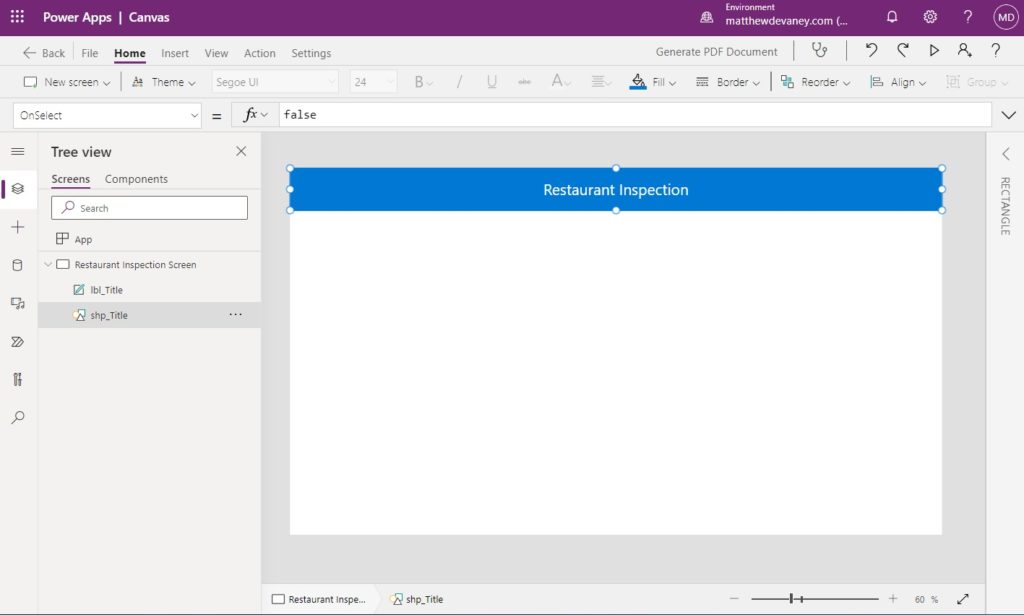
Open Power Apps Studio and create a new canvas app from blank. Insert a label at the top of the app with the words “Restaurant Inspection” and place a rectangle shape behind it with a blue fill property.
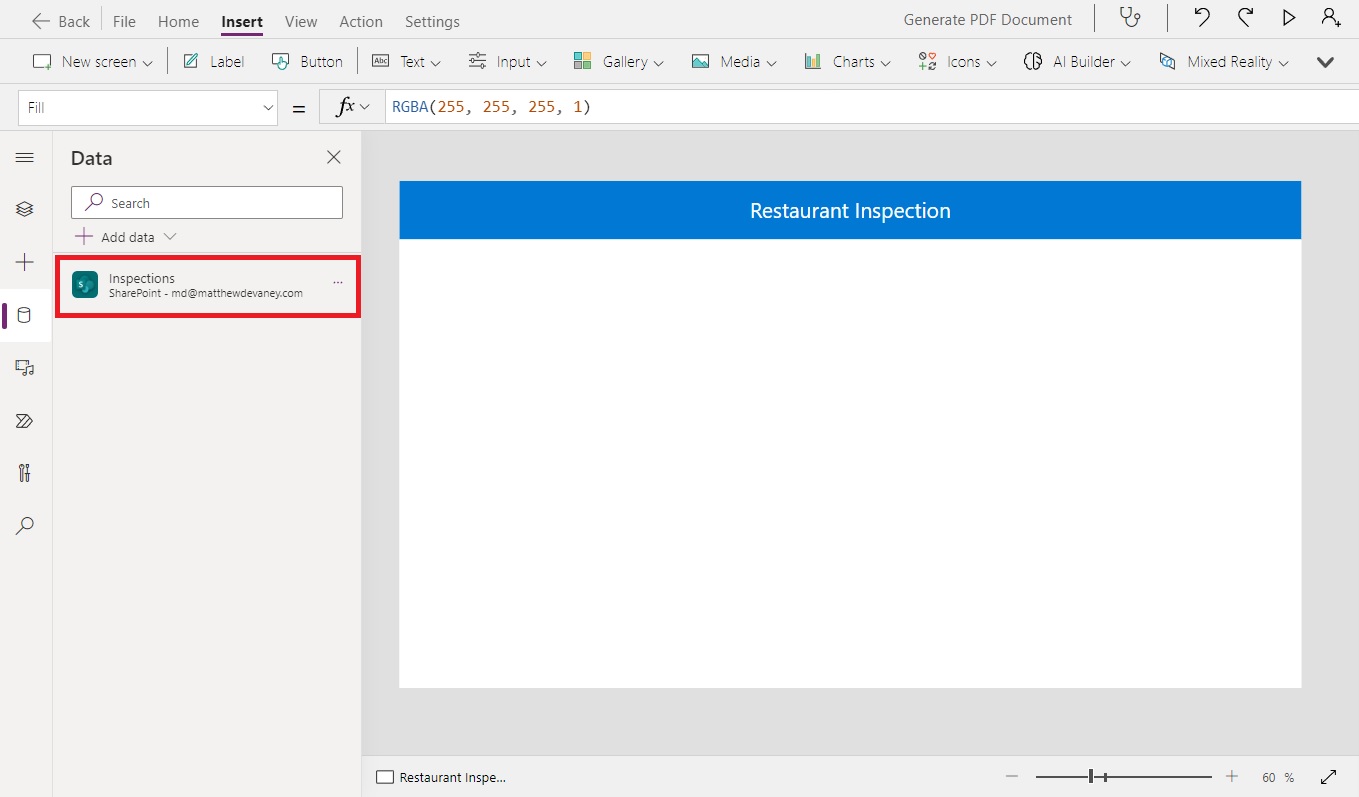
Connect the Inspections SharePoint list to the app.
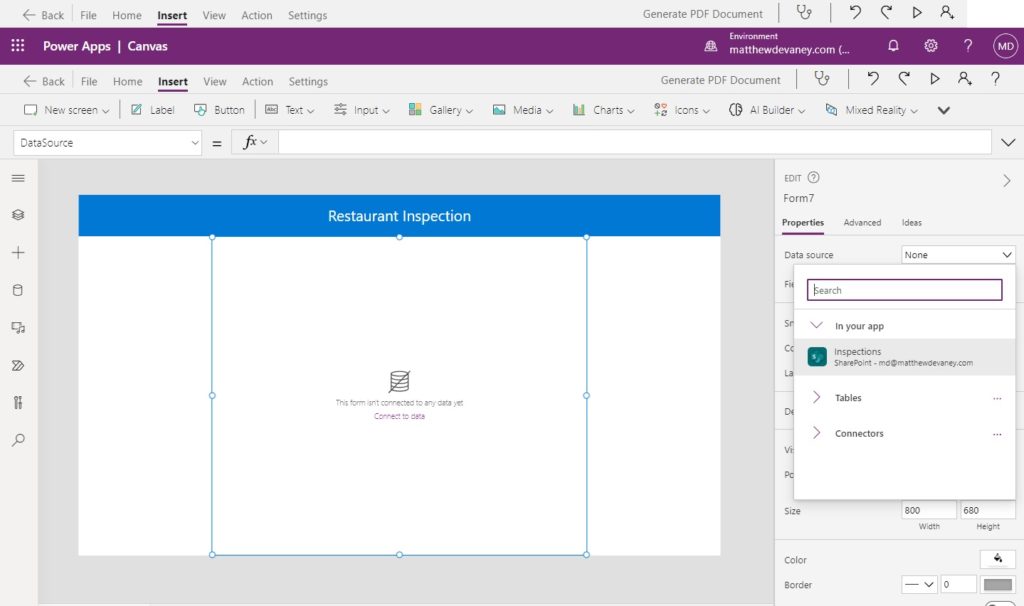
Then insert an Edit Form to the screen and use the Inspections list as the Datasource.
Layout the form controls as shown in the image below.
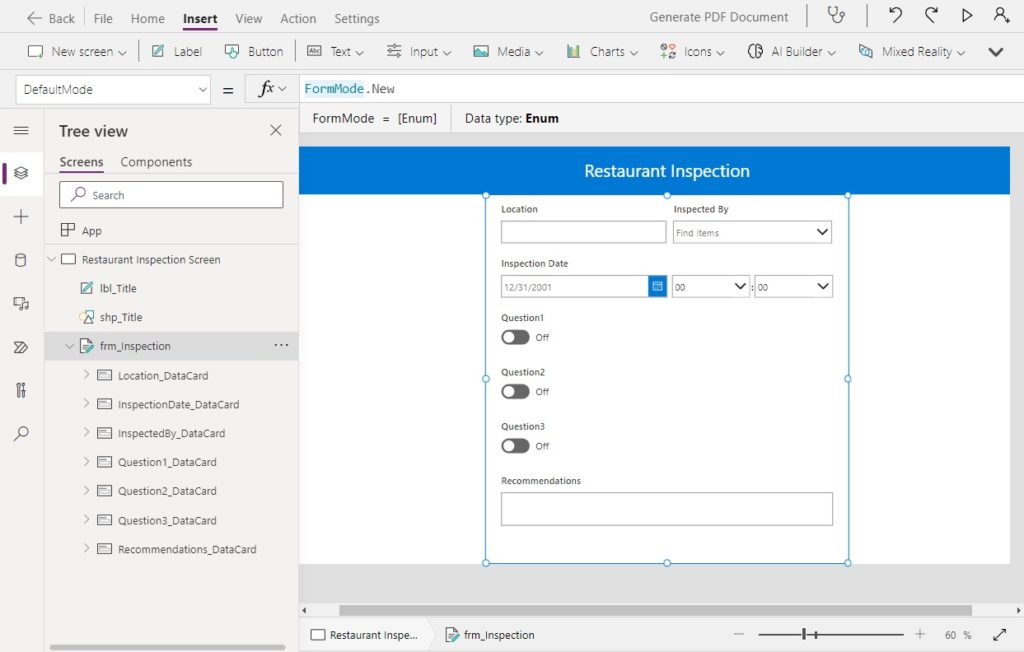
Write this code in the DefaultMode property of the form to create a new record when the form is submitted.
FormMode.NewCode language: CSS (css)
Configure The Inspection Form Questions
The Question1, Question2 and Question3 all use a toggle control with a text value of On or Off. We want the toggle to read yes or no instead.
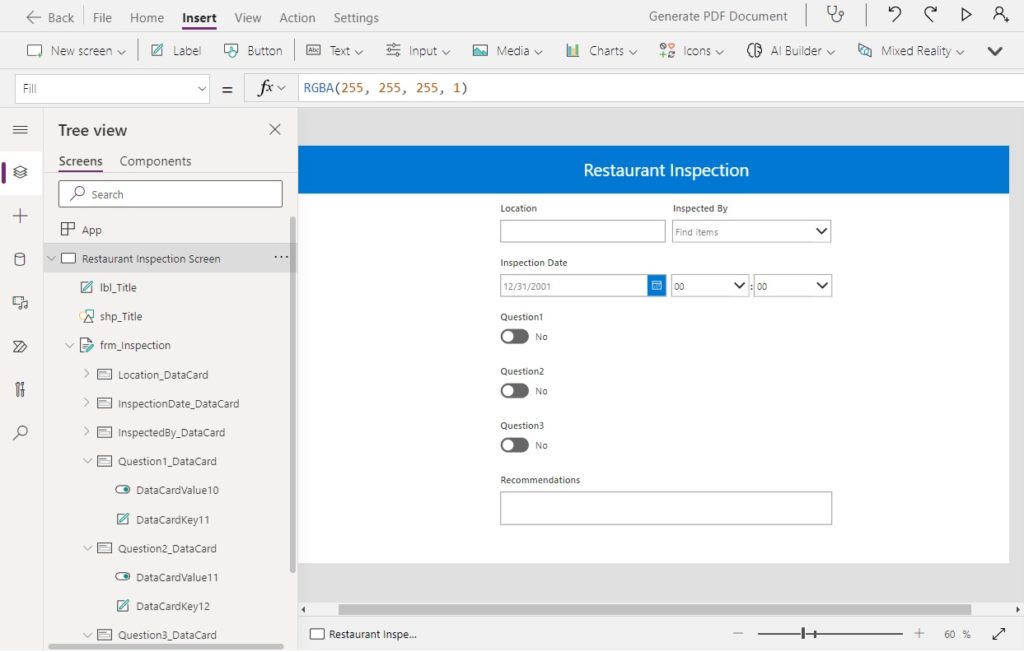
Use this code in the FalseText property of all the toggles.
"No"Code language: JSON / JSON with Comments (json)
Then write this code in the TrueText property of the toggles.
"Yes"Code language: JSON / JSON with Comments (json)
Set the toggles to start in the No position by changing the Default property of their card to false.
falseCode language: JavaScript (javascript)
Next, we must replace the titles Question 1, Question 2 and Question 3 with a yes-or-no question.
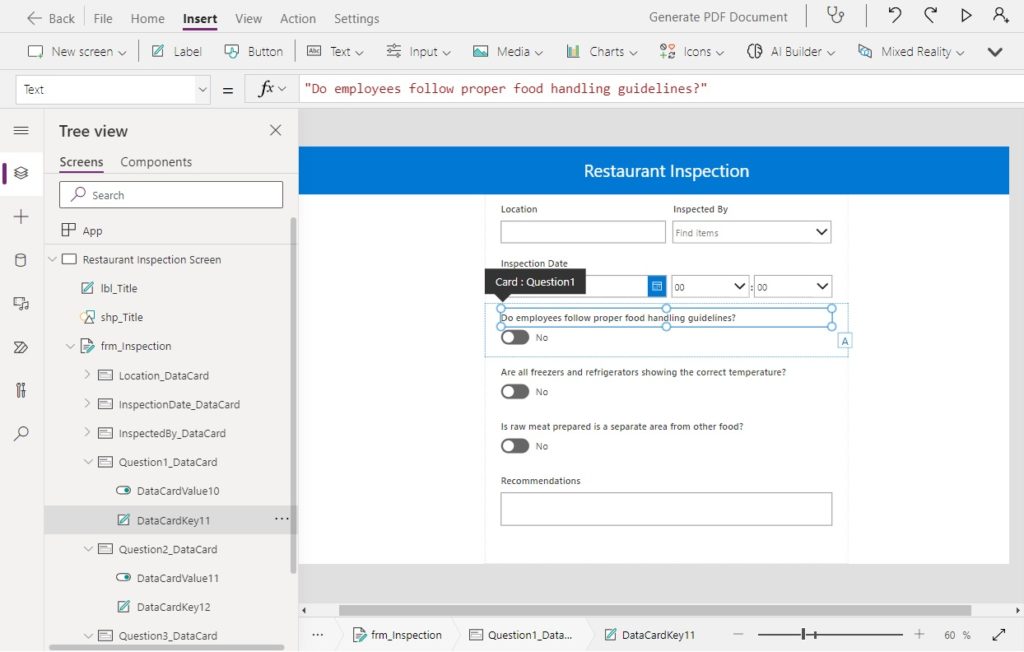
Write this code in the Text property of Title label for Questions 1, 2 and 3.
"Do employees follow proper food handling guidelines?"                 // Question 1
"Are all freezers and refrigerators showing the correct temperature?"  // Question 2
"Is raw meat prepared is a separate area from other food?"             // Question 3Code language: JSON / JSON with Comments (json)
Submit The Restaurant Inspection Form
When the restaurant inspection form is completed the staff member presses the submit button and the results are posted to the Inspections SharePoint list. Submission of a new inspection form triggers the creation of a PDF form.
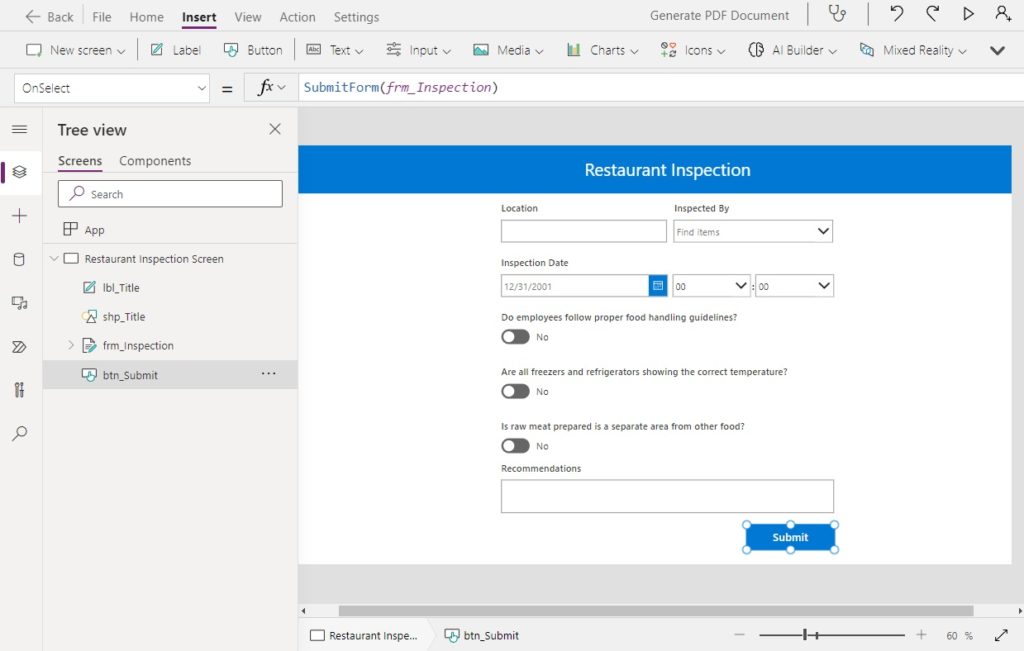
Insert a button at the bottom of the form and use this code in the OnSelect property.
SubmitForm(frm_Inspection)
Once the Inspection form is submitted we want to show a success notification and clear the form for the next inspection.

Write this code in the OnSuccess property of the Edit Form.
NewForm(frm_Inspection);
Notify("Success: Inspection Form was submitted", NotificationType.Success)Code language: JavaScript (javascript)
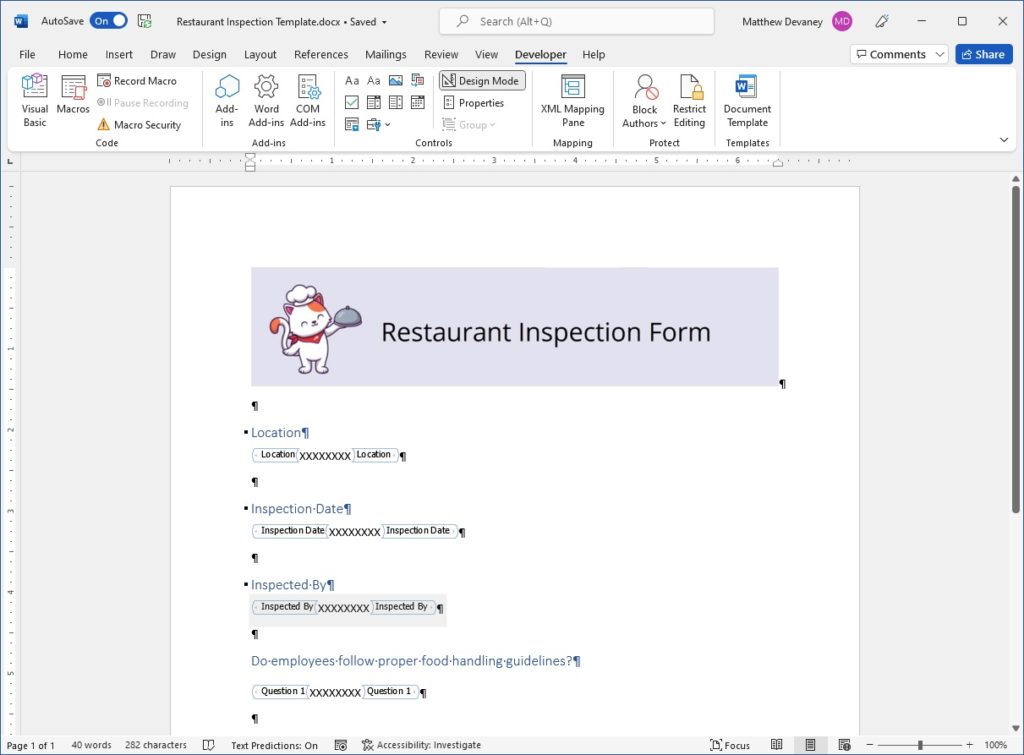
Enable The Developer Tab In Microsoft Word
Next we will create a Word document template. The Word document will be filled in with information from the Power Apps form and converted to a PDF by Power Automate. Open Microsoft Word and begin a new document (.docx). Include a title for each form field and then write some placeholder text below each title.

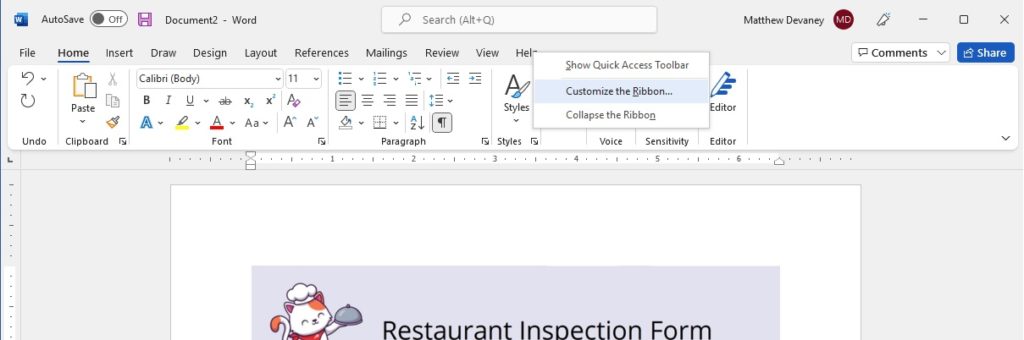
We need to enable the developer tab in Microsoft Word. Right-click on any tab in the ribbon and select Customize the Ribbon.
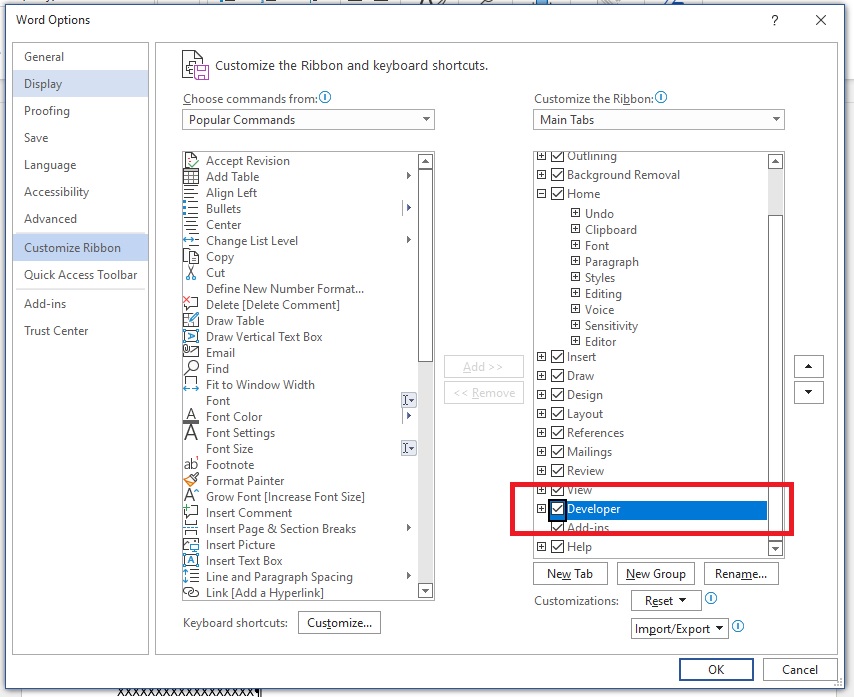
Check the developer tab on the right-side menu. Then press OK. The developer tab now appears on the ribbon.
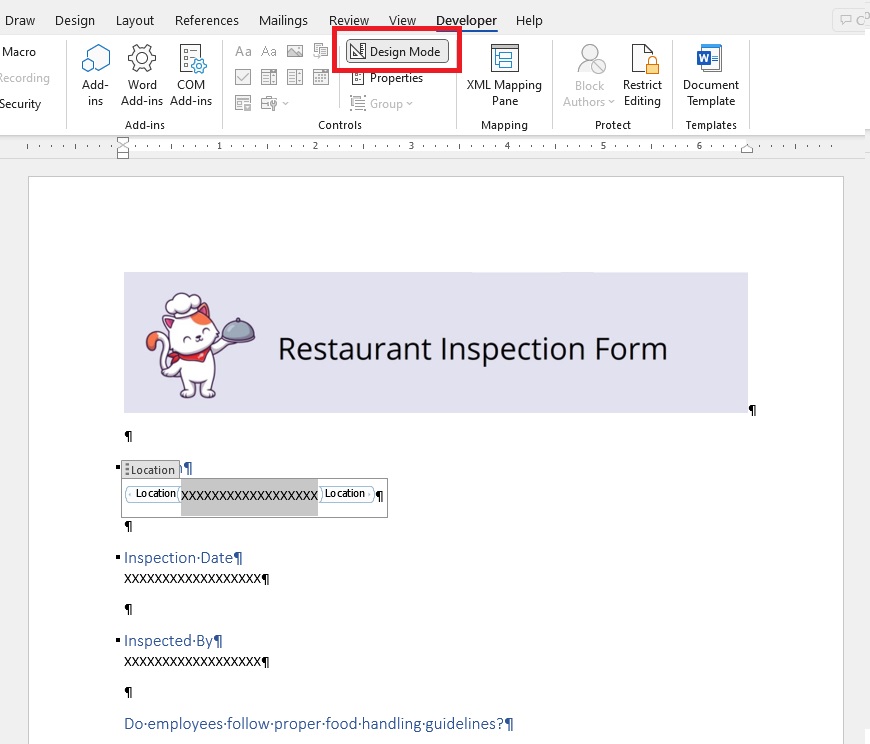
Add Plain Text Fields To The Word Document Template
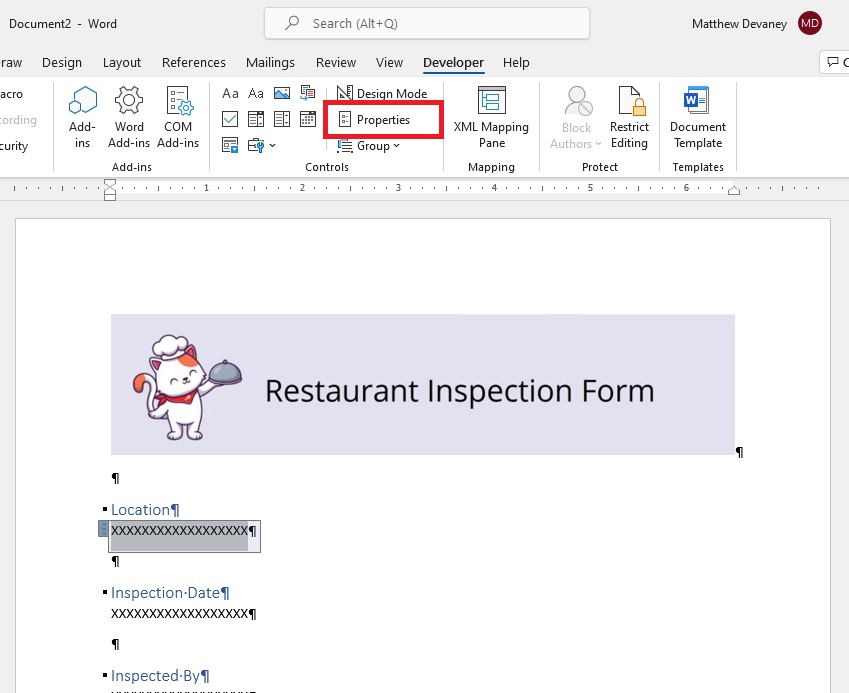
To fill the form in Power Automate we must implement a fillable plain text control for every form field. Highlight the placeholder value for location and select the plain text control.

Then with the plain text control selected click on Properties.
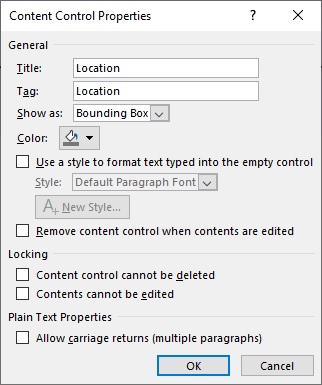
Fill-in the Title and Tag properties with the name of the field “Location.”
Click on Design mode to see the boundaries of the text input field. The placeholder value should be between the start and end of the plain text control.
Repeat the previous steps for all other fields in the Word document.
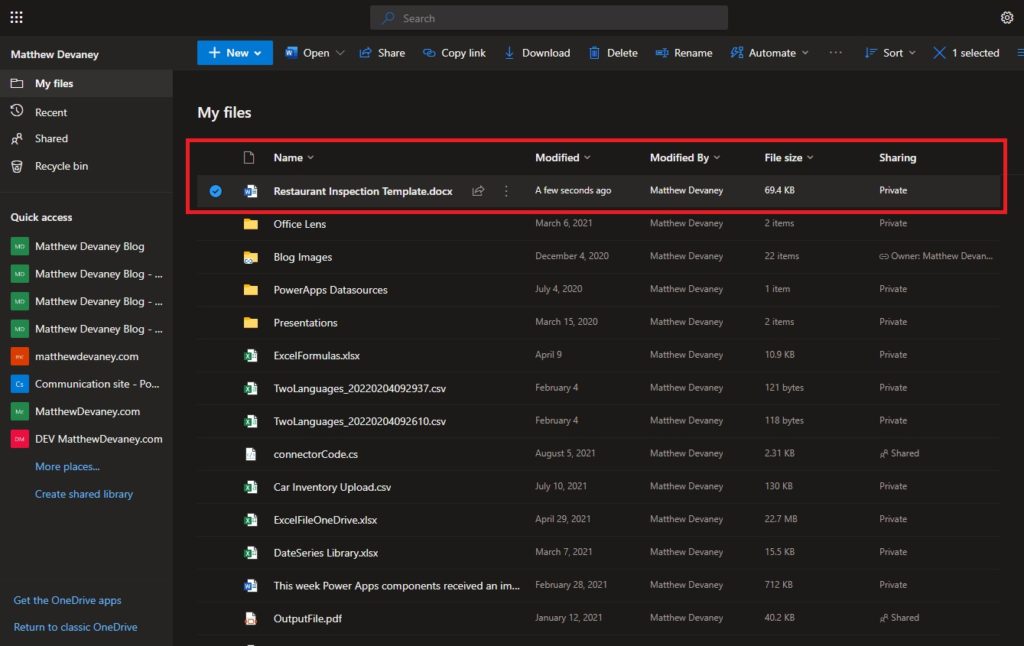
Save The Word Document Template To OneDrive
The Word document must be saved to a SharePoint document library or OneDrive to be used by Power Automate. In this tutorial we will save it to OneDrive. Open OneDrive and drag-and-drop the Word document into the root folder.
Fill-in The Word Document Template With Power Automate
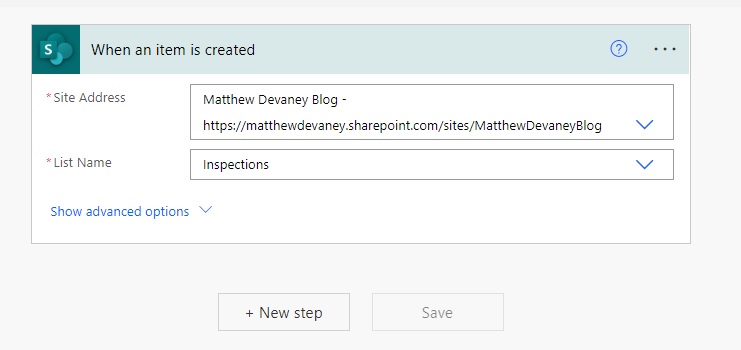
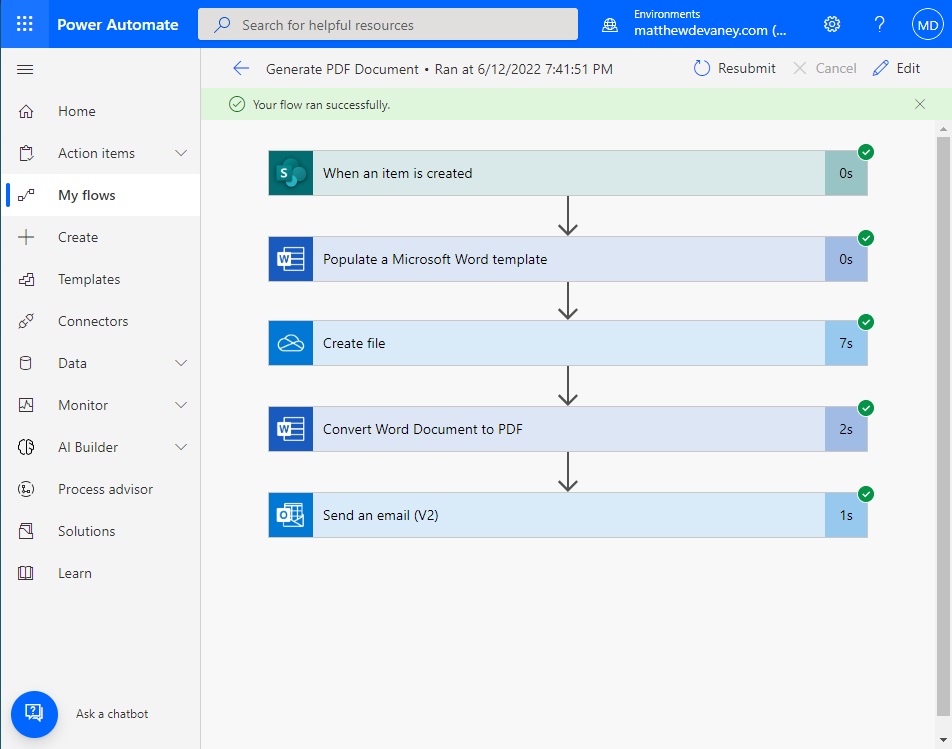
A PDF of the Restaurant Inspection form will be generated once the form is submitted in Power Apps. Open Power Automate and create a new automated cloud flow. Name the flow “Generate PDF document” and use When an item is created as the trigger.

Connect the When an item is created trigger to the Inspections SharePoint list.
Add a Populate a Microsoft Word Template action and point it to the Restaurant Inspection Template word document we stored in OneDrive. Fill-in the Word document with information from the newly created record.
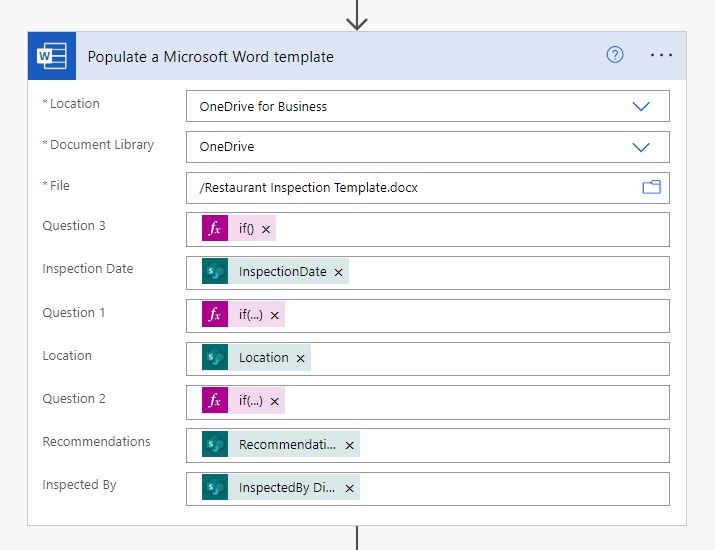
The Question 1, 2 and 3 fields have the data type Yes/No in SharePoint but they will display the values true or false in our Word document by default. We must write a Power Automate expression to change the values to yes or no instead. Write these expressions in the Question 1, 2 and 3 fields respectively.
if(triggerOutputs()?['body/Question1'],'Yes','No')Code language: JavaScript (javascript)if(triggerOutputs()?['body/Question2'],'Yes','No')Code language: JavaScript (javascript)if(triggerOutputs()?['body/Question3'],'Yes','No')Code language: JavaScript (javascript)
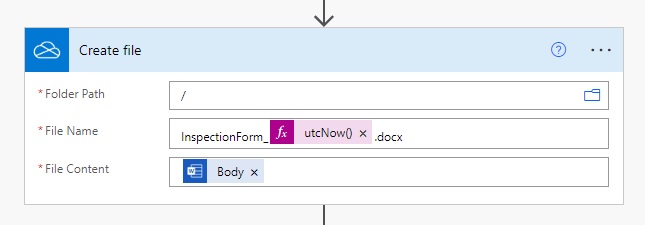
Insert a Create File step to generate the Word document. Use the Body of the previous step as the file content.
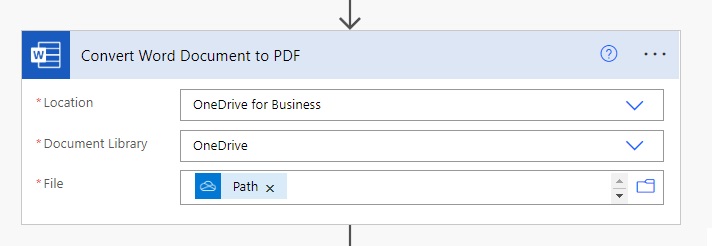
Next, use the Convert Word Document to PDF action and supply the location of the newly created file.
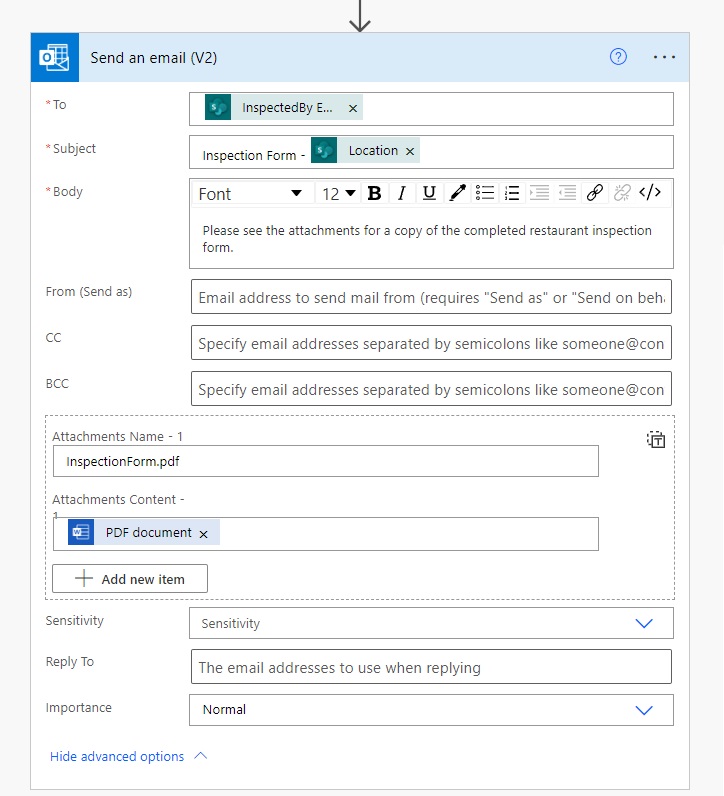
The resulting PDF file can be output to a SharePoint document library, stored in a OneDrive folder or sent in an email. In this tutorial we will send an email. Add the Send an email (V2) action and open the advanced properties. Fill-in the Attachments Name property with the filename “InspectionForm.pdf” and populate the Attachments Content property with the PDF document.
We are now done building the flow in Power Automate. Save the flow and turn it on. We are ready to generate the PDF form in Power Apps.
Generate The PDF Document Using Power Apps & Power Automate
It’s time to test the app, flow and word template we’ve created together. Fill-in the Restaurant Inspection form in Power Apps and click Submit.
Once the form is submitted the Power Automate flow will be triggered. It creates a Word document, converts it to a PDF and then sends an email with the PDF attached.
The filled-in PDF attached to the email will look like this.

Did You Enjoy This Article? 😺
Subscribe to get new Power Apps articles sent to your inbox each week for FREE
Questions?
If you have any questions about Easiest Way To Generate PDFs In Power Apps (No HTML) please leave a message in the comments section below. You can post using your email address and are not required to create an account to join the discussion.


Great post Mathew, thanks!!! I did something like this using Excel with two Sheets. One hidden for loading data from Power Apps and other with a template where cells are referenced to that data. It works without premium connector and can be converted to PDF also.
Francisco,
That’s a neat solution. I haven’t heard of anyone doing that before but I have no doubts it works. Have you found any way to do the repeating data?
Thanks!!! Sorry, but I’m not clear what you mean with repeating data.
Could you tell us in more detail how it is implemented without the premium connector
Hi Aydar, you need an Excel file with two sheets stored in SharePoint. One hidden to load data with Power Automate (sheet1) and other (sheet2) with a formulated template referencing the data of sheet1. I will attach 2 pictures to show how it works.
I’m bringing data from 9 lists from SharePoint, stored by my app in Power Apps. It’s a large flow. Hope it was clear.
The flow.
Francisco,
This is a valuable tip. Thank you for sharing. I’ll definitely use it to help a client.
Matthew, I’m very glad that it was useful.
Hello Mattehw, thanks a lot for this helpful tips. I was wondering if you could help me with the final part of the flow, I have been able to create the excel file but I don’t know how to convert the PDF.
Marco,
Use the Convert File action for OneDrive as shown in this video:
https://www.youtube.com/watch?v=xU3K7QcBb1M
Great post! It gave me the courage to try this again. Not easy, but worth it !
George,
Agreed that making a PDF in Power Apps & Power Automate is not the easiest subject. But man, the HTML method is so hard compared to using Microsoft Word.
Thanks Matthew, I was able to follow along up to the point on how to insert fields in the Word doc. I kinda did it, but it wanted me to choose from a list.
How close am I?
Dave,
I don’t understand where you are stuck in the article. Can you please ask a more specific question and provide a screenshot showing what you are asking about?
Hi Matt,
Thanks for sharing your knowledge and experiences. Been extremely valuable.
I worked through it and it came out just fine. As you keep saying, there is indeed no substitute for “doing” it yourself.
Douglas,
No substitute for DIY indeed.
I’ve been doing this over the last month with a couple of word files and it seems to me that word is very flakey with the text controls. I’ll have it working then I need to tweak something in the Word and I’ll go back into Automate and I’ve lost one of the text controls or there’s now a dynamic schema field (not what I named it). I’m sure I’m doing something stupid but it’s not obvious. This happens frequently.
Richard,
Have you found any alternative to Word documents you like better? I know the Plumsail connector is very good. But that has a monthly cost with the vendor on top of the premium Power Automate connector.
This is excellent, Matthew – thanks for sharing.
Andrea,
I’m glad you enjoyed it. Please check out the other articles in this series:
Add An Image To A PDF Form
https://www.matthewdevaney.com/power-apps-add-an-image-to-a-pdf-form/
Create A Repeating Section In A Word Document
https://www.matthewdevaney.com/power-automate-create-word-document-with-a-repeating-section/
I don’t get ‘populate a Microsoft word template’ option in my flow.
Supriya,
Open Power Automate studio, type Microsoft Word into search, then select the Microsoft Word icon. You will see the list of all available actions including Populate a Microsoft Word template.
Hi,
Firstly can I just say how amazing your guides are, they’ve helped me a lot and this one is definatley one of the final pieces to my project i need.
I do have a question though and that is if it would be possible to create a form, that has three sections, user one completes section A presses submit which sends the form to a user who completes Section B and then on to User C who then presses a final button which then outputs, this way, to a PDF.
From what i can see this would be used in a single form but would it be possible in a form.
As per Evan, this is exactly what I need to do for our company. I need to create a standard Inspection form that needs to be filled out on an ipad by at least 2 operatives during a manufacture stage, then a final sign off by a supervisor for completion. Each form would then have to be named per the Panel unit number, Example; A12345-123. All forms to be saved to the cloud for any inspector to view when needed. At times, they may have to add a photo or drawing to the pdf (just to complicate things). Any help would be most grateful.
Hey Mathew you are amazing can do you one app using power apps which contains two or three questions and attachments and pen input control. All these data should be saved in SharePoint and after that by using power automate to get pdf all the details including attachment images and pen input signature to pdf. Please help me I got stuck in this one. Could you please share your email?
Manoj,
I’ve already done an article on Pen Capture. You can view it here. Sorry, I cannot share my email.
https://www.matthewdevaney.com/capture-a-signature-with-power-apps-pen-input-and-save-to-sharepoint/
Hi!! Very nice explanation, I have a question, is it posible to add images or camera pictures taken in power apps to the word pdf making ??? thanks ;))
Santiago,
Yes, I wrote about how to do it. Simply substitute the Add Photo control for the Signature control here and it will work
https://www.matthewdevaney.com/power-apps-add-an-image-to-a-pdf-form/
Hi Matthew.
Thanks for this. It kinda work, but flow stuck at creating PDF.
Error details are:”The selected file doesn’t exist, please select a valid file and drive.
clientRequestId: aef4f84b-9f23-4c1d-b78a-5c7df6643bf1″.
So i put delay before creating PDF (so the word file have enough time to save) but it does not work eather.
Im using SharePoint, not OneDrive, but it should work same, right?
Thanks
Nick,
I have/had the same problem.
The flow error will show you that the Path dynamic variable is causing the problem. Replace Path with /_support/08.V…../ and follow it with the Name dynamic variable.
That should solve your problem. I have added a screenshot of my changes and they work fine.
Regards
Wayne,
Is this general problem that I need to cover in my tutorial? Or does it only happen in specific cases?
Hi Matthew,
The problem only happens if you are saving to SharePoint and not OneDrive.
I would respectfully suggest that you could add a comment or two stating that if you are saving to a Sharepoint Site then the Path statement will not work and you have to manually add the path followed by the Name variable.
Hi Mathew and Wayne,
After manually adding the path followed by the Name variable, Still I’m unable to convert the word document to Pdf.
Kindly help!
Thanks,
Jeeva
Hi Wayne,
I’m facing the below error while converting the Word Document to PDF.
The selected file doesn’t exist, please select a valid file and drive.
clientRequestId: 739e061d-d095-4b66-b9aa-62e73b74c719
I see you have provided a solution as “Replace Path with /_support/08.V…../ and follow it with the Name dynamic variable.”
Could you please explain. If possible please give an example syntax.
Thanks,
Jeeva
Has anyone tried this in PowerPoint ? I need to create a Powerpoint template the same way this word doc is being created and fill it with the entries from the Power Apps form
Can I use the above method to add a table with dynamic data (sometimes 10 rows sometimes 20 rows) into the Word doc? Any other possible ways?
Jawl,
Yes, the number of rows can be dynamic. No, the number of columns cannot.
Hi everyone, Powerapps now has built in PDF creation function, you can turn this on under upcoming features, Experimental. You shouldn’t need to use this method unless you cant built a view you need from gallery’s and form controls in a container, or worried Experimental features won’t become built in in the future for production apps.
Great blog though, i’m only pointing it out as it might save people a lot of time, but thank you, people like you Matt save peoples bacon on a daily basis, coming up with ideas for functionality that builders need!
Note: If the option is missing it might not have been rolled out to your Tennant so sit tight, also Reza Dorrani has a video on youtube explaining it functionality.
Iain,
The new PDF() function feature is currently Experimental. I would not recommend launching an app with Experimental features turned on into production. Microsoft is still working out the bugs on this one and functionality could change.
In the future, I believe this will be a great addition to Power Apps. I’m already thinking of how I can re-formulate this article, or write a new one, to take advantage of it. And yes, Reza Dorrani is an excellent vlogger.
Agreed. I found a bug with the experimental PDF function. It will not render the state of radio buttons but instead leaves them all unselected. See: https://powerusers.microsoft.com/t5/Building-Power-Apps/Create-PDF-From-Gallery-Rendering-State-of-Radio-Buttons/m-p/2217011#M555346
Chris,
I wish the PDF function was out of experimental phase already. It will take time to perfect…
Yeah, it’s a shame it still needs work.
Hi Matthew, Great post, thank you so much 🙂 I wanted to know if it’s possible to have a dynamic word template. Can we display and hide questions and answers in the template depending on a selection in a dropdown box in the PowerApps form?
Hammad,
You could put the questions and responses into a Word document repeating section. Only pass the required questions into Power Automate.
https://www.matthewdevaney.com/power-automate-create-word-document-with-a-repeating-section/
Seems Nice but since when is word a premium connector holy moly
Asmr,
Document generation using the Word connector was always premium. It’s really cost-effective. Apply a per user $40/month license to your Service Account any generate as many documents as you want per month. If the only amount you can pay is $0 month, you can generate an HTML form for free. It’s more work, and less-maintainable, but that is the cost of free.
Also, Power Apps recently launched a new experimental PDF function. You can give that a try, but I don’t suggest it for a production app. It’s not ready yet.
Is there any way to recreate this flow without using Premium Content? This flow is exactly what I need but I can’t use Premium. 😢
Emily,
Unfortunately, this method is premium only. I like this method the most but there are some free alternatives. #1. Generate HTML and use Power Automate to convert to PDF file type. #2 Use the Experimental PDF Function() which can be enabled in advanced settings.
I have found most organizations have at least one licensed account called a “Service Account.” If your organization is open to the idea, you can route all document generate through the service account to save costs. It’s a really cost effective service!
Yes Emily, you can
https://youtu.be/iW3J7RAyxOo
Hi Matthew, I am a newcomer in the ‘Power family’ 🙂
I would like to create a contract with a few variables (name, staffnumber, date) that needs to be signed by an employee directly (iPad). The contract must then be saved as a pdf-doc on Sharepoint.
I checked both ‘The restaurant Inspection App’ en ‘How to add an image’, but I could need some help.
Thank you in advance, regards Heidi
Heidi,
Welcome to the ‘Power Family’ 🙂
I read your message but I don’t see a question. Is there something you would like to ask me?
Hi Matthew,
Thank you for this information. I have been able to successfully follow your steps here and the flow all works however it doesn’t pull across the content from the power app into the PDF. It looks like it has done it within the flow, but it doesn’t appear on the document. It populates the data into the SharePoint list that was entered into the app, so I am assuming the error sits within the Word Document. Do you have any suggestions on what I can try?
Jess D,
I would start troubleshooting by checking the flow. What does a the Populate A Word Document action look like once executed in the flow run. Maybe post a screenshot? I’m wondering if the variables it’s pulling in are blank or something.
Thank you matthew! I got my flow up and running, I added a step of making the created PDF an attachment to the list item. I would love to add one more step and send that attachment in outlook email as an attachment but i cant seem to get it quote right. any suggestions?
Sheliva,
This article I wrote will show you how to email file attachments:
https://www.matthewdevaney.com/power-apps-send-email-using-outlook-the-complete-guide/#Email-File-Attachments