Power Apps Add An Image To A PDF Form

Power Apps can be used to collect data and display the results on a PDF document with the help of Power Automate. Populating text fields in a PDF is easy but figuring out how to add an image is not as straightforward. However, you must know how to insert images to show a customer’s signature on a contract or a picture of something that failed during an inspection. In this article I will reveal how to add an image to a PDF Form in Power Apps.
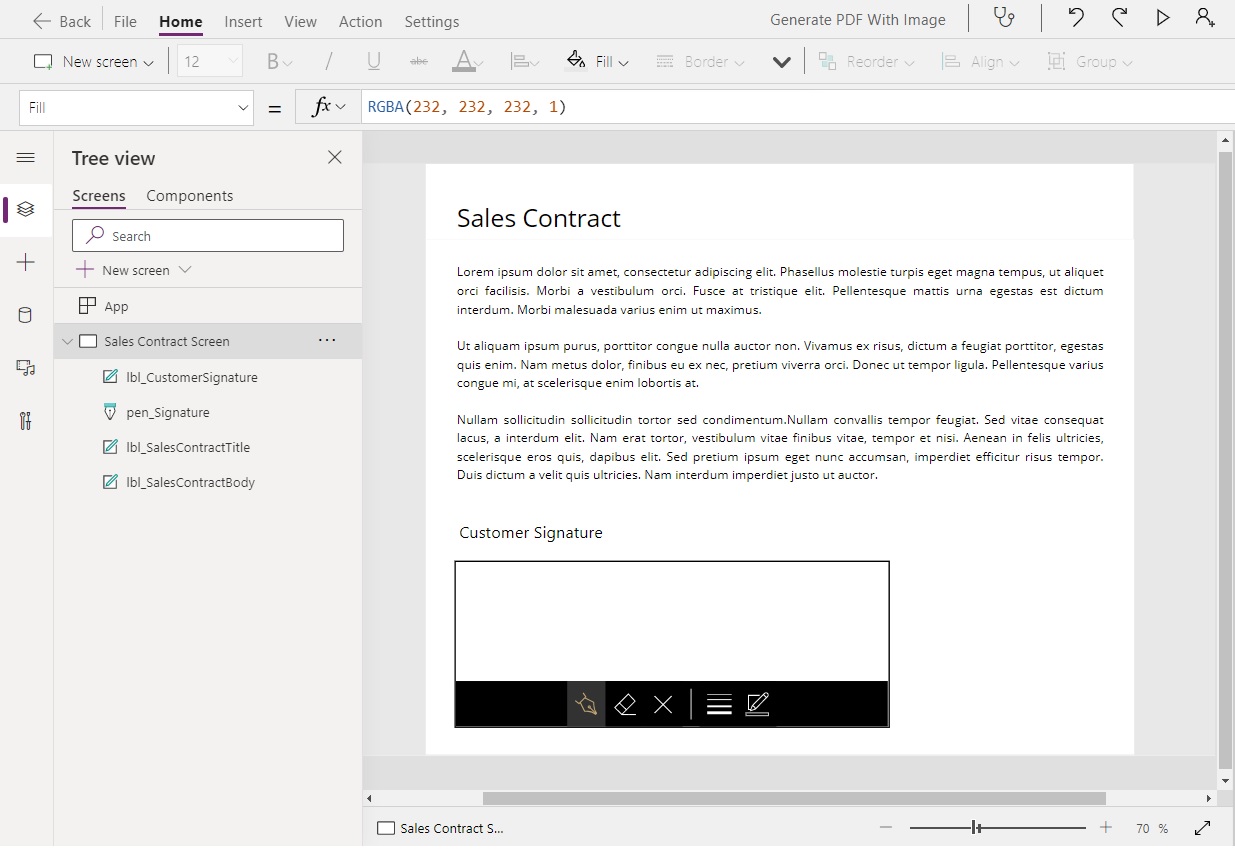
Introduction: The Sales Contract App
Salespeople at a selling & marketing company use the Sales Contract app to collect a contract signature from their customers. A signed a PDF copy of the contract is sent to both the salesperson and the customer.
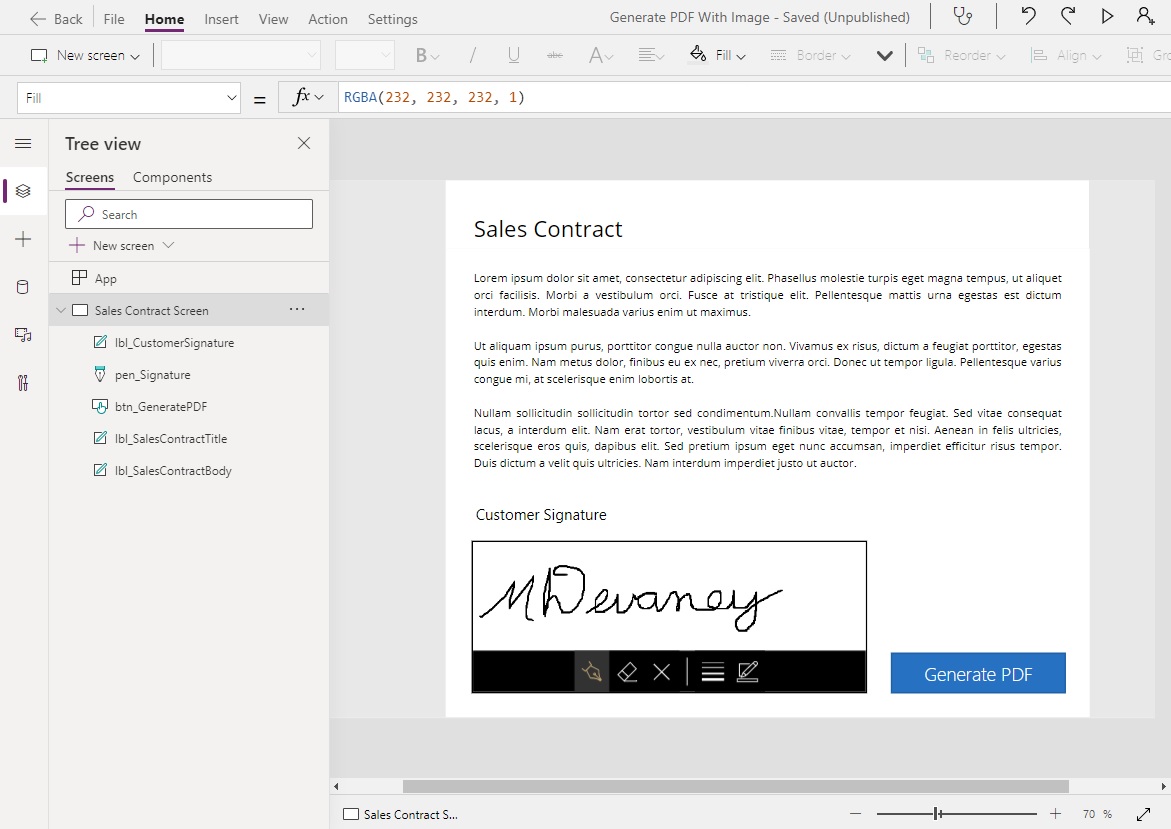
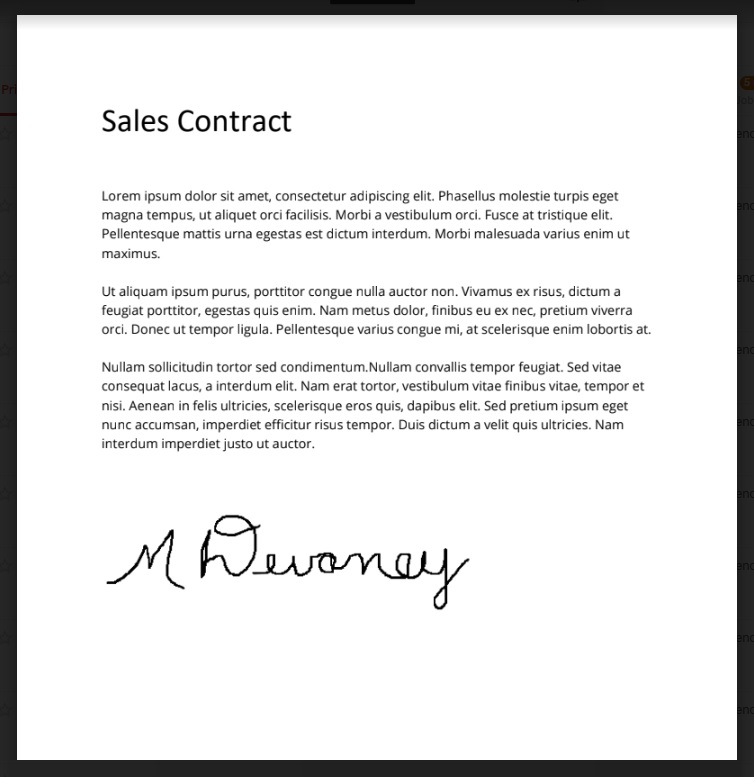
The PDF contract looks like this:
Create A Sales Contract App In Power Apps
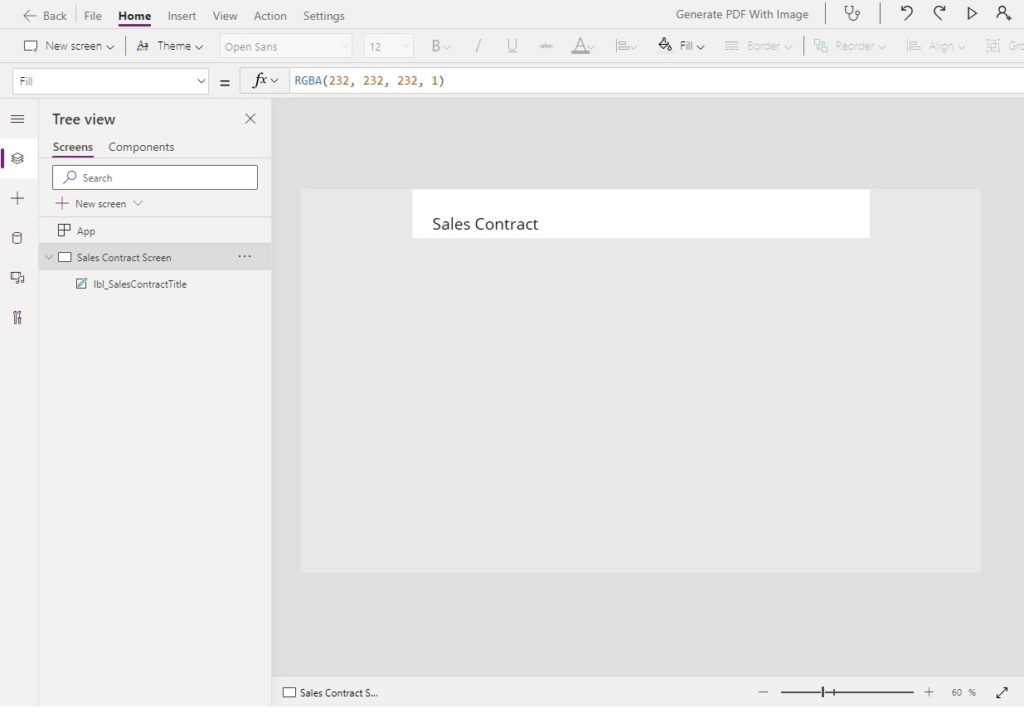
Open Power Apps studio and create a new tablet app from blank. Place a label with the words “Sales Contract” at the top of the screen.
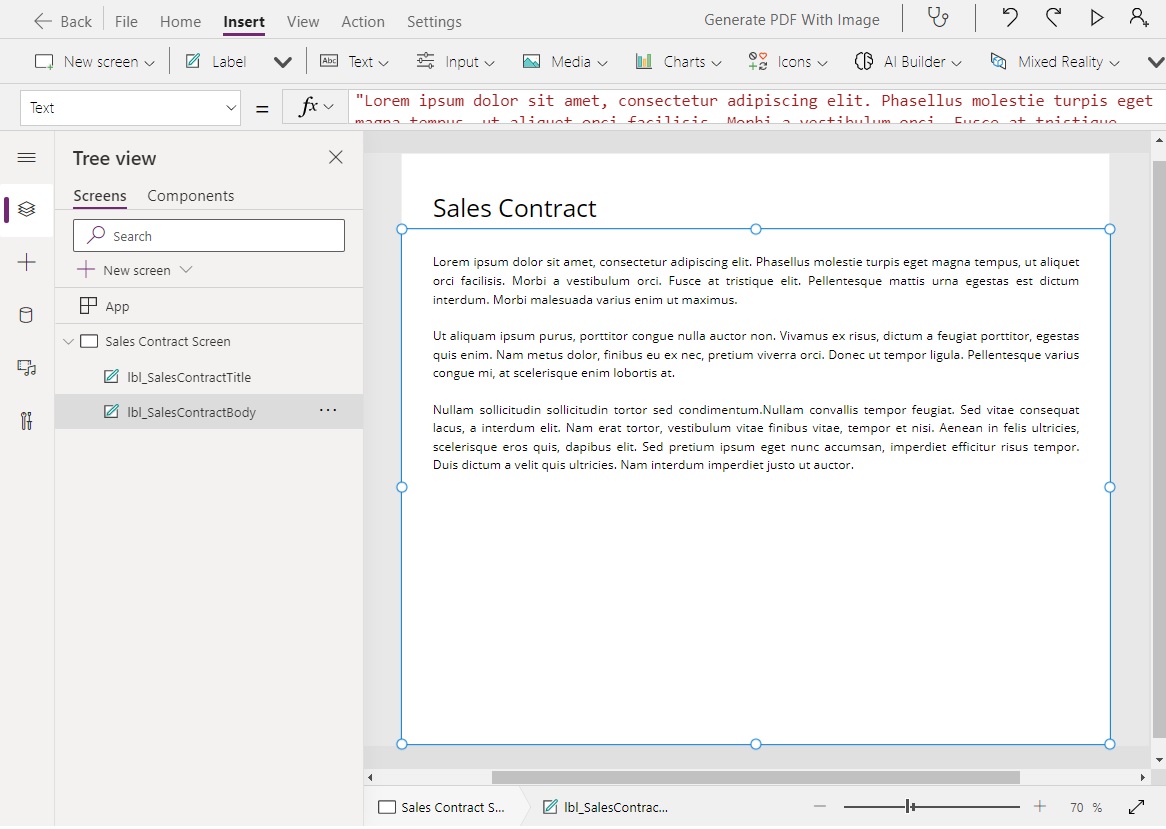
Next, insert another label directly below with the contract text.
The Lorem Ipsum placeholder text for this example can be found below.
"Lorem ipsum dolor sit amet, consectetur adipiscing elit. Phasellus molestie turpis eget magna tempus, ut aliquet orci facilisis. Morbi a vestibulum orci. Fusce at tristique elit. Pellentesque mattis urna egestas est dictum interdum. Morbi malesuada varius enim ut maximus.

Ut aliquam ipsum purus, porttitor congue nulla auctor non. Vivamus ex risus, dictum a feugiat porttitor, egestas quis enim. Nam metus dolor, finibus eu ex nec, pretium viverra orci. Donec ut tempor ligula. Pellentesque varius congue mi, at scelerisque enim lobortis at.

Nullam sollicitudin sollicitudin tortor sed condimentum.Nullam convallis tempor feugiat. Sed vitae consequat lacus, a interdum elit. Nam erat tortor, vestibulum vitae finibus vitae, tempor et nisi. Aenean in felis ultricies, scelerisque eros quis, dapibus elit. Sed pretium ipsum eget nunc accumsan, imperdiet efficitur risus tempor. Duis dictum a velit quis ultricies. Nam interdum imperdiet justo ut auctor."Code language: CSS (css)
Then add a pen input control and place it below the contract text. This is all we must do to setup the app for now. We will return to it later to insert a submit button.
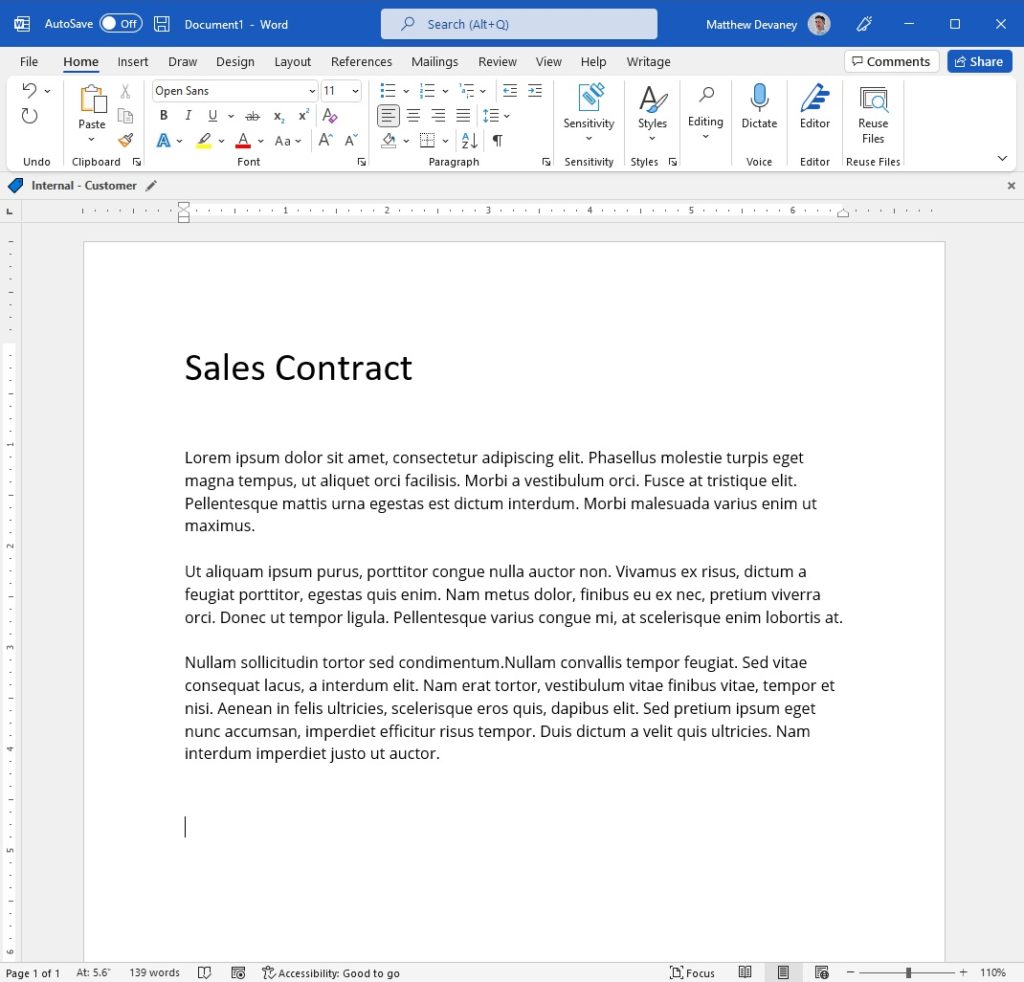
Enable The Developer Tab In Microsoft Word
When the sales contract is submitted in Power Apps the customer’s signature gets applied to a PDF sales contract. We will create the sales contract template in Microsoft Word and then apply the signature and convert to PDF using Power Automate. Open Microsoft Word and start a new document. Insert the text shown below.
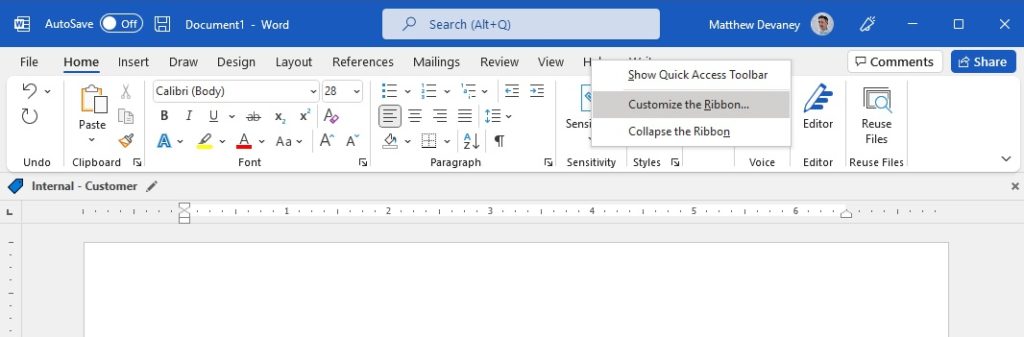
Then right-click on any tab in the ribbon and choose Customize the Ribbon.
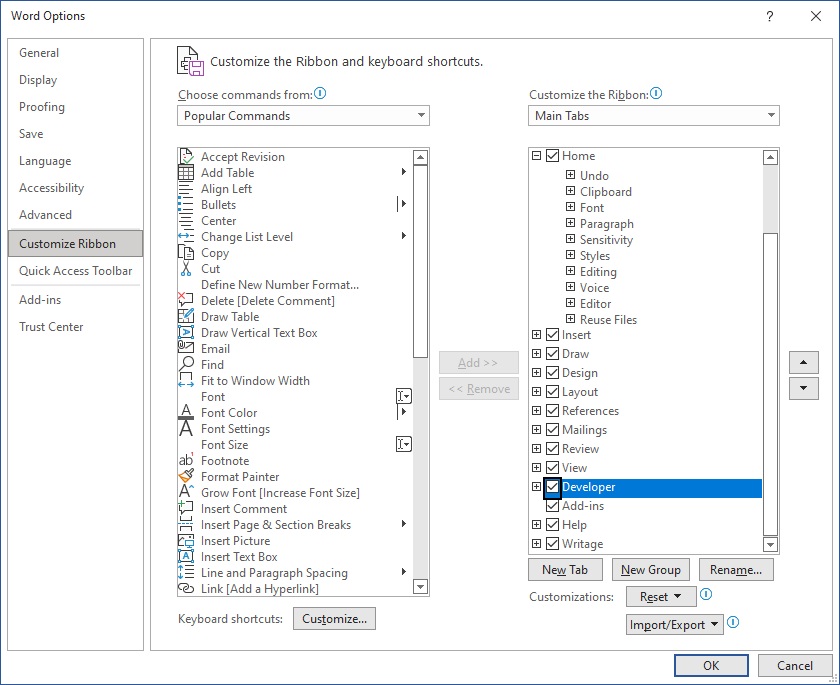
Check the Developer box and press OK. Now the developer tab will appear in the ribbon and allow us to create a Word document template.
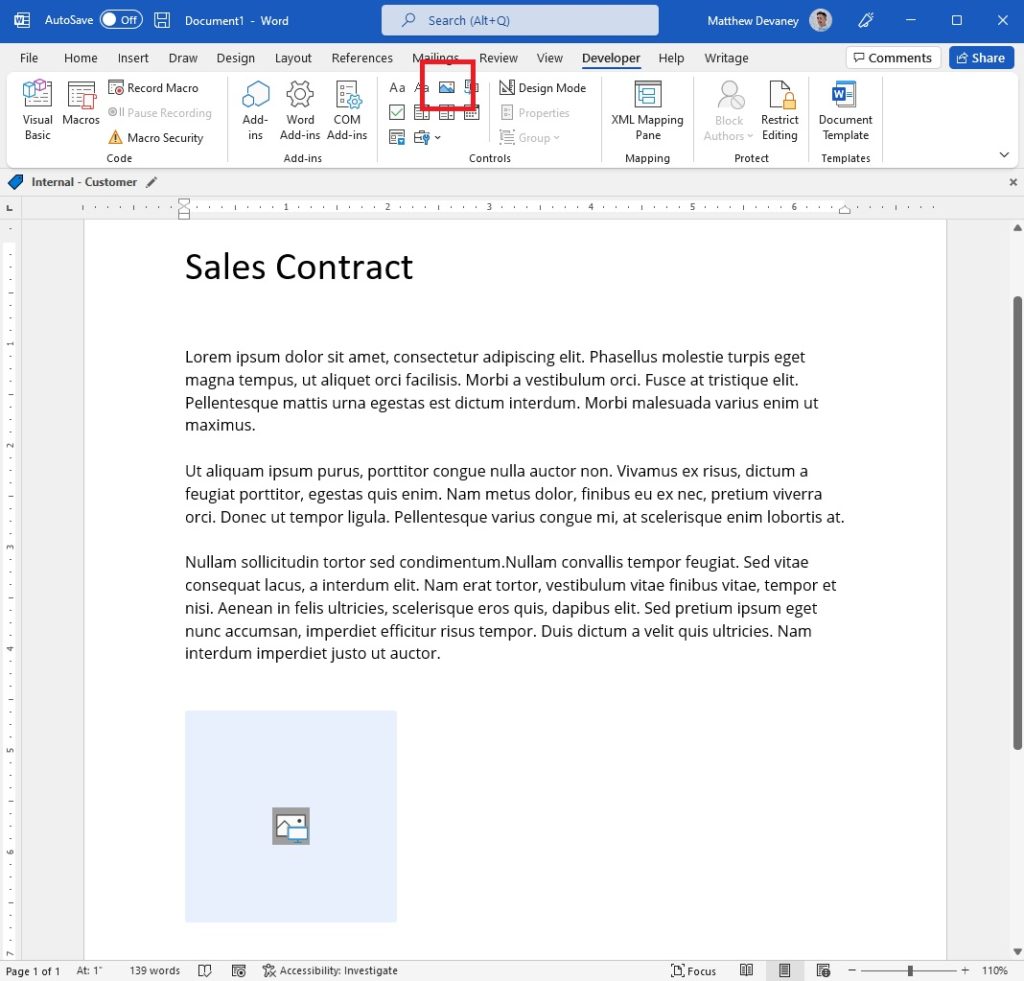
Add An Image Field To The Word Document Template
In Power Apps the customer will sign at the bottom of the contract. We will need an image field at the bottom of the Word document template to display the signature. Add an image field to the contract.
Right-click on the image and choose Size and Position.
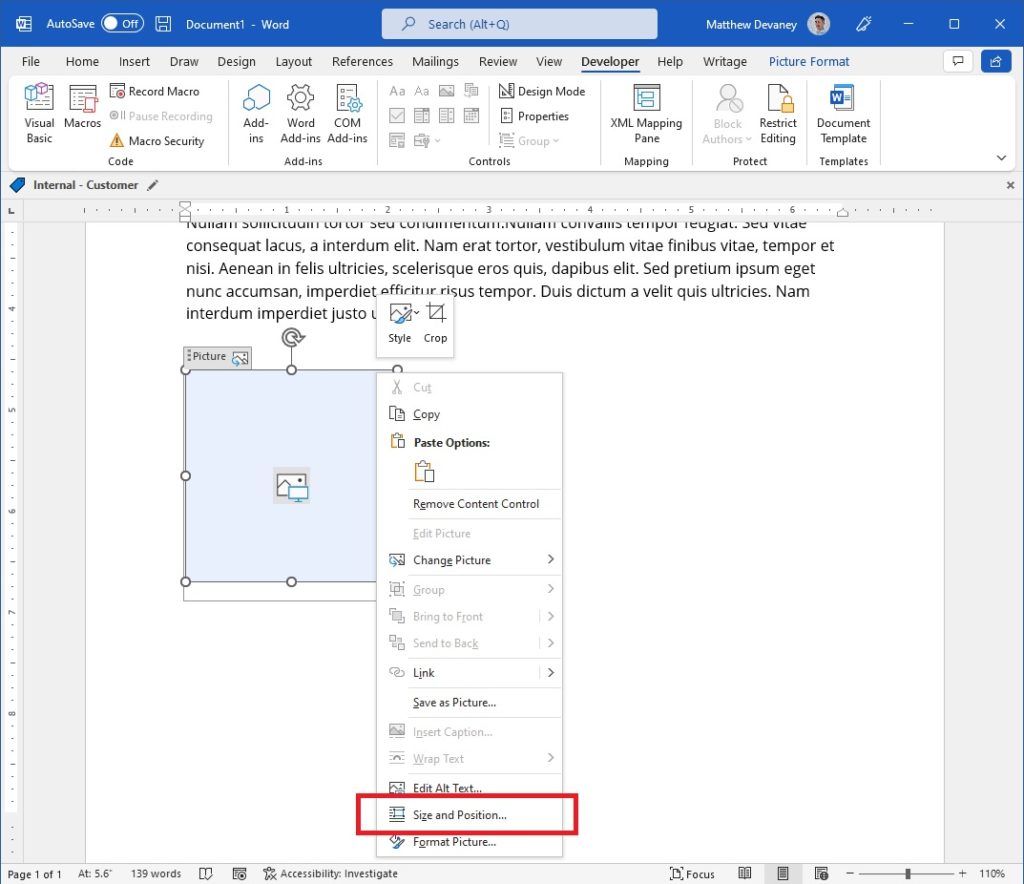
Uncheck lock aspect ratio and choose a height and width. In Power Apps my pen input had a height of 216 and a width of 563 of I chose 2.16″ and 5.63″.

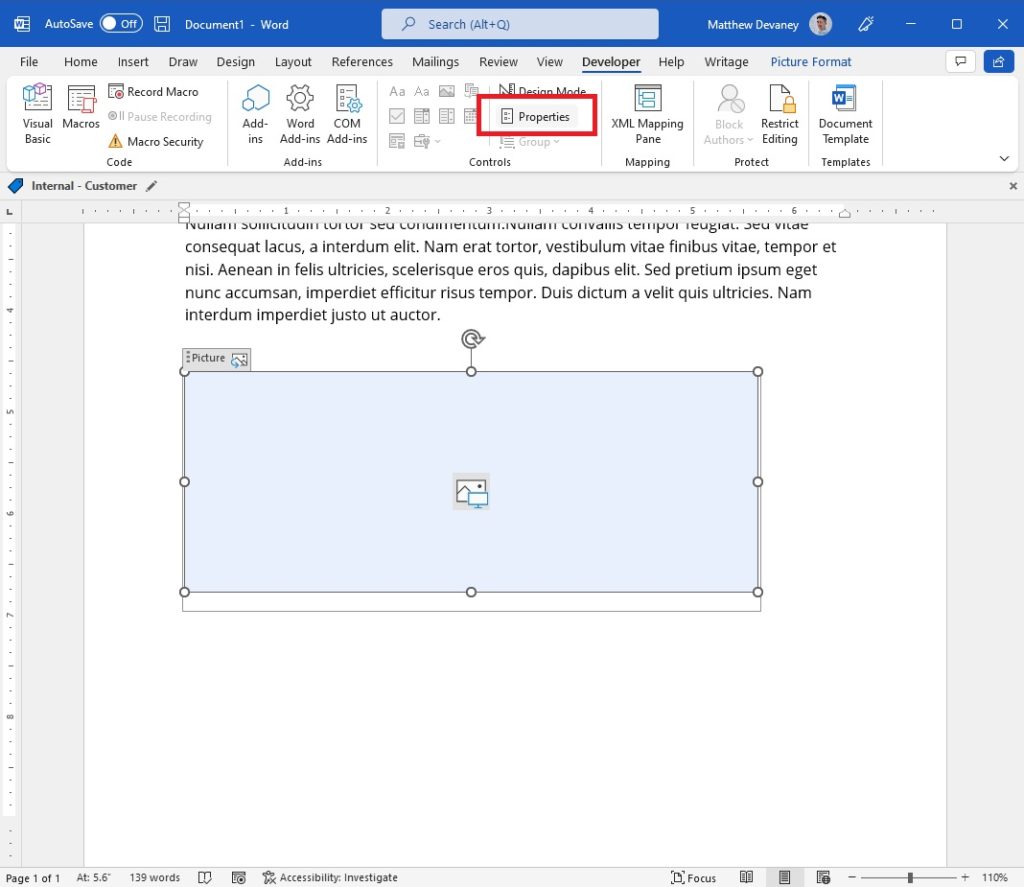
Next, highlight the image field and select Properties.
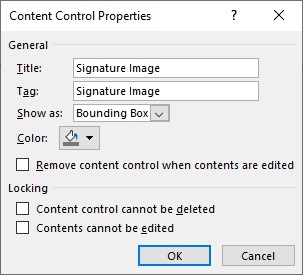
Input the title and tag Signature Image to identify the field in Power Automate. Save and close the Word Document once finished.
Save The Word Document Template To OneDrive
The Word document template must be stored in a SharePoint document library or OneDrive for Power Automate to access it. In this example we will use OneDrive. Move the sales contract word document template to the root folder in OneDrive.
Generate A PDF From A Word Document Template Using Power Automate
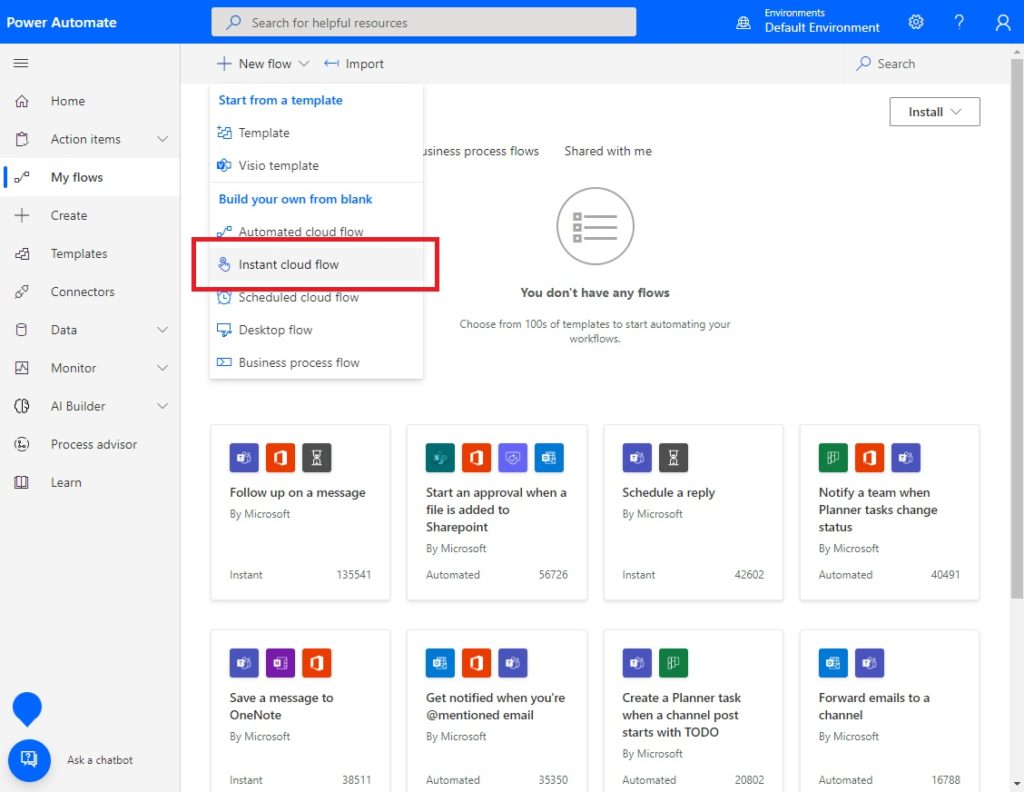
After submitting the contract Power Automate is used to populate the word document template with the customer’s signature image, convert the file to PDF and send the contract as an attachment via email. Open Power Automate and start a new instant cloud flow.
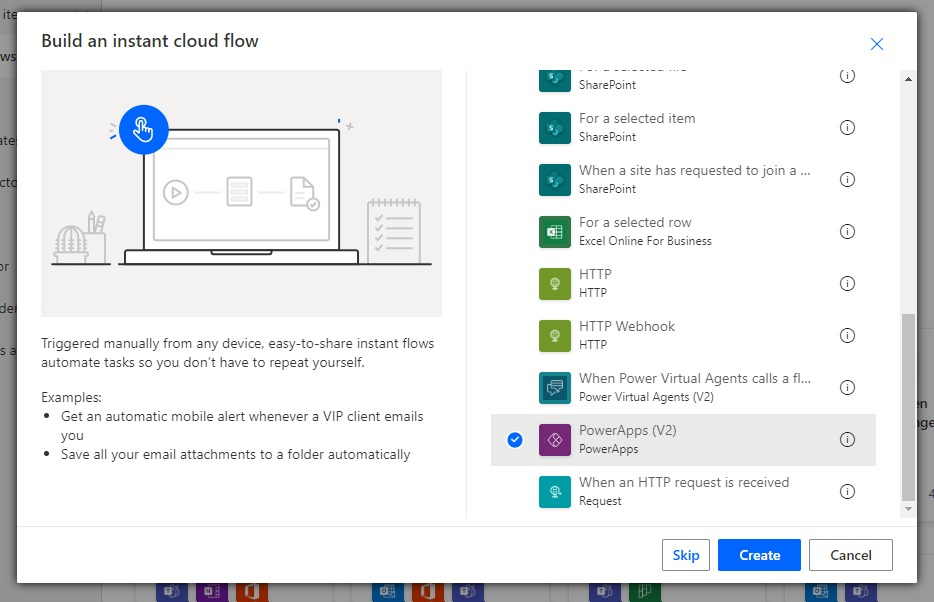
Select the Power Apps (V2) trigger and press Create.
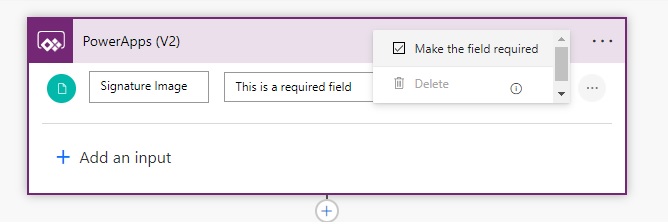
Add a file type input to the Power Apps (V2) trigger named Signature Image and remove the description.
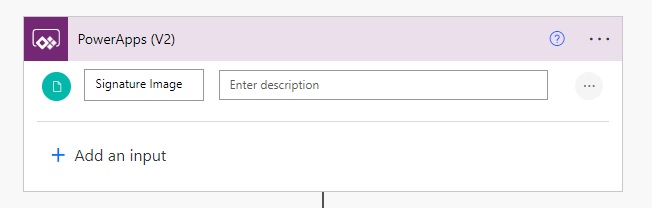
Then make the Signature Image required.
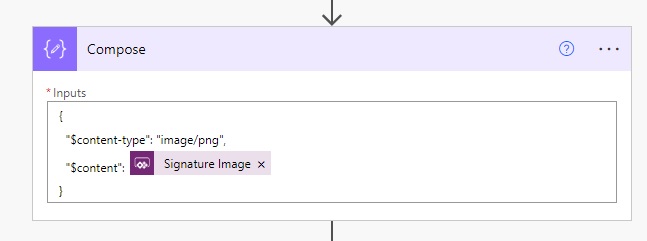
Next, add a compose action with the following code. The Word document template requires the image code to be formatted in this way.
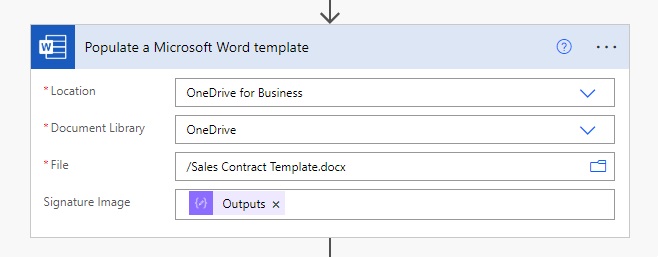
Insert a Populate a Microsoft Word template action and point it to the sales contract we created. Use the output of the compose action in the Signature Image field.
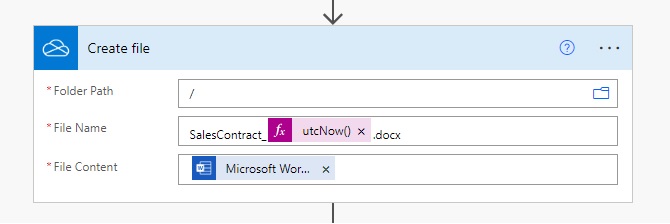
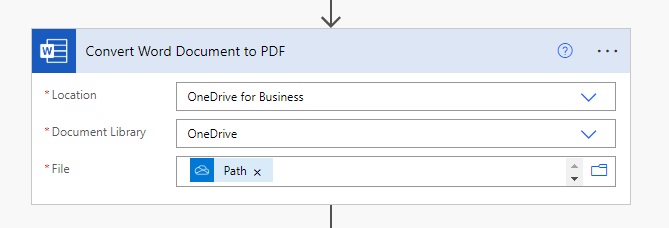
Add a Create File action and fill it with the Microsoft Word document body.
Then Convert the Word Document to PDF.
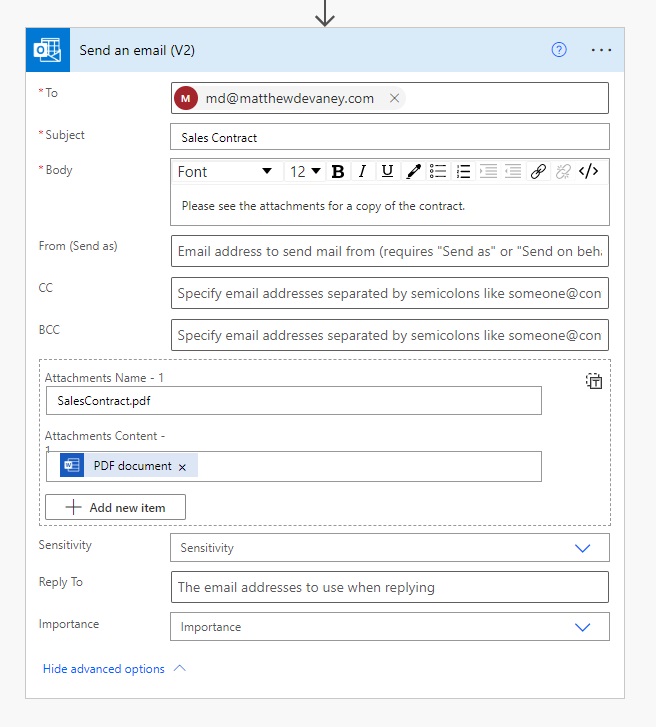
And finally Send an Email (V2) with the Sales Contract attached. The Power Automate flow is now completed.
Transfer Signature Image From Power Apps To A Power Automate Flow
Now we will complete the Sales Contract App. Go back to the Power Apps and connect the Generate PDF With Image flow to the app.
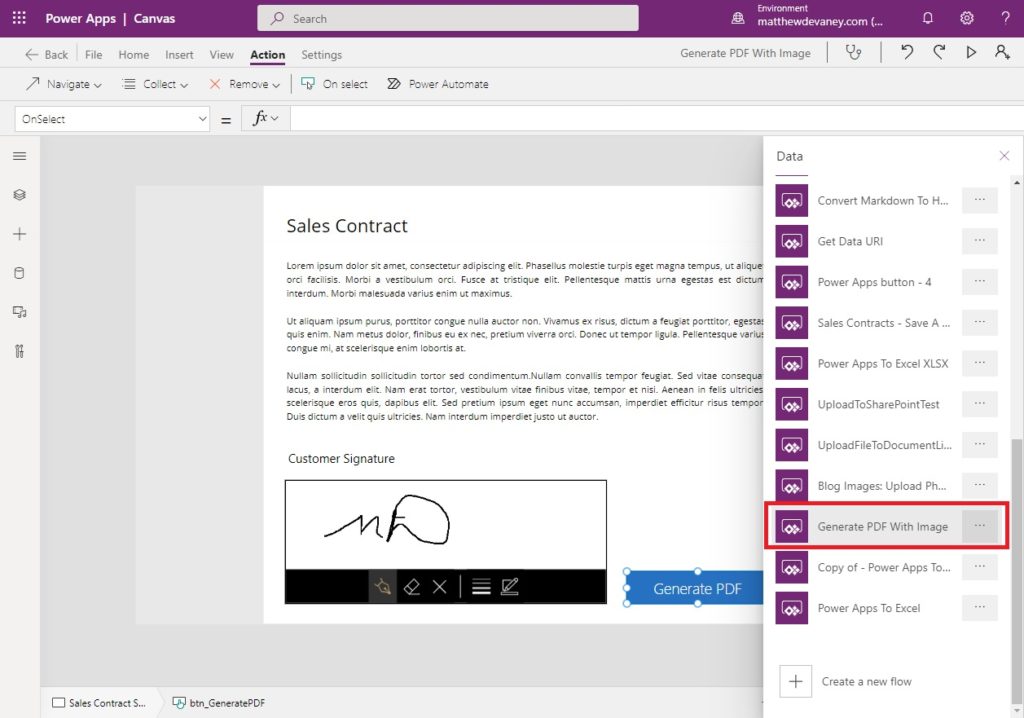
Insert a button with the text “Generate PDF” at the bottom of the contract.

Use this code in the OnSelect property of the button to trigger the flow and take the signature image as a flow input.
GeneratePDFWithImage.Run(
    {
        contentBytes: pen_Signature.Image,
        name: Concatenate("signature_", Text(Now(), "yyMMddhhmmss"), ".jpg")
    }
)Code language: CSS (css)
Generate The PDF Contract From Power Apps
Our app, flow and word document template are now complete. Write a signature in the pen input field to and select the Generate PDF button.

After a few moments the Sales Contract PDF is received via email and shows a signature image at the bottom.

Did You Enjoy This Article? 😺
Subscribe to get new Power Apps articles sent to your inbox each week for FREE
Questions?
If you have any questions about Power Apps Add An Image To A PDF Form please leave a message in the comments section below. You can post using your email address and are not required to create an account to join the discussion.


Hey Matt, How’s it going?
Just run through this, thanks ! I just wanted to point out that it is important to check the name of the flow that you have created and underneath the name of the flow, when it has been connected to the app, is the name of the flow that you need to precede the .Run action.
Also, to rename the pen input to pen_Signature 🙂
Jon,
Thanks for the comment. Did I miss naming the control Pen_Signature somewhere? I’d like to know if I need to make a correction 🙂
Matthew,
Thanks for this nice feature.
After the compose,
{
“$content-type”: “Image/png”,
“$content”: @{triggerBody()[‘file’][‘contentBytes’]}
}
I get the error: The image is not of type PNG or JPG. Please provide an image of type PNG or JPG.
On the Populate a MS Word Template.
See attached flow image.
Thanks,
Martin
Added image flow run information
Martin,
I got this error message too when writing the tutorial. The fix was to toggle the File input in the trigger to ‘Required’. Please try that and let me know if the issue is solved.
Even after doing this, facing the same jpg/png issue, what to do now
Can confirm that this bug is still there. My users must take pictures because of this. I can’t find a way around it.
Hi Max,
Did you find any solution to fix it ? I got the same jpg/png issue…
Another winner ! Thanks !!
George,
Thank you. Stay-tuned for next week’s article which focuses on repeating sections (invoice lines, reports, etc.).
Matt, first of All thanks, is very cool from you to share the knowledge, let me show you and example of What I did witha a Word template and works very good, so you may have this as an alternative,
from PowerApps I create a Button in “OnSelect Property”
Set(vConceptSign,JSON(SignatureCtrl.Image,IncludeBinaryData));
Set(vConceptSign,Mid(vConceptSign,24,Len(vConceptSign)-24));
The minus 24 is to remove this from the Binary variable to send : data:image/png;base64
And this is the code for the flow:
SignedDoc.Run(vConceptSign)
Then in my Flow after the PowerApps Trigger
I create a File with this Filename Expression : concat(‘sng’,utcNow(‘yyyyMMddhhmmss’),’.png’)
Then the Filecontent with this expression : base64ToBinary(triggerBody()[‘CustomerSign_FileContent’])
Finally I add the file content into the Mapped field for the signature,
Is Just an Alternative
Mahesh,
Thank you for sharing your alternative method. The JSON method is quite popular. It was discovered by Ramiro Melgosa (@ohthreesixfive) and Shane Young (@shanescows). It is the only method that works with the Power Apps V1 trigger. My method uses the Power Apps V2 trigger which allows for a different way of doing things.
Hi Matt this is great. I have image and text fields that I want to populate a word document with from a powerapp. I have been using powerapps to save to save the text and image a SharePoint list and attachment before sending it to flow.
If I wanted to skip the SharePoint step, would I use JSON and the image method detailed by Mahesh above? Or is there another way using the V2 trigger?
Just answered my own question. Just needed to add an extra input with the V2. Have one for JSON with text fields and the other for the image
Will,
Yup, you did. Sometimes all it takes is writing the problem out and then you find the solution 🙂
Thank you Matthew, juste remade it on my computer and it works really well !
I hope you’ll cover also all the things that you can populate Word with, because I have a project going on where I’ll have to copy pieces of text in the middle of a Word template to re-create a complete Sales Order. I’ll stay tuned !
Didier,
Yes, I will do an article on repeating sections of a Word document next week where you will learn how to populate multiple line items in a sales order. Stay tuned 🙂
Hi Matthew, In my environment the Populate a Microsoft Word Template is a premium connector. How come this does not show as a premium connector for you?
Dean,
I used a developer environment for this tutorial. Developer environments can use any premium action for free.
I’m still looking for a reliable and free method of creating a PDF containing multiple images that is paginated. I have used the Power Automate Word connector in the past but you need to add the number of image slots to the template. The OneDrive Convert action can be used to convert HTML to PDF but this is limited to 2MB so doesn’t handle multiple images. Really hoping MS address this as I feel it is a very common business scenario.
Hi Matt,
Thank you for this post, it helps me a lot !
I just have a question, let’s say that I want populate 2 or more pictures. What would be the modification in the script you propose?
Thank you in advance for your help !
Mathieu
Mathieu,
Suggest you add a 2nd parameter to the trigger and pass in 2 images from the app.
Thank you Matthew ! It worked
Hi Matt,
first to all, thank you very much for your very usefull article and job.
I would ask you something .
I know that it is possible to create a signature from power app, but
Can I attach it to an existing pdf document dowloading it from on drive business?
I always have different pdf files that someone send me to on drive business folder, and I need to create an app to sign them.
Thanks once again
Bye
Daniele
Danielle,
No, I do not believe it is possible with the current data connectors in Power Automate.
Hi Matthew, just to be sure I asked you correctly.
Let’s suppose users send me daily different word files inside a directory in OnDrive business and
each of this files contain a TAG Signature Image.
Can I think to use your solution in order to sign them by a power app?
Thanks once again.
Bye
Daniele
Hello Matt,
Thank you for your help with your website.
I’m currently creating PDFs using Power Apps, and I would like to include pictures that I’ve saved in my list. However, I’m having trouble finding a way to access those images and include them in the PDFs. Do you have any suggestions or a solution for this?
Thank you in advance for your help!