How To Get A Docusign Signature In Power Automate

Power Automate and Docusign are the perfect pair for collecting signatures on documents. You can generate a document using the Power Automate populate a word document action. Then send the document over to Docusign to apply signature fields and send it to signers. When the process is complete the signed PDF document can even be automatically saved to a SharePoint library.
Introduction: The Sign An Agreement With Docusign Automation
A service company uses Docusign to collect signatures from its clients. The agreement is generated using a Power Automate flow and then sent out for signature to the client and the service provider.

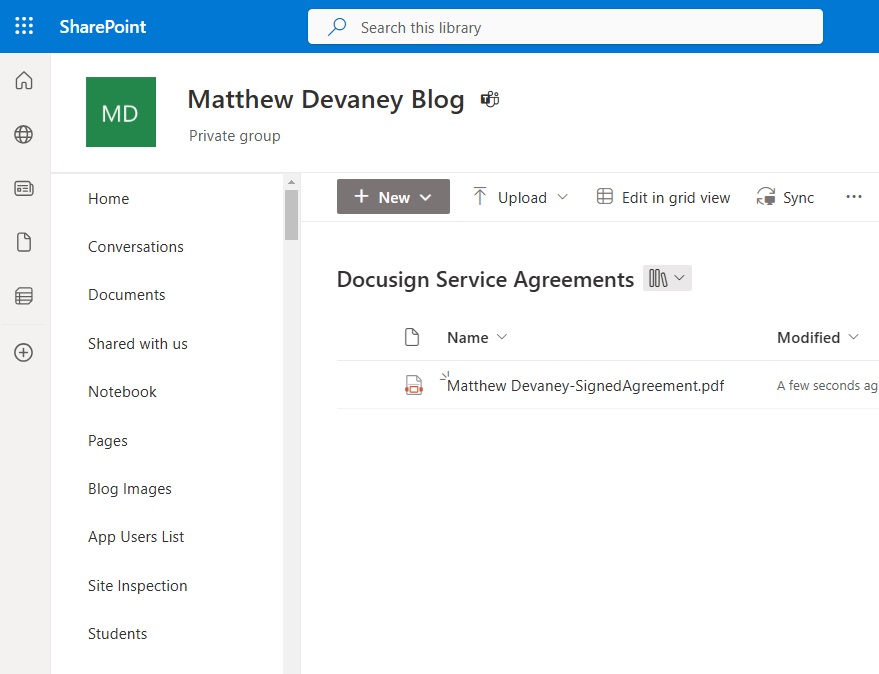
After agreement is completed the signed PDF and certificate of completion are stored in SharePoint.

Sign Up For A Free Docusign Developer Account
To generate an agreement and send it out for signature developers must create a Docusign account. Docusign offers a free developer account which can be used for learning purposes. None of the agreements sent from a developer account are legally binding.
Once you are ready to start sending agreements to clients you will need to purchase a paid Docusign plan.

Create An Agreement Template In Microsoft Word
The Power Automate flow will add signature and date fields to an existing Word Document. Open OneDrive and create a new file named Service Agreement Contract.docx.
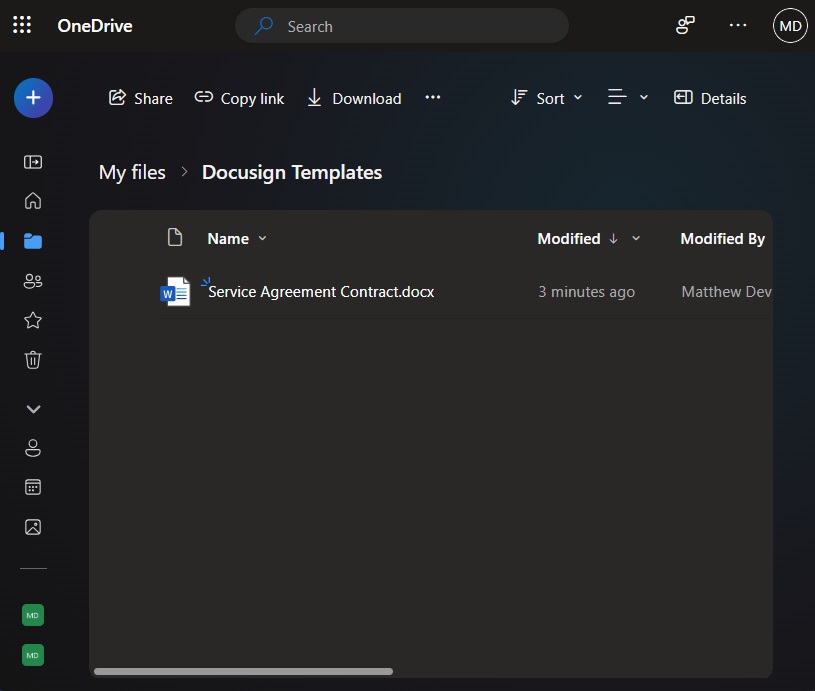
The Service Agreement Contract file contains the agreement which requires signatures. Use the contract text shown below or use your own text.

Signature and date fields are applied by using document tags. A document tag always starts and ends with a / symbol. Any identifier can be written between the / symbols much like a variable. They can have any name the developer wishes.
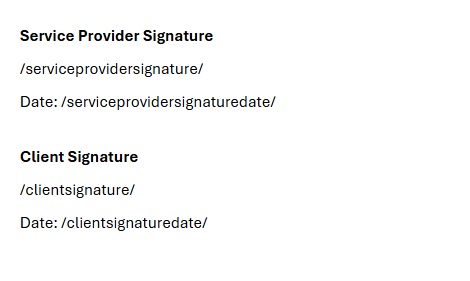
The following tags must be applied in the document for use in our Power Automate flow.
/clientsignature/
/clientsignaturedate/
/serviceprovidersignature/
/serviceprovidersignaturedate/Code language: JavaScript (javascript)
Create An Envelope To Hold Documents
Docusign collects eSignatures by sending an envelope of documents to signers. Envelopes are useful because they can contain one or more documents. Often signatures are required on multiple documents and there are also supporting materials which do not require any signature at all
Open Power Automate and create a new instant flow named Get Signatures With Docusign.
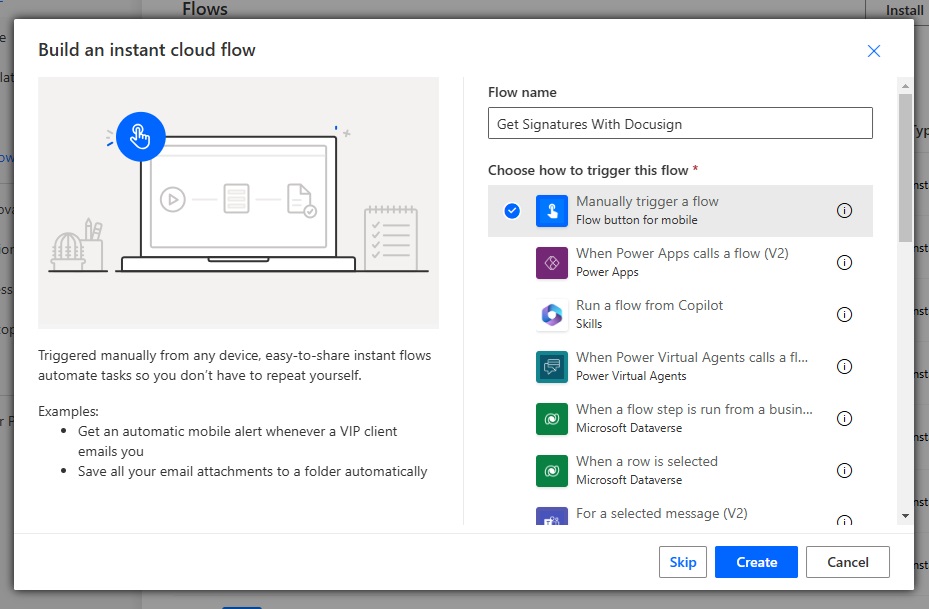
There are two Docusign connectors: Docusign and Docusign Demo. Select the Docusign connector if you are using a paid account. Or choose the Docusign Demo connector if you are using a free developer acocunt.

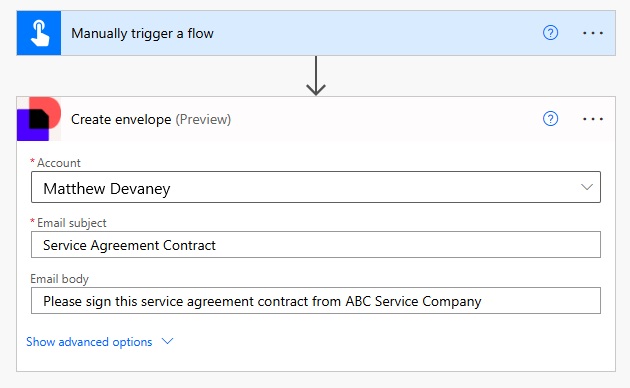
Add a Docusign Demo – Create Envelope action to the flow. Select an account, then provide an email subject and and email body. The email body can be written as HTML. When the envelope is sent it will show the subject and body in the message from Docusign.
Add A Document To An Envelope
Any documents to be sent to the client must be added to an envelope. Insert the OneDrive For Business – Get File Content Using Path action.
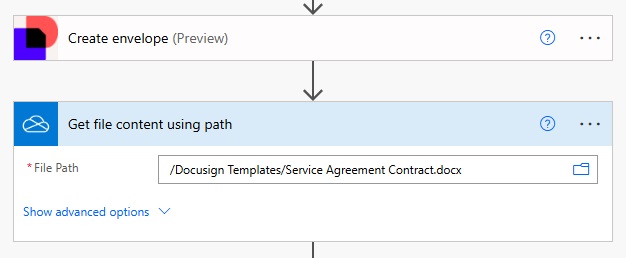
Select the Service Agreement Contract.docx in the file path field. Include the folder name and file extension.
/Document Templates/Service Agreement Contract.docx
Then aad a Docusign – Add Documents To An Envelope action to the flow. Select the envelope id returned by the create envelope action.
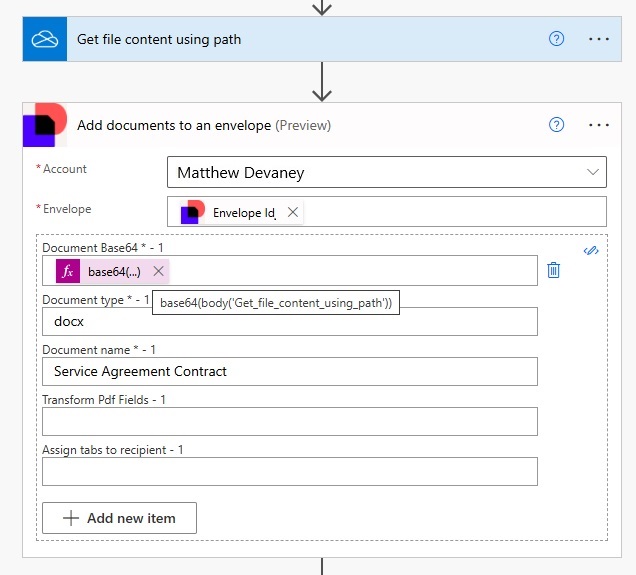
Use this expression in the Document Base64 field. The agreement document cannot be uploaded as a docx file. It must be convert to Base64 format.
base64(body('Get_file_content_using_path'))Code language: JavaScript (javascript)
Indicate the file is a Word Document type.
docx
And give the document to be signed a name.
Service Agreement Contract
Add The First Recipient To An Envelope
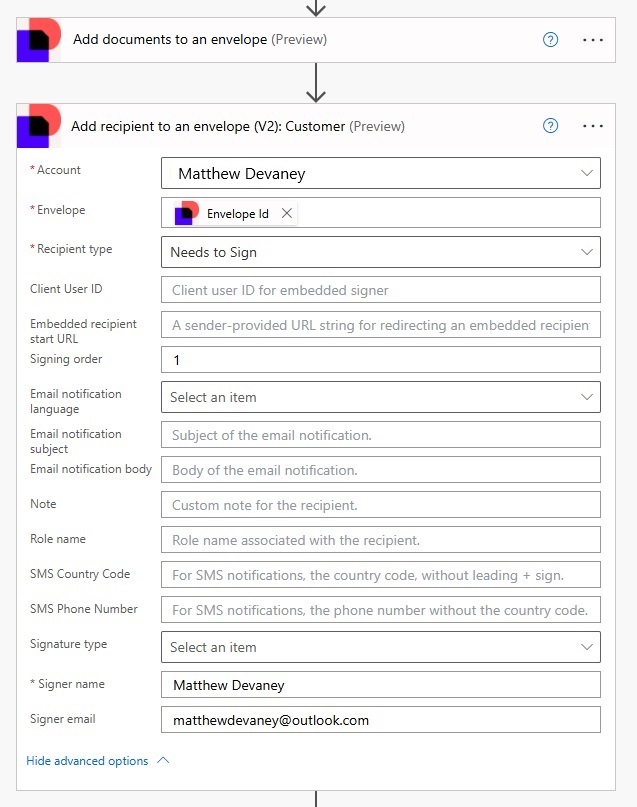
The agreement must be signed by two parties in this order (1) Client (2) Service Provider. We will add the first signer (Client) to the envelope. Insert a Docusign – Add Recipient To An Envelope (V2) action to the flow. Fill-in the following fields with these values:
- Account: your account name
- Envelope: Envelope Id from Create Envelope action
- Recipient type: Needs to Sign
- Signing Order: 1
- Signer Name: your signer name
- Signer Email: your signer email
Add Tabs For The Recipient Of An Envelope
A Docusign document tab is an interactive field where a signer can take an action such as filling-in data or signing the document. For instance, we wrote the tag /clientsignature/ in our Service Agreement Contract and we can use Power Automate convert it to a signature tab.
Insert a Docusign – Add Tabs For A Recipient On An Envelope action and include the Envelope Id and Recipient Id (from the Add Recipient action).
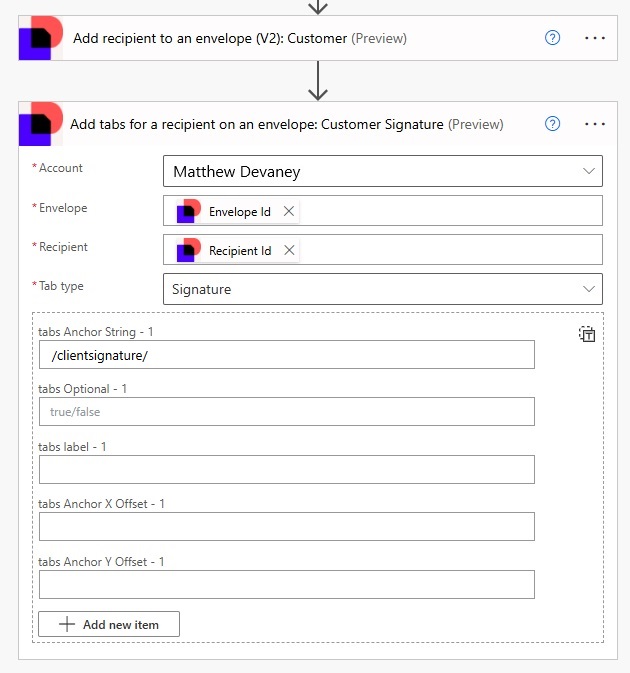
Choose the tab type Signature and use the tabs Anchor String below. Ensure it matches the document tag in the Service Agreement Contract.
/serviceprovidersignature/
Then create a 2nd Add Tabs action to capture the date signed.

Choose the Date Signed tab type and use this document tag in the Anchor String field.
/serviceprovidersignaturedate/
Add The Second Recipient And Signature Tabs
The second signer (Service Provider) must be added to the envelope the same way as the first. Follow the same steps as before but supply the 2nd signer’s details.

Remember to use the Signer Order “2” in the add recipient action.
2
And use the service provider document tags instead of the client document tags.
/serviceprovidersignature/
/serviceprovidersignaturedate/Code language: JavaScript (javascript)
Send The Docusign Envelope To Recipients
Now that we have added all recipient and tagged the documents the final step is to send the envelope out for signature. Add a Docusign – Send Envelope action to the flow and supply the Envelope Id from the Create Envelope action.

Change The Word Template Tags Color To White
Before running the flow we need to make a small edit to the template. Document tags remain in the document even after Tabs are applied to them. The signature and date are printed over top of them. So we need to hide the document tags.

Hide the document tags by changing their color to white to match the background.

Run The Power Automate Flow To Sign A Docusign Agreement
It’s time to send the agreement for signature. Run the Power Automate flow to send the Docusign envelope to the client and the service company signers.

Sign The Agreement In Docusign
The first signer at the client company receives the Docusign document in their email.

Upon opening the document they see a signature field and sign their name.

When the document signature is finished the signature date appears and the document is sent to the next signer.

The second signer at the service company receives the Docusign document and opens it.

They see the client’s signature and apply their own signature.

The document now has both signatures so the service company signer presses the finish button.

The completed Docusign agreement is sent to both the client and service company for record-keeping purposes.

Save The Docusign Agreement To A SharePoint Site
The Docusign agreement can be saved to a SharePoint site upon completion by building a 2nd Power Automate flow. Next week I will send an article showing how to do this. Make sure to subscribe to my blog if you haven’t already!
Complete Power Automate Flow Screenshot
A screenshot of the full Power Automate flow can be found below.

Did You Enjoy This Article? 😺
Subscribe to get new Copilot Studio articles sent to your inbox each week for FREE
Questions?
If you have any questions or feedback about How To Get A Docusign Signature In Power Automate please leave a message in the comments section below. You can post using your email address and are not required to create an account to join the discussion.