Power Apps Phone Number Formatting In A Form (Input Mask)

Power Apps users want to see the proper formatting applied to a phone number as they type. As an app builder, I want to make sure phone numbers are stored consistently in my datasource. Input masks are an excellent way to accomplish both of these goals and by making sure phone numbers are always formatted correctly. With an input mask we can define data validation rules and a format that will be automatically applied. Power Apps does not have an input mask feature but we can build it ourselves using a new technique I’ve invented.
| Important: This tutorial shows how to apply phone number formatting in an Edit Form. If you are using the Patch form method instead I’ve built a phone number input mask component you can easily insert into your own apps. The reason I am showing you how to make it for yourself is components cannot be placed inside Edit Forms. |
Introduction: The Business Contacts App
Recruiters at a staffing agency use the Business Contacts app to manage their client information. When a new client is added to the app their phone number is automatically formatted using an input mask.
Setup The Business Contacts SharePoint List
Create a new SharePoint list called Business Contacts and include the following columns:
- FullName (single-line text)
- PhoneNumber (single-line text)
Populate the list with the following data.
| FullName | PhoneNumber |
| Alice Lemon | 204-000-2929 |
| David Johnson | 309-199-2992 |
| Sarah Green | 204-567-3040 |
| Roger Sterling | 345-304-0500 |
| Leanne Davies | 204-594-9393 |
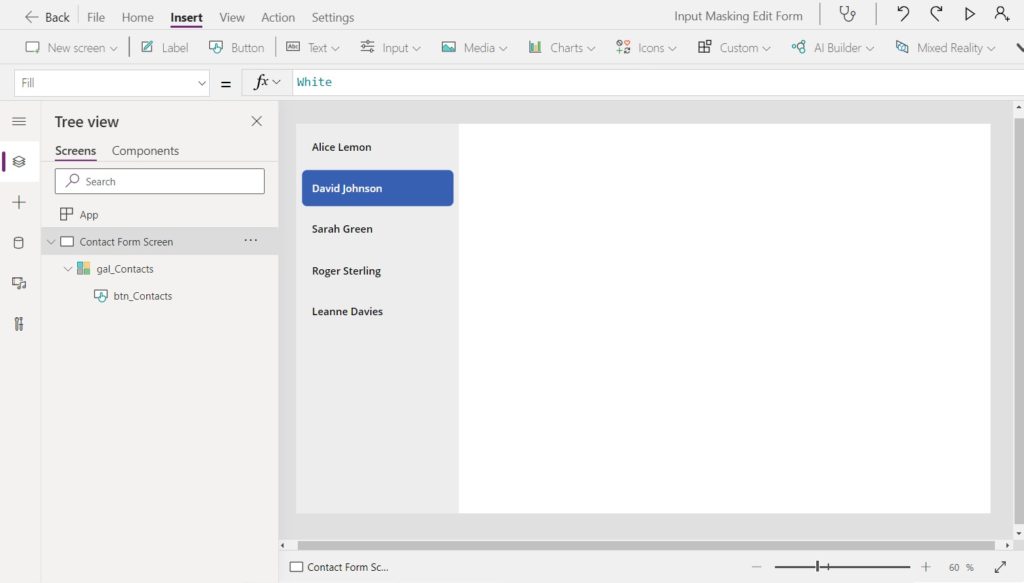
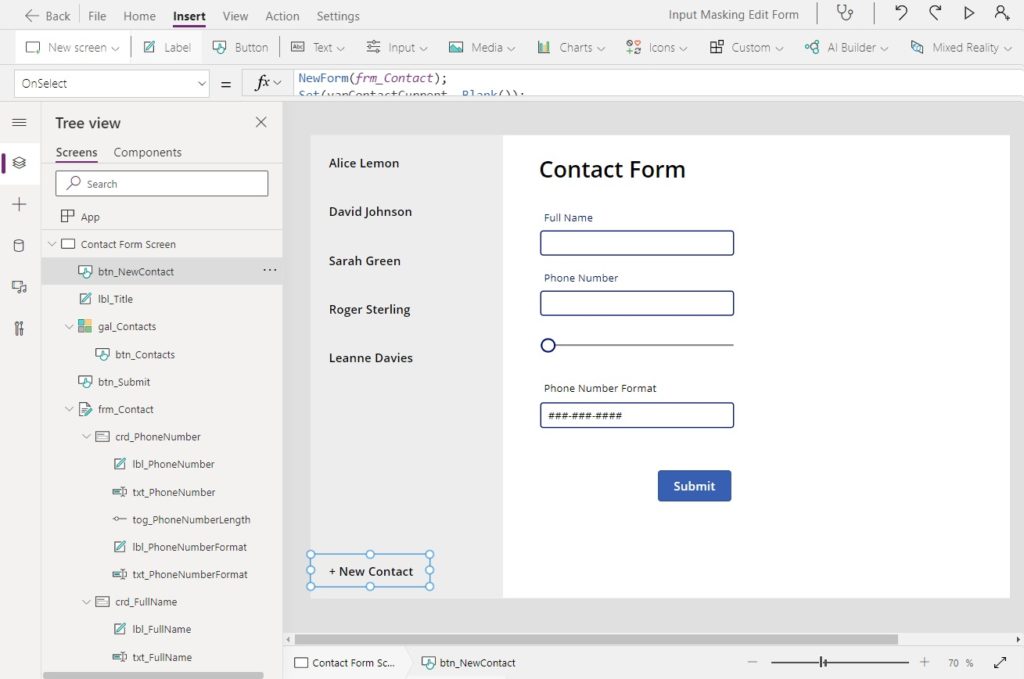
Create A Side Navigation Menu With The Contact Name
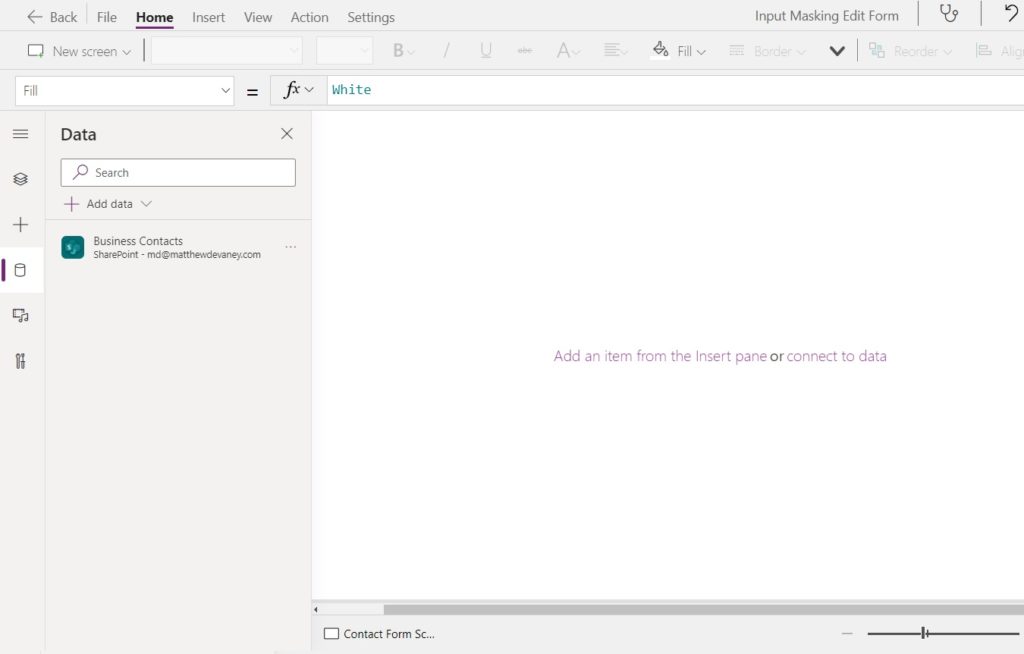
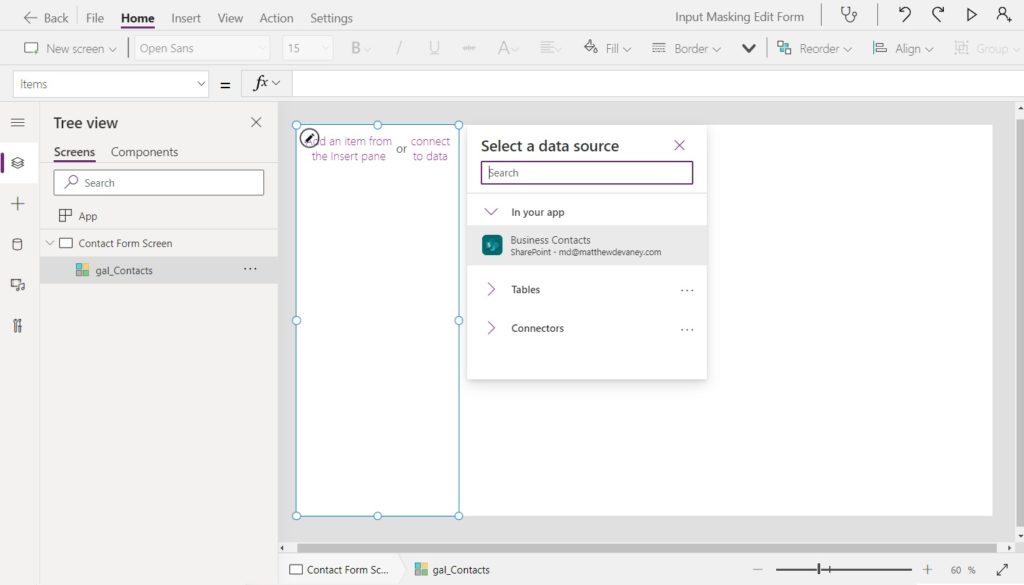
The first feature we will build is a side navigation menu with a list of contact names. Open Power Apps Studio and create a new app from blank. Connect the Business Contacts SharePoint list to the app.
Insert a gallery on the left side of the app. Select the Business Contacts SharePoint list as the datasource.
Use these values in the following properties of the gallery.
Fill: RGBA(237,237,237,1)
TemplatePadding: 10
TemplateSize: 70Code language: HTTP (http)
Next, insert a button to display the contact name in the gallery.
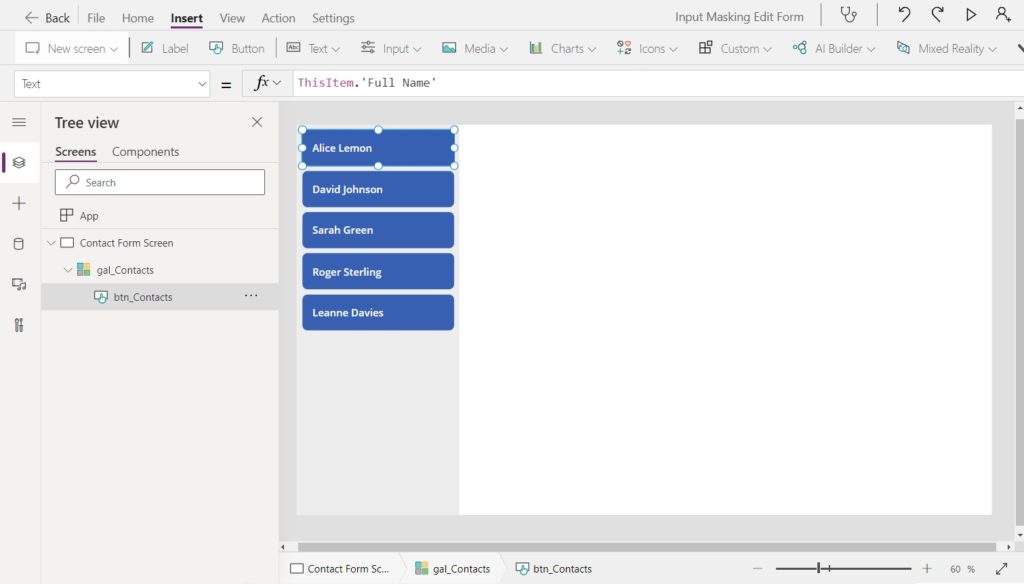
Write this code in the Text property of the button to show the contact’s full name.
ThisItem.'Full Name'Code language: JavaScript (javascript)
Store The Current Contact And Phone Number In A Variable
When the recruiter clicks on a name in the contacts list we want to store their record and their phone number in variables. We will need this in a moment when we create a form to show the contact information.

Use this code in the OnSelect property of the contact name button.
Set(varContactCurrent, ThisItem);
Set(varPhoneNumber, ThisItem.PhoneNumber)Code language: JavaScript (javascript)
Then we’ll edit the button properties to highlight the currently selected contact name. We want the selected contact to have white text with a blue fill. All other contact names should have black text with no fill.
Write this code in the Color property of the button…
If(
    ThisItem.ID=varContactCurrent.ID,
    White,
    Black
)
…and type this code into the Fill property of the button.
If(
    ThisItem.ID=varContactCurrent.ID,
    RGBA(56, 96, 178, 1),
    Transparent
)
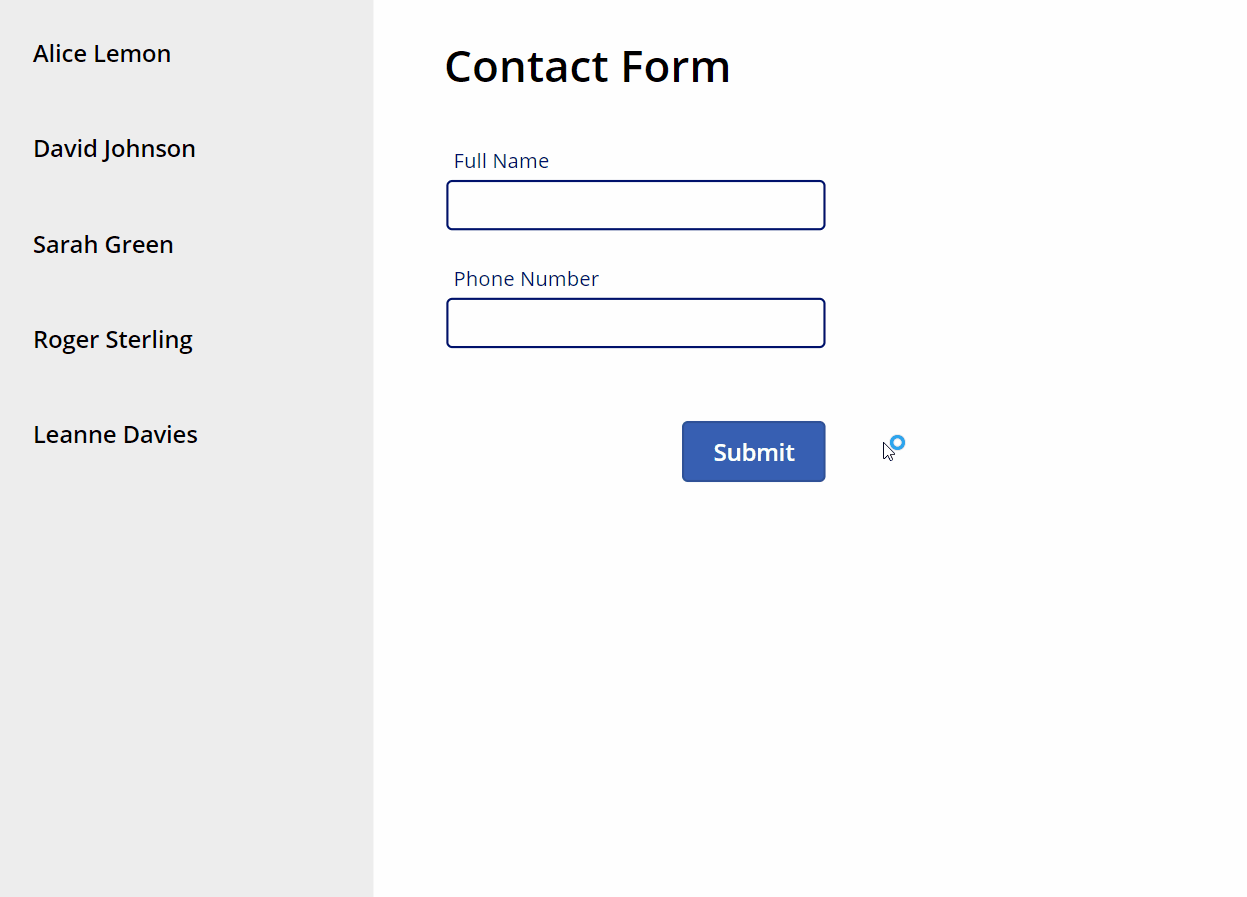
Add A Contact Form With A Phone Number Field
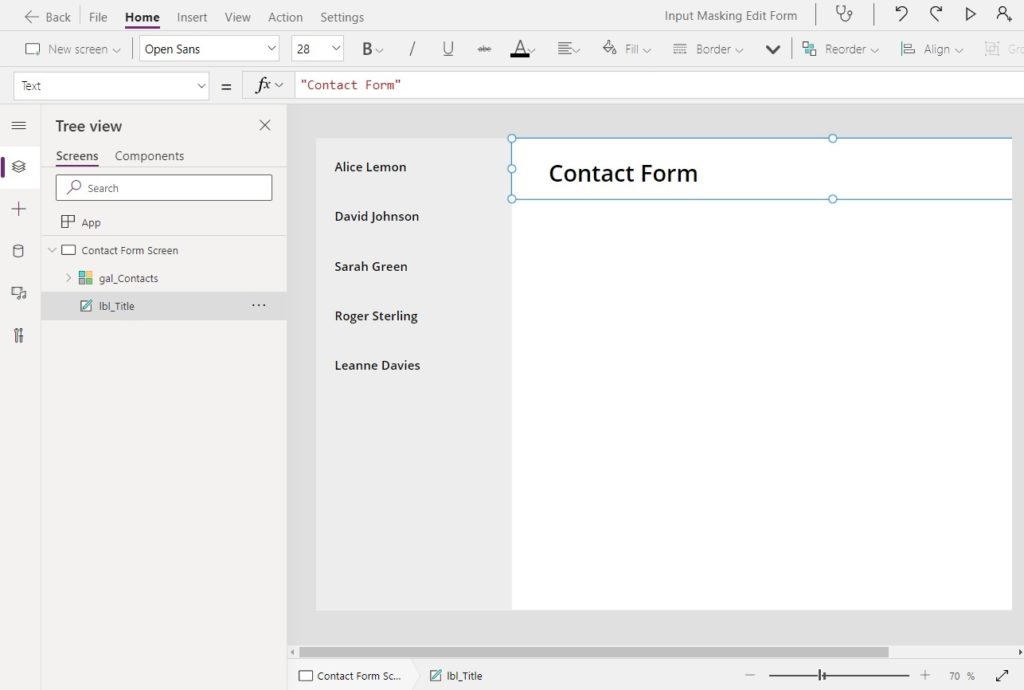
For each contact the recruiter must fill-in a form with a name and a phone number. Let’s start by giving our form a title. Insert a new label at the top of the app with the text “Contact Form.”
Then create a new Edit Form and select Business Contacts as the datasource.
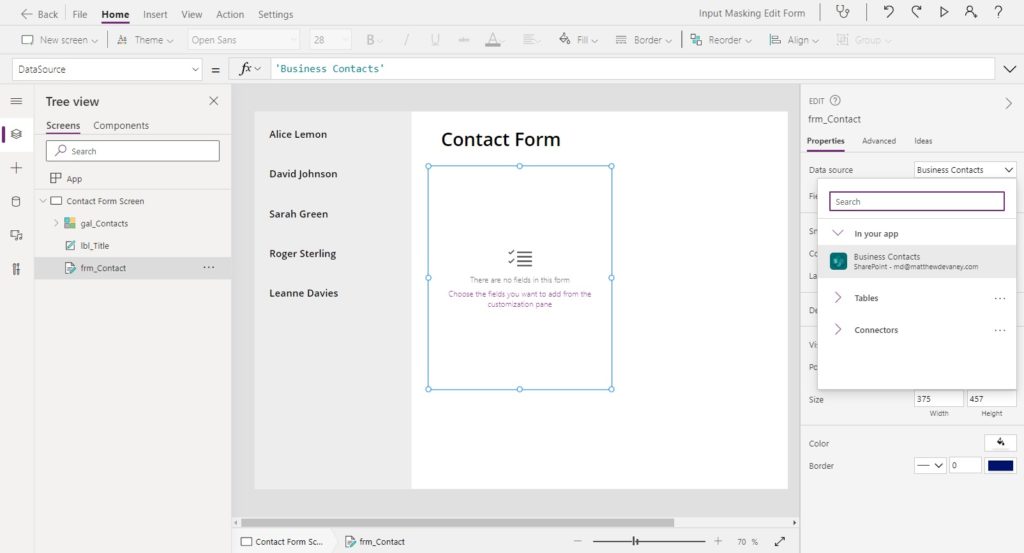
The form should have only 2 fields: Full Name and Phone Number.
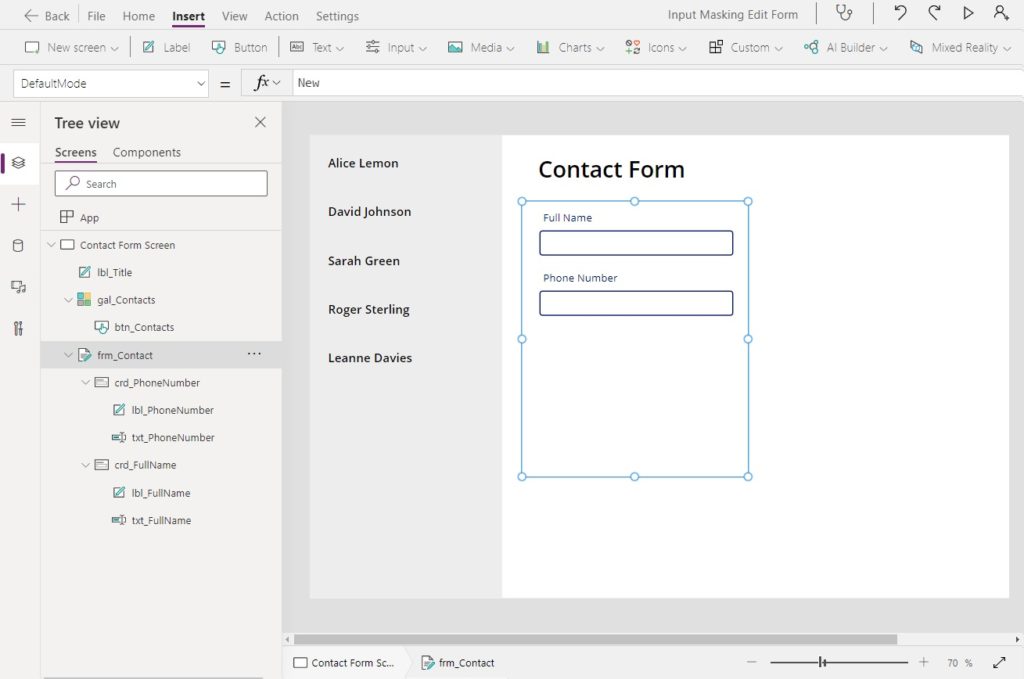
We want the form to create a new entry in the SharePoint list by default. Change the DefaultMode of the form to the code below.
FormMode.NewCode language: CSS (css)
Count The Length Of The Phone Number Field
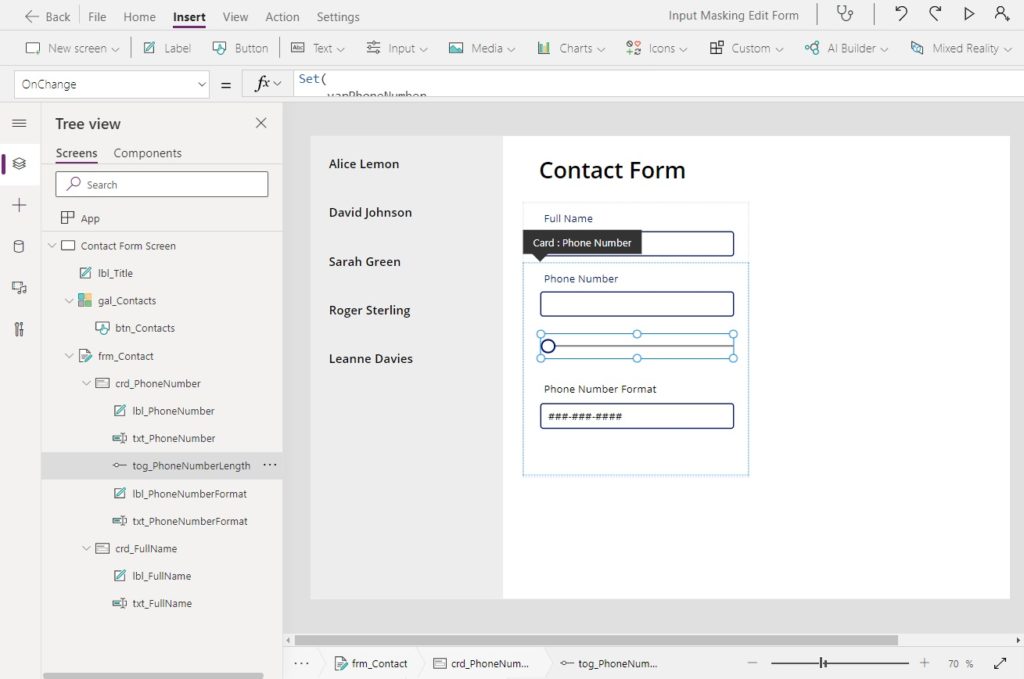
As the recruiter types a phone number the formatting should be automatically applied using an input mask. Phone number input masks are not a feature of Power Apps so we will build it ourselves. To start, insert a new slider control into the phone number card.
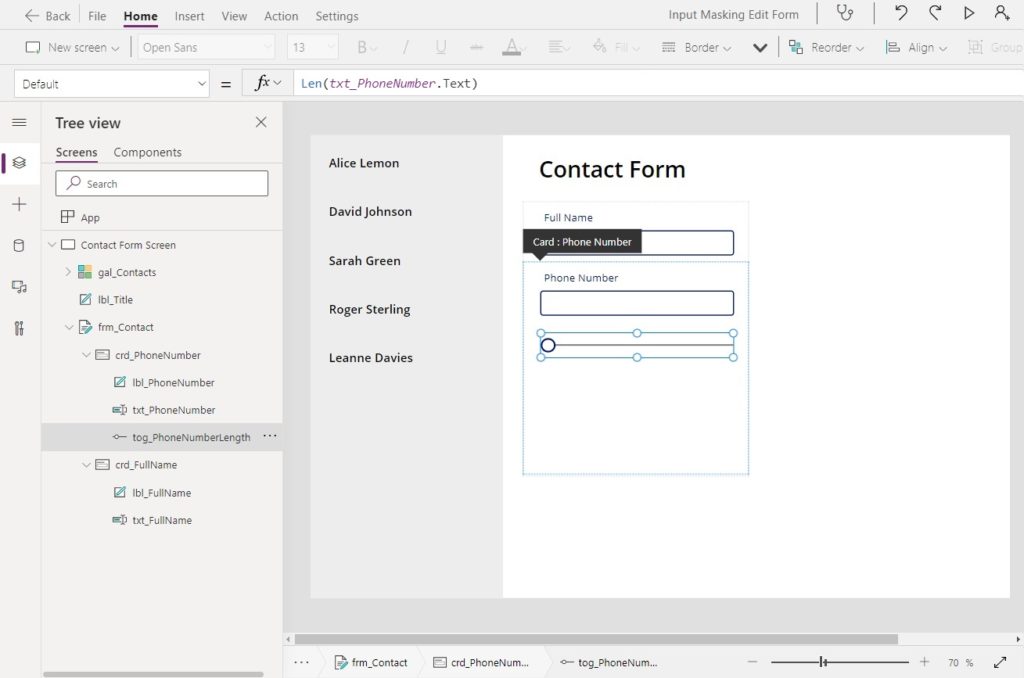
Then use this code in the Default property of the slider. The slider is used to count the current length of the phone number text input. Every time the user inputs another number the slider increases. Soon we will add some code to the OnChange property to re-format the phone number after each digit is typed.
Len(txt_PhoneNumber.Text)Code language: CSS (css)
Here’s what the slider looks like in action. Eventually we will hide it from the user but for now we need to keep it visible.
Define The Phone Number Formatting In Power Apps
Next up, we’re going to define the phone number format for our form. Add a text input to the form’s Phone Number card.
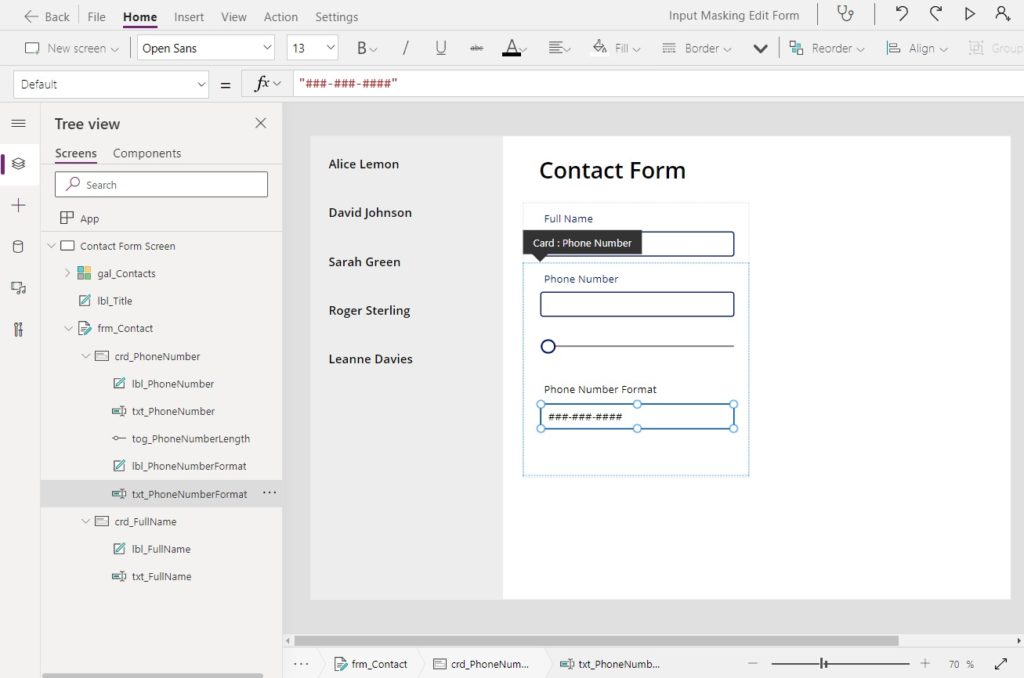
Write this code to represent the phone number format in the Default property of the text input. The # symbol identifies positions in the phone number where a digit is found. Any other symbols or spaces in the format will automatically be filled-in as the phone number is typed.
"###-###-####"Code language: CSS (css)
Phone Number Format Examples For Other Countries (Optional)
We can also choose another phone number format if we desire. Here are some examples for other countries. Copy them into the Phone Number Format text input to see the result.
| Country | Example | NumberFormat |
| Canada | 204-998-8344 | ###-###-#### |
| US | (204) 998-8344 | (###) ###-#### |
| United Kingdom | +44 1234 567890 | +## #### ###### |
| Japan | (03)-4567-1234 | (##)-####-#### |
| India | +91 0123 456789 | +## ####-###### |
Setting The Phone Number Maximum Length
Phone numbers have a fixed amount of digits. Therefore, we should limit the amount of numbers a user can type into the phone number text input.
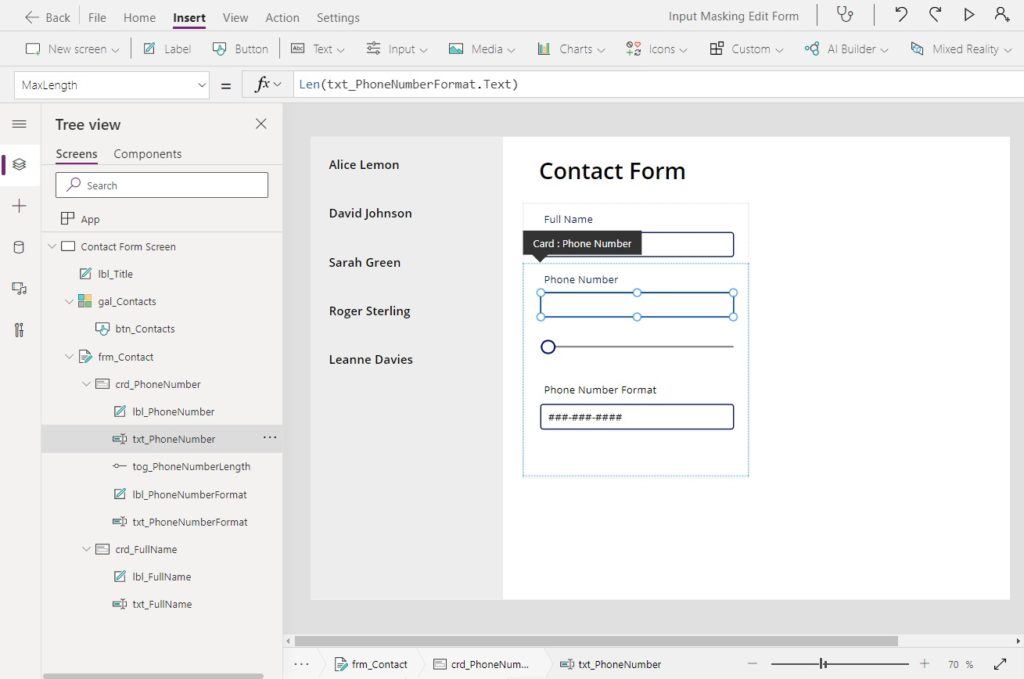
Use this code in the MaxLength property of the phone number text input.
Len(txt_PhoneNumberFormat.Text)Code language: CSS (css)
Apply Phone Number Formatting To The Text Input In Power Apps
As the user types they expect to see the phone number formatted. This is the last step needed to make that happen.
Copy and paste this code into the OnChange property of the phone number length slider. As each digit is typed into the phone number text input field, it reads all of the numbers in the field, determines what formatting should be applied, stores the result in a variable named varPhoneNumber and then resets the text input. It also removes any non-numeric values entered by the user.
Set(
    varPhoneNumber,
    With(
        {
            // extracts all numbers from the phone number field
            varTextNumbersOnly: Concat(
                MatchAll(
                    txt_PhoneNumber.Text,
                    Match.Digit
                ),
                FullMatch
            ),
            // builds a table with phone number format at every position
            varPhoneNumberFormat: With(
                {varTextPhoneNumberFormat: txt_PhoneNumberFormat.Text},
                With(
                    {
                        varTablePhoneNumberFormat: ForAll(
                            Sequence(Len(varTextPhoneNumberFormat)),
                            With(
                                {
                                    varNumberCurrentLength: Left(
                                        varTextPhoneNumberFormat,
                                        Value
                                    )
                                },
                                {
                                    NumberFormat: varNumberCurrentLength,
                                    CountNumbers: CountRows(
                                        MatchAll(
                                            varNumberCurrentLength,
                                            "#"
                                        )
                                    )
                                }
                            )
                        )
                    },
                    ForAll(
                        Sequence(
                            Max(
                                varTablePhoneNumberFormat,
                                CountNumbers
                            )
                        ),
                        LookUp(
                            varTablePhoneNumberFormat,
                            CountNumbers = Value
                        )
                    )
                )
            )
        },
        Text(
            Value(varTextNumbersOnly),
            LookUp(
                varPhoneNumberFormat,
                CountNumbers = Len(varTextNumbersOnly),
                NumberFormat
            )
        )
    )
);
Reset(txt_PhoneNumber);Code language: JavaScript (javascript)
To show the updated phone number with formatting we need to supply the varPhoneNumber variable to the text input.
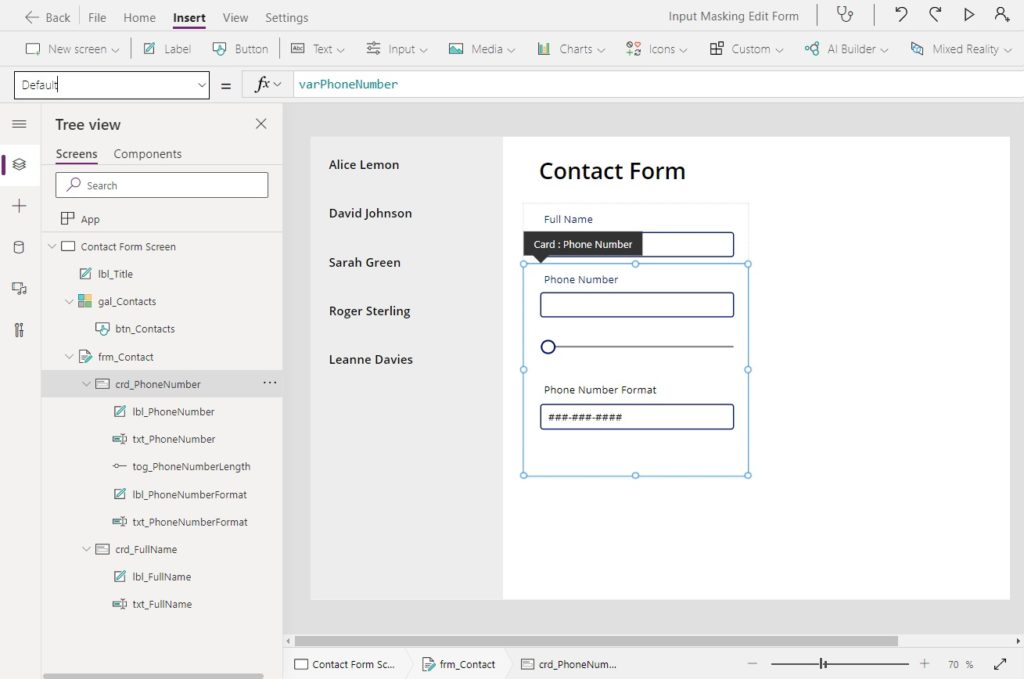
Write this code in the Default property of the phone number card…
varPhoneNumber
…and make sure the phone number text input has this code its Default property.
Parent.DefaultCode language: PHP (php)
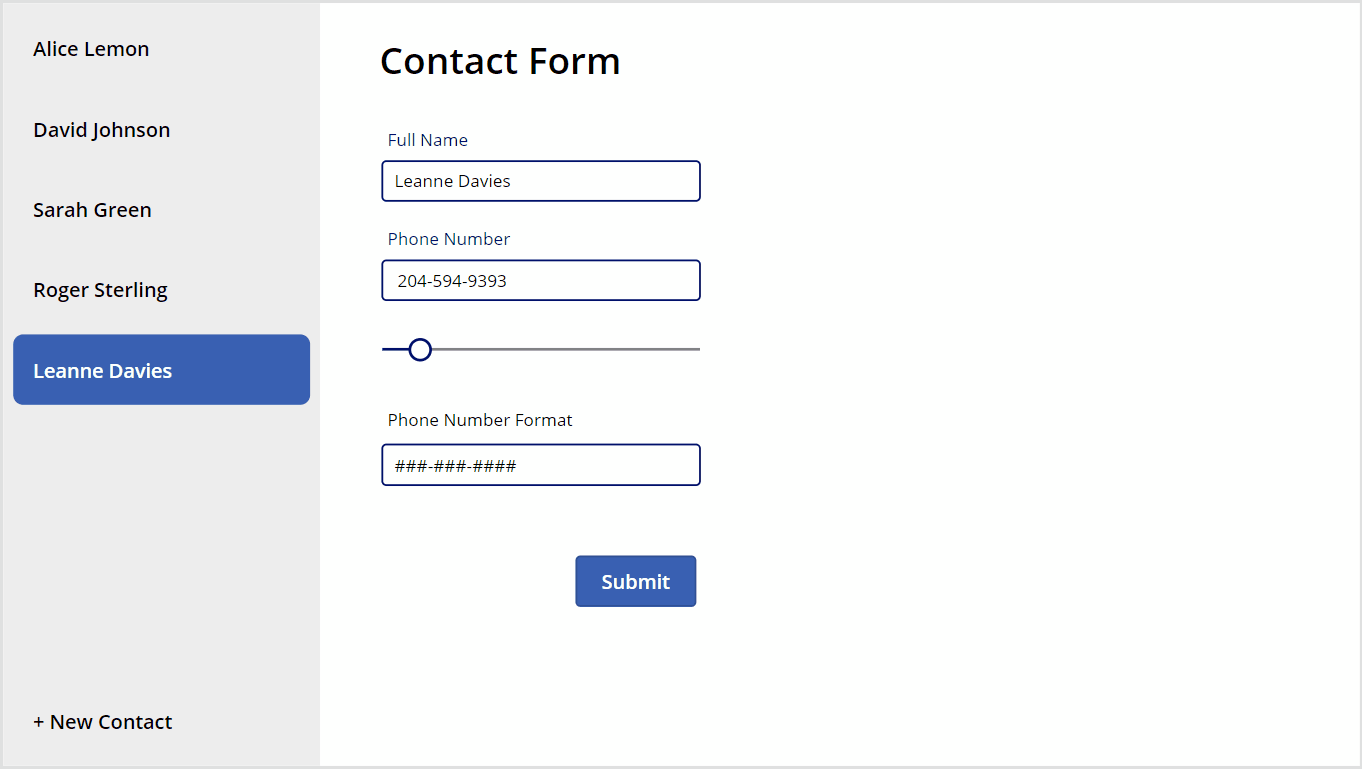
Go ahead and give the phone number field a try. It now applies formatting as you type the number.
Submit The Contact Form
After a contact name and phone number are input the recruiter submits the form to save the data. Insert a new button at the bottom of the form with the text Submit.
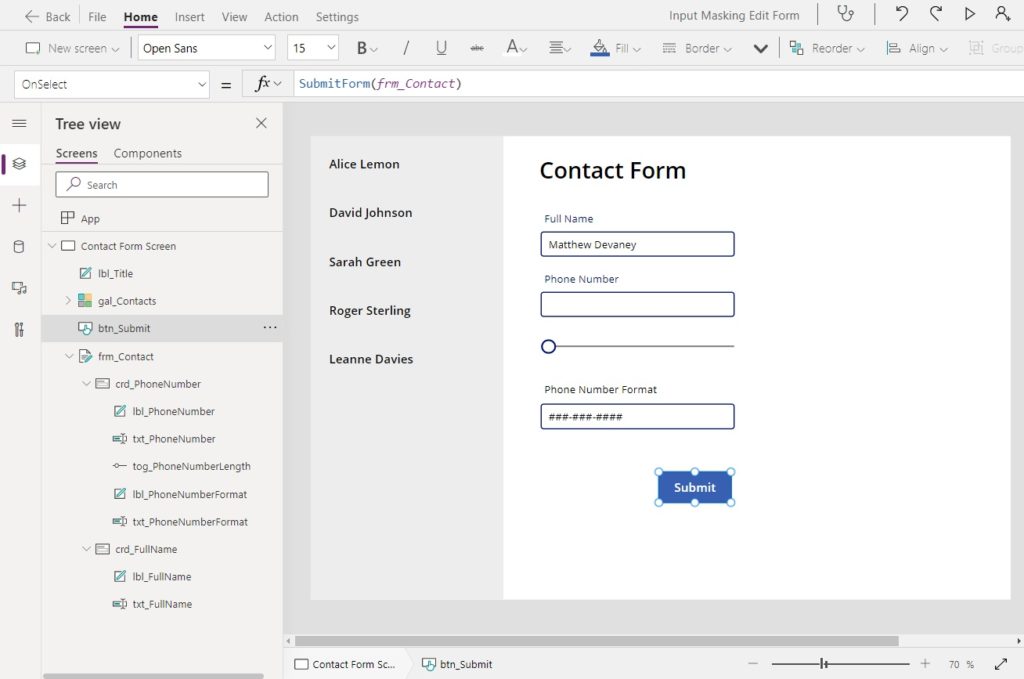
Use this code in the OnSelect property of the button to submit the form.
SubmitForm(frm_Contact)
Once the form is submitted we want to store the saved record in a variable and change the form to Edit mode.
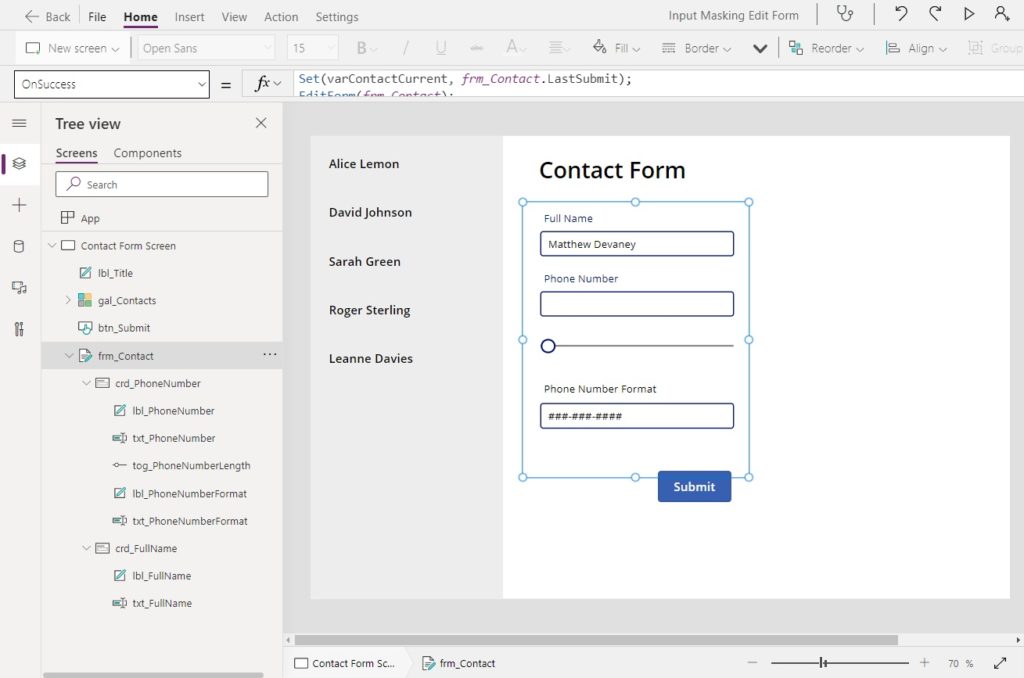
Write this code in the OnSuccess property of the form.
Set(varContactCurrent, frm_Contact.LastSubmit);
EditForm(frm_Contact);Code language: JavaScript (javascript)
When the form switches to edit mode it won’t show any value unless we tell it what to display.
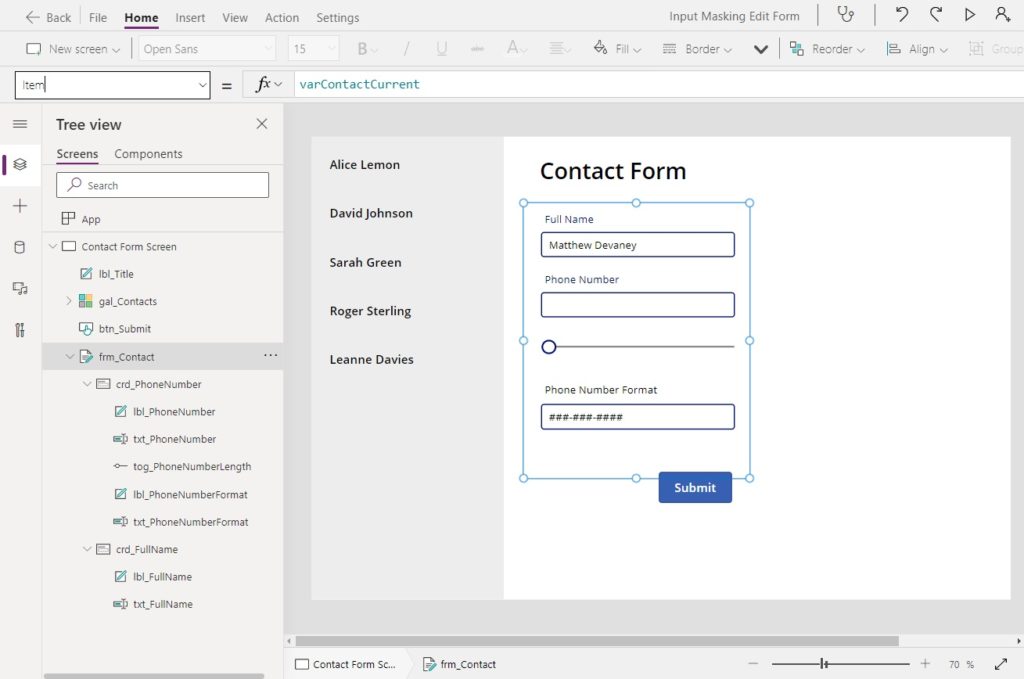
Use the varContactCurrent variable in the Item property of the form to show the record we just saved.
varContactCurrent
Edit An Existing Contact Phone Number
The recruiter needs the ability to select a contact and change their phone number.
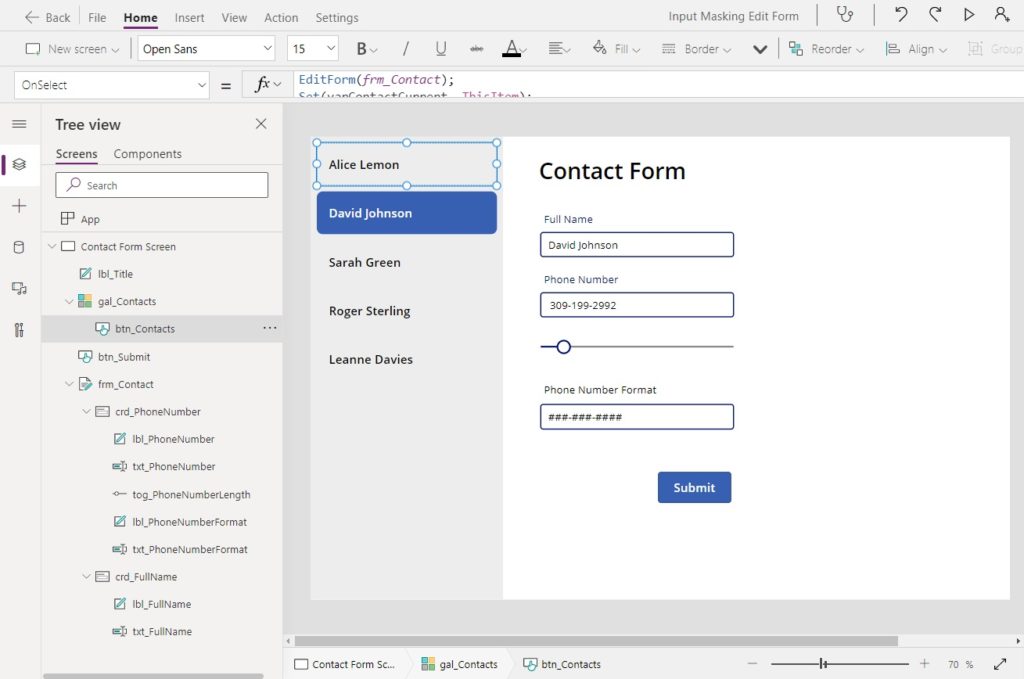
Update the OnSelect property of the Contacts menu button code to include an EditForm function at the top. This will allow the recruiter to edit contact information
EditForm(frm_Contact);
Set(varContactCurrent, ThisItem);
Set(varPhoneNumber, ThisItem.PhoneNumber);Code language: JavaScript (javascript)
Test the navigation menu by clicking on each contact name in the list. As we do this the form will show the contact’s information.
Add A New Contact Phone Number
Recruiters must also be able to a add new contact to the app. Insert a new button at the bottom of the navigation menu with a transparent fill and the text New Contact.
Write this code in the OnSelect property of the button to set form to new mode which creates a new record upon submission.
NewForm(frm_Contact);
Set(varContactCurrent, Blank());
Set(varPhoneNumber,Blank())Code language: JavaScript (javascript)
After adding a new contact their name will be included in the navigation menu on the left.
Hiding The Phone Number Format Text Input & Slider
Before publishing our app the last thing we need to do is hide the phone number length slider and the phone number format text input. We don’t want a user to interact with these controls because it would break the app.
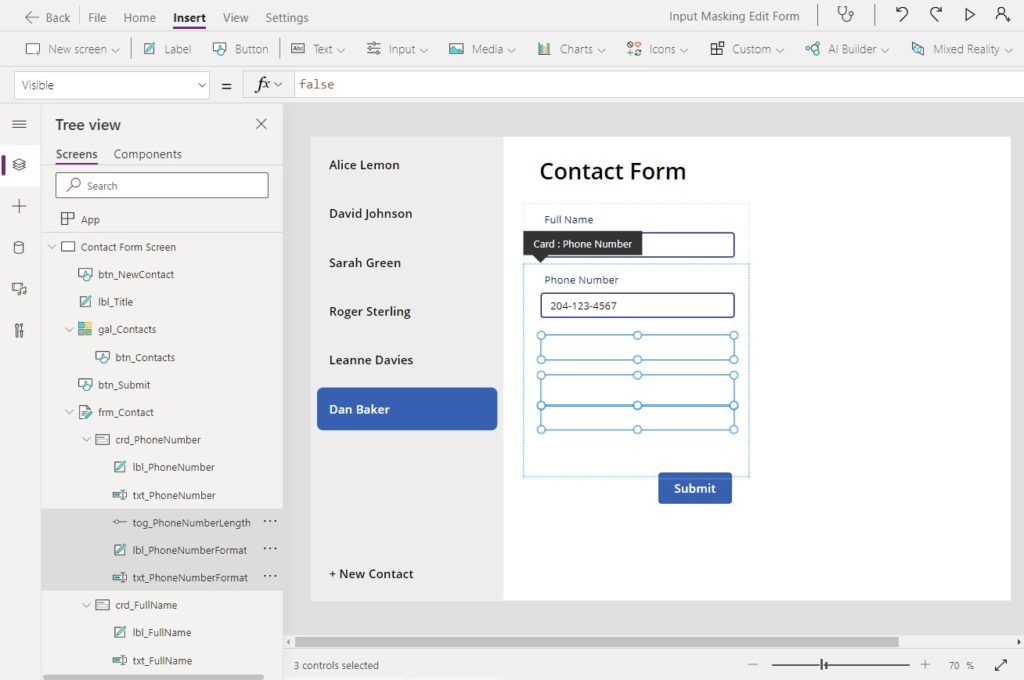
Select both controls and set their Visible property to false.
falseCode language: JavaScript (javascript)
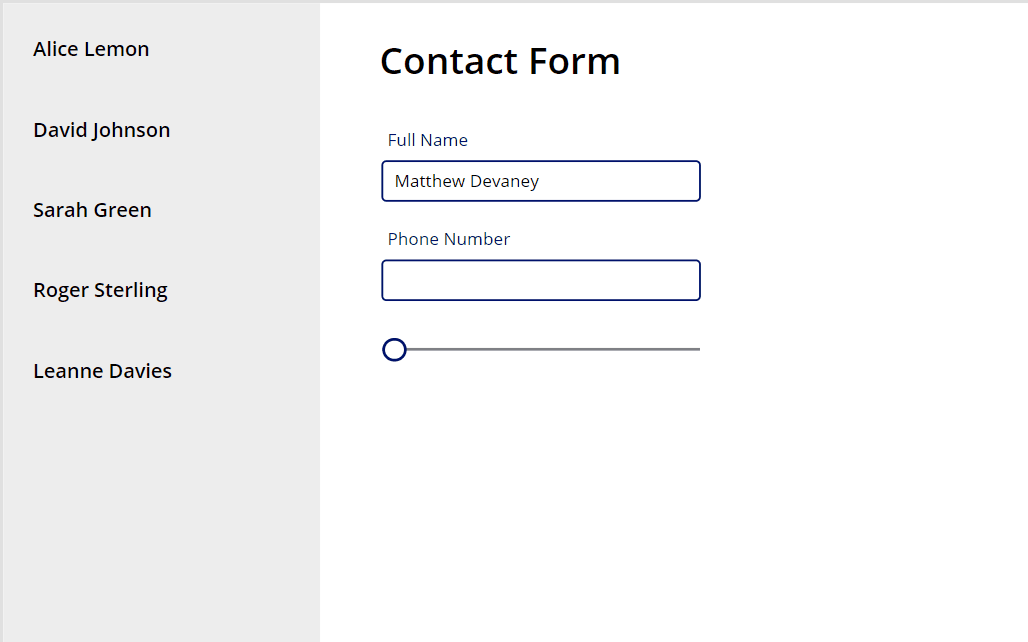
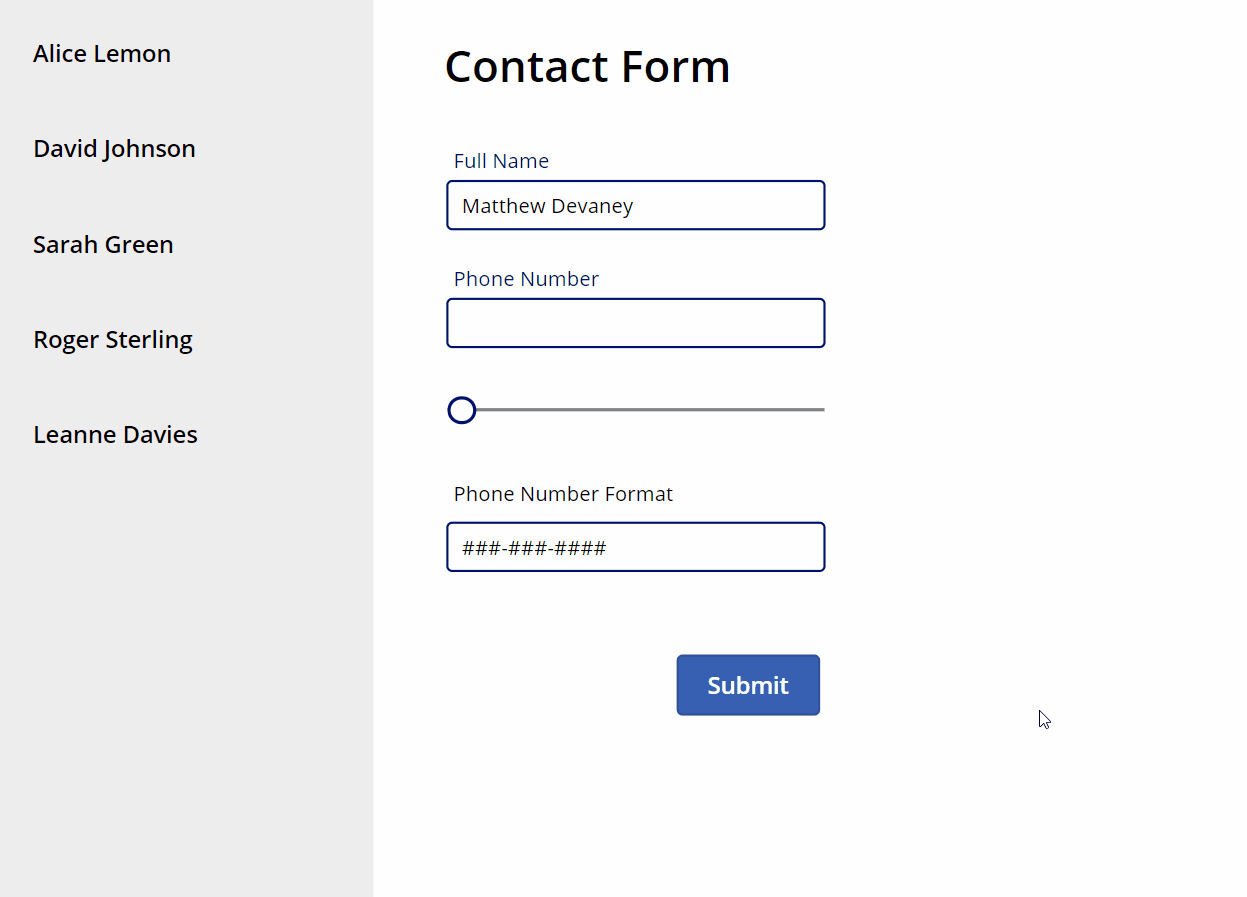
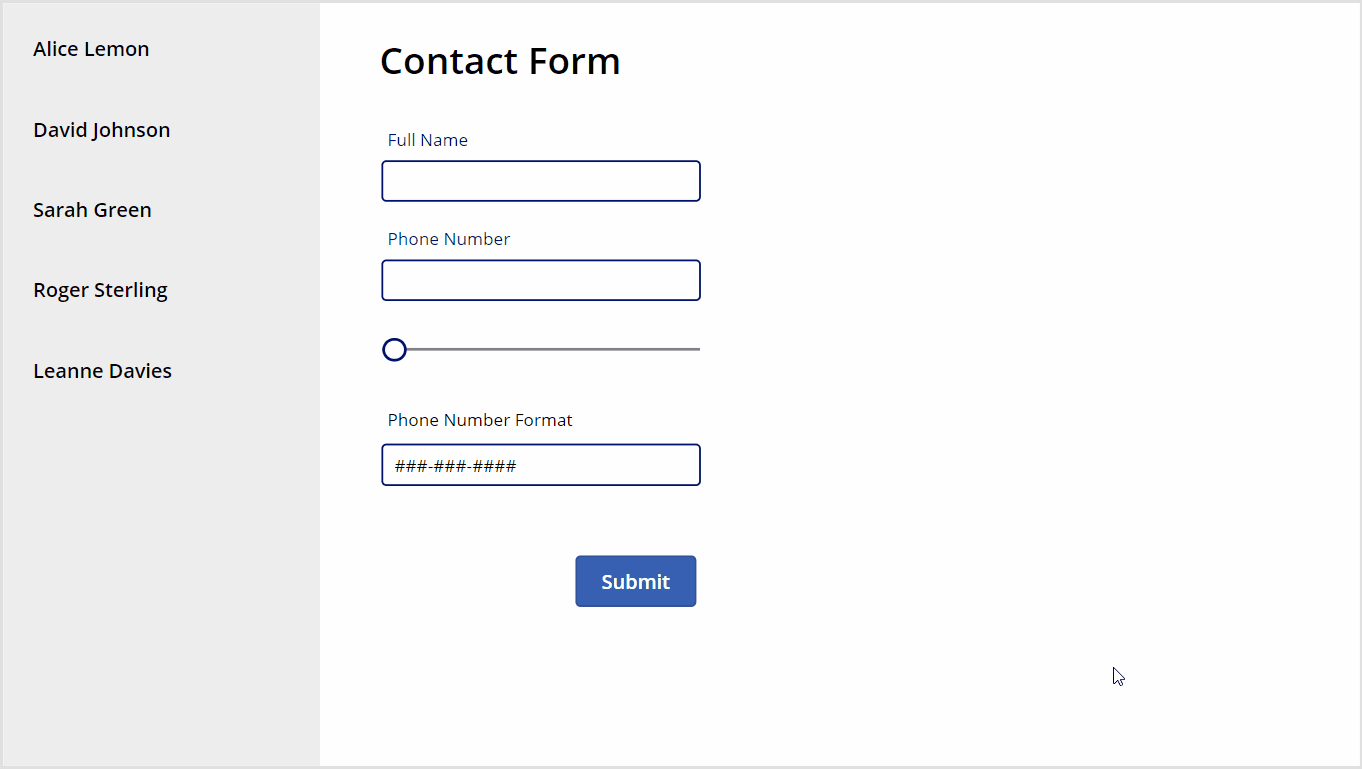
The finished contact form should look like this.

Did You Enjoy This Article? 😺
Subscribe to get new Copilot Studio articles sent to your inbox each week for FREE
Questions?
If you have any questions about Power Apps Phone Number Formatting In A Form (Input Mask) please leave a message in the comments section below. You can post using your email address and are not required to create an account to join the discussion.


As always – great examples. Keep up the great work. Personally I would also have liked a more detailed explanation to the formatting with the onChange property and may I make a suggestion to add links to the appropriate function page in the Power App docs.
Richard,
I agree, the OnChange code is very complex and I did not make much of any attempt to explain it. It’s a big deviation from my normal blogging style; making the simplest explanation possible and ensuring folks understand what they are building. I think my previous article does a better job of it… https://www.matthewdevaney.com/powerapps-phone-number-formatting-for-any-country-input-mask/
In the next 1-2 weeks I will publish a component so you don’t have to create this for yourself. Stay tuned.
Also, what did you mean by “link to the appropriate function page in the Power Apps docs.” Can you please clarify this comment?
Try this code. It’s easier to understand and do not need a slider ( use it on the “on change” propriety of the text box on the phone number card):
ClearCollect(TempFormatedPhoneNumber,”);
ClearCollect(PositionOfPhoneDigit,1);
//Desired format
Set(DesiredFormat,‘###-###-####’);
Set(strPhone;Concat(
MatchAll(
txt_PhoneNumber.Text,
Match.Digit
),
FullMatch
));
ForAll(Sequence(Len(DesiredFormat)),
If(Mid(DesiredFormat,Value,1) = ‘#’,
//collect number
Collect(TempFormatedPhoneNumber,Concatenate(Last(TempFormatedPhoneNumber).Value,Mid(strPhone,Last(PositionOfPhoneDigit).Value,1)));
Collect(PositionOfPhoneDigit,Last(PositionOfPhoneDigit).Value+1),
//collect symbol
Collect(TempFormatedPhoneNumber,Concatenate(Last(TempFormatedPhoneNumber).Value,Mid(DesiredFormat;Value,1)))));
//Final number formated
Set(varPhoneFormatado,Last(TempFormatedPhoneNumber).Value);
Reset(txt_PhoneNumber)
Josdeyvi,
Thank you for providing your alternate method.
I was not successful at using the OnChange property of the text input. When I typed it did not always immediately recognize a keypress event even with the DelayOutput property set to false. That is why I introduced the slider!
Can you confirm you have a working input mask without the slider?
Yes, it shows the formated number at the end, after the user type all numbers and press a button to save. In my case it is ok. In fact, using a slider didn’t work for me, since the app change of that value didn’t trigger the ‘on change’, only when I change it by hand. I think it can be an issue with the PowerApp for Teams, perhaps.
This work great, love it. However, I am having an issue when I try to implement this with a SharePoint integration form. I am not able to read back in the stored Phone Number into the varPhoneNumber variable. I tried the OnEdit section of the SharePointIntegration actions, but no dice, it does not recognize “ThisItem”.
Any other ways to make this work?
Tom,
You will need to replace ThisItem with SharePointIntegration.Selected when creating a SharePoint list custom form.
Hi Matthew,
Thanks for the nice code!
But what about leading zero’s?
In our country (Belgium) the format of our phone numbers always start with a leading zero and when I try it with your code, the first zero always disappears.
Any thoughts on that?
Regards,
Cedric
Cedric,
Can you please provide a few examples of Belgian phone numbers to work with? They will make it possible for me to test with. I live in Canada so I have not seen one before.
For instance, all cellphone numbers start with 04.
Frequently used formats are:
Cedric,
I used this code in the Default property of the txt_PhoneNumberFormat text input and the leading zeros worked for me. If you’re unable to get it working, try downloading the component I shard on the Power Apps community website. The link is at the top of my aritcle.
If(
StartsWith(txt_PhoneNumber.Text, “01”),
“##### ######”,
StartsWith(txt_PhoneNumber.Text, “02”),
“### #### ####”,
StartsWith(txt_PhoneNumber.Text, “03”),
“#### ### ####”,
StartsWith(txt_PhoneNumber.Text, “04”),
“#### ## ## ##”,
StartsWith(txt_PhoneNumber.Text, “07”),
“##### ######”,
StartsWith(txt_PhoneNumber.Text, “08”),
“#### ### ####”,
“##### ######”
)
Good afternoon, I have the same problem for numbers that start with zero
Gabriela,
I used this code in the Default property of the txt_PhoneNumberFormat text input and the leading zeros worked for me. If you’re unable to get it working, try downloading the component I shard on the Power Apps community website. The link is at the top of my aritcle.
If(
StartsWith(txt_PhoneNumber.Text, “01”),
“##### ######”,
StartsWith(txt_PhoneNumber.Text, “02”),
“### #### ####”,
StartsWith(txt_PhoneNumber.Text, “03”),
“#### ### ####”,
StartsWith(txt_PhoneNumber.Text, “04”),
“#### ## ## ##”,
StartsWith(txt_PhoneNumber.Text, “07”),
“##### ######”,
StartsWith(txt_PhoneNumber.Text, “08”),
“#### ### ####”,
“##### ######”
)
Brilliant input mask solution, but I also struggled getting it to work with numbers starting 0, as it would reset the input to blank.
I seem to have resolved it by replacing any # with 0 within the code for both:
Hi,
I tried this on the new form and its working fine and also saving data in SP list, but my issue is that the contact number field is not resetting, i have tried reset(fieldname) on submit button it gives error “the reset function can only be used with a resettable control”.
any idea how to reset that contact number field in new form?
Hi Tripathi, Even I am trying to reset the field. Not getting any error but on submitting the form. I can still see the previously entered value for the mobile number field. Please share if you get the solution. Thanks.
Thank you! this works great for traditional US phone numbers (###) ###-####, but i’ve been trying to get it work with periods i.e. ###.###.#### The text input keeps bumping the periods to the right as i type, leaving me with “##########..”
The text input is set as “TEXT” format, not number. I’ve tried using Char(46) in the format string with the same results. Any suggestions?
Adam,
My phone number input mask does not support periods. It does support spaces, dashes, brackets, symbols (such as +). But not periods. I based this decision on the Wikipedia article called “National Conventions For Writing Telephone Numbers (link: https://en.wikipedia.org/wiki/National_conventions_for_writing_telephone_numbers).
Upon reading your message, I now understand that use of periods in phone numbers is a relatively new aesthetic. I have no current plans to support them in my design. But you are welcome to attempt it and I’d love to see the result if you get it working 🙂
Hi Matthew,
Tremendous work on this – it works great for me. One issue that did come up for me – I have a button used to submit my form that changes DisplayMode based on the Unsaved property of the Form. When changes are made to the phone number after the input mask has been implemented, the Unsaved property momentarily becomes true before reverting back to false.
Any thoughts on why this may be occuring?
Tim,
Sorry, I don’t know the answer here. Edit forms are really quirky as you have noted with the Unsaved property. I typically use PATCH forms to avoid strange issues like these.
Great work Matthew, I have been looking for something like this for a around 6 months as I thought it was as easy as inputting “##### ######” (UK area code/numer) in the text input default value. Using your method, whihc works, but it drops the 0 and just shows the number as 14826 666666 when I input 01482666666. any ideas how to change the number formatting?
Thank you
Derek
I have very recreantly started learning Sharepoint and this was a very interesting practice, thank you so very much 😀
Kiki,
Wow, this is an intense tutorial for just starting to learn SharePoint. Glad to hear you conquered it!
Hi @Matthew Devaney,
Thank you for the above Code and process. Just wanted to check if i wanted to implement the same on edit screen, where it as show the default value in the box.
Since we are using variable as the default value for the field on whole, is there a way to show the default value filled. if so please do let us know that would help further.
Matthew, the code looks great, but no matter how I implement still does not work for me. Is there a chance you can share the project on a zip or via email. Let me know.
Gustavo,
Suggest you download the component I provided at the top of the article:
https://powerusers.microsoft.com/t5/Canvas-Apps-Components-Samples/Phone-Number-Input-Mask/m-p/1521206#M486
Microsoft broke that link. I’ve been unable to find it. I thought it would have relocated to the Sample Solution Gallery in adoption.microsoft.com but it’s not there among the 35 things you’ve helpfully posted.
Hi, Thank you for this information! the mask part works great for me BUT…I have ran into an issue when I Submit. It will not save the form, I get error message: Error: The Request was not submitted. (An entry is required or has an invalid value. Please correct and try again.) Our application is different in that we have a home screen with a button for a new request. Once the new button is pressed then it goes to a New screen where you start the request, hit Submit and then it goes to an Edit screen where you finish adding the fields then Save button.
I am stuck at the New screen, it will not submit. I made the varPhoneNumber a global variable to make it work for me. However, I am not able to set varPhoneNumber to equal ThisItem.PhoneNumber. Could that be the issue? Help please.
I have used these very helpful instructions before but I can’t seem to get it to work on my modern text input field. Everything seems to work except the OnChange code. The slider moves when I enter numbers but it refuses to add the dashes.
Amy,
The Modern Text Input is not “General Availability” status yet so I haven’t used it.
Thanks for the reply. I haven’t had the time to work it out, but I’ll reply if I do.
Hi, the input format for the phone number has to be text? can it be number? the reason is because in the article it contains a dash (-) so the format must be text, is this accurate?
Unfortunately, this just doesn’t work 🙁 Maybe someday PowerApps will fix this.
Fyi, I spent 3 hours on this and many of the suggestion for the leading 0 don’t work. This may be because this code is not supported with today’s PowerApps as they change things often.
This was great! I used this for SSN field. However, if an SSN started with a zero, this didn’t work. Do you happen to know how this could work with leading zero(s)?
Does it still work today? I tried implementing it, but it keeps clearing the text input. Do you have any suggestions?
Hi Matthew! I realize this is an older blog of yours but your instructions here are the closest I have been able to get to finishing my PowerApps Form that populates my SP List for Employee Emergency Contacts. However, I need additional help. And right up front I’ll tell you that I have received this error before, was able to correct it (using other formulas) but when I decided to use your method, the error is back and I am unable to correct it. Please Help?
When I complete all your steps and attempt to test/submit my form, I receive the “Value cannot be converted to a number” error. This error appears just as soon as I enter enough digits to get to the “-” portion of the phone number in the formatted field.
I have deleted the associated SP List column and re-added it as single line of text.
I have deleted the DataCard and re-added it.
My form is on Default mode ‘New’ and all other fields have been checked several times over.
Any suggestions would be appreciated so much! Thank you and Happy New Year!