Power Apps Filter Menu: Apply, Clear and Reset

In this article I will show how to make a filter-menu that appears on the right-side of the app just like SharePoint. I will also demonstrate how to clear filters and reset filters.
If you want to build the Paid Time-Off app below you can start by reading this article on filtering a gallery with multiple dropdowns. Or if you already have a gallery you want to add this user-interface to you should be able to achieve it just by studying this blog.

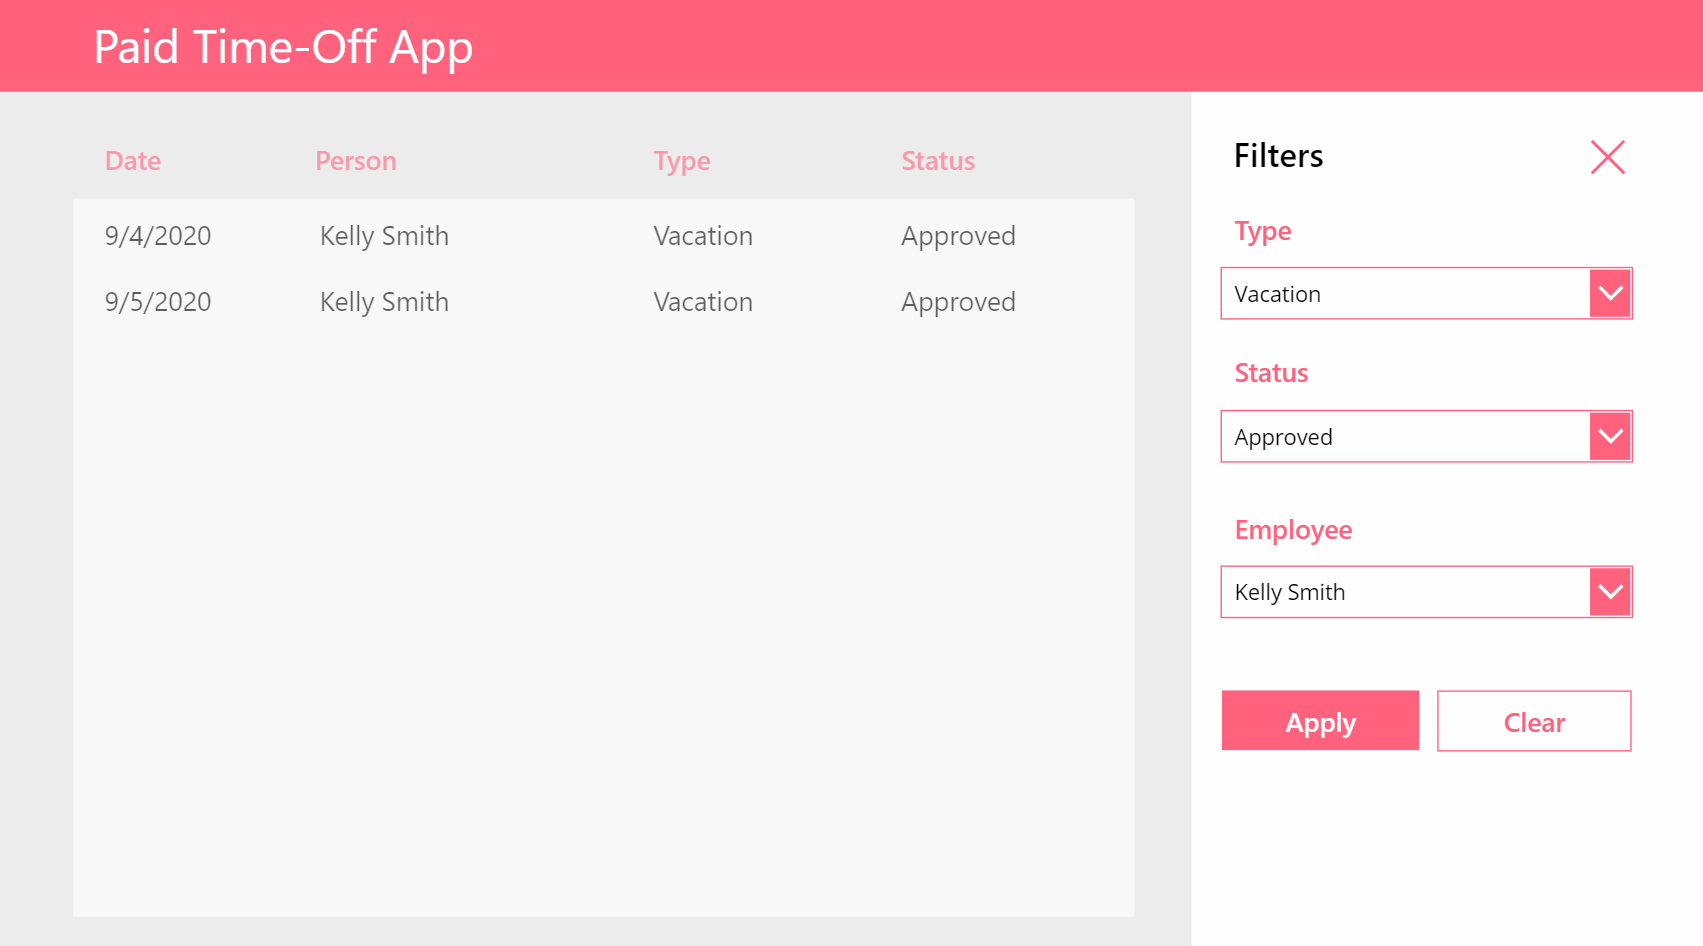
Creating the Filters Menu
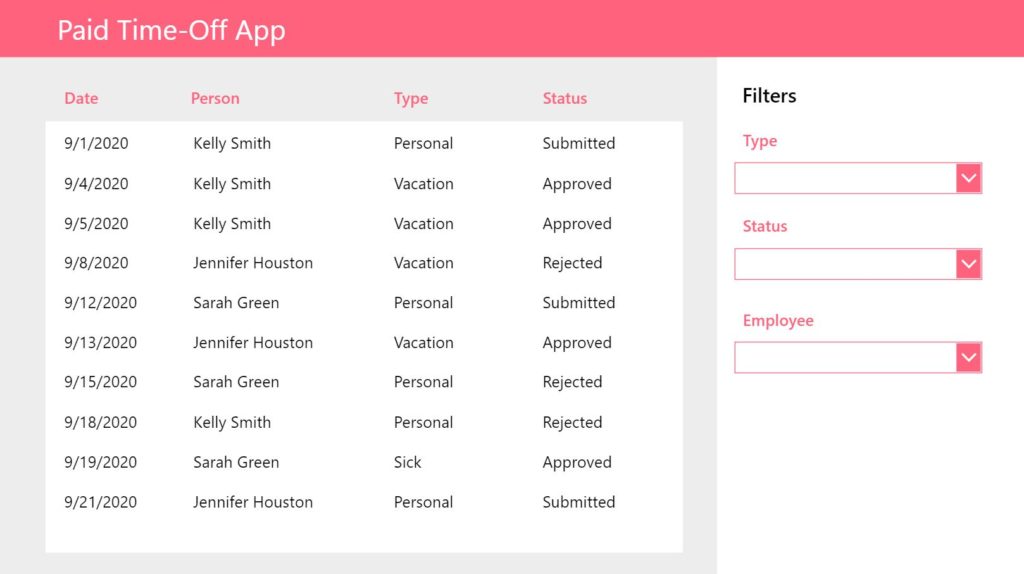
After completing the previous article the Paid Time-Off App has the ability to filter past requests by using the dropdown menus on the right-hand side.

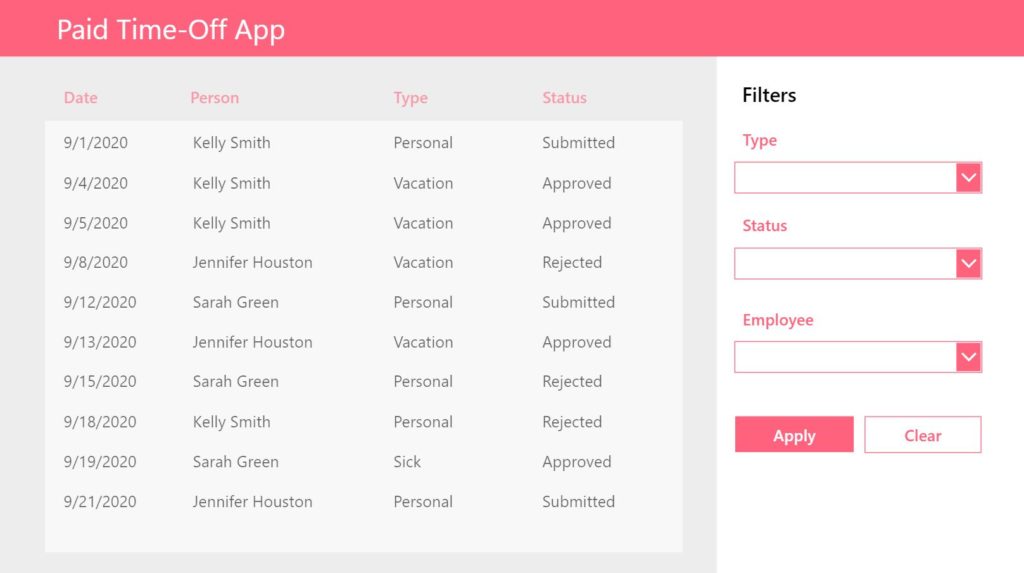
Add a label with a ‘White’ Fill property underneath the dropdown menus. Reposition the dropdown menus slightly below their current position and place another label with the title ‘Filters’ on top.
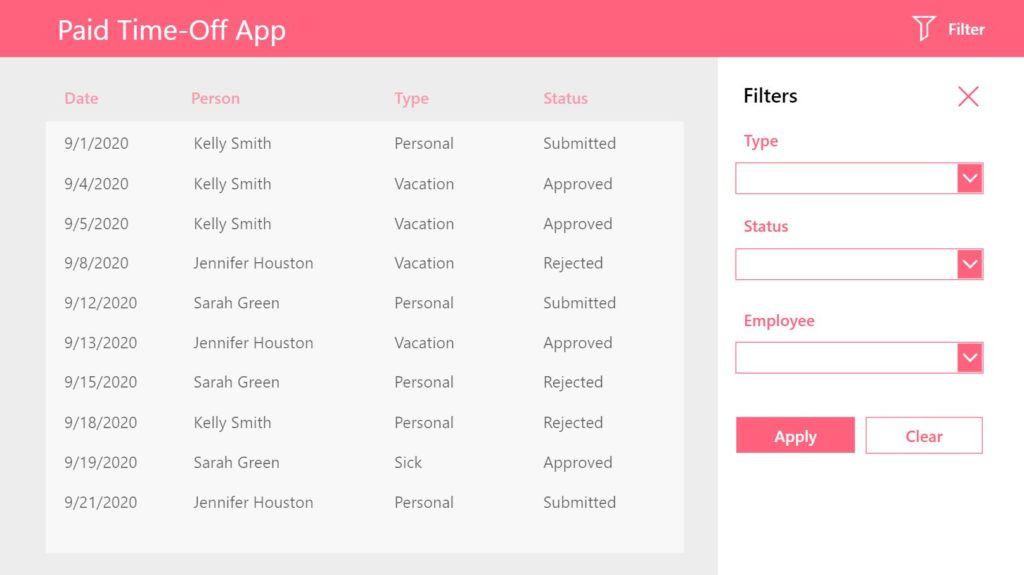
Then insert another label over top of the gallery to prevent the user from clicking it while the ‘Filters’ menu is active.

To achieve the transparent look put this code in the Fill property of the screen-protecting label.
RGBA(237,237,237,0.4)Code language: CSS (css)
Place two buttons underneath the dropdown menus: Apply and Clear.
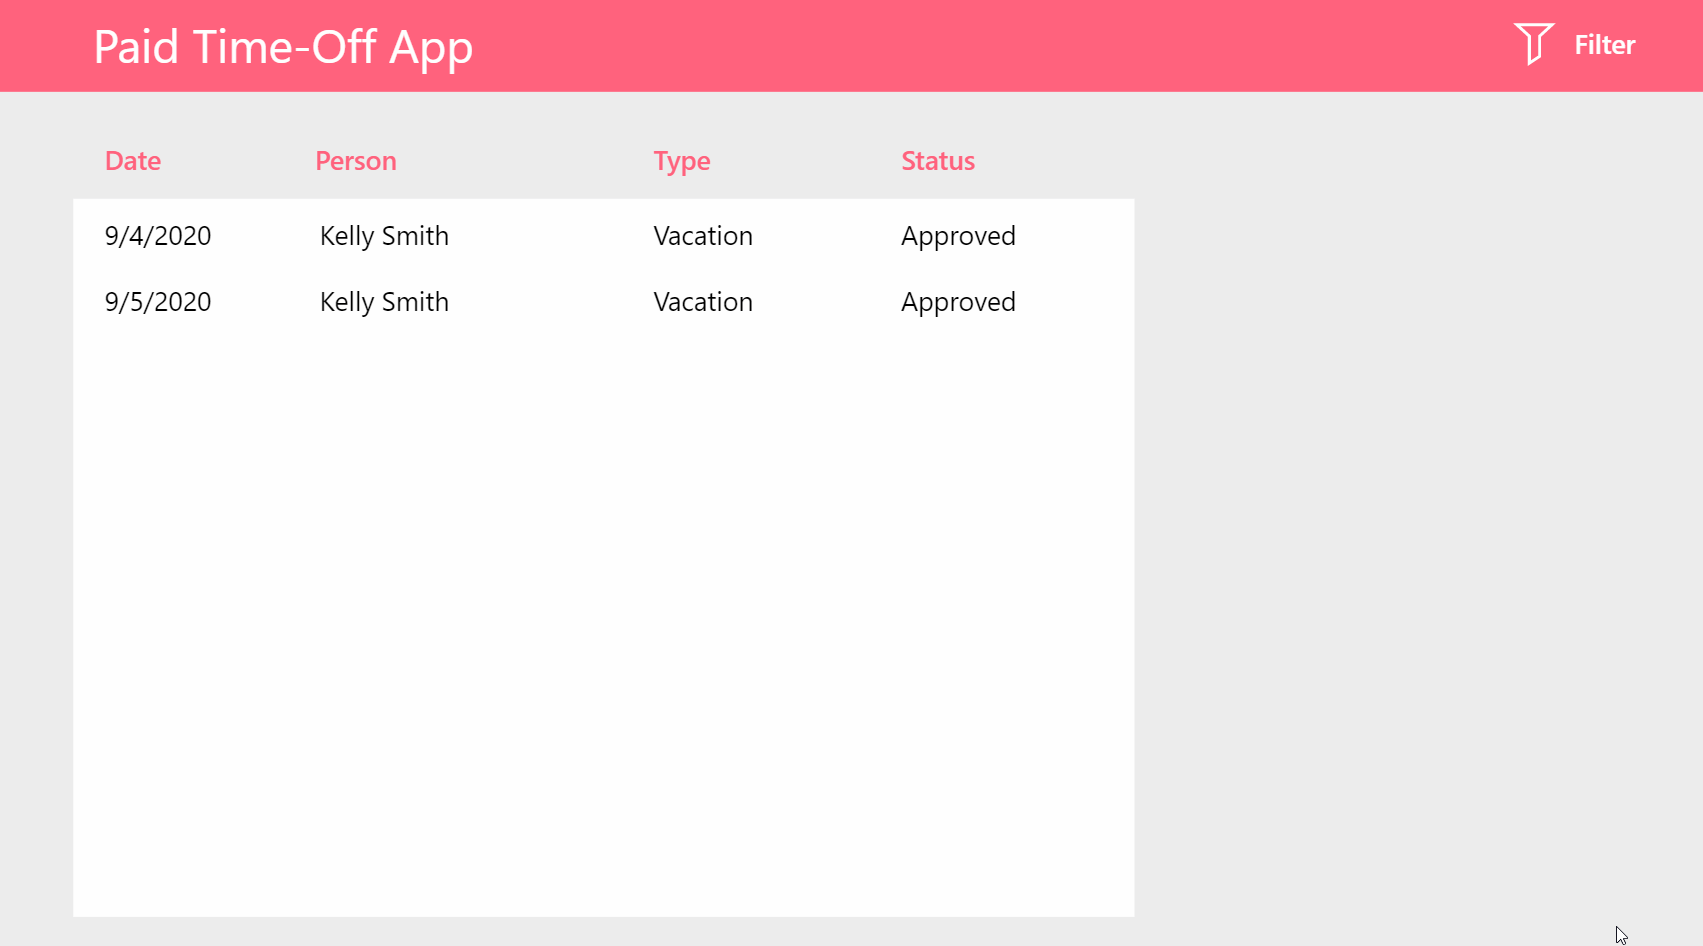
Show And Hide The Filters Menu
Next, we fill create the controls to show and hide the filters menu. Insert a Filter icon and a label with the word ‘Filter’ into the top-right corner of the title bar. Also make a Cancel Icon beneath the Filter icon.
Use this code in the OnSelect property of the Filter icon.
Set(varShowFilters, true);Code language: JavaScript (javascript)
Then write this code in the OnSelect property of both the Apply button and the Cancel icon.
Set(varShowFilters, false);Code language: JavaScript (javascript)
Finally, put the varShowFilters variable in the Visible property of all of the menu controls and the screen-protect label.
varShowFilters
And put the opposite code in the Visible property of the Filter control
!varShowFilters
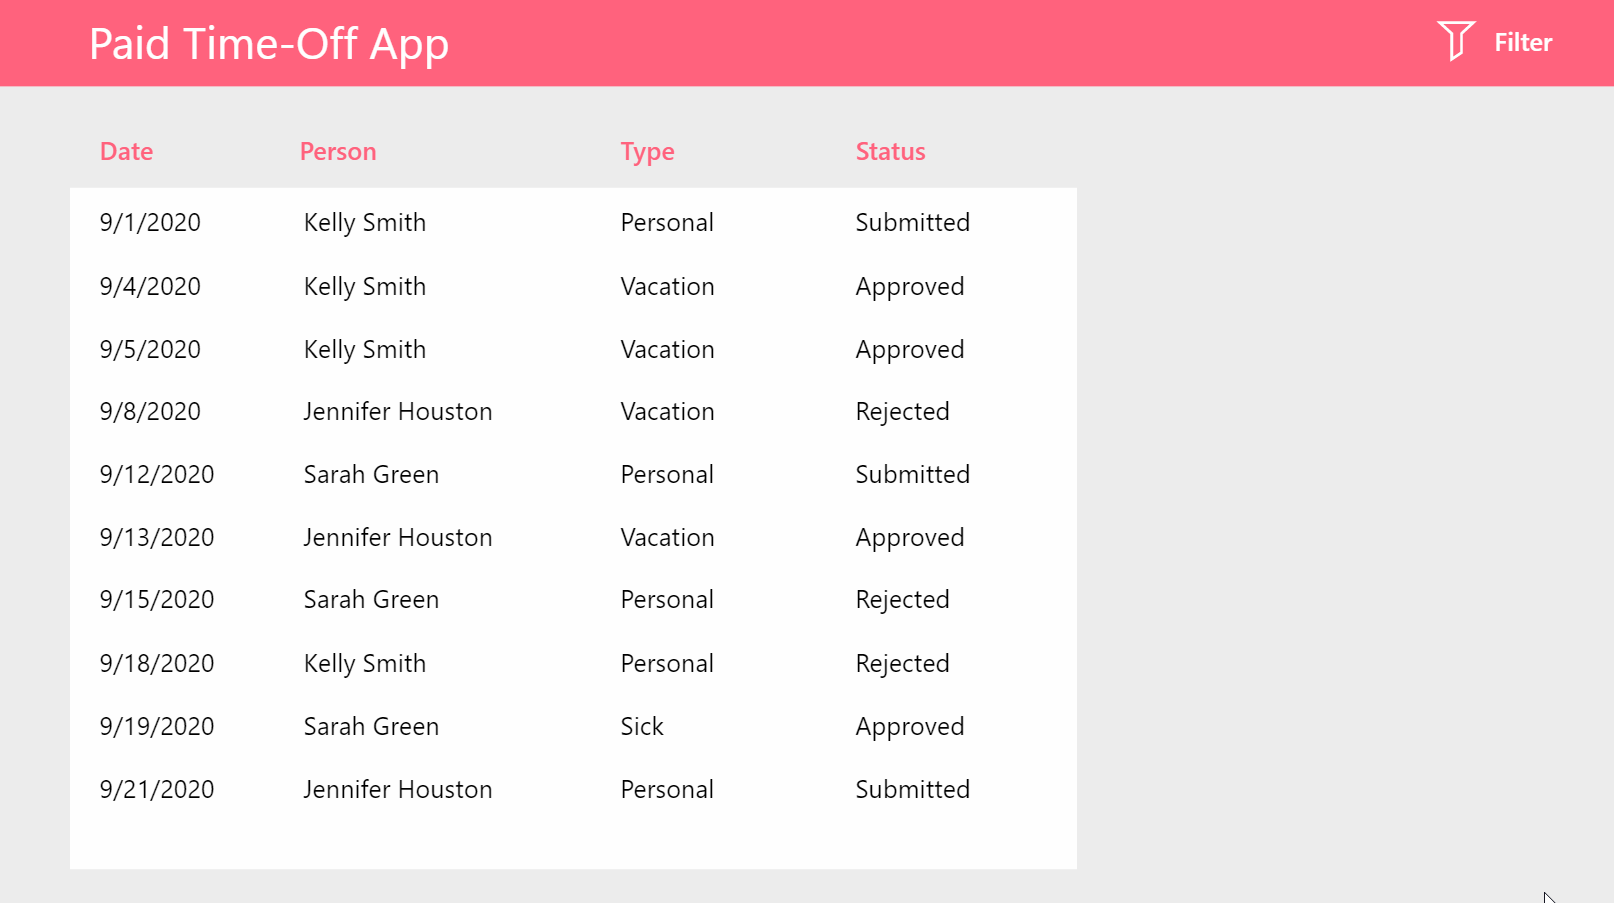
Now menu will now show when you click Filter and hide when you click either the Apply button or Cancel icon.
Clearing Filters
When a user clicks the clear button all of the filters should revert to a blank selection. Write this code in the OnSelect property of the Clear button.
// Define default filter values
Set(varDefaultFilters, {
    Type: Blank(),
    Status: Blank(),
    Employee: Blank()
});

// Reset all of the filter controls
Reset(drp_Type);
Reset(drp_Status);
Reset(drp_Employee);Code language: JavaScript (javascript)
Then set the Default property of each filter using this code
varDefaultFilters.TypeCode language: CSS (css)varDefaultFilters.StatusCode language: CSS (css)varDefaultFilters.EmployeeCode language: CSS (css)Clicking the Clear button will now reset the dropdown menus and show all information in the gallery once again.
Cancel Filter Changes
When the user clicks the Cancel icon any changes made to the filters will return to their previous values before opening the menu.
Replace any code in the OnSelect property of the Filter icon with this code.
// store currently applied filter values in a variable
Set(varAppliedFilters, {
        Employee: drp_Employee.Selected.Value,
        Status: drp_Status.Selected.Value,
        Type: drp_Type.Selected.Value
});

// copy the applied filters to default filters variable
Set(varDefaultFilters, varAppliedFilters);

// show the filters menu
Set(varShowFilters, true);
Code language: JavaScript (javascript)
Then write this code in the OnSelect property of the Cancel icon.
// hide the filters menu
Set(varShowFilters, false);

// copy the applied filters to default filters variable
Set(varDefaultFilters, varAppliedFilters);

// Reset all of the filter controls
Reset(drp_Type);
Reset(drp_Status);
Reset(drp_Employee);
Code language: JavaScript (javascript)
Now clicking the Cancel icon will return the dropdowns to their previous state.
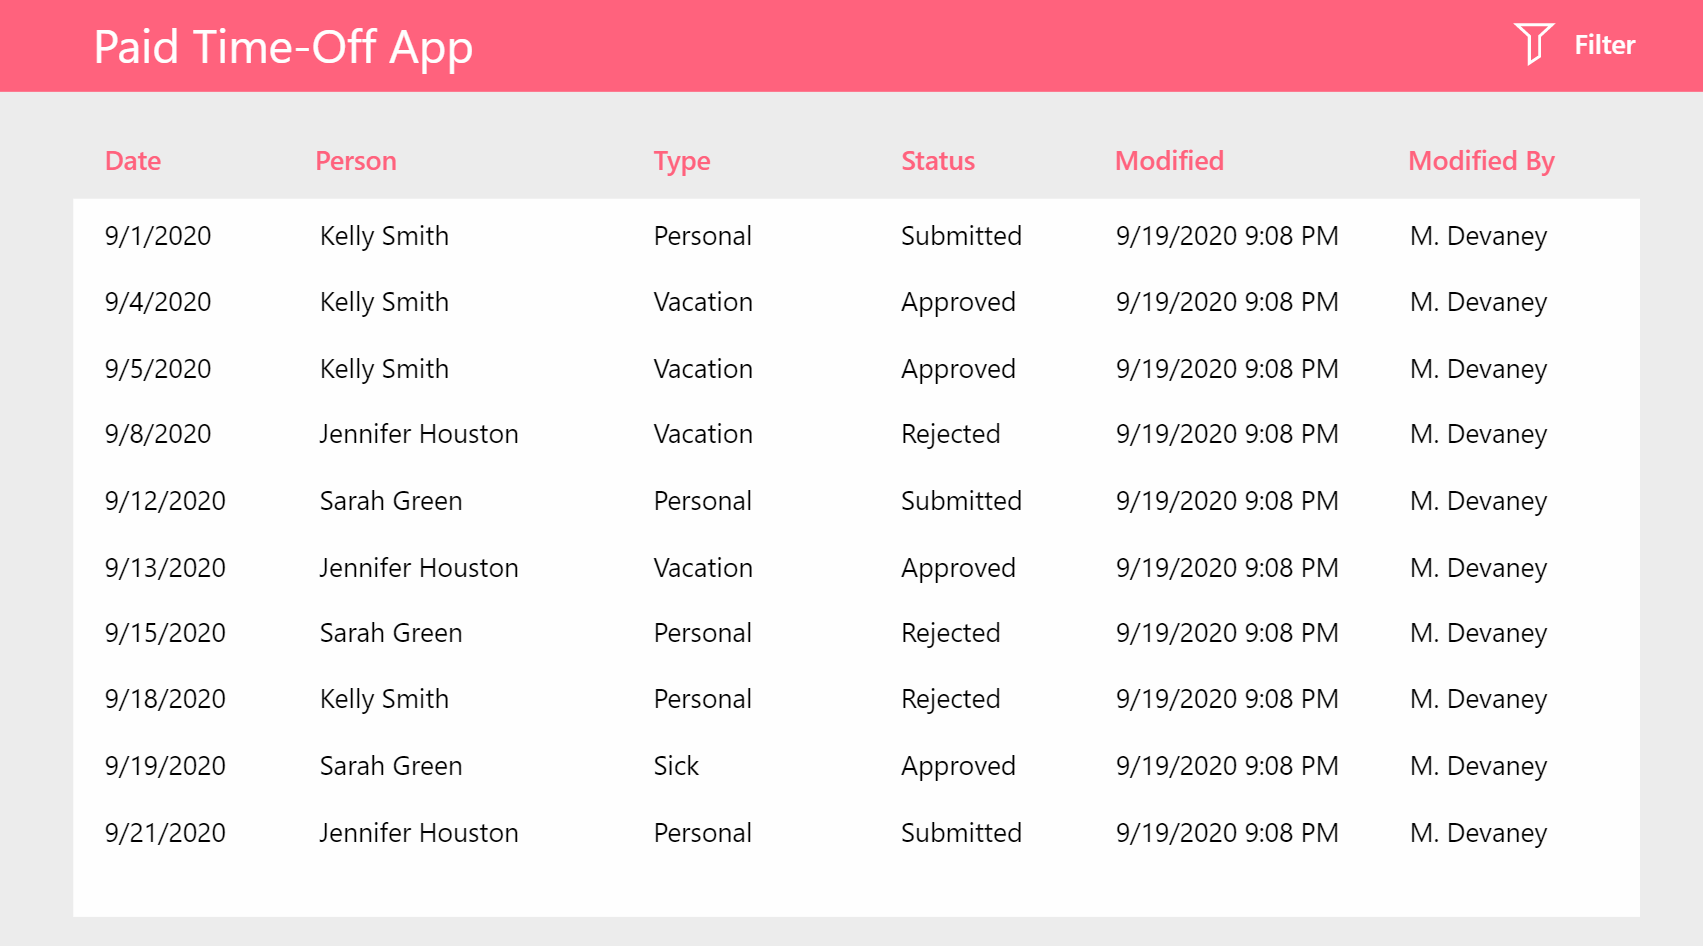
More Space To Display Data
Hiding the dropdown menu when not in-use gives us more space to display data in the gallery. Now we can display 2 additional columns on-the-right instead of using the space for a menu.
Did You Enjoy This Article? 😺
Subscribe to get new Copilot Studio articles sent to your inbox each week for FREE
Questions?
If you have any questions or feedback about Power Apps Filter Menu: Apply, Clear and Reset please leave a message in the comments section below. You can post using your email address and are not required to create an account to join the discussion.


I love this solution! My gallery extends the full width of my screen and I only have a small header area at the top. I was wondering how to squeeze in 4 filter dropdowns as well as my logo, app name, search box and new request button without it looking cluttered and awful. I can’t wait to try this – Thanks Matthew!
Sir!!!, I have a question???
how can you make the filter dropdown non-transparent “the modified” and “modified by” columns when you use the filter??? I mean when you use he filter menu, it covers the two last right end column. how did you do that????
Many thanks
Zewdu,
I accomplished it by placing the controls above the gallery in the tree menu.
Great example!
If I want the filter changes to be applied to the gallery after the Apply button is hit, how do I do that?
Alfred,
Instead of using code like this in the Items property of the gallery:
Filter(
‘Paid Time Off’,
drp_Type.Selected.Value=Blank() Or TimeOffType=drp_Type.Selected.Value,
drp_Status.Selected.Value=Blank() Or Status=drp_Status.Selected.Value,
drp_Employee.Selected.Value=Blank() Or Employee=drp_Employee.Selected.Value
)
You would want to store the dropdown value in a variable using the OnChange property:
Set(varTimeOffType, Self.Selected.Value)
Then update the Items property of the gallery like this:
Filter(
‘Paid Time Off’,
drp_Type.Selected.Value=Blank() Or TimeOffType=varTimeOffType,
drp_Status.Selected.Value=Blank() Or Status=drp_Status.Selected.Value,
drp_Employee.Selected.Value=Blank() Or Employee=drp_Employee.Selected.Value
)
Now repeat for the other two dropdowns.
Big thanks for your help!
I like your solutions always, it is easy to implement in various scenario. I have two questions
Regards
Ashish
Nice solution 🙂
The filtered result from a gallery vanishes or gallery becomes empty on removing one or more of the applied dropdown filters in power apps, I want the gallery should display the results for the remaining dropdowns values applied. how to handle this situation in power apps