Power Apps Custom Page Modal Dialog For Model-Driven Apps

Power Apps custom pages can be used to build a modal dialog in model-driven apps. A modal dialog is a pop-up menu that lets the user fill in some information then click OK or cancel. This technique requires a little bit of JavaScript code. But don’t worry. If you’re a JavaScript beginner I’ve got code you can copy and paste into your own model-driven app to make it work. In this article, I will teach you how to make a Power Apps custom page modal dialog.
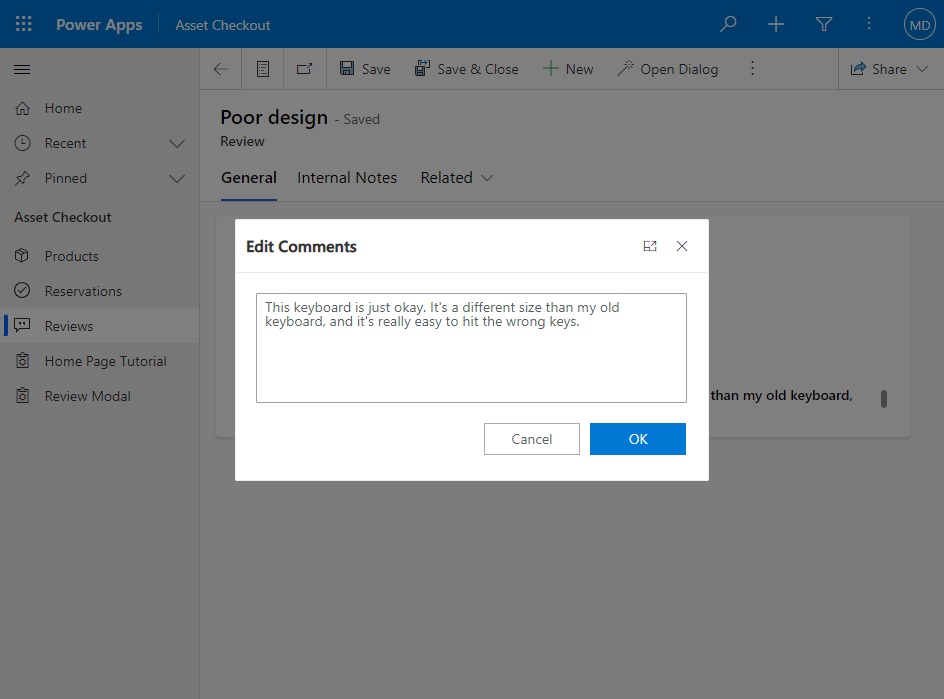
Introduction: The Review Comments Dialog Box
The I/T department uses the Asset Checkout app to manage loaning devices for users. The Reviews table stores user reviews for the device they borrowed. Comments can be edited using a modal dialog built using a custom page.
Create A New Power Apps Model-Driven App
Open Power Apps Studio and navigate to the Create page. Select the Asset Checkout model-driven app template.
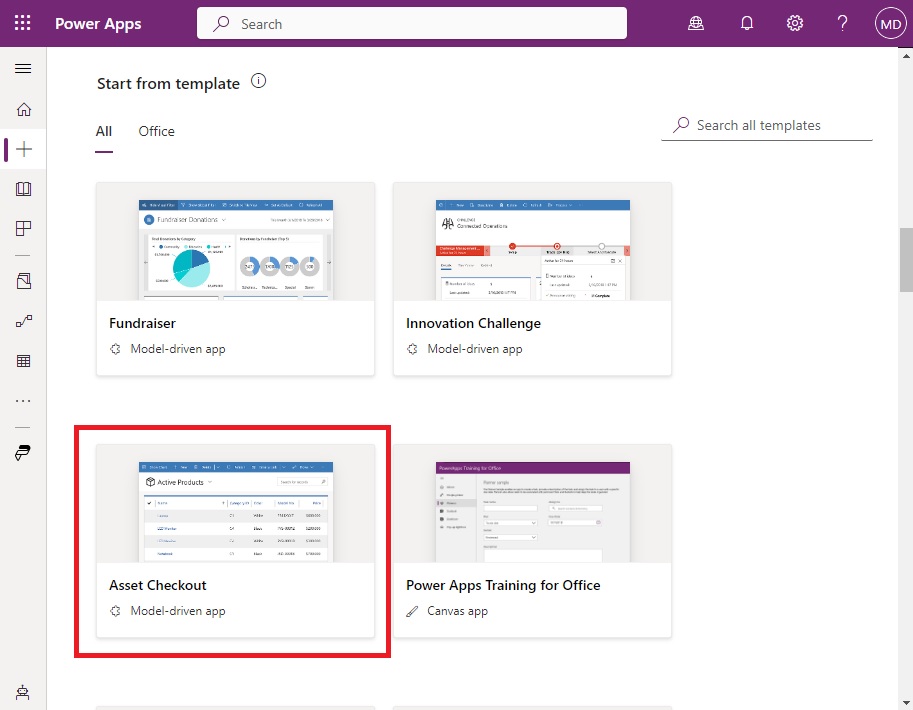
Click the Create button.
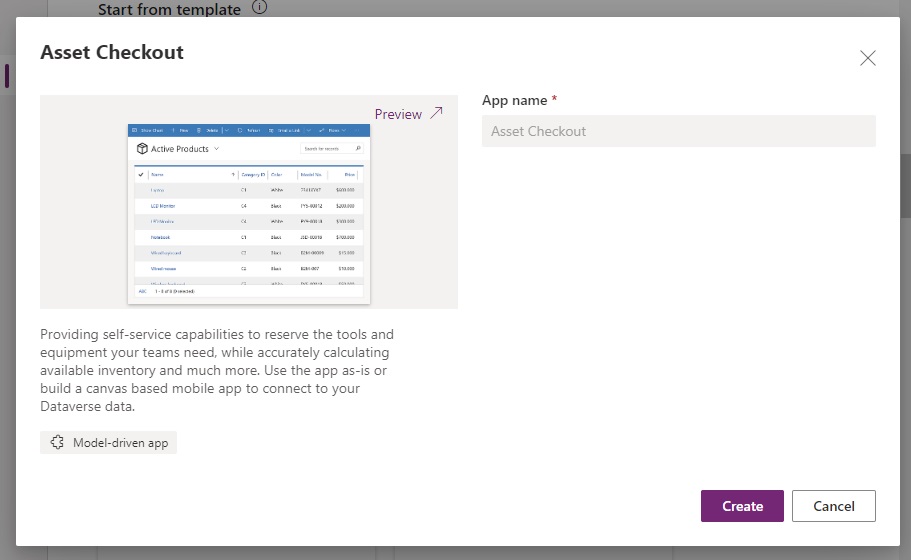
The Asset Checkout app will open in the model-driven app editor.
Add A New Custom Page To The Model-Driven App
Press the Add page button in the model-driven app editor
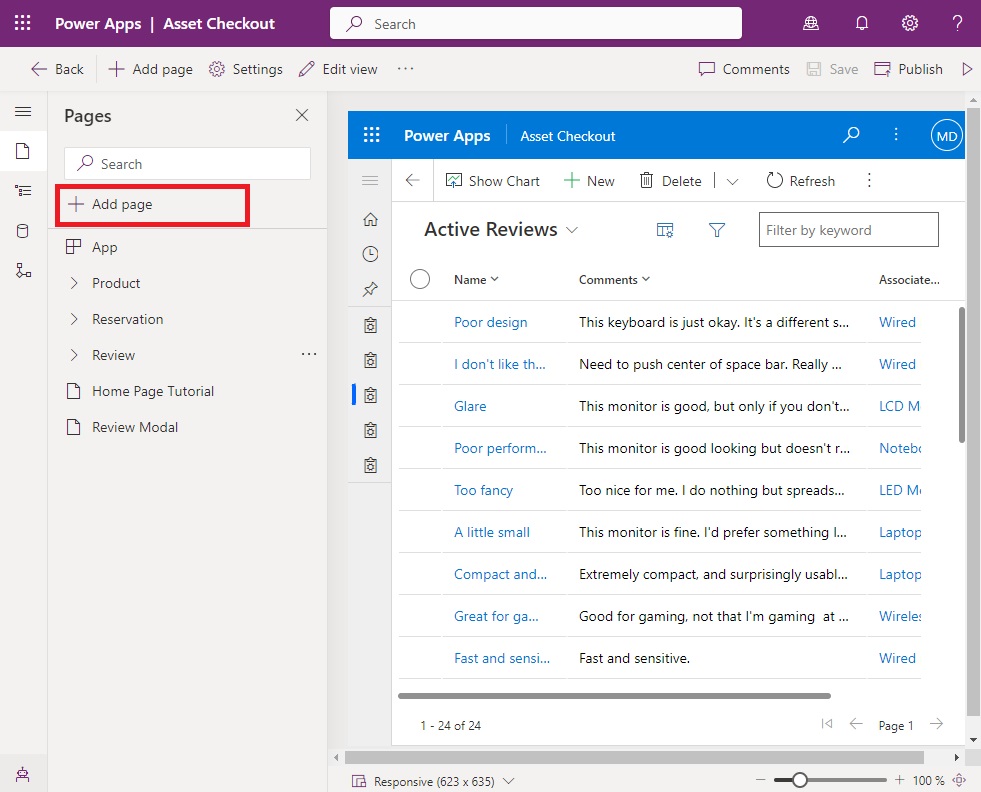
Select Custom page.
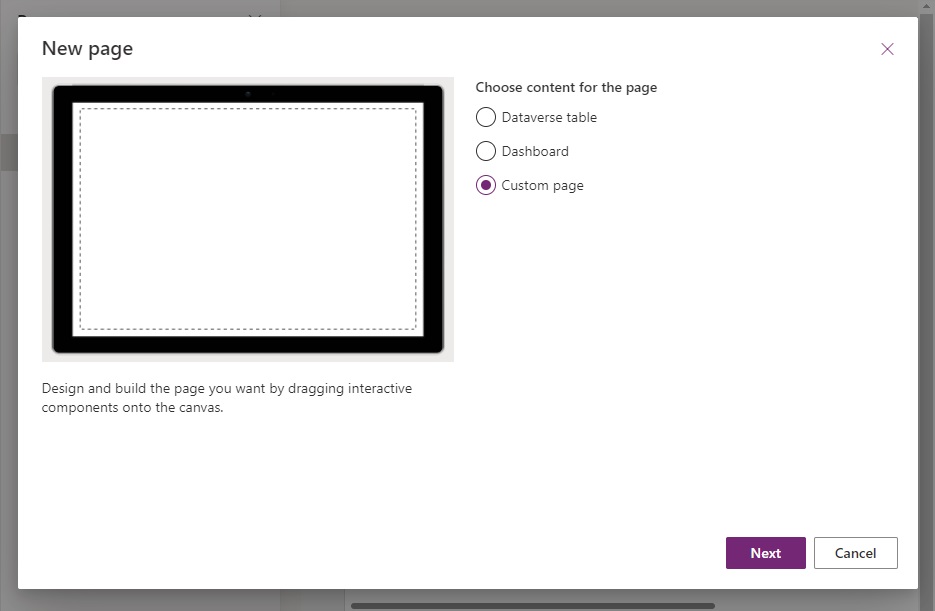
Choose Create a new custom page called Review Modal then click the Add button. This will open a new custom page in the canvas app designer.

Configure The App Display Settings
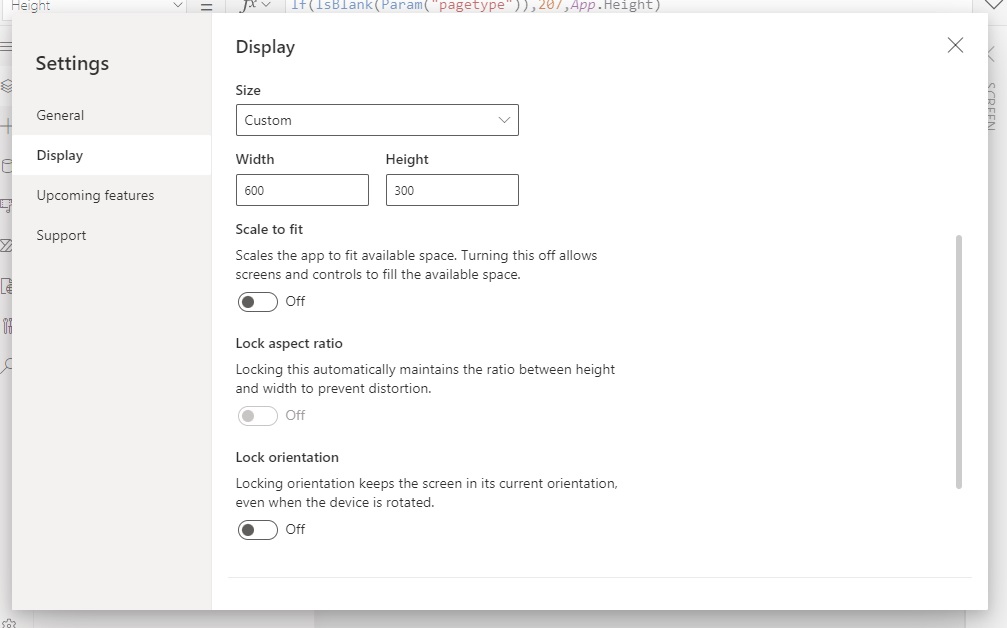
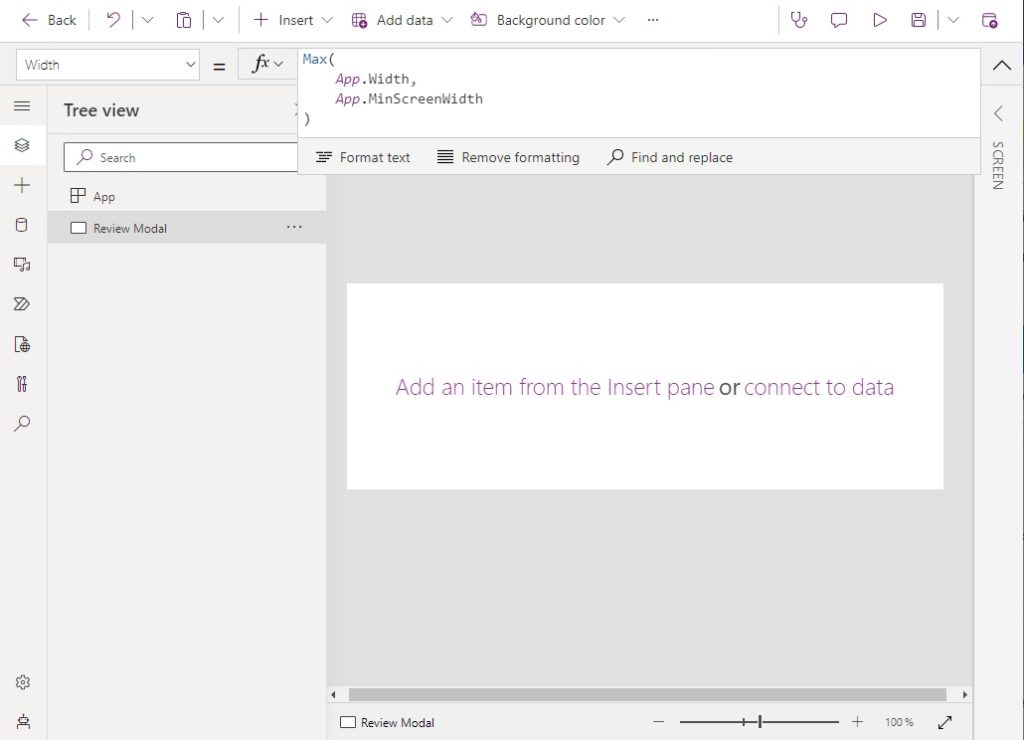
In Power Apps Studio, the custom page will appear on the screen as a full-size page. To make the modal dialog smaller, open the Advanced Settings menu and go to Display. Change the Width and Height to 600 x 300 pixels. Also, toggle off the Scale to fit option. This will allow the modal dialog to become responsive and properly sized on mobile, tablet and PC.
Setup The Custom Page App Object And Screen
We will starting building the custom page modal dialog by updating the app object.
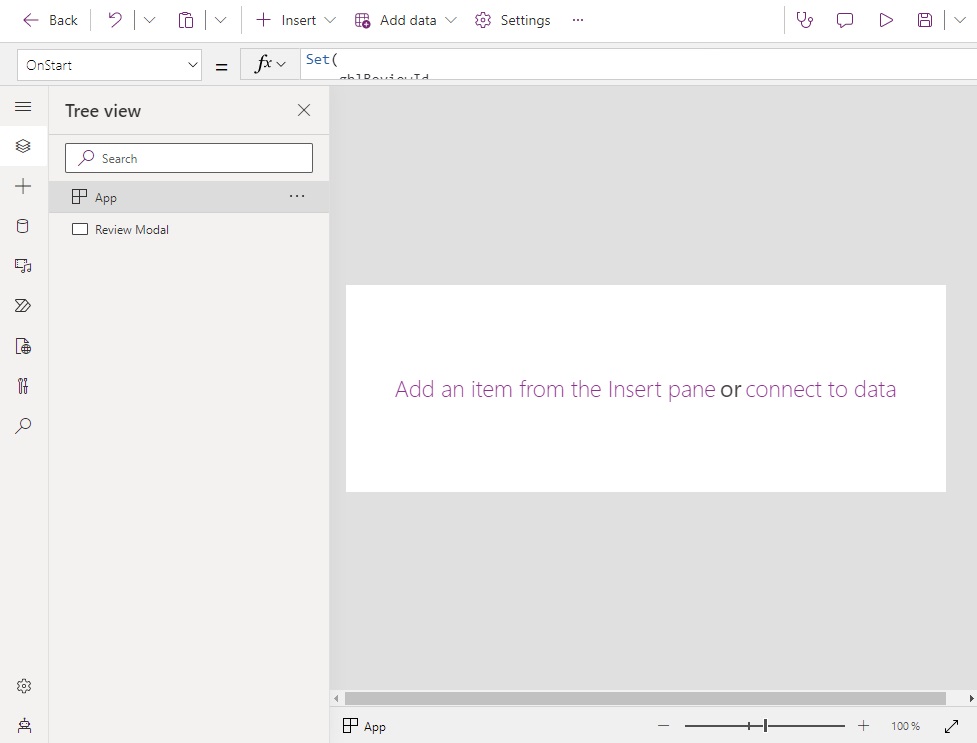
Write this code in the OnStart property of the app object. It gets the recordId from Dataverse and stores it in a variable called gblReviewId. The GUID is in the format “{725851A0-B573-4A33-B609-DA0F2E202EFA}” so we must remove the curly braces and change the data type from string to GUID.
Later in this tutorial, we will learn how to pass a GUID to the modal dialog using URL parameters. Nothing should appear in the custom page at this point. Then we use the variable gblReviewId to obtain the Review record from the reviews table and store it in a variable named gblReview.
Set(
    gblReviewId,
    GUID(Mid(Param("recordId"),2, Len(Param("recordId"))-2))
);
Set(
    gblReview,
    LookUp(
        Reviews,
        Review = gblReviewId
    )
)Code language: JavaScript (javascript)
To use the Reviews table in the OnStart property code make sure it is added to the Data menu.
Also, change the minimum screen width and height to 200 x 200.
MinScreenHeight: 200
MinScreenWidth: 200Code language: HTTP (http)
Then set the width and height of the screen named Review Modal.
Set the following properties to change the screen width and height. The height property uses a formula to check whether the app is running in studio mode or in play mode. In play mode, the modal dialog comes with a header that is 53 pixels tall. Therefore, when we are in studio mode we must decrease custom page modal dialog height by 53 pixels.
We will set the pagetype URL parameter later in the tutorial. For now, enter the code shown below and trust me that it will work.
Height: App.Height - If(IsBlank(Param("pagetype")), 53)
Width: Max(App.Width, App.MinScreenWidth)Code language: CSS (css)
Create The Custom Page Modal Dialog Main Container
Add a vertical container to the screen to hold all of the dialog’s controls.
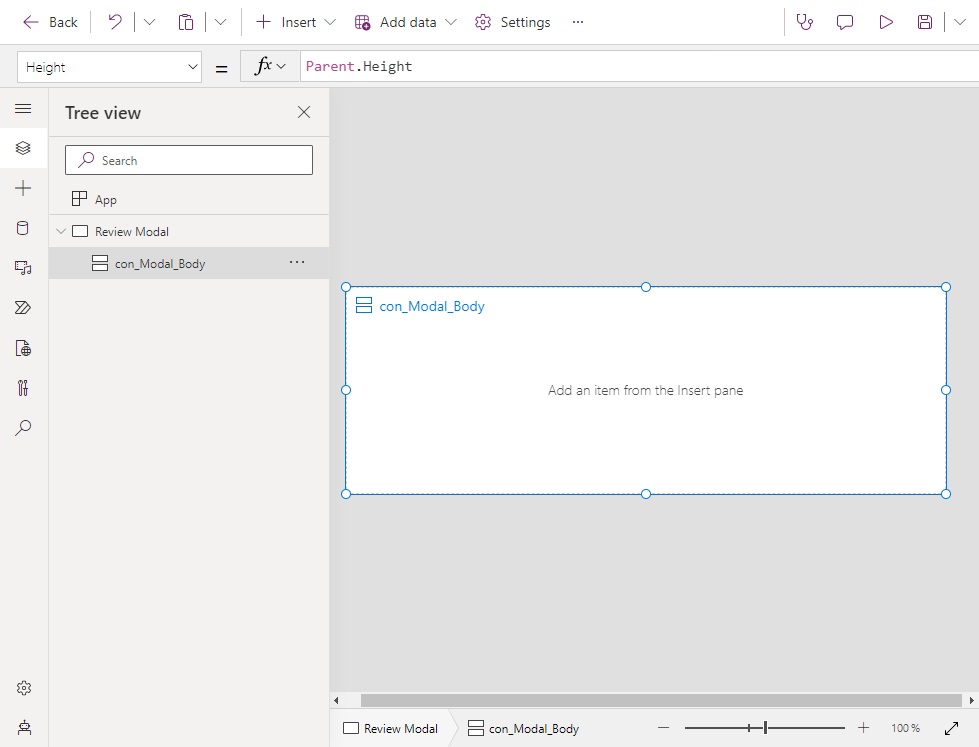
Position the container in at X & Y co-ordinates (0, 0) and set the width and height to match the size of the screen.
Height: Parent.Height
Width: Parent.Width
X: 0
Y: 0Code language: HTTP (http)
We want controls placed inside the main container to flow from top-to-bottom and stretch to fill the size of the container.
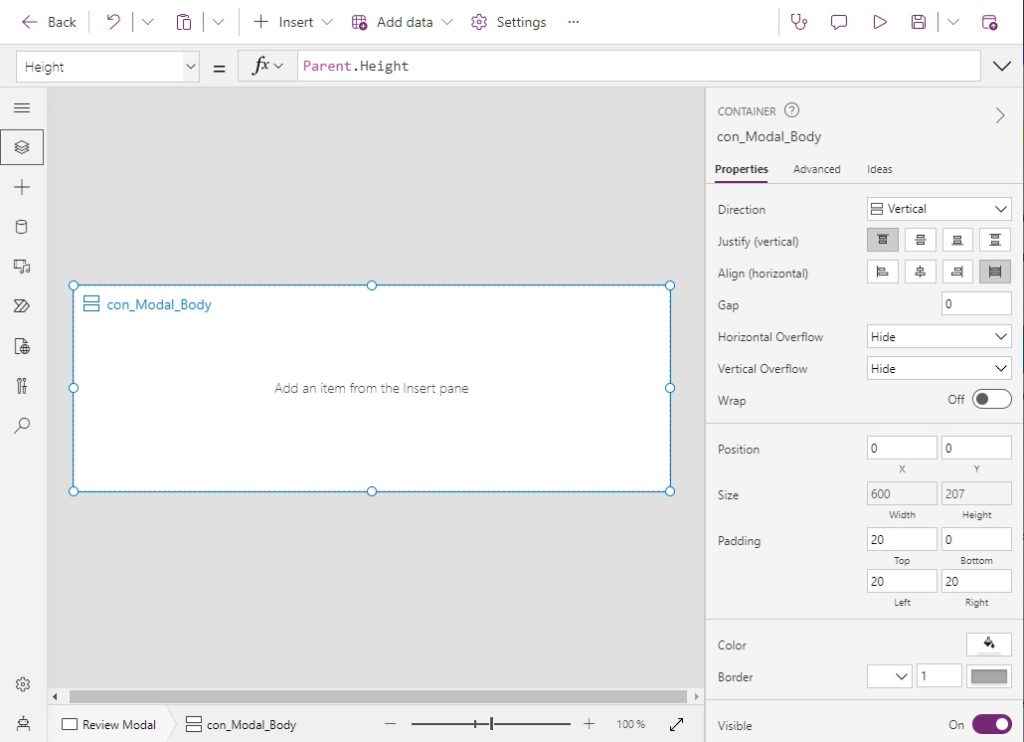
Use these values to define the LayoutJustifyContent and LayoutAlignItems properties of the container.
LayoutJustifyContent: LayoutJustifyContent.Start
LayoutAlignItems: LayoutAlignItems.StretchCode language: CSS (css)
Insert A Comments Box Into The Modal Dialog
The key feature of the modal dialog is text box to display comments and let user make edits. Insert a text input into the main container.
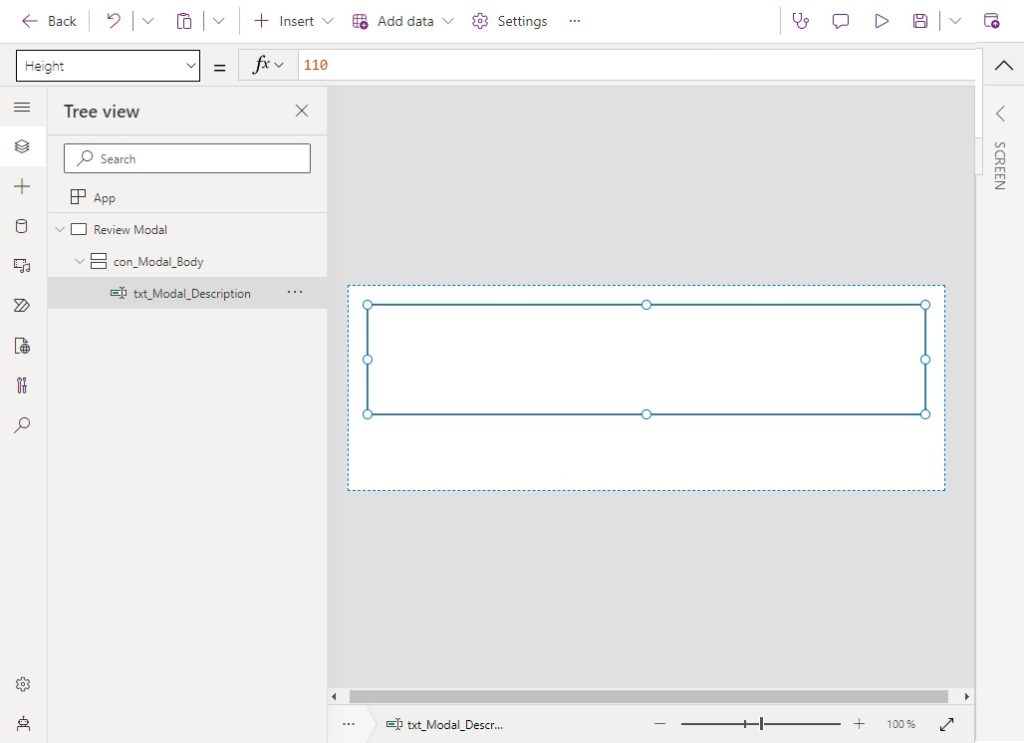
Use this code in the Value property of the text input (modern control). It will display the current record’s comments when the model-driven app is in play mode, but not in studio.
gblReview.CommentsCode language: CSS (css)
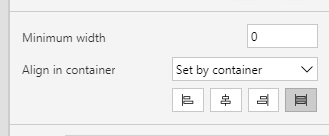
Ensure the text input’s Align In Container property is “Set by Container.” This will make it stretch to fill the available space.
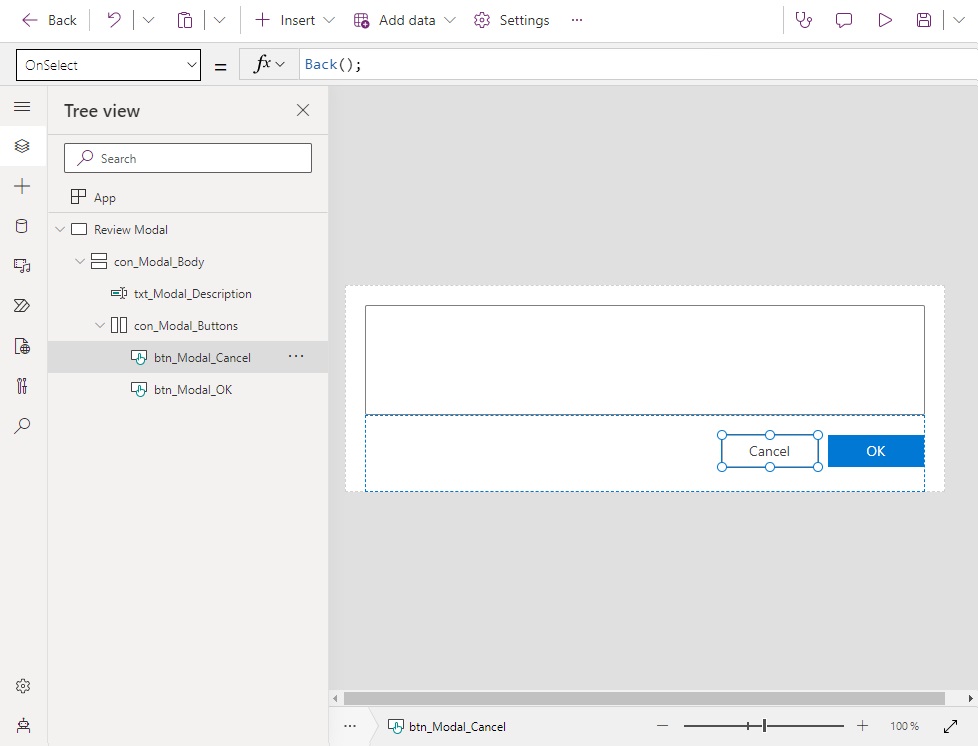
Create OK and Cancel Buttons For The Modal Dialog
The modal dialog’s OK and Cancel buttons will be placed below the comments box. Create a new horizontal container to hold them.
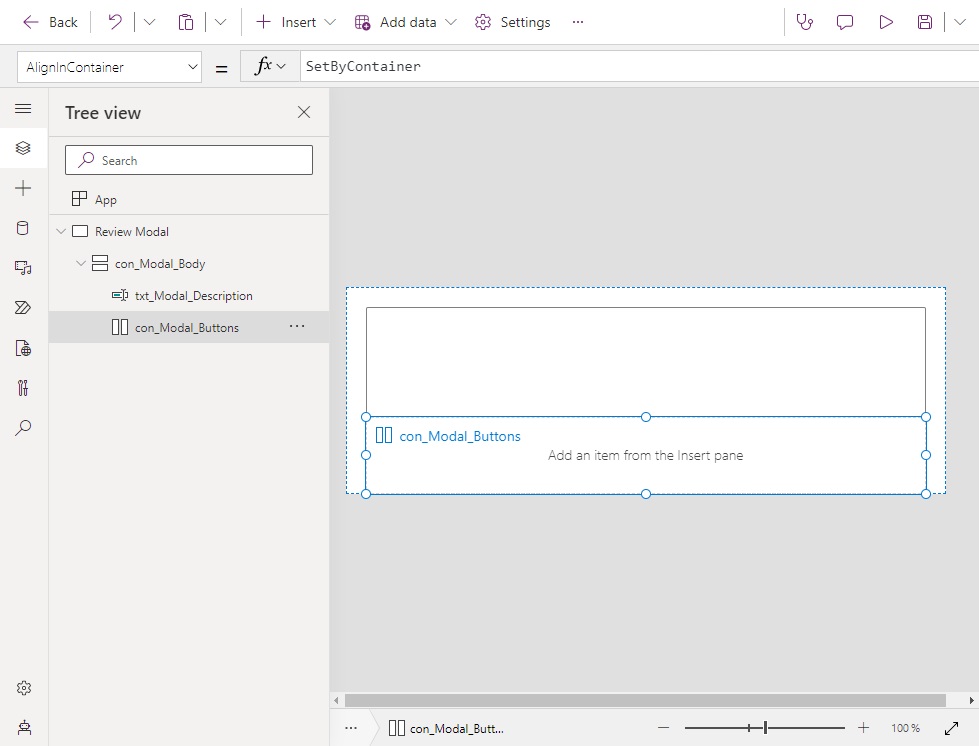
Set the Justify property of the container to End and the Align property to Top.

Insert a button into the horizontal container with the text “OK.”
Use this code in the OnSelect property of the button. It saves text from the comments box to the current record and closes the modal dialog using the back function.
Patch(
    Reviews,
    gblReview,
    {Comments: txt_Modal_Description.Value}
);
Back()Code language: CSS (css)
Insert another button into the horizontal container with the word “Cancel.”
Use this code in the OnSelect property of the form to close the modal dialog without saving.
Back();
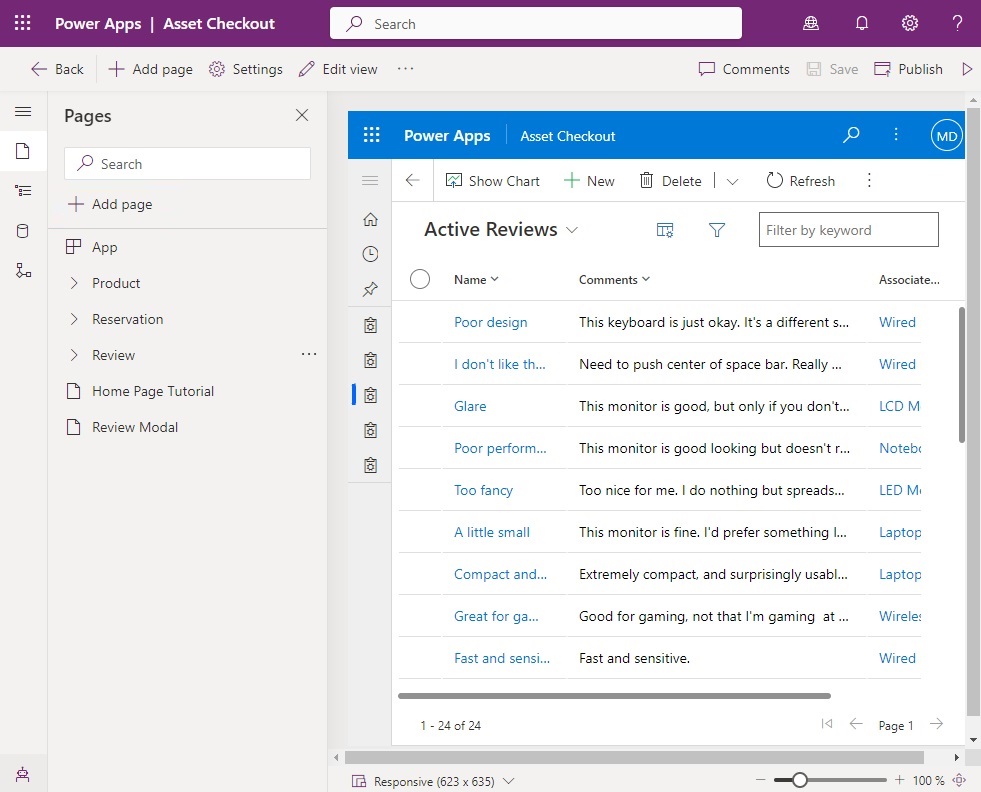
We are now done building the canvas app. Save and publish the app. Then the close the canvas app editor.
Add A Button To The Main Form Command Bar
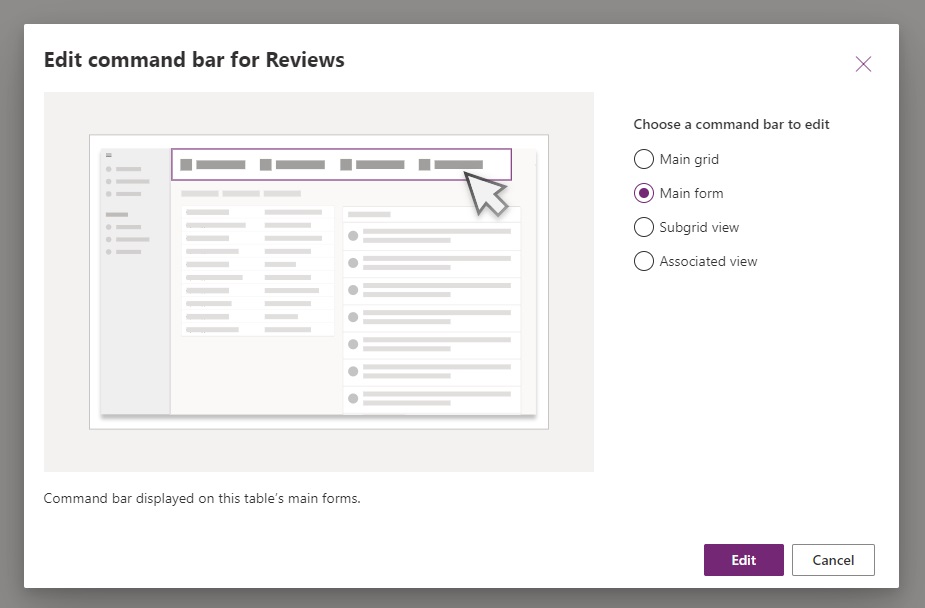
Now that the Review Modal custom page is completed we will add a button to the model-driven form so a user can open it. Go back to the model-driven app editor and click the three dots beside the Review Table. Choose Edit Command Bar.
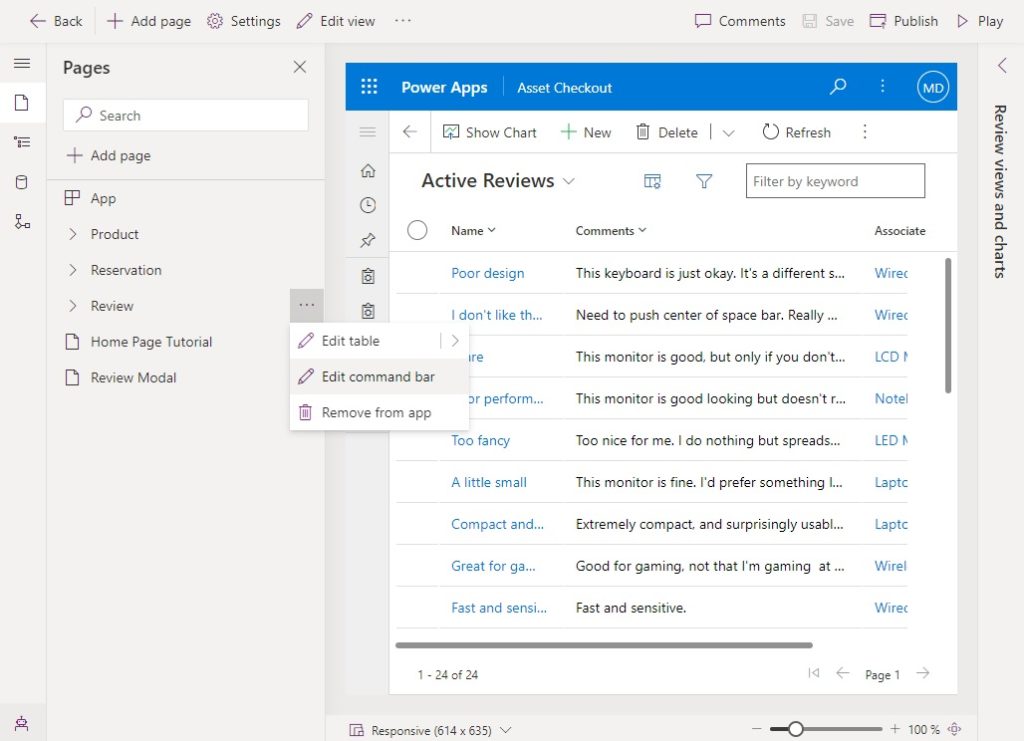
Select Main form.
In the command bar edit, go to the ribbon menu and choose New > Command.
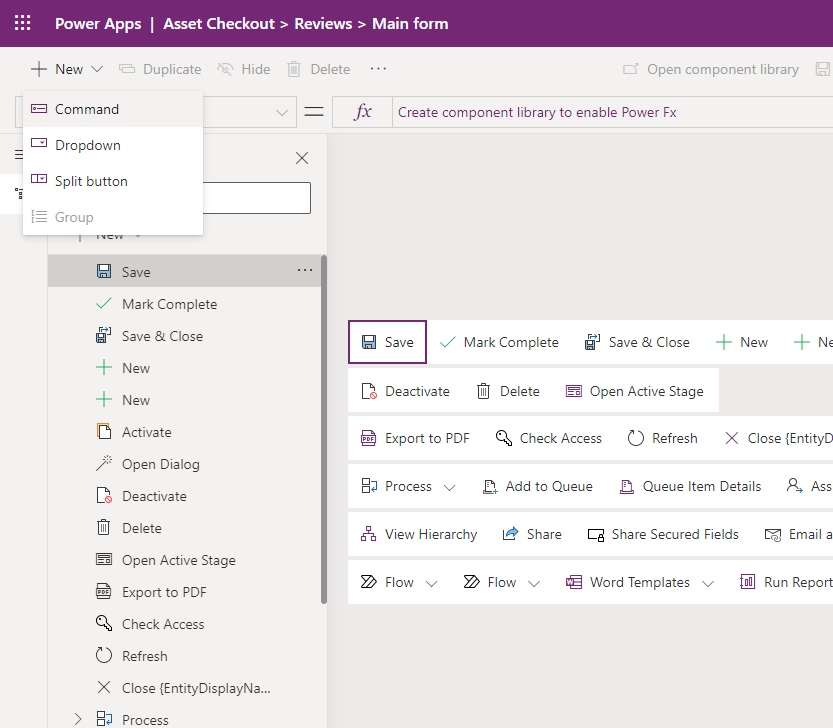
Add JavaScript Code To The Button To Open The Modal Dialog
Select the newly added button from the center menu of the screen. Give the icon a label called “Open Dialog” and choose an icon for it. Then update the Action dropdown to Run JavaScript and select Add Library.
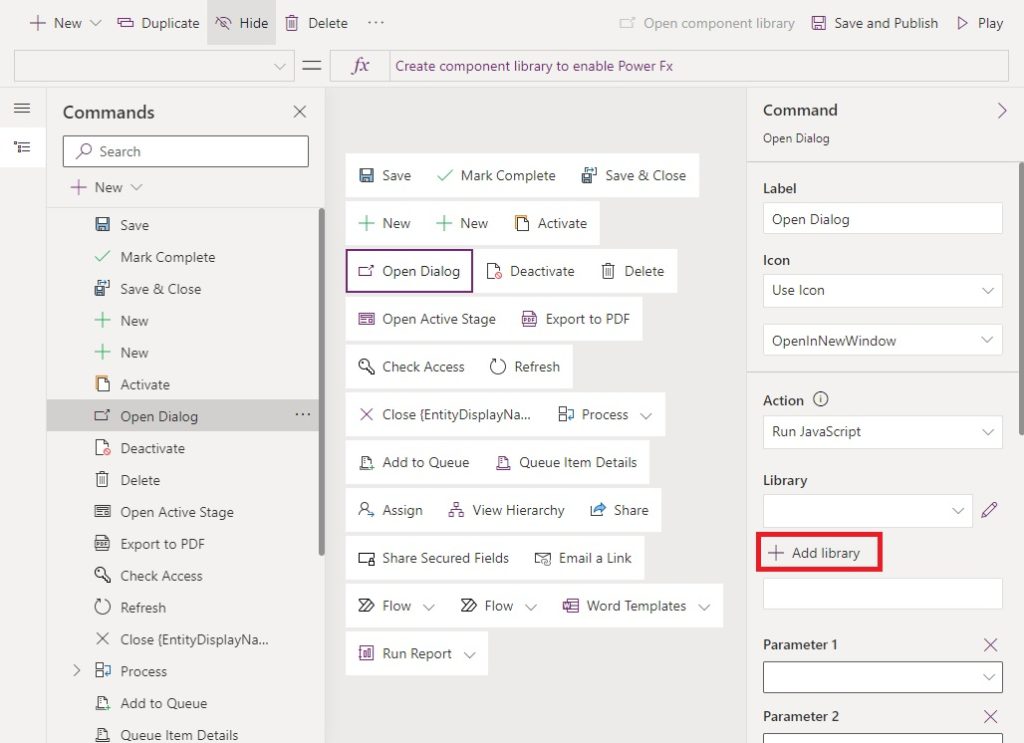
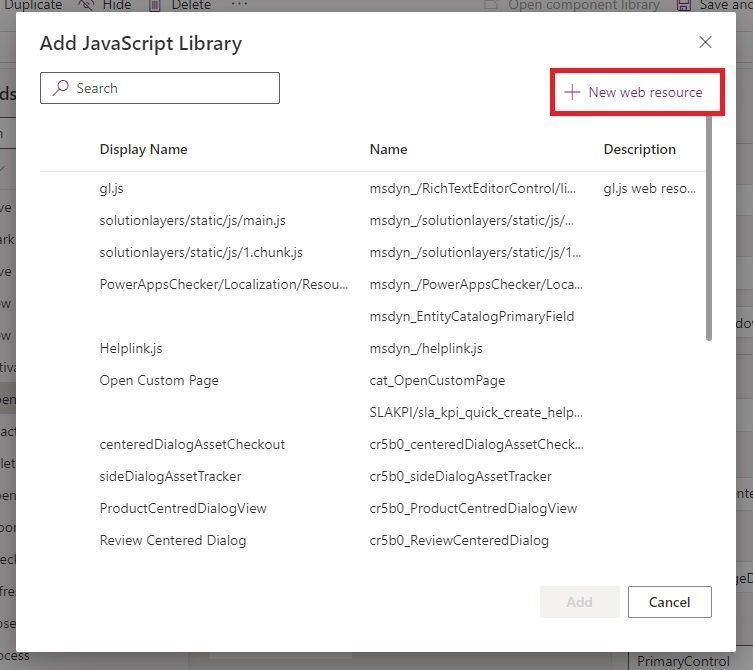
On the Add JavaScript library menu click New web resource.
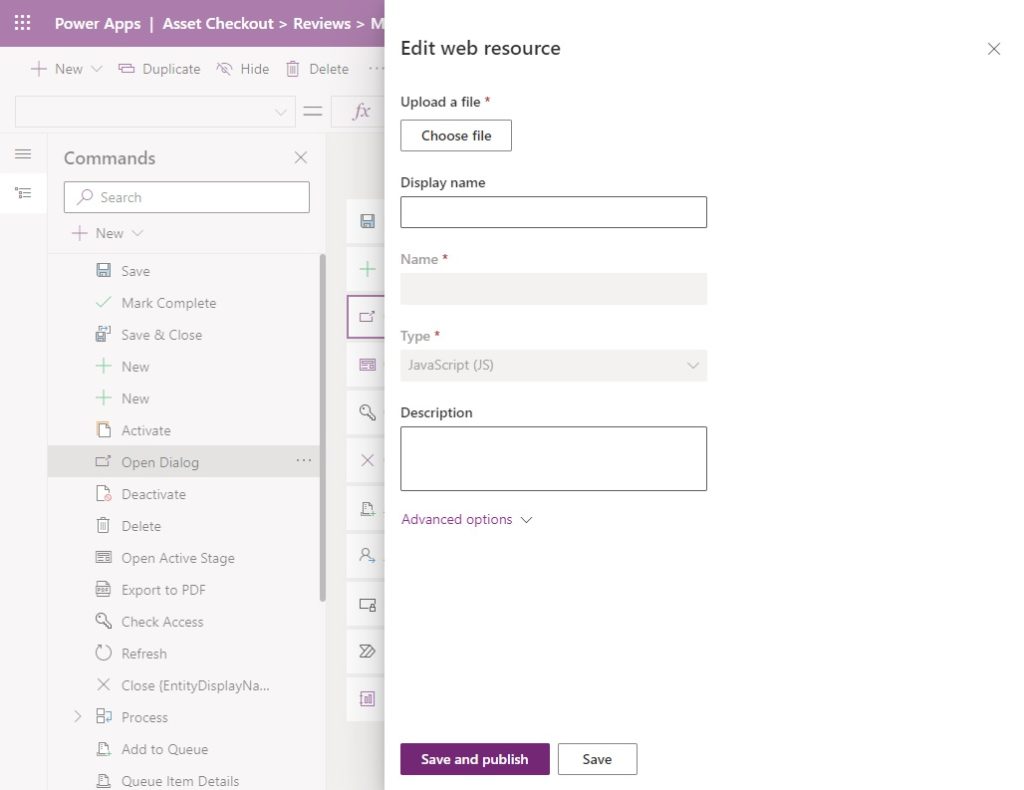
Then Power Apps will navigate to this screen.
Write The JavaScript Code To Open The Modal Dialog
Now we need to write some JavaScript code to open the custom page as a modal dialog. If you have not written any JavaScript code before, don’t worry. I will provide you with the necessary code you can copy and paste into a text file while making only a few minor changes.
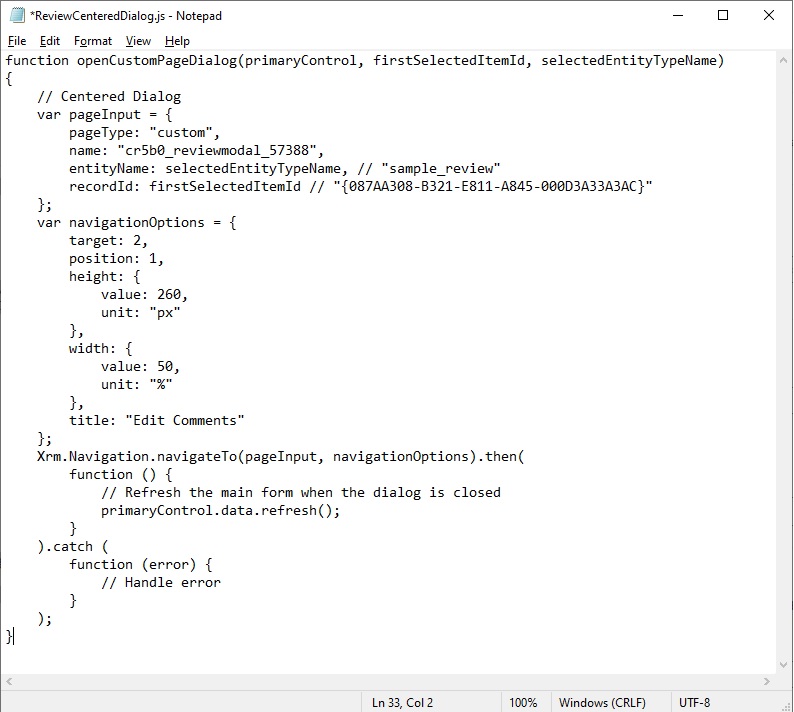
Copy and paste this code into Windows Notepad and save it as a Javascript file (extension .js). You will need to update the name parameters with your own custom page’s logical name.
function openCustomPageDialog(primaryControl, firstSelectedItemId, selectedEntityTypeName)
{
    // Centered Dialog
    var pageInput = {
        pageType: "custom",
        name: "cr5b0_reviewmodal_57388",
        entityName: selectedEntityTypeName, // "sample_review"
        recordId: firstSelectedItemId // "{087AA308-B321-E811-A845-000D3A33A3AC}"
    };
    var navigationOptions = {
        target: 2,
        position: 1,
	height: {
	    value: 260,
	    unit: "px"
	},
	width: {
	    value: 50,
	    unit: "%"
	},
	title: "Edit Comments"
    };
    Xrm.Navigation.navigateTo(pageInput, navigationOptions).then(
        function () {
            // Refresh the main form when the dialog is closed
            primaryControl.data.refresh();
        }
    ).catch (
        function (error) {
            // Handle error
        }
    );
}Code language: PHP (php)
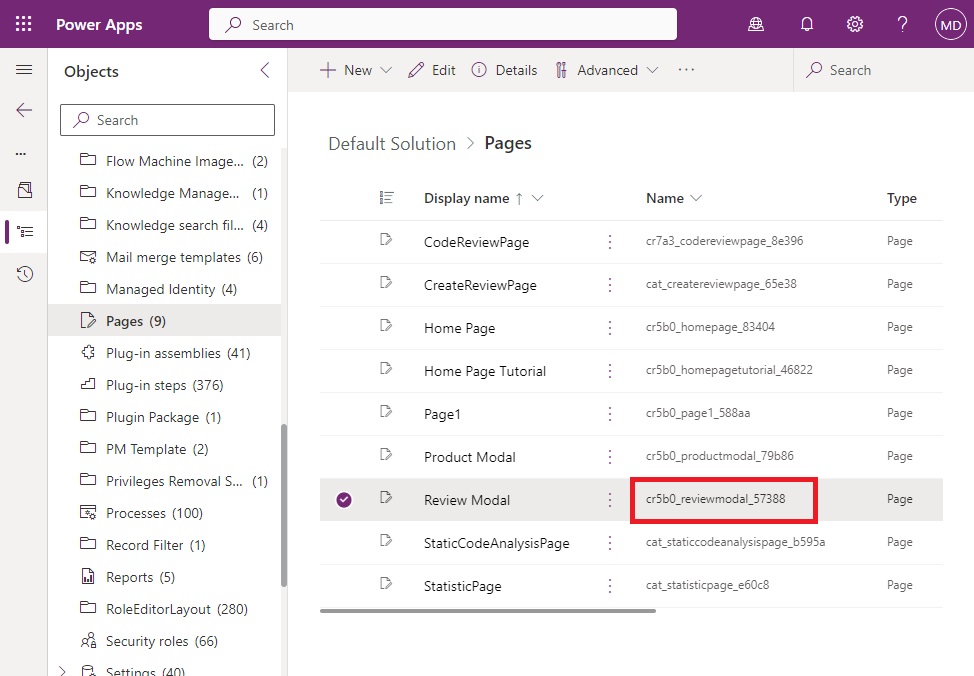
Get the logical name by going to the Solutions menu in make.powerapps.com, go to the Default Solution, choose the Pages category and look for the Page. The logical name is displayed in the Name column.
Save the JavaScript file and upload it in the command bar editor. Click save and publish.

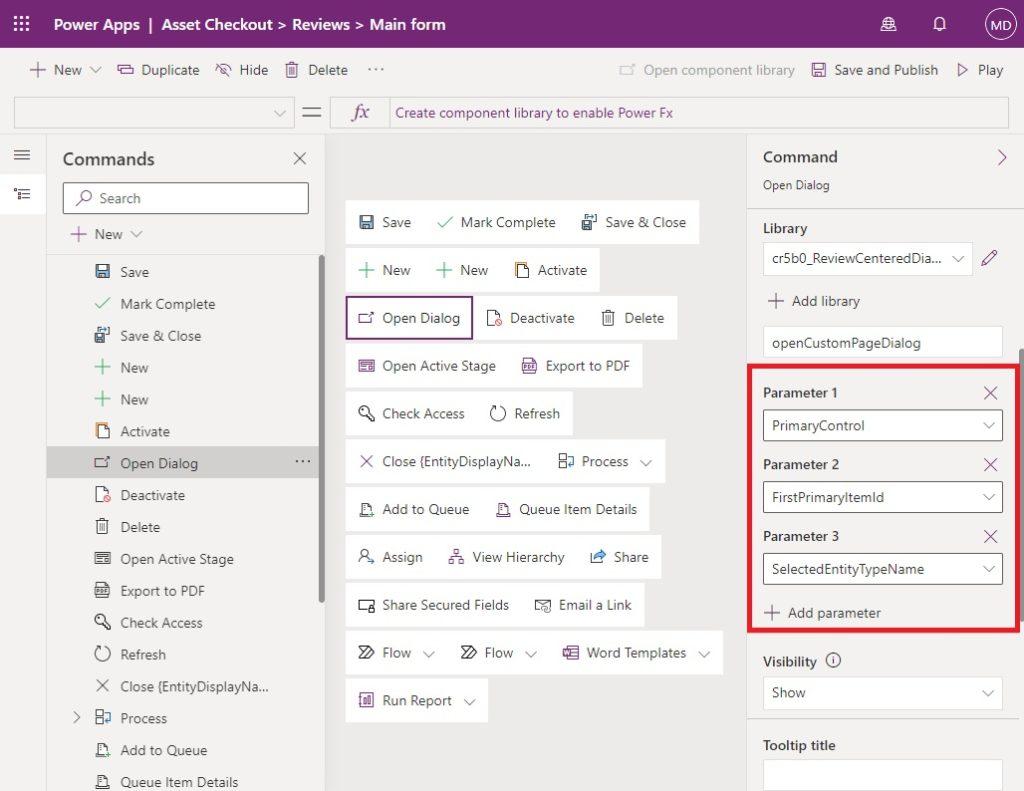
As a final step, set the command button parameters as shown below. These values get passed into the JavaScript function when the Open Dialog button is pressed.
- Parameter 1 – PrimaryControl (identifier for the open dialog button)
- Parameter 2 – FirstPrimaryItemId (current record GUID)
- Parameter 3 – SelectedEntityTypeName (table name)
Save and Publish the command bad and then press Play.
Test The Custom Page Modal Dialog
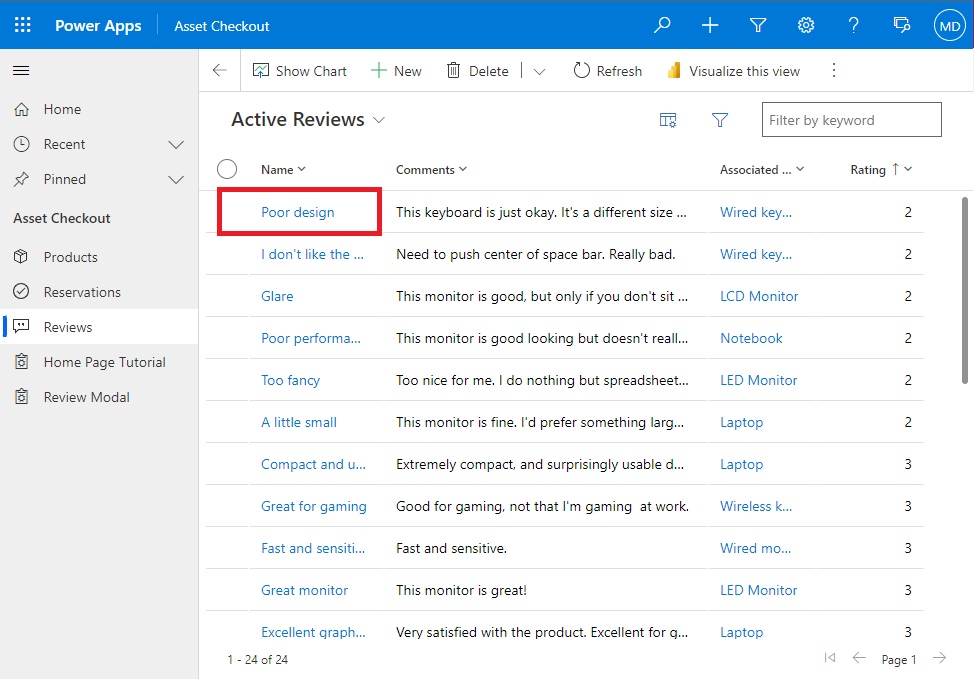
It’s time to test our custom page modal dialog. Open the model-driven app in play mode and select Reviews. Open the first record in the app.
Click on the Open Dialog button.
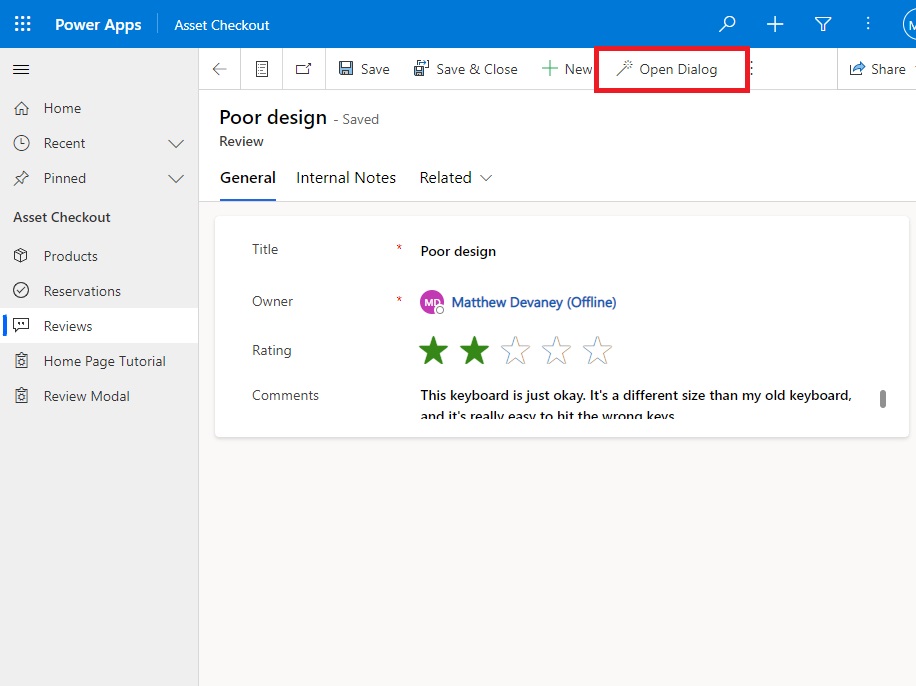
The Power Apps custom page modal dialog appears on the screen!

Did You Enjoy This Article? 😺
Subscribe to get new Copilot Studio articles sent to your inbox each week for FREE
Questions?
If you have any questions or feedback about Power Apps Custom Page Modal Dialogs For Model-Driven Apps please leave a message in the comments section below. You can post using your email address and are not required to create an account to join the discussion.


Great step by step. If you add the “use strict” statement to your javascript you’ll avoid warnings in the solution checker. Also, you can copy and paste the name of the custom page from within the model driven app designer, rather than having to type it, that saves me some time.
Thank you for your article!
May I ask you a question regarding Custom buttons in the Model Driven app?
Currently, we are not allowed to use some PowerFx functions here (for example, User() – https://learn.microsoft.com/en-us/power-apps/maker/model-driven-apps/commanding-use-powerfx).
However, I need to hide buttons for specific users. Do you know how we can achieve this now?
Many thanks,
Uliana
Uliana,
First, for the readers for of this article I want them to know the User() function is available in custom pages. However, User() is not available for custom commanding.
To show or hide a button on the ribbon based on the User you must use the Ribbon workbench. It is a free app found inside the XRM Toolbox.
Thank you!
Depending on your use case you may be able to use Datasourceinfo or RecordInfo functions. For example we use RecordInfo.DeletePermission to know if the current user has access to delete the current record and show/hide a button accordingly.
Hey Matthew, how are you doing?
Just a quick one to say, you are missing a closing curly bracket on the end of the javscript code.
Jon
Jon,
Thank you so much for reviewing and commenting! I’ve made the change you suggested. It will appear as soon as the page cache is cleared.
Thanks Matthew, this is really interesting and highlights the convergence of Model Driven apps and Custom Pages. I also removed the Review Modal custom page from Navigation in the Model Driven app editor.
Great article. I’ve only recently started to extend myself from Canvas Apps to Model, so being able to combine the best of both worlds is fantastic. One thing I’ve been looking to do but haven’t been able to figure out yet is how to embed a canvas app in a model form passing the current record context.
It looks like it can be done, but if you’ve looking for new articles to write … (hint hint).
Gavin,
To be honest, I’ve stopped using embedded apps since custom pages launched. I found they required several little tricks to work well. And custom pages can do everything an embedded app can out-of-the-box. Just my opinion.
But yes, I will do more model-driven apps articles in the future. No current plans to cover embedded apps though. I thank you for the suggestion, it’s always welcome 🙂
Hi Matthew. Great tutorial as always – really appreciate all your content. My first go at a modal on a custom page, I adapted to my solution table names etc and all works beautifully – so thanks. The one thing that I am stuck on though is the modal displays as in the image attached – with the buttons cut off halfway. Have you come across this before?
Got the same issue. I think there are a few instructions he isn’t providing that are key for the dialog and component sizing.
Tried reducing the height of the input text? try 110 or lower. Worked for me
Thanks Matt
Hi Mathew, great article! I found your blog from the XrmToolCast episode you were on recently 😉
I wanted to ask how do you then hide the custom page from the model driven app navigation section (the left panel). I want to use the custom page only as a dialog an not have the page be visible in the app site map. Do you have any recommendation?
Tomasz,
It must be added to the site map but I believe you can hide it in the model driven app editor properties for that page.
Hi Matthew, thanks for your nice article, it’s exactly what I need in my MD APP! But after I click the button nothing happens. I’ve check several times for my setting and cannot find any reason. Could you please give me a suggestion what could be the possible reason? Thank you!
Emily,
Unfortunately JS does not give any clues about the error. Please try to go over the tutorial again and see what was missed.
Late to respond but in case someone else is suffering, I had this exact issue. I was in a Model Driven App and trying to launch the custom page via a Command Button on a table Main Form. It wouldn’t appear. Stepped through, everything looked good. No errors in browser developer DevTools. Adding my custom page to the MDA got it working as expected. I didn’t have the page navigable on the site map. I just added it to the MDA.
Thanks for this – I was running round in circles with it not launching, but this step fixed it the problem for me 🙂
Emily,
I had the same issue because the main app was not republished (the command bar on the main form was, but not the MDA.) You have to do both.
Moreover, if you want to remove it from the navigation pane, in the main MDA, you click the three dots and remove it from the navigation: the page is in the MDA (mandatory) but not in the navigation.
Matt, huge fan.
In your example, the OK button appears to update the underlying Dataverse record. Would it be possible to update one (or more) of the form fields instead? This would leave those fields (and the form) in a ‘dirty’ state that the user could save or exit without saving. “Patch” writes to the record. Can I simply update the form fields from this popup custom page? I can do it from a JS function. What about Fx?
Eric,
No, this is not possible with Power Fx. It can only update the record and set the form.
Hi Matthew! Thanks for the article it’s really useful.
I wondered if it would be possible to use a lookup field to provide a list for the user to choose from in the modal?
Emma,
Yes, you can definitely add that feature.
great step-by-step tutorial as usual, thanks a lot!
Gordon Freeman,
I appreciate you saying that. It takes a lot of effort to craft these.
Hope you can escape the Combine. Long live the resistance!
Hi Matt…love your tutorials and content. I didn’t see a comment about this…and I am going to test here in a second, but I noticed in the js you have firstSelectedItemId as the second input parameter, but in the command button parameters you set the second parameter as FirstPrimaryItemId. I am using this on a form and was getting blank using firstselected on both, so I am going to try firstprimary on both. I assume they should be the same.
Hi Matt,
Is there a reason why in script you have firstSelectedItemId but later in Parameter2 you select FirstPrimaryItemId?
This article is very good
If I add the Custom page to the Tab of the Form. There is no option to send Parameters. Even the modeldrivenformintegration component not available if I don’t edit in Classic mode.
Thank you so much. I really want to know how to achieve the same from the view itself. Let’s say I have got a view for a table, I select one record and then click on a button, a modal pop-up opens containing a custom page and off course getting the record on the App-Start of the custom page.
This was a great revelation to me, and we use it a lot in the work I do now. Just wondering, the title area appears just white. Is there a way to control the background colour of the title area please? Any tips would be great. Many thanks for this tutorial.
Ash,
Not that I know of.
Hi Matthew,
Really appreciate your step by step tutorial, I have canvas app and is there a possibility to convert to page without change a application functionality
John,
Not that I know of unfortunately.
It gets refresh even click cancel button and close dialog also but I want only ok button click only needs to refresh what I do