Make Your First Custom Connector For Power Automate And Power Apps

There are currently over 500 connectors for Power Automate and Power Power Apps that allow us to interact with other web services. But what if the connector you want to use does not exist? Custom connectors make it possible to create our own connectors for any web service that has a REST API. We can define triggers and actions based on our own requirements and the best part is once built custom connectors are re-usable in any project
In this article I will show you how to make your first custom connector for Power Automate and Power Apps.
Introduction: The Currency Conversion Custom Connector
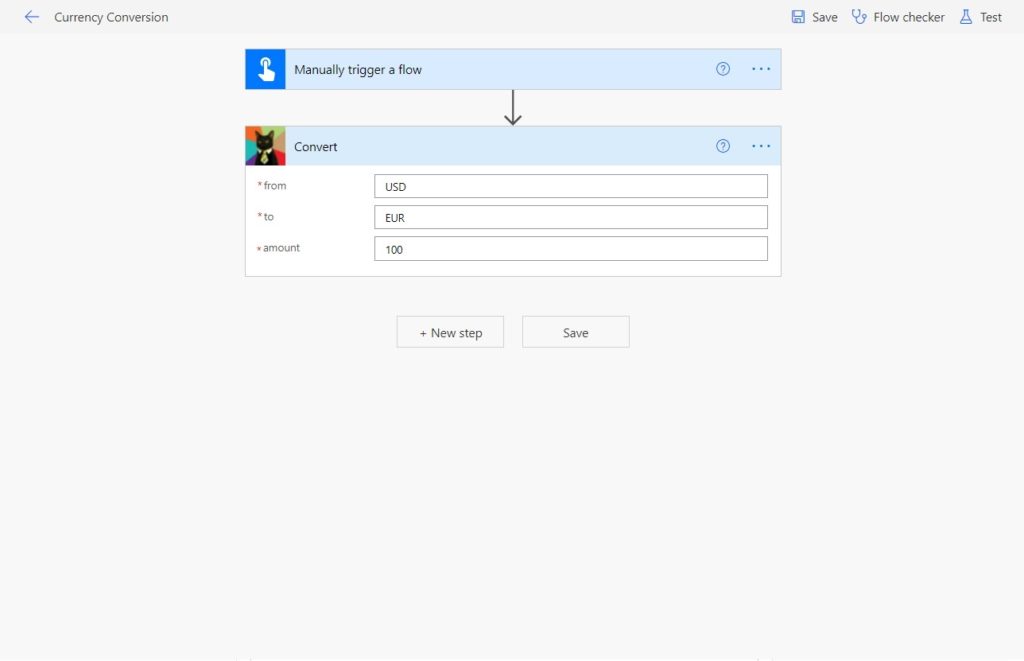
In this tutorial we will make a customer connector to perform currency conversions with the Currency Scoop API. The custom connector will take in a base currency then convert it to a specified amount. It will available for use in Power Automate and PowerApps as shown below.
Obtain A Currency Scoop API Key
Currency Scoop is an independent service outside of the Power Platform. It provides an API with foreign exchange rates and other financial information.
To use the Currency Scoop API obtain an API key by creating a free account. API keys have a dual purpose: they act as both a unique identifier to track your usage of an API and as password to prevent unauthorized users from consuming an API.
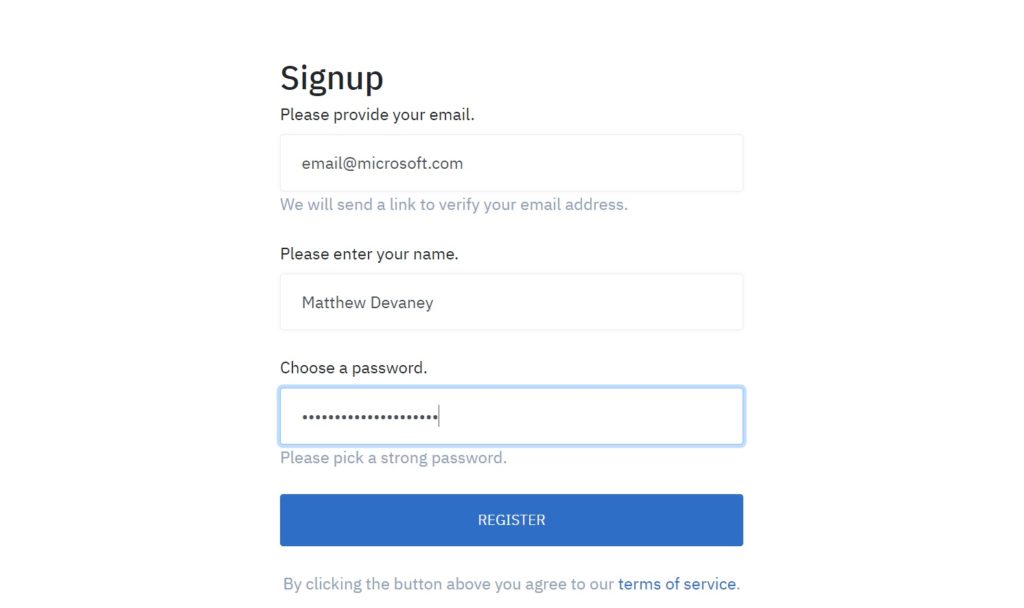
Open the Currency Scoop website and sign-up for an account.

Input your email, full name and password. A link will be sent to verify your email address
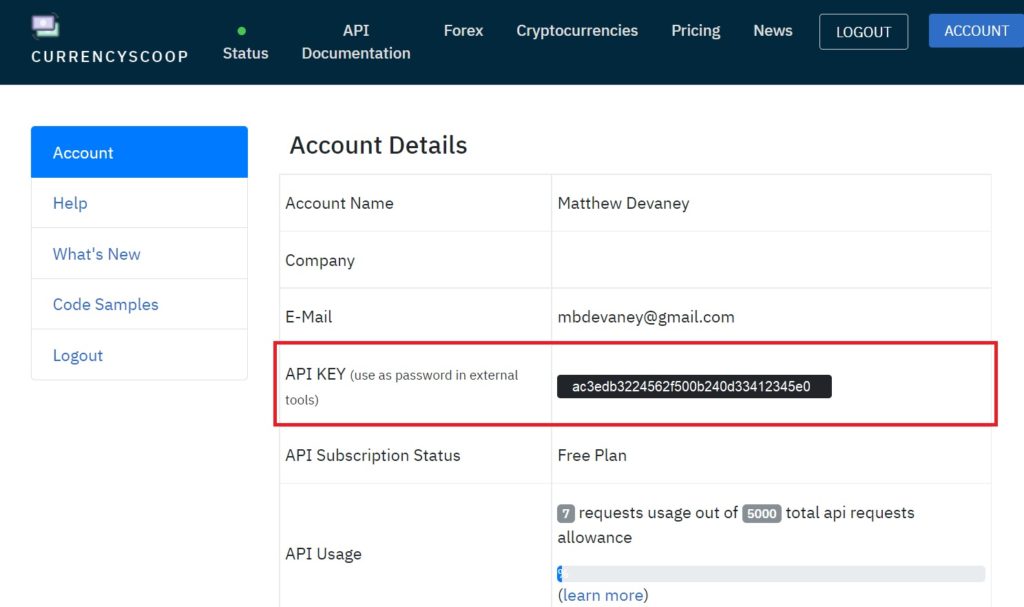
Once your email address is verified login to your newly created account. You will see your API key on the Account Details page. Keep this tab open on your web browser until this tutorial is completed since we will require it several times.
Review The Currency Scoop API Documentation
When understanding how to use an API for the first time we should read its documentation. The Currency Scoop API Documentation tells what features are available, how to request information and show examples of what the API’s output (called a response) will look like.
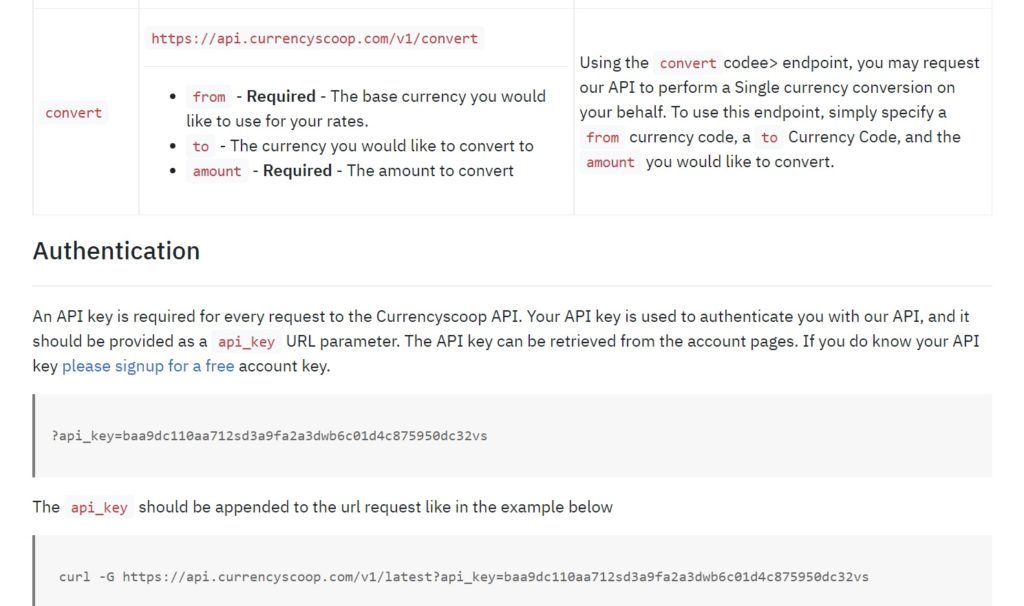
We fill use the Convert feature of the API to perform a currency conversion. The documentation tells us we can use a URL like this…
https://api.currencyscoop.com/v1/convert?api_key=ac3edb3224562f500b240d33412345e0&from=USD&to=CAD&amount=1Code language: JavaScript (javascript)
…to return a response like this with the result. Give this a try for yourself by copying and pasting the URL above into a new web browser tab and substituting the sample API key with your own.

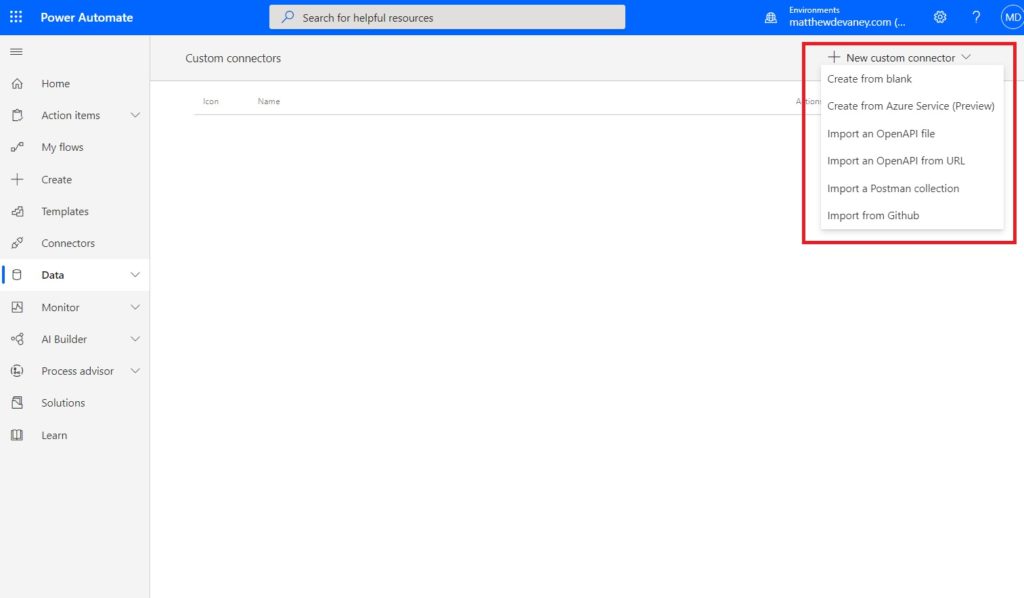
Create A New Custom Connector
Now that we’ve done the required pre-work its time to make our custom connector. Login to Power Automate, expand the data section on the left-navigation menu and select custom connectors. Then start a new custom connector and choose the create from blank option.
Fill-In Custom Connector General Information
Once the custom connector editor is open the first thing we must do is give our connector a name that describes which API it uses: Currency Scoop.
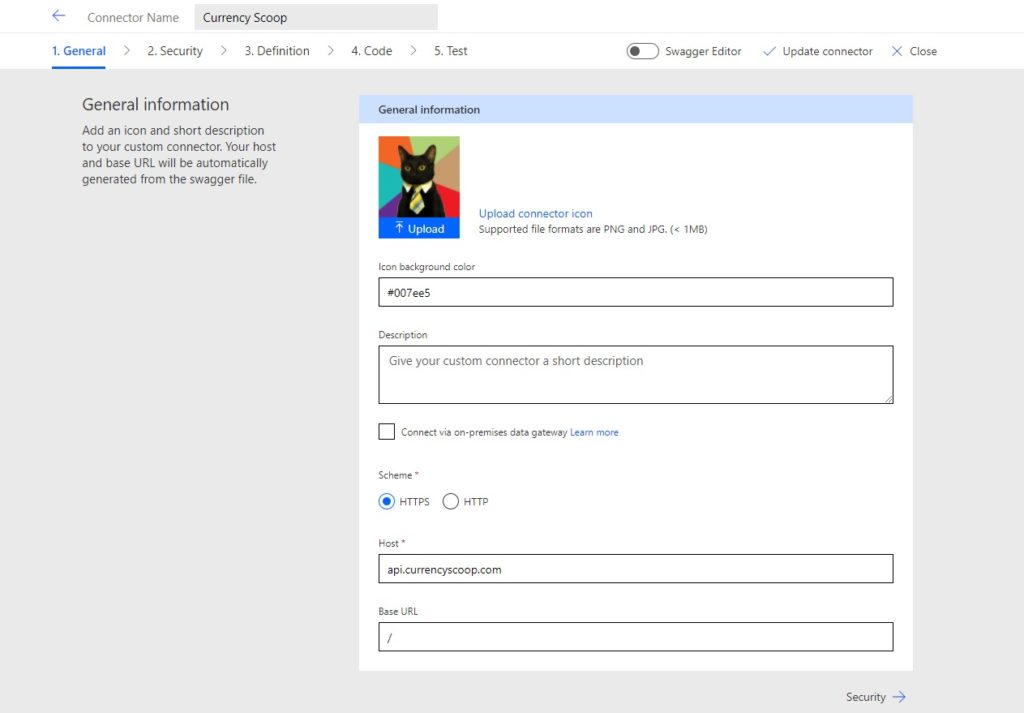
Then upload a connector icon of your choosing (optional) and fill in the general information tab with the following values from our sample URL.
:
| Field | Value |
| Scheme | HTTPS |
| Host | api.currencyscoop.com |
| Base URL | / |
Here’s our sample URL for reference. Take a moment to understand where the values we used came from.
https://api.currencyscoop.com/v1/convert?api_key=ca7bde2665298f055a630b66192302f7&from=USD&to=CAD&amount=1Code language: JavaScript (javascript)
Apply Custom Connector Security Settings
Next we will setup authentication so our custom connector is allowed to access the Currency Scoop API.
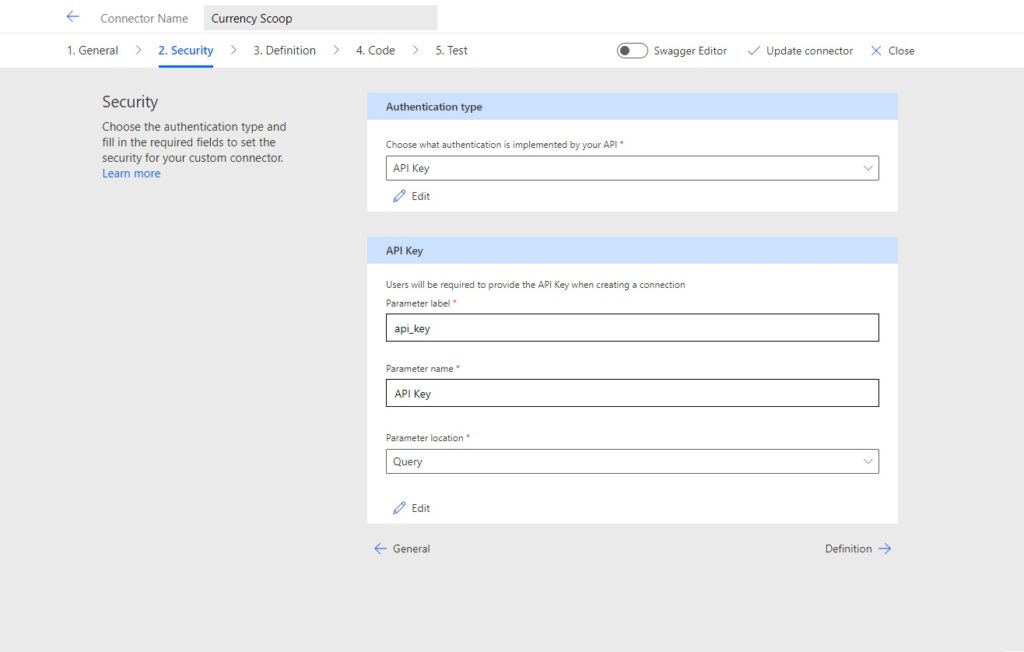
Choose the API Key authentication type then fill-in the API section with these values:
| Field | Value |
| Parameter label | api_key |
| Parameter name | API Key |
| Parameter location | Query |
Once again, here’s our sample URL. Notice there are several pairings of [fieldname=value] found after the question mark (?) symbol. These are known as the query parameters. The API key is one of 4 parameters found in the URL.
https://api.currencyscoop.com/v1/convert?api_key=ca7bde2665298f055a630b66192302f7&from=USD&to=CAD&amount=1Code language: JavaScript (javascript)
Define An Action For A Custom Connector
Custom connectors can have one or more actions. In this tutorial on currency conversion connector will only have one action but we could extend it to have more later on. The Currency Scoop API Documentation outlines several other features beyond convert such as: latest, historical, timeseries, etc.
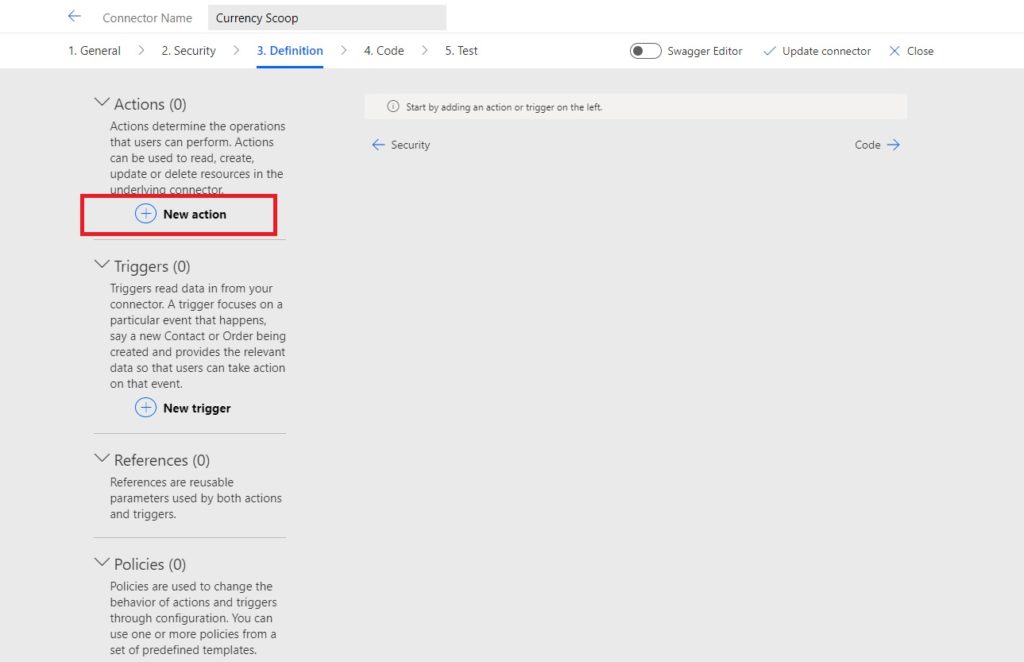
Go to the definition tab and select New Action.
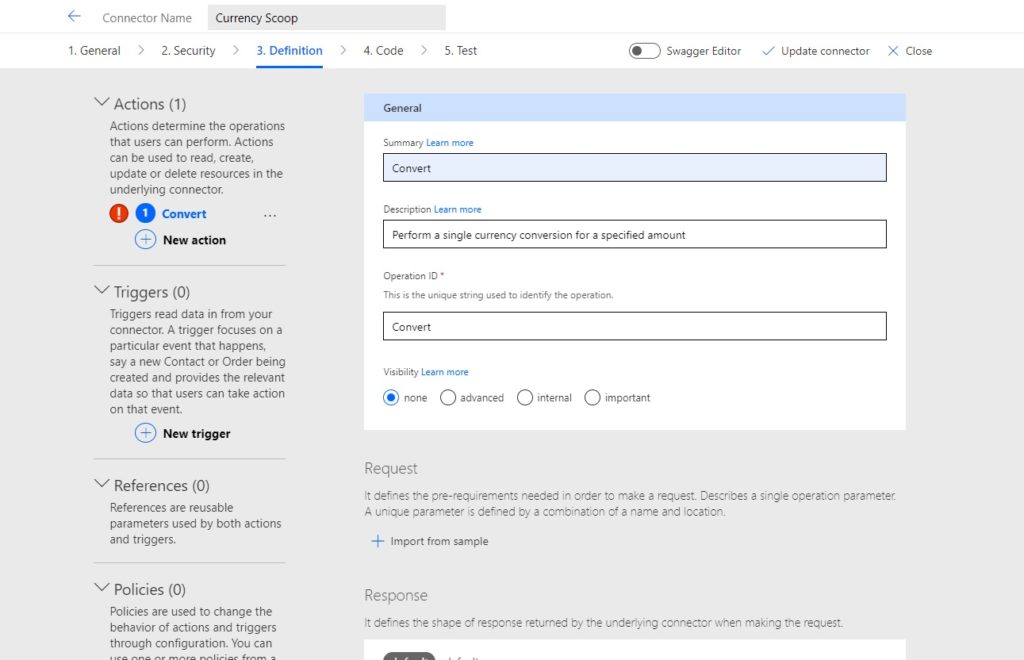
Fill-in the General section with a summary, description and operation ID. The summary and description will be show in Power Automate to identify the action whereas Operation ID will be used in Power Apps. Operation ID must be a text string with no spaces.
Import Request From A Sample URL
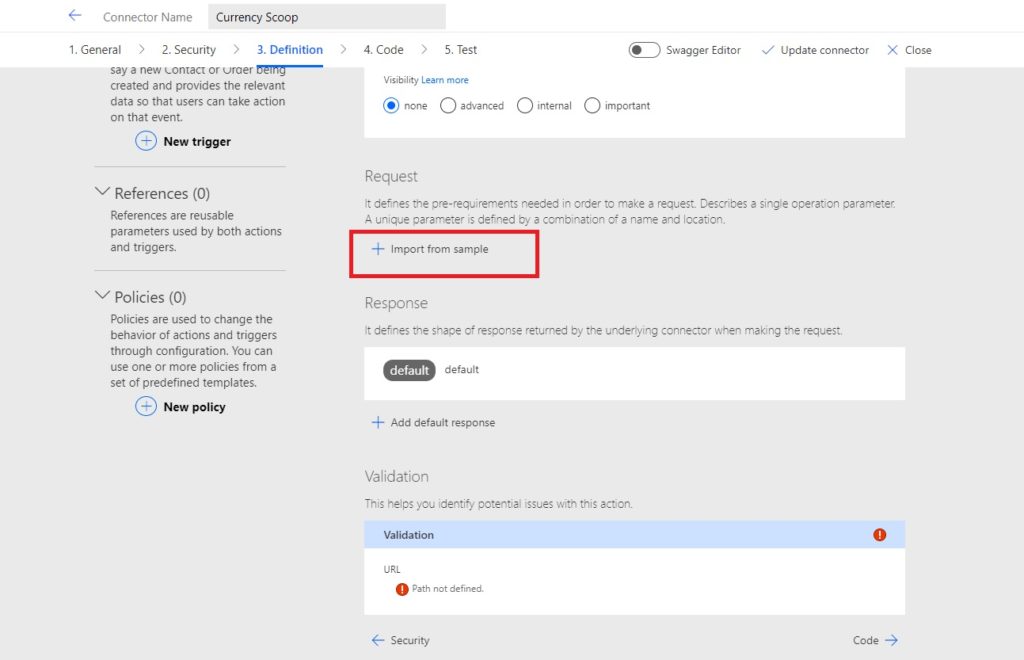
The purpose of a request is to ask the API which information to retrieve. A typical request includes the feature we want to use and the parameters we want to filter the query by. Click Import from sample in the request section.
The Verb list shows a standard set of API request types. We want to use the API to query and retrieve data from Currency Scoop’s database so we choose the GET request. GET is the most popular type of API request along with POST which is used to write data to a database.
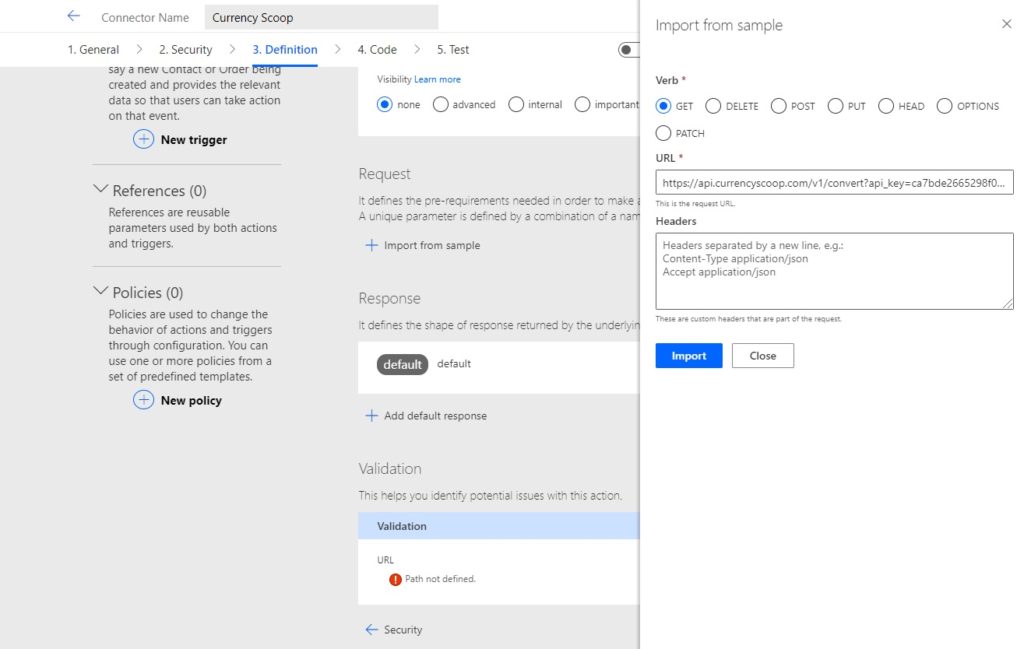
Copy and paste the sample URL we’ve been using into the URL field. Then click Import.
https://api.currencyscoop.com/v1/convert?api_key=ac3edb3224562f500b240d33412345e0&from=USD&to=CAD&amount=1Code language: JavaScript (javascript)
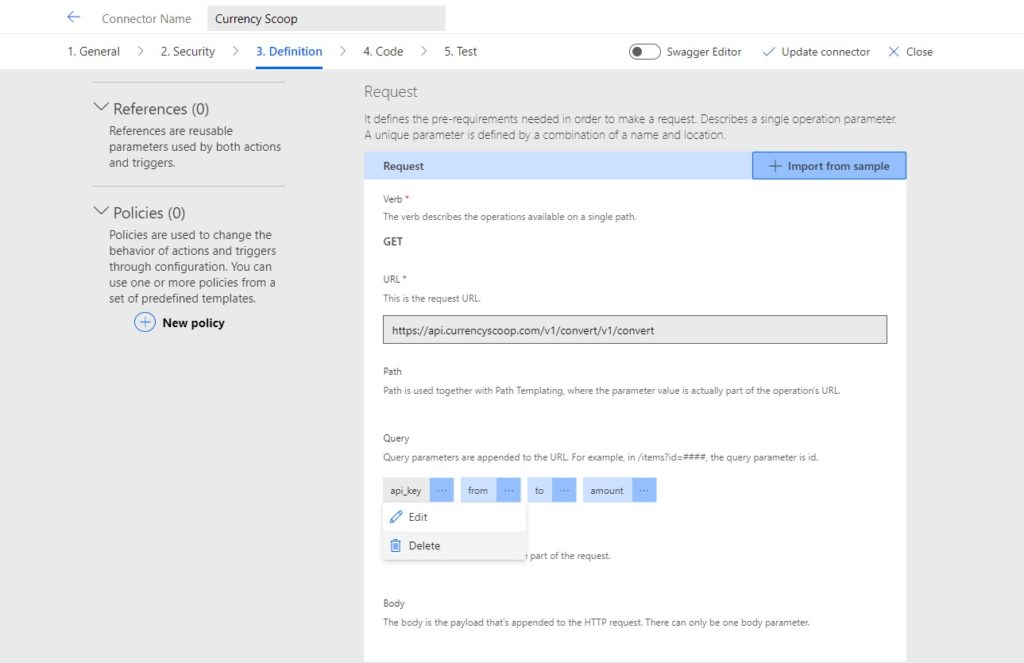
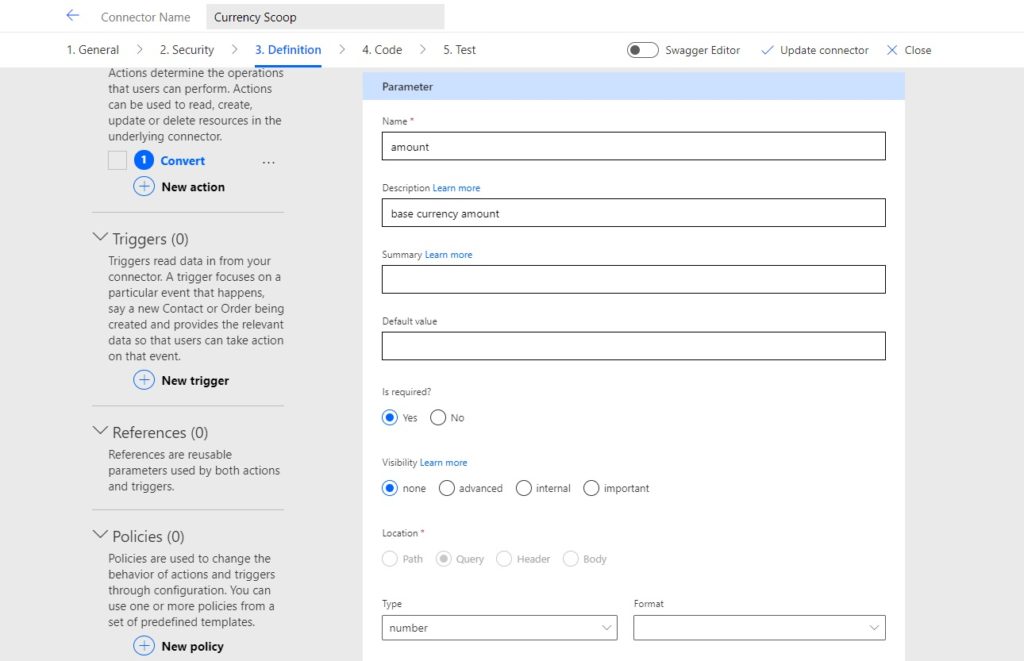
Define Query Parameters For The Custom Connector
When we import the sample URL its query parameters appear in the Request section. We must setup each of the parameters. Begin by deleting the api_key parameter. It is not needed because we already added it in the security section.
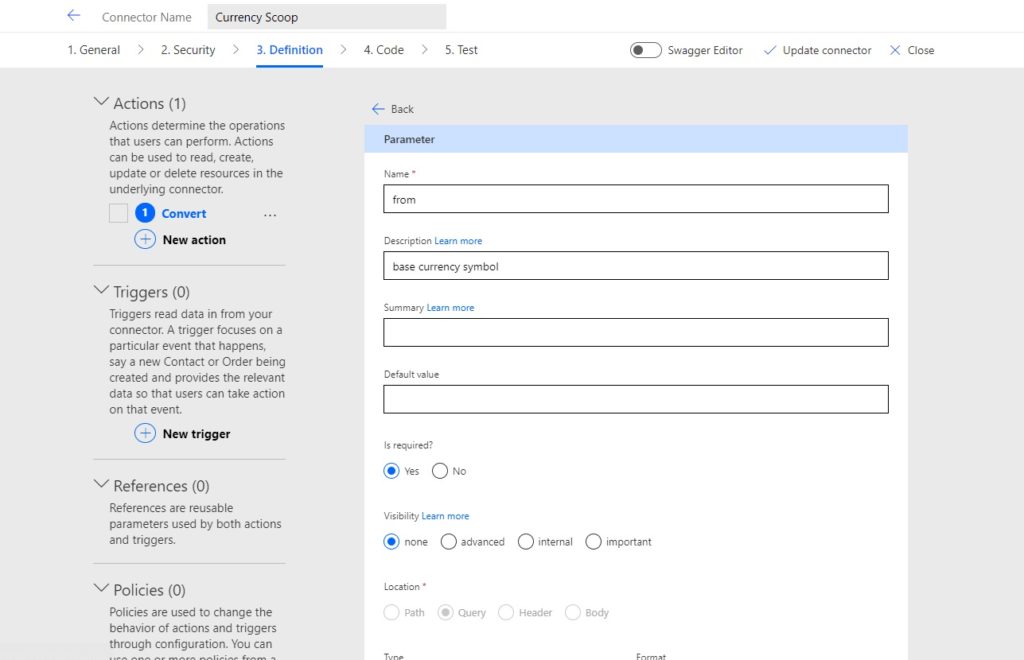
Edit the from parameter…
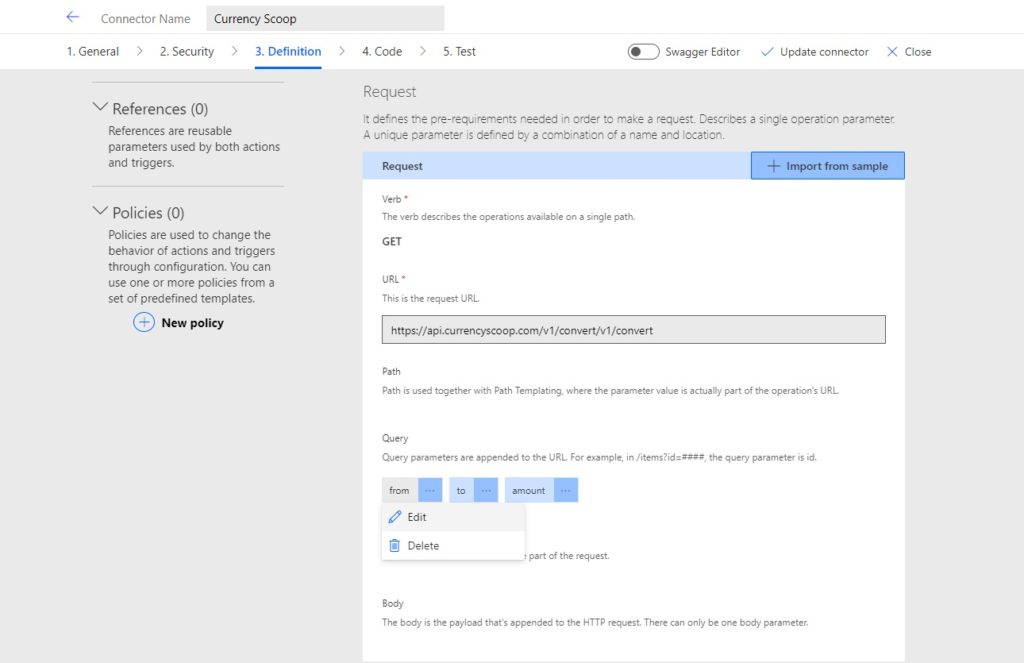
…by supplying a description and change the required setting to Yes.
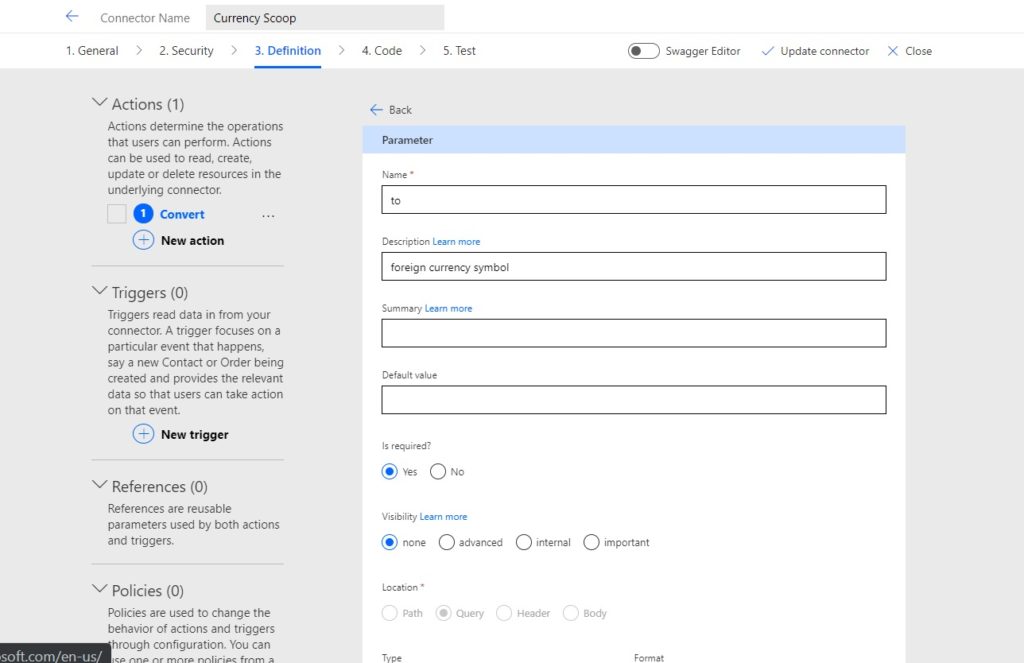
Then edit the to parameter and the amount parameter and set them up in the same way.
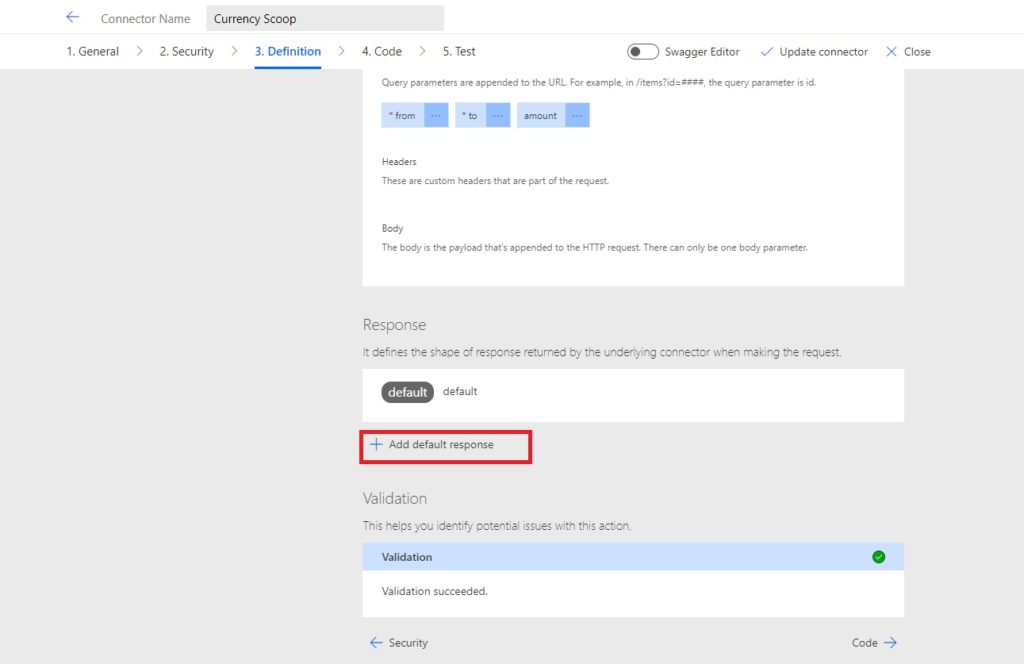
Add A Default Response To The Custom Connector
In final section of the definition section we must describe the structure of the API response. A response is the data the API call returns and is usually in the form of a JSON object. Click on the add default response button.
Input a sample of the response JSON into the body section and click Import. The response can be obtained by copying and pasting our sample URL into the web browser.
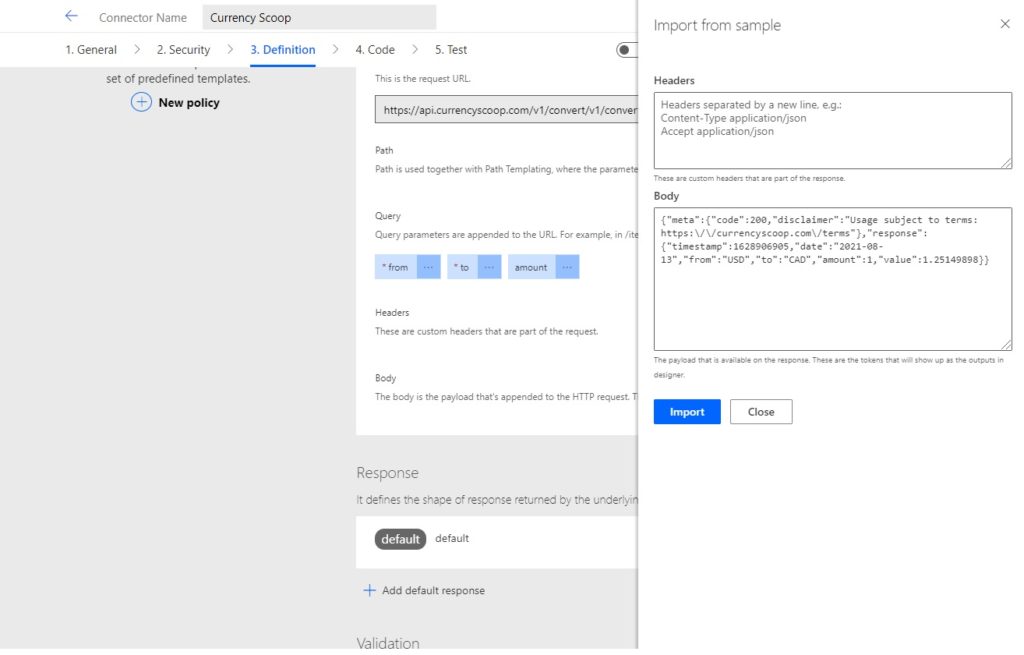
The sample response should look like this:
{
   "meta": {
     "code": 200,
     "disclaimer": "Usage subject to terms: https://currencyscoop.com/terms"
   },
   "response": {
     "timestamp": 1628942872,
     "date": "2021-08-14",
     "from": "USD",
     "to": "CAD",
     "amount": 1,
     "value": 1.25154843
   }
 }Code language: JSON / JSON with Comments (json)
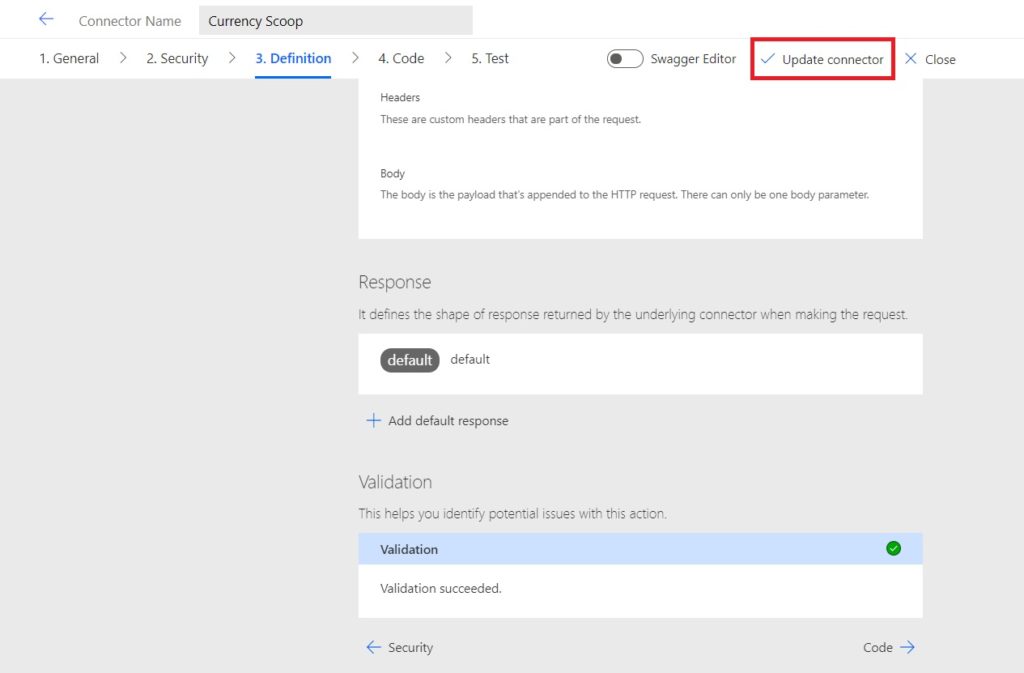
Save The Custom Connector
We’ve completed the definition for our convert action so now would be an excellent time to save our progress. To do this select Update Connector on the top menu.
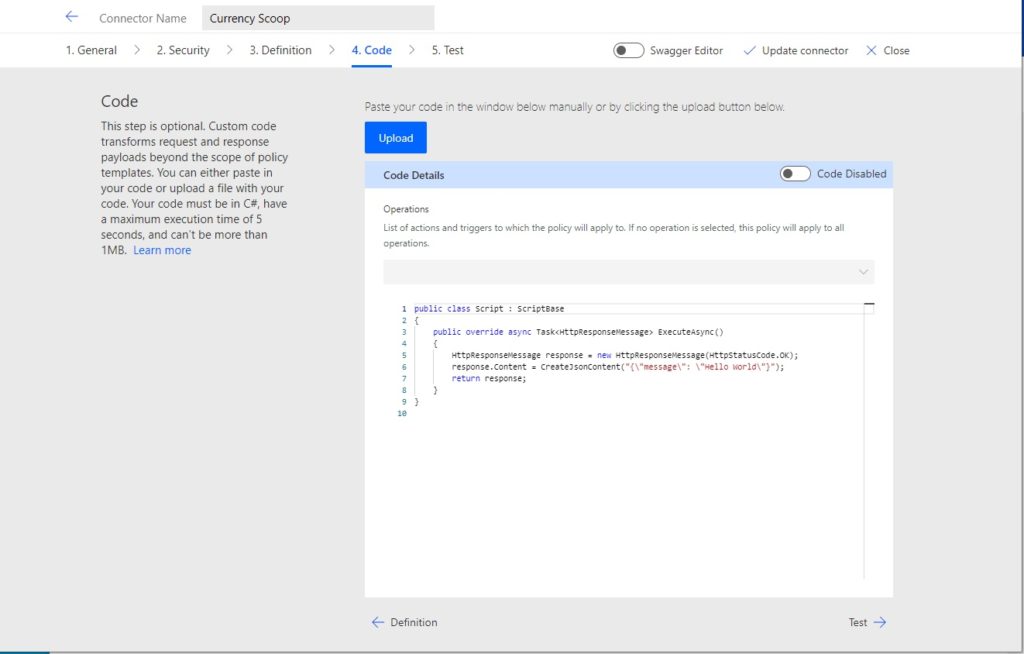
Transform The Custom Connector Response With C# Code (Optional)
The code section can be used to reshape the response of the custom connector using C# code. This is an advanced topic and is not necessary to build our first connector so we will skip it. If you want to know more about what this screen does and how to use it check out my article: transform a custom connector response with C# code.
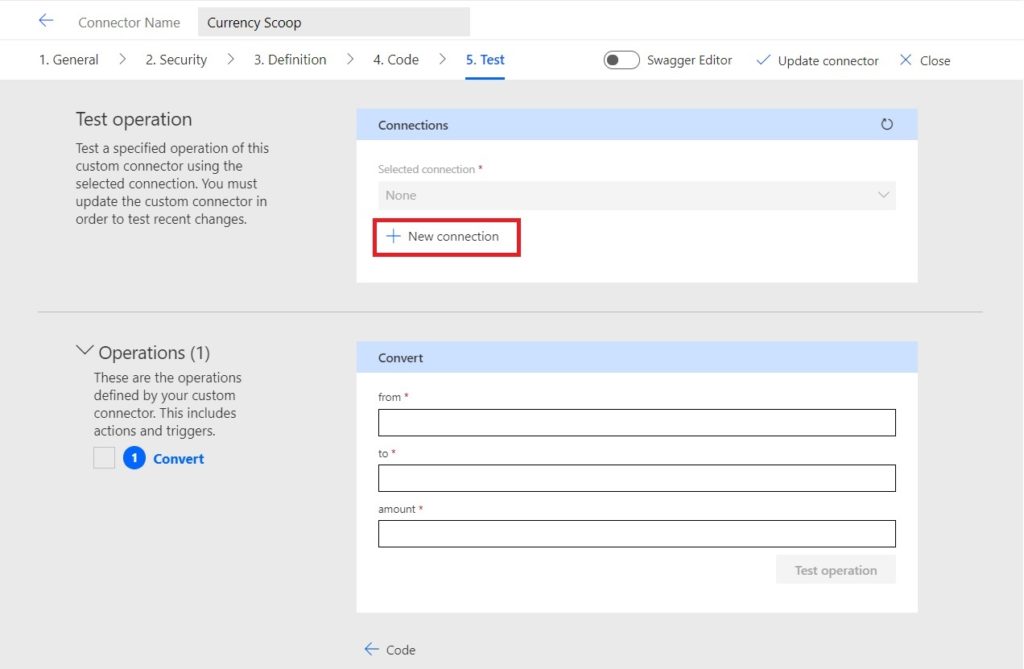
Test The Custom Connector
Before we can use the custom connector in Power Automate or Power Apps it must be tested. Click on the add icon to create a new connection.
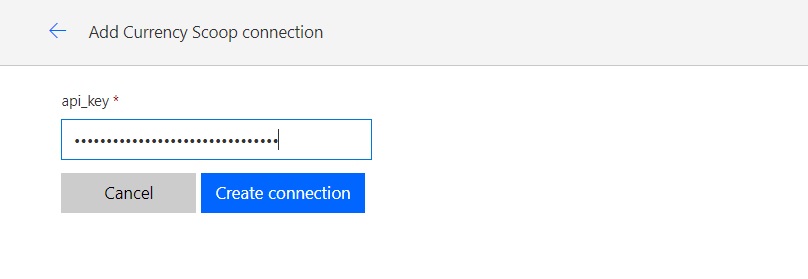
A prompt appears to input the api_key because this is the authorization type we chose earlier on. Use the Currency Scoop API key you obtained here and click the create connection button.
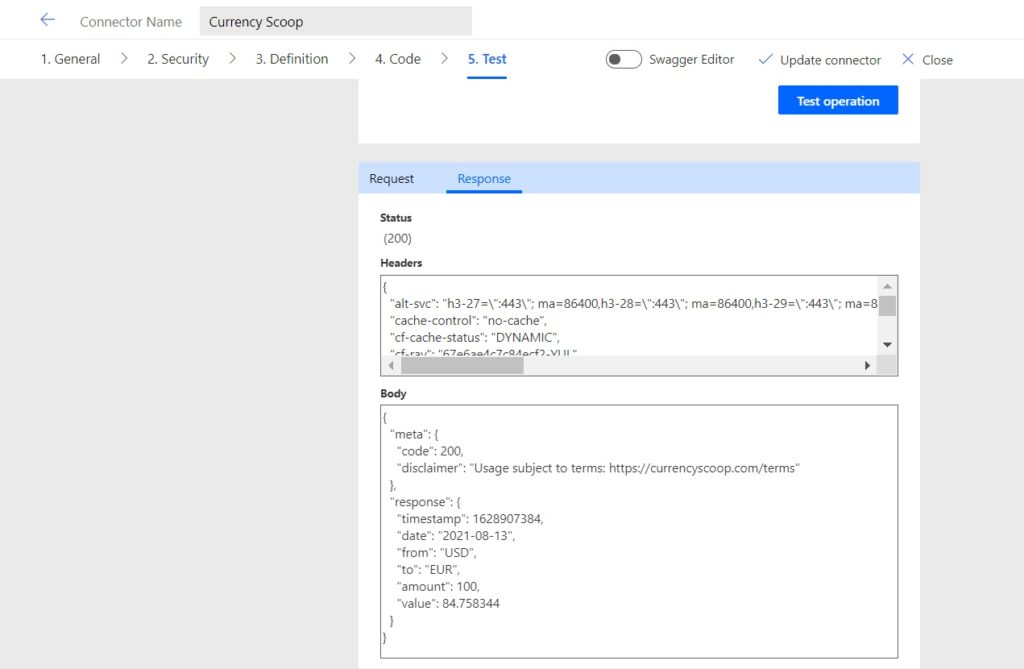
Back on the Test screen click the Refresh icon and choose the newly create connector in the selected connection field. Then input the following parameters in the Convert section and press the Test Operation button.
- from: USD
- to: CAD
- amount: 100
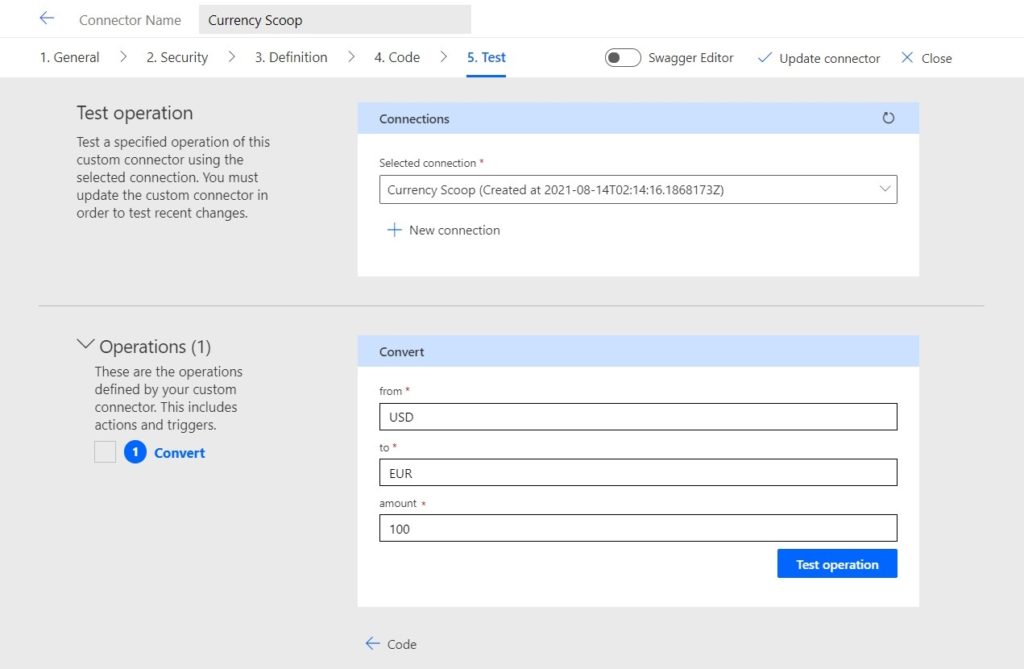
Once the test is completed scroll down to view the response. In the body section we can see the value of USD $100 is equal to $EUR 84.758344 at this moment in time.
Use The Custom Connector In Power Automate
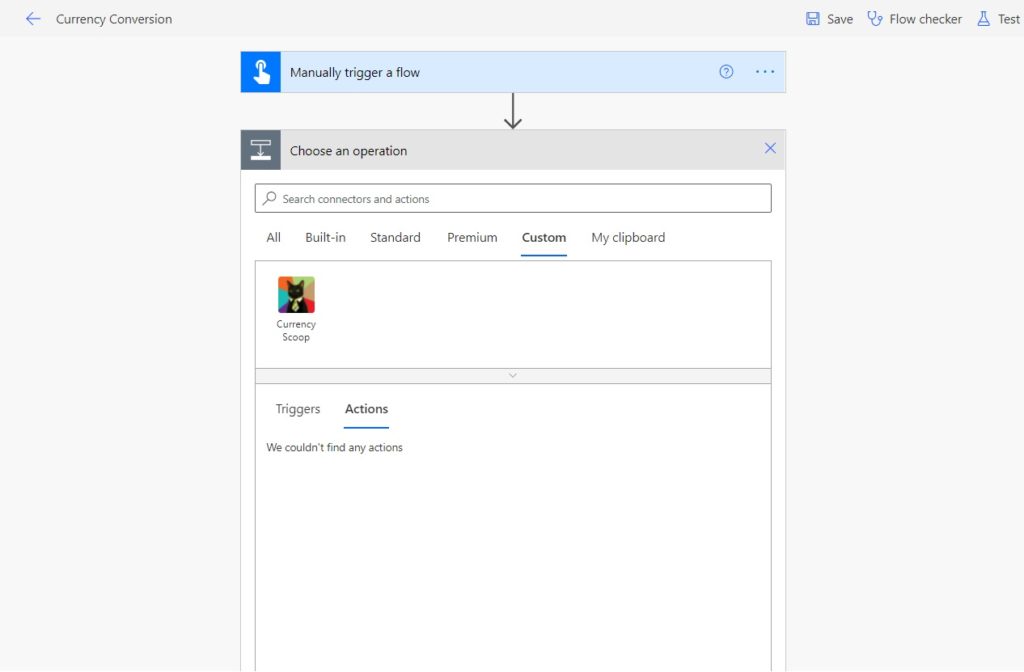
Our custom connector is now ready to use in Power Automate so lets give it a try. Create a new instant flow with a manual trigger button. Then create a new custom action, choose the Currency Scoop action and select the Convert action.
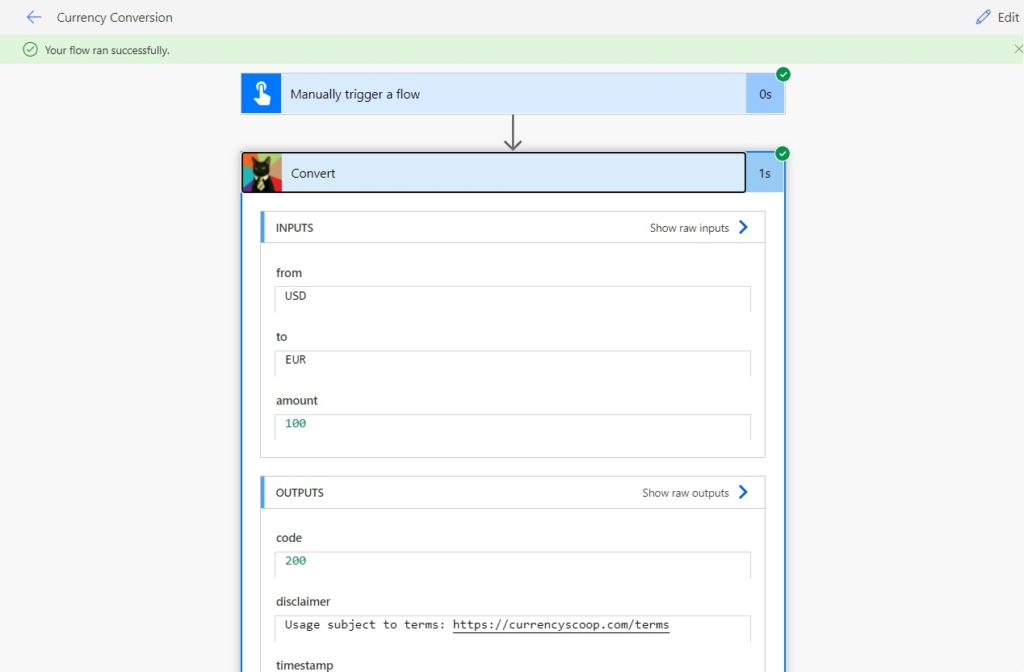
Fill-in the Covert action parameters as shown below then Save the Flow and click Test. Choose to run a manual test.|

The flow will perform a test run and output the JSON response as values.
Use The Custom Connector In Power Apps
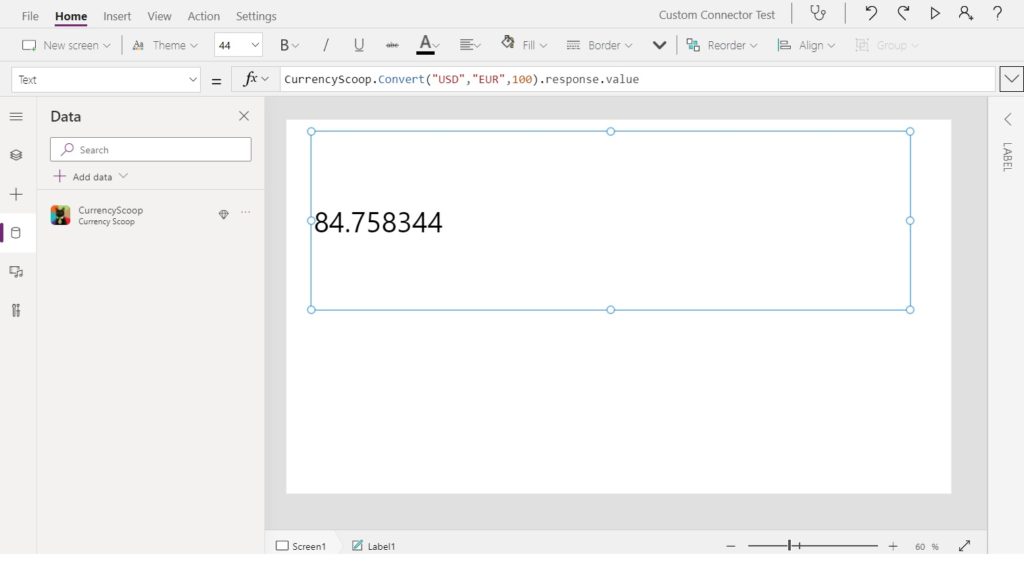
We can also test the custom connector in Power Apps. Create a new app from blank then add the Currency Scoop custom connector. Insert a label onto the screen and use this code in the Text property.
CurrencyScoop.Convert("USD", "EUR", 100).response.valueCode language: CSS (css)
The value of the converted currency will be shown just like the image below.

Did You Enjoy This Article? 😺
Subscribe to get new Copilot Studio articles sent to your inbox each week for FREE
Questions?
If you have any questions or feedback about Make Your First Custom Connector For Power Automate And Power Apps please leave a message in the comments section below. You can post using your email address and are not required to create an account to join the discussion.


That was amazing, so simple and very useful!! Thank you Matthew, your instructions are always clear and helpful.
Lydia,
Thanks for the compliment. Clear and helpful is the goal I have when writing 🙂
excellent,Thank you Sir
Babu,
Many thanks. I wish you luck in building a custom connector.
Any hints on how to fix a custom connector that works in preview but not when published? I made your navigation bar and it works fine during building, but when I access the app published, it just loads in the sample data instead of the data it shows in preview.
Joe,
I’m a little confused, what’s this navigation bar you are making reference to? I don’t believe there is a nav bar in this custom connector tutorial that the comment makes reference to.
Hi, technically it’s for this post: https://www.matthewdevaney.com/power-apps-navigation-menu-component/ but the commenting is off on there. This post seemed the closest relevant one that I could raise the question as, in theory, it could happen to any custom connector.
Joe,
I was confused about your question until I realized you are using the words ‘custom connectors’ and ‘components’ interchangeably. They are actually two different things!
I’m not sure what is meant by “the component only works in preview.”
Very nice writeup, with great detail. Many thanks for sharing!
hey i am nikita here , my question is i am using post method in request and after on testing the custom connector i am getting hello world in body response and the api is not actually hiting from the backend. can u please give me solution of my query ?
Nikita,
My example uses the GET method to retrieve information. Are you doing my example or are you building another custom connector?
Sir i am using post method.
Nikita,
If you are trying to follow my example to make a currency conversion connector with the Currency Scoop API you should be using the GET method.
sir i am building another custom connector using post method but the api is not hiting from backend.
Nikita,
I suggest you post this question to the Power Automate forums and supply the following information
* API you are building a custom connector for
* Documentation for the endpoint you are making an action for
* A detailed description of what you have done so far, what the error message is and what you have tried
Make sure to supply all of the information needed for the helper to replicate the issue you are having.
Link:
https://powerusers.microsoft.com/t5/Connector-Development/bd-p/ConnectorDevelopment
thank you!
Great article !
I have few queries, I created Custom Connector for fetching Teams User Presence/Status using MS Graph API.
Currently App is accessible without premium license (Trial License is also not activated).
Does Users need premium license to use this PowerApp ? I have around 600 Users so which license is best fit ?
Can we Skip/prevent Fix Connection for Custom Connector ? Because every few hours Fixing connection is not suitable for Users.
Soyeb,
Yes a premium license is required for custom connectors. You can currently obtain one for $USD 5 per user if you live in North America.
If you do not want to pay for premium you can already make MS Graph API calls using the Office 365 groups connector for free.
Thanks for another useful blog post. I’m implementing this in an pricing app but each user is asked to supply the api key when they use my app. Do you know if there is anyway around this because that is a deal breaker.
I have added the api key as a query parameter with a default value instead of in the security settings. Although probably not as secure.it avoids the need to get every user in my organisation to add the API key.
Hi Matt,
just succesfully finished my first custom connector (accessing Jira via REST-API). Up to date only GET methods, but this tutorial surely acts as a good starting point for POST methods as well (at least I hope so ;-))
very much appreciated, thanks!
Volker,
You’re welcome. Best of luck with building your apps & flows using custom connectors 🙂
Here you manually define the currencies but what we can do if we to take input through canva app from user and base on input change the currencies?
Raza,
Add extra parameters to the flow inputs.
Great blog site however in this guide are you API Parameter name and label the wrong way around?
Antony,
Can you please help me identify which section of the article the incorrect information is found within?
Matt,
Apply Custom Connector Security Settings section in the image and table.
I cant get this to work, I keep getting a 401 error. Not sure what I am doing wrong, when i test it with just my api key in a url, it works fine. But when i test the connector I get:
{
“meta”: {
“code”: 401,
“error_type”: “auth failed”,
“error_detail”: “Missing or invalid api credentials. See https://currencybeacon.com/api-documentation for details.”
},
“response”: []
}
Hans,
It has been a few years since I constructed this tutorial. It’s possible it could need an update if the API name is now CurrencyBeacon instead of CurrencyScoop.
Hello Matthew,
Great tutorials to create a custom connector! I have revised each currencyscoop.com into currencybeacon.com, but still obtained the same error code 401. What’s wrong with this? so upset…
I too have the same issue.
I am also facing the same. then I decide to pass API key while importing from sample. After that I got the response from the API.
Hi Everyone, i am not sure if this custom connector api fields have been updated. But i saw another article and understood that the API key labels are not correct/updated.
The correct way should be :
Parameter Label: API Key
Parameter name: api_key
In this article its the other way round. hope it helps
Hi Matthew,
This was a very useful interesting article.
Have one issue my custom connector. I created an on-premise gateway, used it to create a custom connector to upload file to an internal api. Custom connector action to upload a file has the fields like (container, title, file ) and posts a multi-part form data to the api. when I check the action in connector’s swagger editor, I see the fields (container, title and file – which allows me to upload a file). When I use the connector in Power automate, I see the fields Container, title, body (instead of file – to post the file content), and file (file name). My api is expecting file parameter instead of body in the pay load. Is it possible to fix the connector so field with name body appears as file. API is HP trim content manager Service API, installed on our internal servers. I have no control over that. I have tried playing with swagger yaml but nothing is changing in powerapps.
Thanks
Swagger yml
post:
responses:
default:
description: default
schema:
$ref: ‘#/definitions/RecordsResponse’
summary: Create or Update Record
consumes:
– multipart/form-data
description: Create or update a Record
operationId: CreateUpdateRecord
parameters:
– name: filedata
in: formData
required: true
type: string
default: RecordContainer, RecordRecordType,RecordTitle
x-ms-visibility: internal
– name: RecordContainer
in: formData
type: string
– name: RecordRecordType
in: formData
type: string
– name: RecordTitle
in: formData
type: string
– name: Fields
in: formData
type: string
– name: file
in: formData
type: file
This was very useful Matthew, very clear and has helped me over time to build on this to create more complex custom connections.
I currently have quite a complex connector which works perfectly most of the time, however for certain parameters does not work. It doesn’t matter why and I have worked with the provider and they are not sure why either.
It does work however when I perform a Test Operation and select the Raw Body option, then paste the JSON into the Body text. This means a work around would be to send the Raw Body to the custom connector when I call the custom connector from Power Automate.
Is there a way to create an action that has a Raw Body instead of a defined JSON structure?