How To Run AS400 With Power Automate Desktop Terminal Actions

Power Automate Desktop is excellent at automating AS400 tasks. AS400, also known as the IBM iSeries, has been around since the late 1980s. Many business still use this legacy system because of its reliability, security and the ability to operate it with only keyboard commands. There are no cloud based APIs for AS400, which makes it a perfect candidate for Power Automate Desktop.
Table Of Contents:
• Introduction: AS400 Terminal Emulation
• Run The AS400 Application
• Configure The PC5250 Menu
• Open An AS400 Terminal Session (HLLAPI)
• Login To AS400 With User And Password
• Navigate The AS400 Main Menu
• Alternate: Open An AS400 Terminal Session (Micro Focus Reflection)
Introduction: AS400 Terminal Emulation
In this tutorial I will show you how to open AS400, login to the system and navigate menus with Power Automate Desktop. We will do this by using terminal emulation actions.
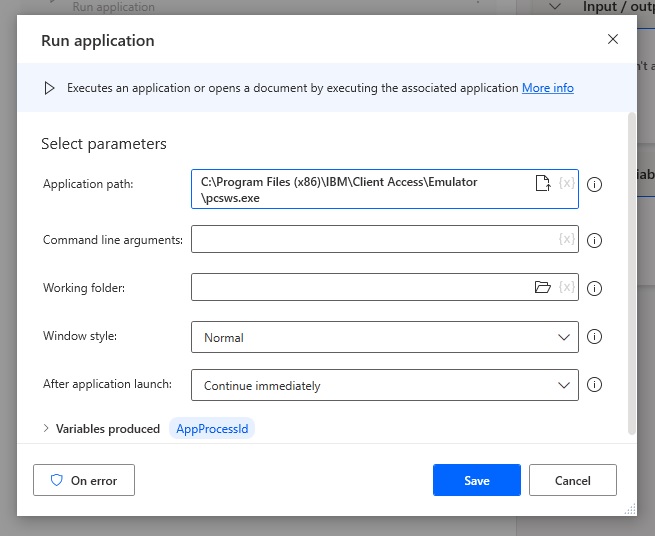
Run The AS400 Application
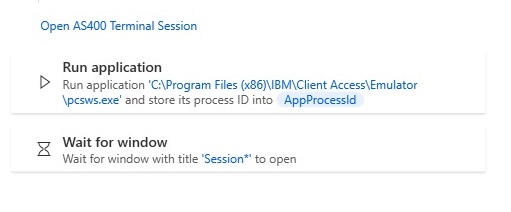
Open Power Automate Desktop and create a new desktop flow. Add the Run Application action. Fill-in with the application path parameter with the path to pcsws.exe which opens AS400. The screenshot below shows the default AS400 installation path but check your own installation to confirm the correct path.
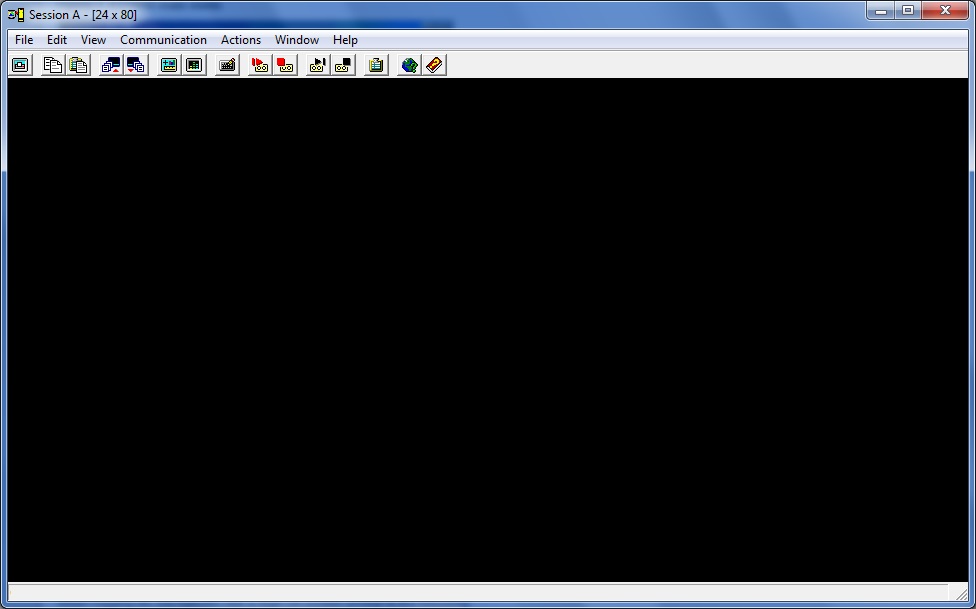
When pcsws.exe is run a new window appears with an AS400 session. In the screenshot below, the session name is “A”.
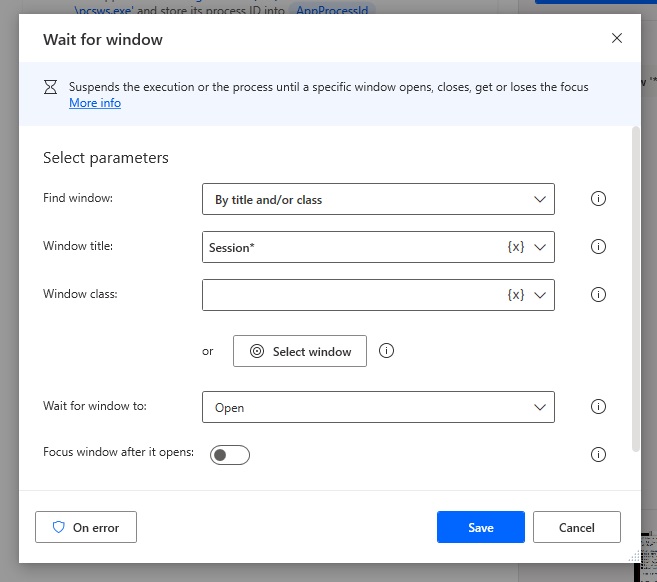
Use a Wait for Window action to ensure the session has started before more Power Automate Desktop actions are run. Set the Find window parameter to By title and/or class and the Window title to Session*. The star (*) symbol is a wildcard.
Next, insert an Open terminal session. Select the Provider HLLAPI and choose the the path to the AS400 ehlapi32.dll file. The Session name is found in the AS400 window title.
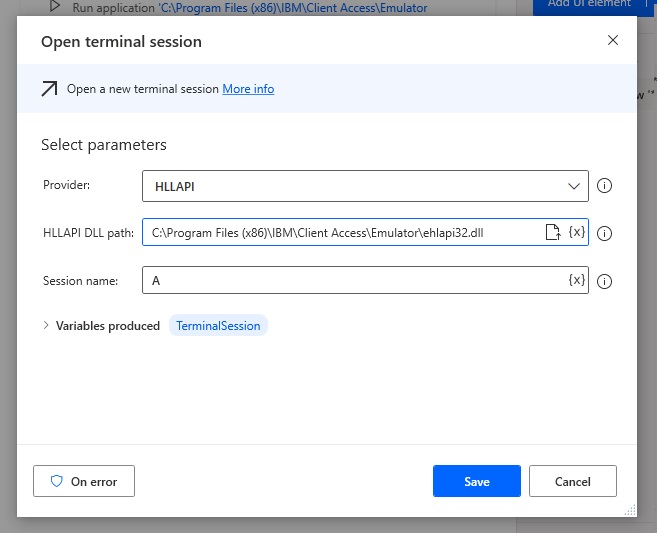
Now Power Automate Desktop can open AS400 by using these 2 actions.
Configure The PC5250 Menu
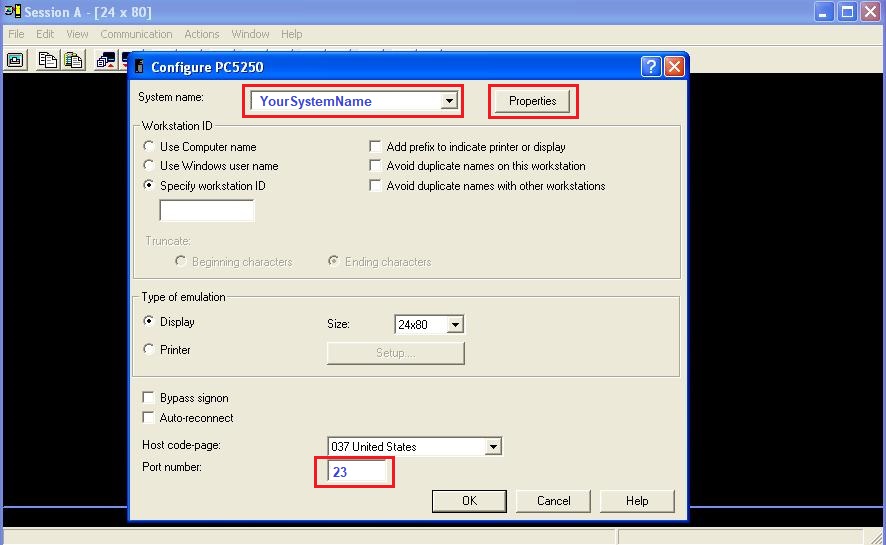
Upon opening AS400 appears asking to configure PC5250. An IBM 5250 is the type of terminal AS400 runs on.
Populate the system name text field with your system name. I cannot tell you the correct value for this. It differs for every company. Select the Radio button Specific Workstation ID. Then populate the Port number text field with the number 23. Press the properties button.
When the Connection menu appears, set the drop-down list value to Prompt Every Time. Choose Use Operations Navigator Default. Press the OK button.
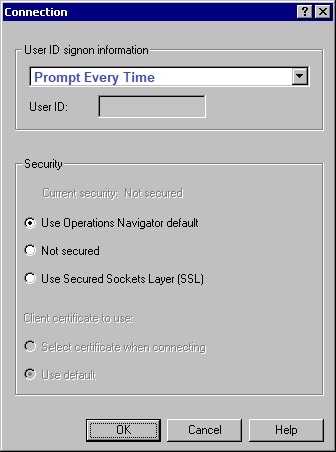
Then press the OK button on the Configure PC5250 screen.

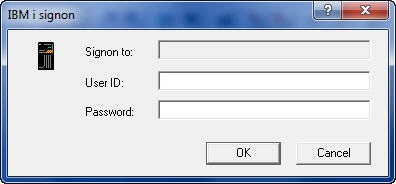
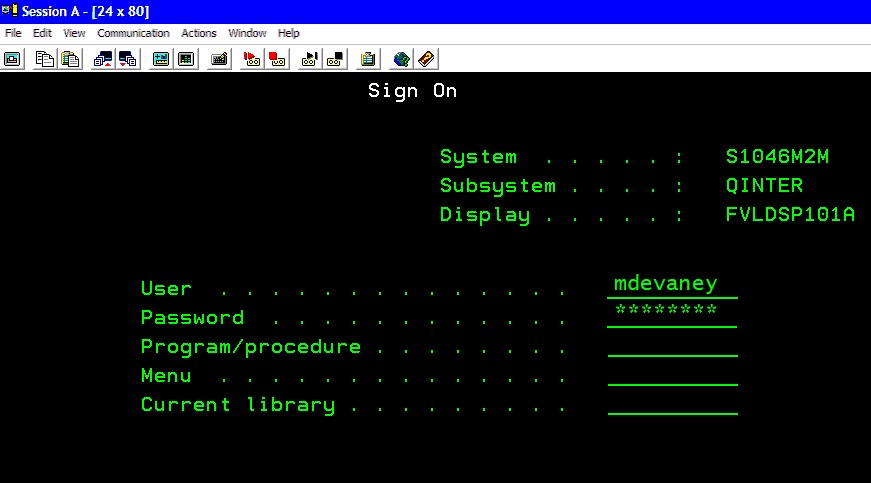
Wait for the The IBM i signon prompt to show on the screen. Then populate the UserID and password fields with values and then press the OK button.
The desktop flow actions for the previous steps look like this:

Open An AS400 Terminal Session (HLLAPI)
Once the login is successful we add an Open terminal session action.
There are 2 different providers for AS400: HLLAPI and Micro Focus Reflection. This section will show how to setup AS400 for HLLAPI. If you are using Micro Focus Reflection instead, please go here to find setup alternate instructions.

Login To AS400 With User And Password
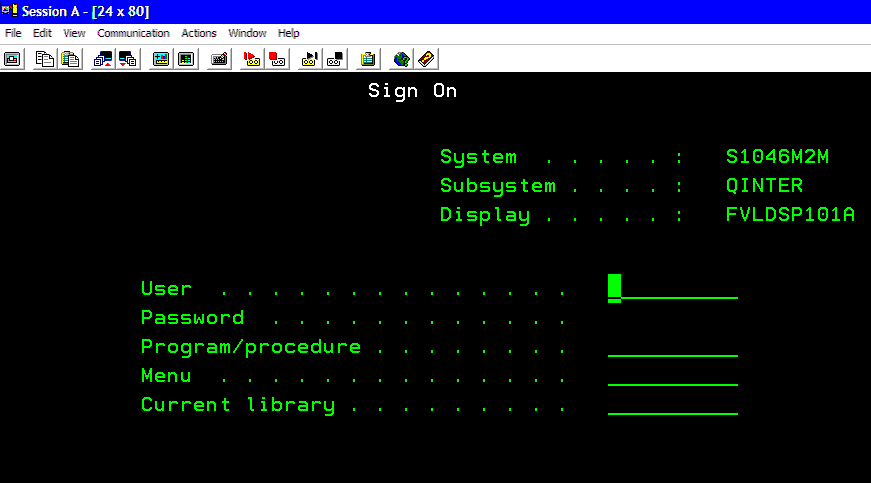
On the AS400 Sign On screen we will use Power Automate Desktop to fill-in the user and password a 2nd time.
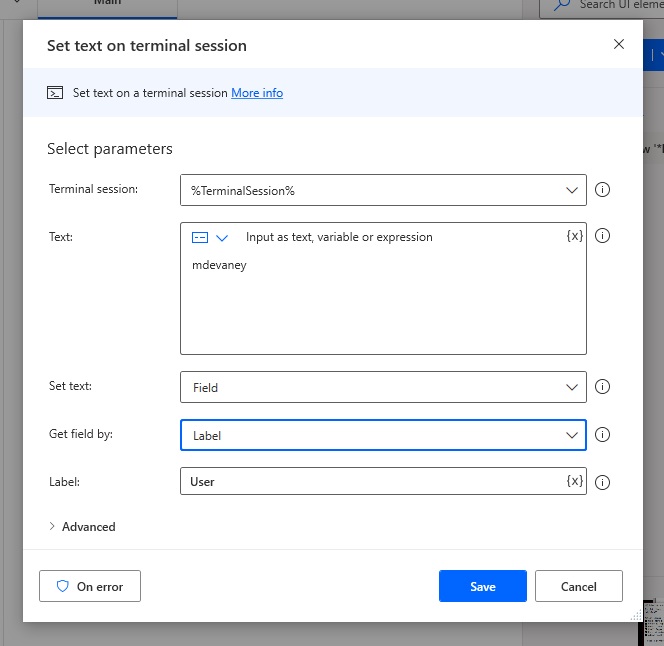
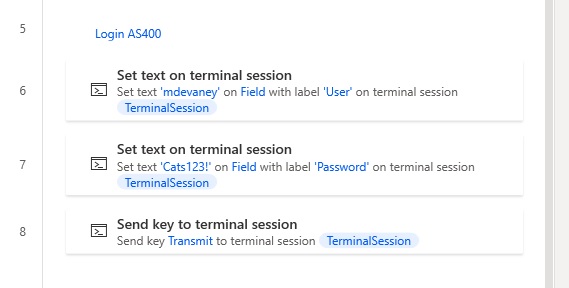
Add a Set text on terminal session action to the desktop flow. Write the username in the text parameter. Tell Power Automate which field to populate using these parameters.
- Set text – Field
- Get field by – Label
- Label – User
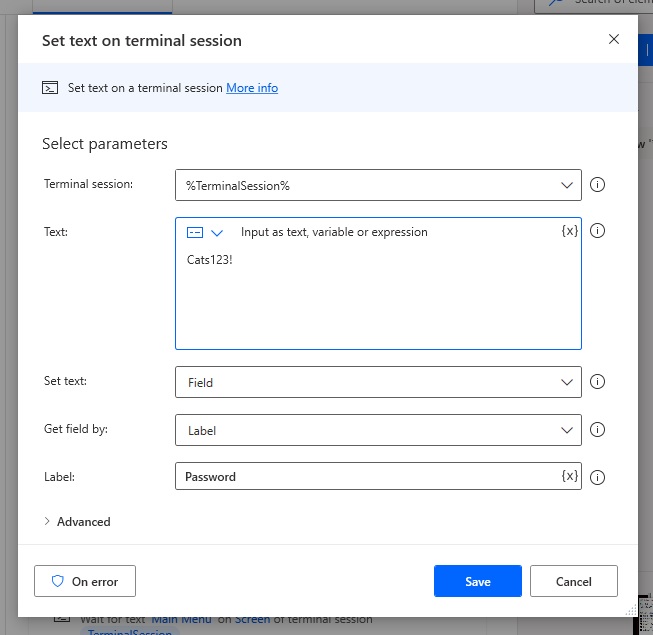
Add another Set text on terminal session to fill-in the password.
When the desktop flow runs it the login information will be entered into the fields as shown below. The final step is to press the Enter key to submit the user/password.
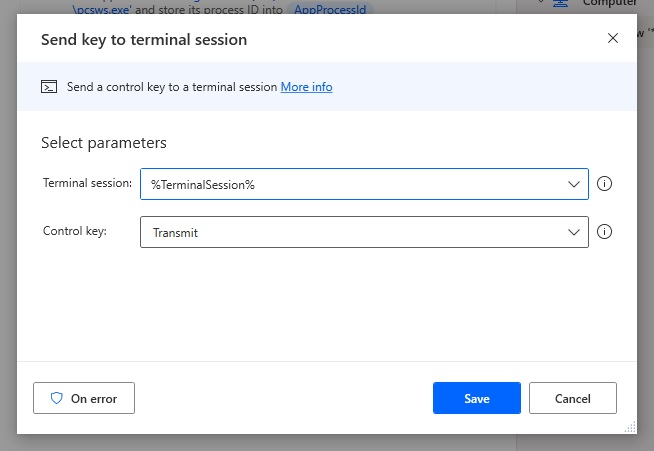
Use the Send key to terminal session action to press the Transmit button. Transmit is the same as pressing the Enter key.
The desktop flow actions to log into AS400 should look like this.
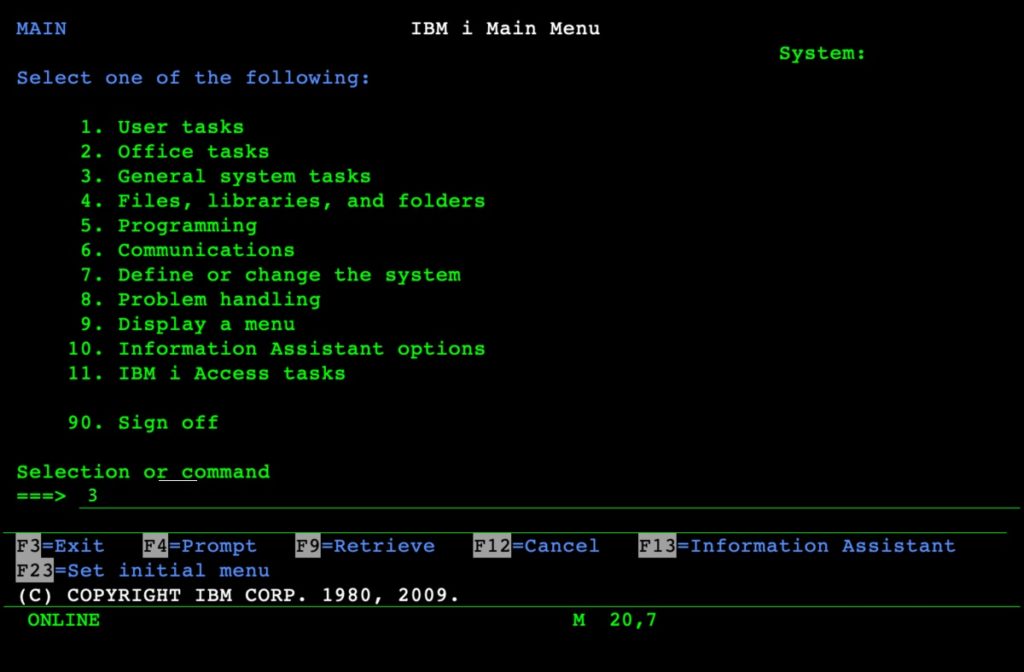
Navigate The AS400 Main Menu
The AS400 main menu will appear after we login. Next, we want to navigate to option 3. General system tasks.
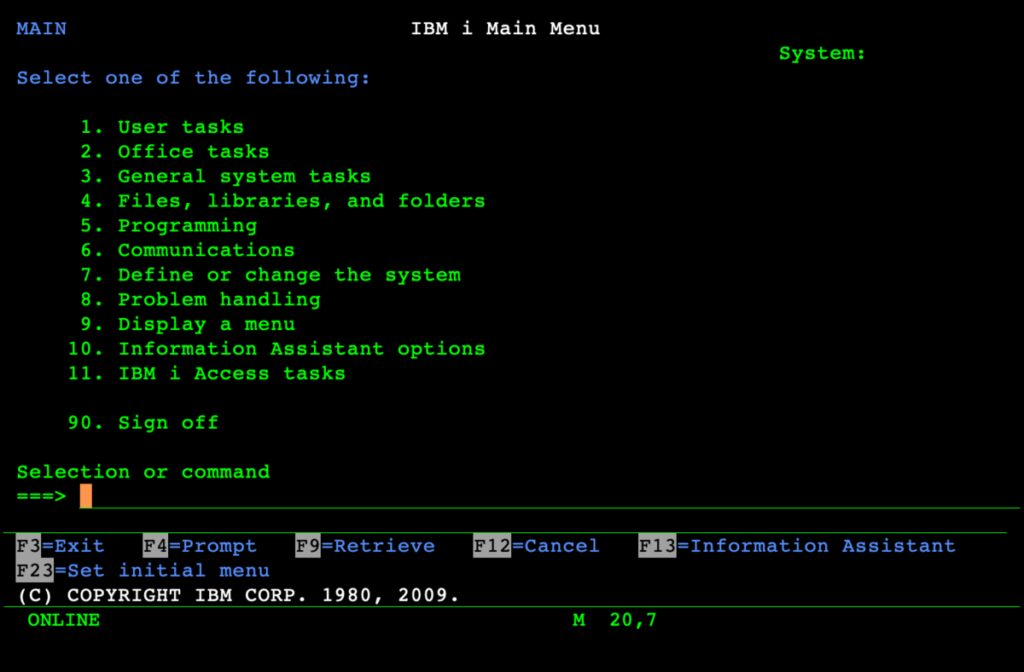
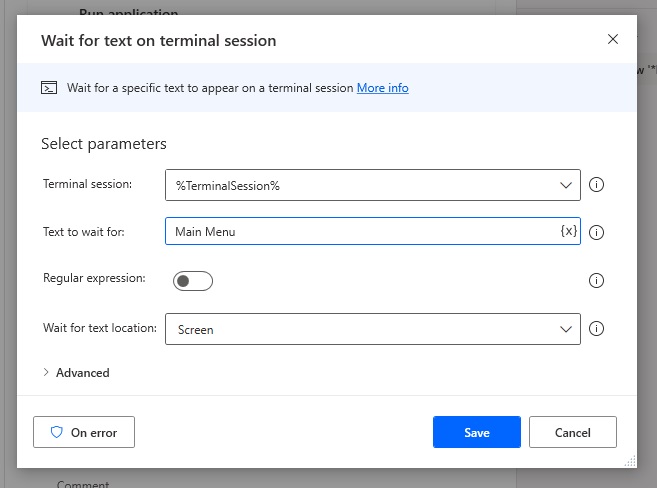
It is important to make sure the main menu has loaded before we start entering keystrokes. Use the Wait for text on terminal session action and fill the Text to wait for parameter with the words Main Menu. Select Screen as the Wait for text location.
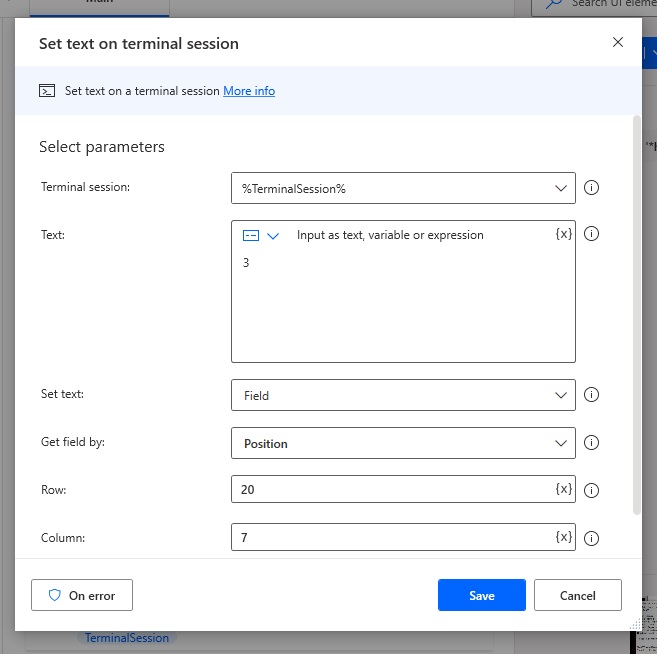
Then we will type a command into the AS400 line. Add a Set text on terminal session action. Use the Text “3” to choose the 3rd menu option.
The command line does not have a label. So we’ll Set Text based on the Field and Position of the cursor. The command line starts at Row 20 and Column 7.
Finally, add a Send key to terminal session action to Transmit the command.

Power Automate Desktop will now select 3. General system tasks and navigate to the next screen.

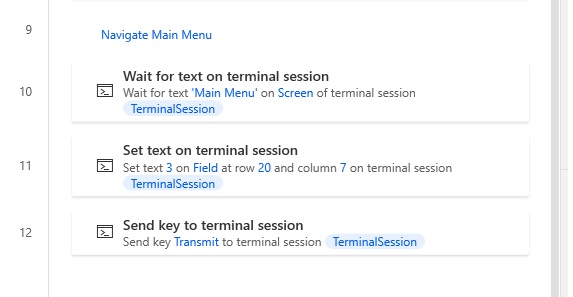
The Power Automate Desktop code the navigate to the main menu looks like this. Our desktop flow to login to AS400 and open the menu is now completed.
Alternate: Open An AS400 Terminal Session (Micro Focus Reflection)
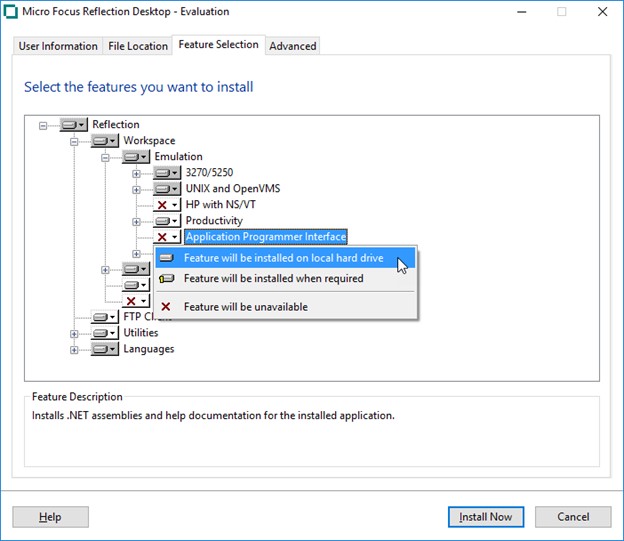
The provider Micro Focus Reflection can also open an AS400 terminal session but the setup steps are slightly different. As a prerequisite, Application Programmer Interface must be enabled for Power Automate Desktop terminal emulation to work. Turn it on in the Reflection settings menu.
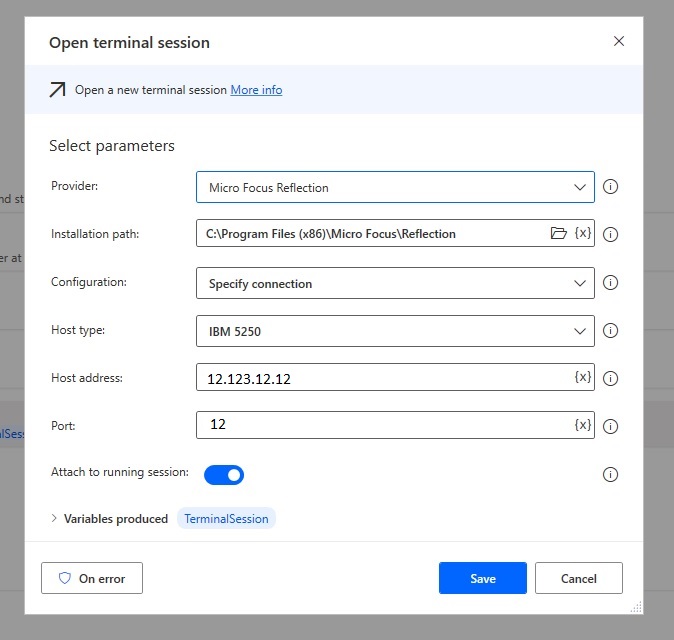
Setup the Open terminal session action as shown below.
- Select the provider Micro Focus Reflection
- Choose the installation path C:\Program Files (x86)\Micro Focus\Reflection
- Pick the host type will be IBM 5250. Host address
- Enter your host address and port
- Enable the attach to running session setting.
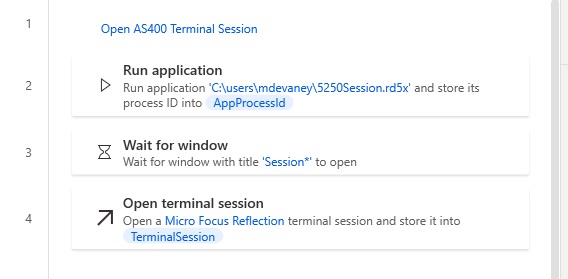
Now Power Automate Desktop can open AS400 by running these 3 actions.
Did You Enjoy This Article? 😺
Subscribe to get new Power Automate For Desktop articles sent to your inbox each week for FREE
Questions?
If you have any questions about How To Run AS400 With Power Automate Desktop Terminal Actions please leave a message in the comments section below. You can post using your email address and are not required to create an account to join the discussion.


Hi Matt, do we nees a premium license to do this?
Ruben,
Anything in Power Automate Desktop can be used for free if you manually trigger the desktop flow while sitting at your computer.
However, if you want to run this on a schedule or trigger it from a cloud flow it requires a license.
Hi Matt – Have you ever used PowerApps with AS400 – struggling with the required permissions required to allow the user to connect via the On Premise Gateway – we receive user is not authenticated, I believe that this is to do with underlying permissions for the user on the server.
Andrew,
I have not used Power Apps to connect to a DB2 database (AS400). I want to make sure – are you trying to build Canvas Apps against AS400? Or are you trying to use Power Automate? This is a Power Automate article.
Hey Matthew,
Thank you for sharing this with us, excellent write-up. My question is: you use the set action for terminal to set the username and password. When I use it, whether I use the coordinates option, label option or field option, I get a “terminal screen is unformatted”. There are no additional details. Additionally, if I use the “set cursor location” first, then a separate set using “cursor position” I do not get the unformatted error. I’m using Passport for PC app by Rocket Software to emulate. Any ideas hot to fix the unformatted error would be great.
Dan,
Apologies, I’m not familiar with the quirks of that particular emulator. Hard to diagnose without getting hands on.
can you please tell me how to extract the data
Irshad,
Extract data from AS/400? The way most folks do it is to setup a job and print the file using the print spooler. You can use Power Automate to execute the print command in AS/400.
Hi Matt,
I am struggling to use Power Automate to manage the case that need to use multiple sessions.
Perry,
I’m curious. What scenario do you need multiple sessions at once for?
Hi..may i know how to copy text from the AS400 terminal?
example to copy text from Row 7 and Column 15 until 24
Wan,
Use the “Get Text From A Terminal Session” action.
https://learn.microsoft.com/en-us/power-automate/desktop-flows/actions-reference/terminalemulation#gettextfromterminalsession
Hello Matt,
I am using Reflection for Unix and OpenVMS (r2win), I am not sure how to find the session name which needs to be provided for PA action. Can you help with this
Adit,
I don’t have this system to test on so unfortunately I cannot help.
This post helped me out a lot with getting Passport Working. I did make a few changes since I didn’t want to have to close any other open sessions for it to work. So now instead of specifying ‘A’, it grabs the HLLAPI short name from the title bar and saves it as a variable.
The biggest obstacle I have right now is with ‘Send Key to Terminal Session’. It is very limited… I even tried copying the action, pasting it in Notepad, making the changes and pasting it back into PAD as a function. It just throws an error. I have a lot of macros that I would like to run in sequence, but have most of the keyboard shortcuts set to CTRL-Something. I can’t use ‘Set Text on Terminal Session’ because if there is a way to use modifier keys, I haven’t figured it out. ‘Send Keys’ works, but I would prefer to keep everything within the terminal session so it can run in the background. I’m not sure if that is possible with ‘Send Keys’. Any Suggestions aside from changing all of the shortcuts?
Hello Matt. Thank you for all your great work.
I am unable to get a connection with PAD.
Could you help me with some information ?
What version of PCOMM terminal are you using?
Does the Java Instalation need to be 32 bits or can it be 64 bits?
Is the PCOMM version you are using 32 bits or 64 bits?
What other troubleshoot options would you recommend me to be able to establish the connection?
Thank you very much for your help
This all appears to be based on the old IBM “Client Access” PC5250 software. IBM stopped developing the product back in 2015. I’m surprised to see this article published in 2022 is still referencing it! It would be great to see an update to the article using the current client “IBM Access Client Solutions” (ACS) which is still actively maintained and enhanced.
hi
i using Mocha TN5250 client, how do i connect it ?
Jadu,
I can always figure this out when I do it for a client but it’s hard to tell you remotely without access to the device.
hi,
what value should i put in “Terminal session”?
Nothing works for me
I work for a large company and am in a mainly production environment. Not a lot of time to explore things such as this. If I was able to get something like this set up for work, would there be a way to run an automation that interacts with an excel workbook? And if so, suppose on the mainframe when I enter information (a check number) from excel more than one option pops up (we recycle check numbers) Could it be programmed to choose the one that matches the amount on the excel workbook?
Todd,
100% yes. This is exactly the kind of use case RPA was intended for.
Hi Matt,
I am extracting a certain text using “Get Text from Terminal Session” from a specific screen using Row and column index. There is no value, but I still get the text.
Can you suggest some solution ?
Hi Matt,
Thanks for that article. I tested today your methods with success.
Till now I was using vba script to connect AS400 and simulate user, but unfortunately we’ve got old PCOMM installed, which require 32bit Office.
Now I’ll have alternative 🙂