Designing A Role-Based User Interface In Power Apps

A successful app has many different types of users, each with their own needs. Employees, Managers and Administrators all require unique levels of access to maintain data privacy and should be able to perform tasks assigned to their role. I will show you how to design a role-based user interface in Power Apps that adapts to the person using the app.
Site Inspections App
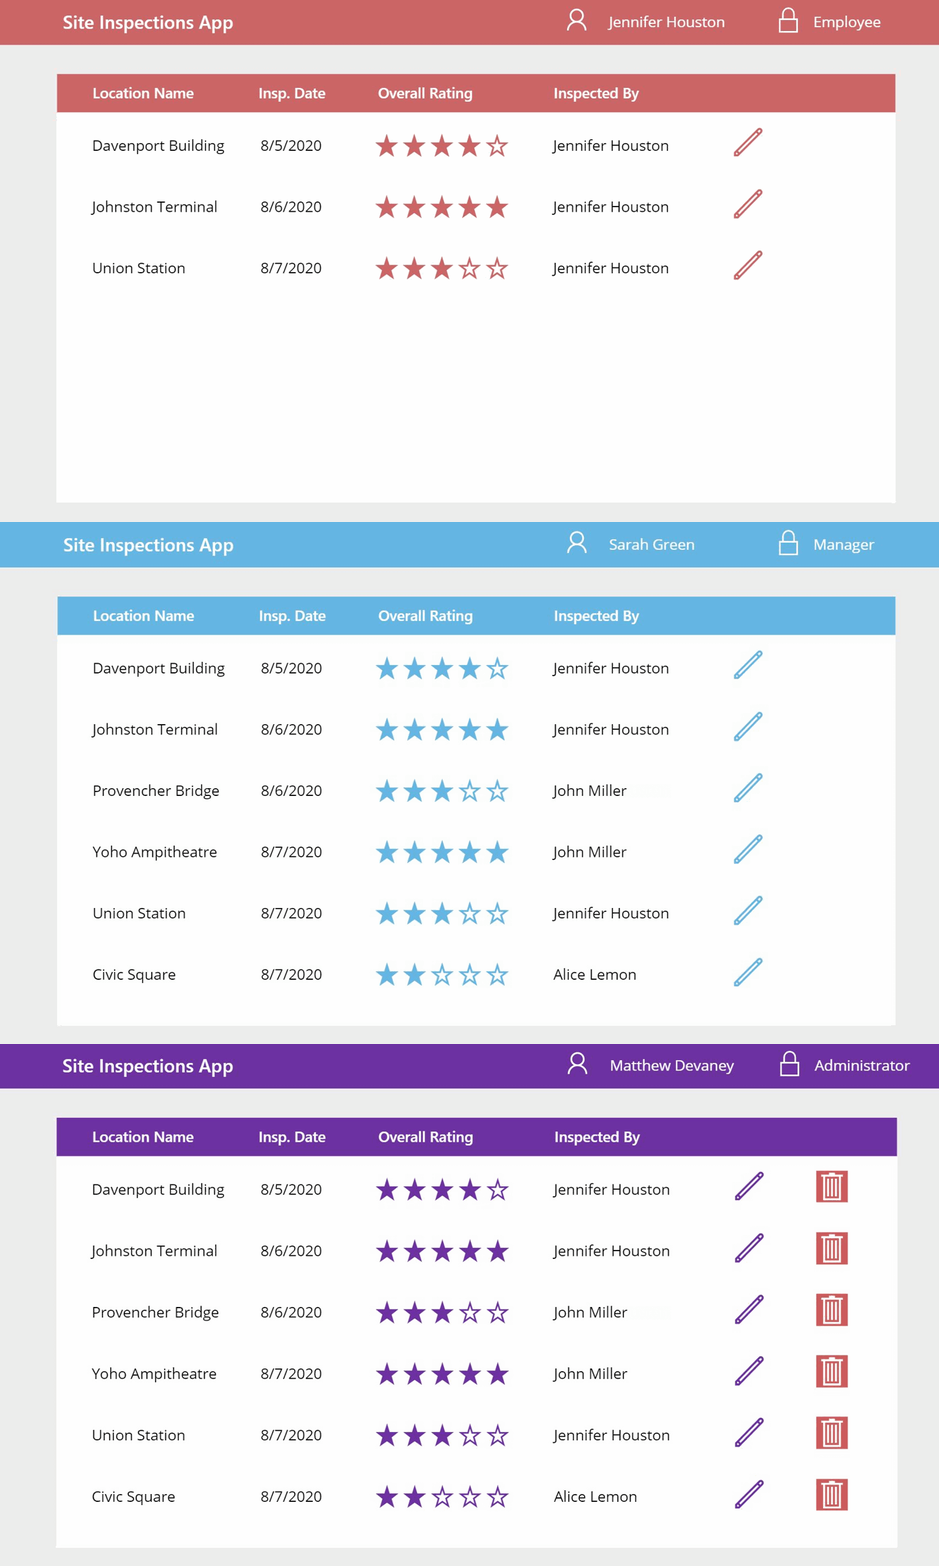
The ‘Site Inspections App’ is used by the quality control department of a restaurant-chain to track the result of on-site audits. Inspectors should only be able to see their own records whereas the manager has the ability to view all records. An administrator also has the unique ability to delete a record if needed.
We will build the ‘Site Inspections App’ to look like the image below. I have used a different color scheme for each role but my instructions do not include how to do this.
Make a new SharePoint list called ‘App Users‘ with two columns: User (Person column type) and Role (Choices column type) with the options Employee, Manager and Administrator. Any people in the User column will need to exist within your organization so you will need to choose different names than I do.
| User | Role |
| Jennifer Houston | Employee |
| John Miller | Employee |
| Alice Lemon | Employee |
| Sarah Green | Manager |
| Matthew Devaney (your name) | Administrator |
Open Power Apps and create a new Canvas App From Blank called Site Inspections App.
When the user starts the app we need to determine their user details (varUser) and role (varRole). Put this code in the OnStart property of the app.
// Obtain username and email of the logged-in user
Set(varLoggedInUser, User());

// Find the user with a matching email in the App Users list
With(
    {wUserRecord: LookUp('App Users', User.Email=varLoggedInUser.Email)},
    Set(varUser, wUserRecord.User);
    Set(varRole, wUserRecord.Role.Value)
);

// If matching user is not found, insert a new user into the list with the role Employee
If(IsBlank(varRole),
    With(
        {wUserRecord:
            Patch(
                'App Users',
                Defaults('App Users'),
                {
                    User: {
                        '@odata.type':"#Microsoft.Azure.Connectors.SharePoint.SPListExpandedUser",
                        Claims:"i:0#.f|membership|"& varLoggedInUser.Email,
                        Department: "",
                        DisplayName: varLoggedInUser.FullName,
                        Email: varLoggedInUser.Email,
                        JobTitle: "",
                        Picture: ""
                    }
                }
            )
        },
        Set(varUser, wUserRecord.User);
        Set(varRole, wUserRecord.Role.Value)
    )
);
Now we will display the User’s name and role in the app.
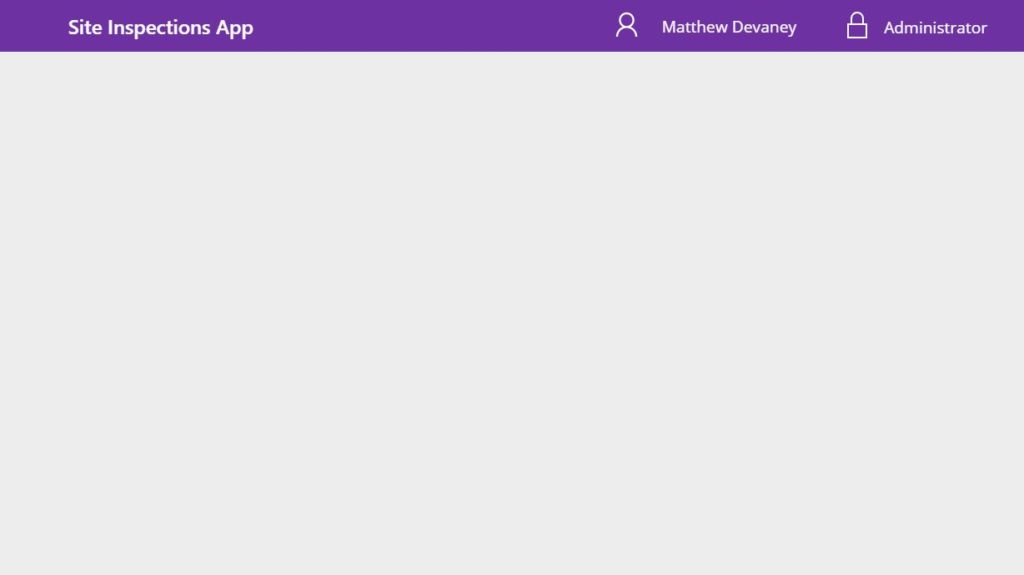
Place a Person icon on the Title bar. Then insert a label beside it with the following code in the Text property:
varUser.DisplayName
Also add a Lock icon to the Title bar. The label beside it should have this code in the Text property:
varRole
Your name and role should now appear in the app. If you want to use the app as another person (example: Jennifer Houston) for testing purposes simply hard-code their email in the app’s OnStart property as shown below.
Set(varLoggedInUser, User());

With(
    {wUserRecord: LookUp('App Users', User.Email="[email protected]")},
    Set(varUser, wUserRecord.User);
    Set(varRole, wUserRecord.Role.Value)
);
Then run the app’s OnStart property to see the changes take effect. Remember to remove the hard-coded employee email before publishing the app.
Filter Records Based On User Role
An employee should only be able to view their own records in the app whereas a manager or an administrator can see all records in the datasource.
Build another SharePoint list called ‘Site Inspections’ with the following columns: LocationName (single-line text), OverallRating (number), InspectionDate (date), InspectedBy (person)
| LocationName | OverallRating | InspectionDate | InspectedBy |
| Davenport Building | 4 | 8/5/2020 | Jennifer Houston |
| Johnston Terminal | 5 | 8/6/2020 | Jennifer Houston |
| Provencher Bridge | 3 | 8/6/2020 | John Miller |
| Yoho Ampitheatre | 5 | 8/7/2020 | John Miller |
| Union Station | 3 | 8/7/2020 | Jennifer Houston |
| Civic Square | 2 | 8/7/2020 | Alice Lemon |
In Power Apps, create a new connection to the ‘Site Inspections’ SharePoint list. After that, insert a gallery onto the screen with ‘Site Inspections’ as the datasource. Format the gallery to display information as shown in the image below using labels, an edit icon and the rating control. Add a label above the gallery to act as a header row.
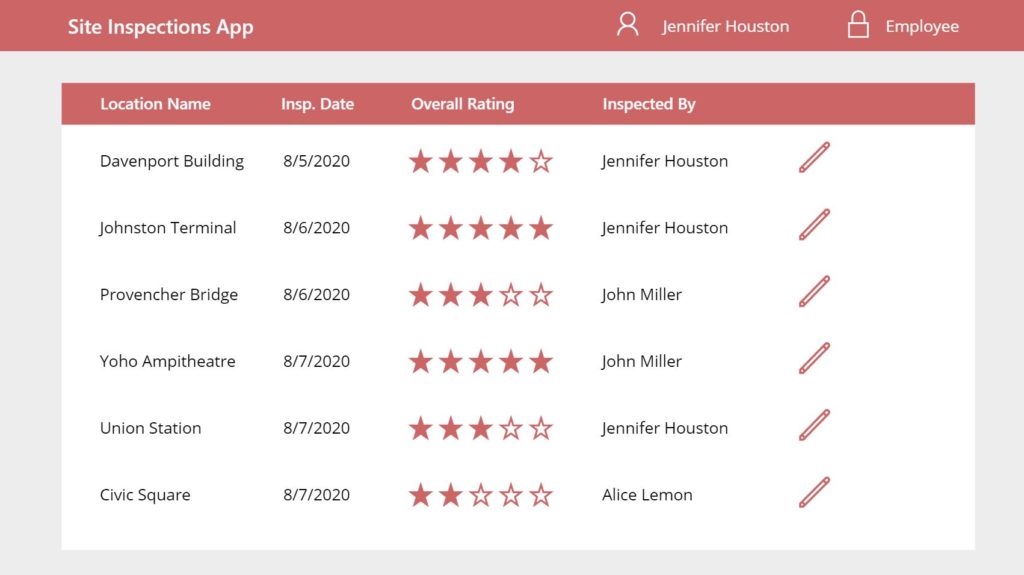
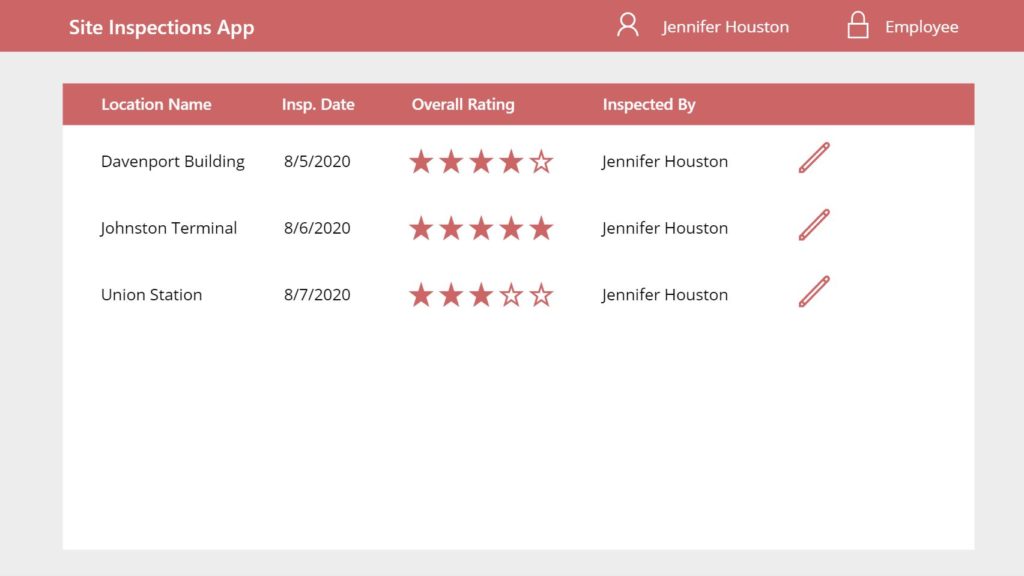
Jennifer Houston is has the role Employee so she should only see 3 records. Put this code in the Items property of the gallery.
If(
    varRole="Employee",
    Filter('Site Inspections', InspectedBy.DisplayName=varUser.DisplayName),
    'Site Inspections'
)
Now she can only view her own records.
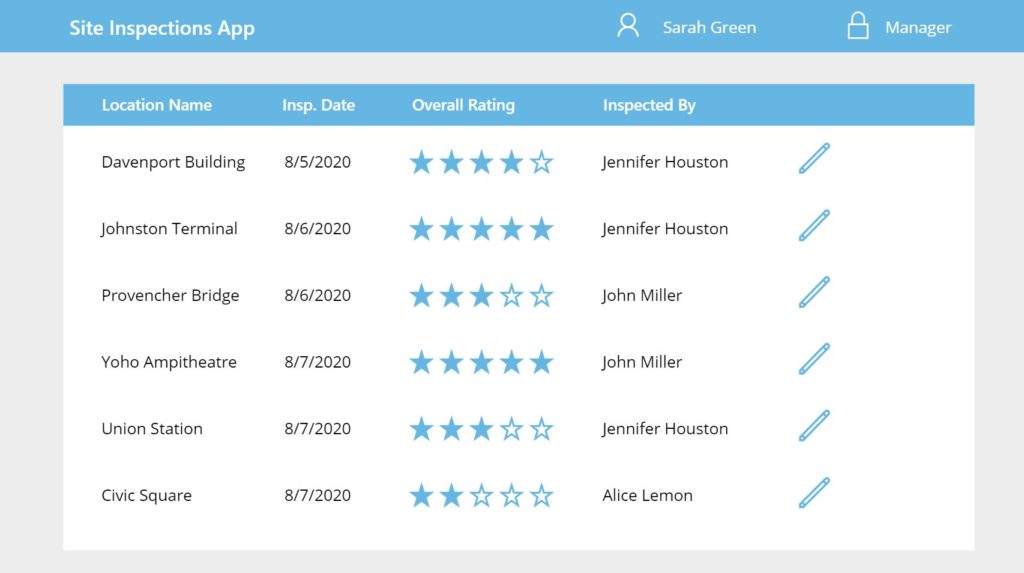
Whereas the Manager Sarah Green can see every record.
Give Different Abilities Based On User Role
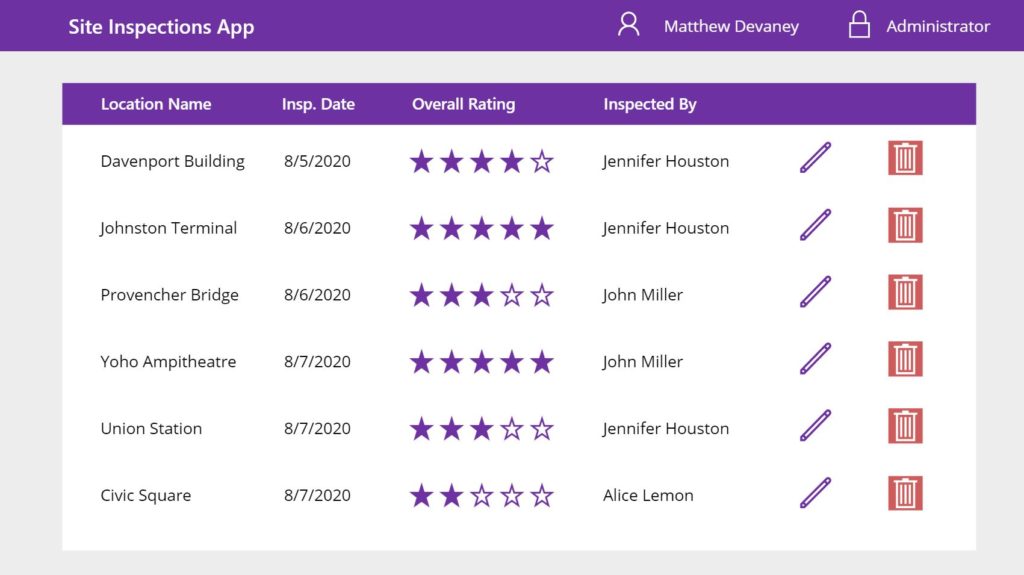
An Administrator is the only role which has the ability to delete records from the datasource. Add a Delete icon to the gallery as shown in the picture below.
Then use this code in the Visible property of the Delete icon
varRole="Administrator"
The Delete icon will show for the administrator and disappear for employees and managers making it impossible to click.
Did You Enjoy This Article? 😺
Subscribe to get new Power Apps articles sent to your inbox each week for FREE
Questions?
If you have any questions or feedback about designing a role-based user-interface in Power Apps please leave a message in the comments section below. You can post using your email address and are not required to create an account to join the discussion.


Learning a lot from you. Thank you for the great article.
Awesome work Matt. Loved your blog articles always.
I know that you are aware of the following information but for other users, I placing my comments here.
As Power App runs on the user context and if user knows the SP site URL, the user can view/manipulate entire data as we are not trimming the security on SharePoint list.
Here are few recommendations:
If this does not help, we definitely need to trim the security on SharePoint list items level, which will degrade the performance of the SharePoint list and Power App. Alternatively, we can use CDS for record level security (it is premium).
These SharePoint list data security recommendations are amazing Krishna. Thank you so much for taking the time to share them!
Your observation is correct: my article only focuses on hiding records to enhance the user experience. Everyone should be paying careful attention to the methods proposed in your comments and enacting them to keep organizational data safe-and-secure 🙂
10/10 as always Matt!
You can also extend this by having a data source where the user can configure the roles different people are allowed to have – so that if people move on / join the company, you don’t need to edit hard values in the app itself, instead you can just refer to the dynamic configuration 🙂
I’ve even hidden entire sections of functionality behind the user-role check, like reporting using embedded Power BI tiles. It adds an extra layer of usability without having to maintain several similar apps. Thanks for sharing for the community! <3
This is so great! Thank you! Will the role validation work with Groups selected in the SharePoint list?
I am not getting the values for varuser and varRole in my app
Venkataramana,
Please click the three dots beside the app object in the left menu of Studio and try to run the OnStart property of the app.
Grear article, very easy to follow.
@odata.type’:”#Microsoft.Azure.Connectors.SharePoint.SPListExpandedUser”,
Claims:”i:0#.f|membership|”& varLoggedInUser.Email, –
where did you get that part from?
Eva,
I most likely learned it from Shane Young at some point:
https://www.youtube.com/watch?v=gsk14D-CYRE
I’m not able to display varUser.DisplayName and varRole.Value values in a Label. I manually ran Onstart and see the variables have the correct value in the Variables section. I set the label property Text to “varUser.DisplayName” but it just shows the string “varUser.DisplayName” instead of the value stored in the variable.
Carl,
I hate to say it but that sounds like a Power Apps bug. Have you tried changing the publisher version in advanced settings? Sometimes when Power Apps does weird stuff like this its because a bug was introduced.
Carl,
You can use this code its working fine.
Set(varLoggedInUser, User());
Set(varDet,LookUp(‘App User’,User.Email=”priyesh@companyname.com”));
With(
{
wUserRecord:varDet
},
Set(
varUser,
wUserRecord.User
);
Set(
varRole,
wUserRecord.Role.Value
);
Does this tutorial also refer to Dataverse instead of Sharepoint ? Is there another Tutorial how to perform the tasks with Dataverse ? Would be really great 😊
Steffen,
It refers to SharePoint. I don’t have any plans to write a copy of this article for Dataverse right now but the basic concepts are right here in the article.
Thank you for this amazing article Matthew! I am still a beginner to PowerApps. And such simple solutions really help me stay motivated.
I tried the solution in this blog post to access data based on a region. However, a user having 2 regions can only see 1. The table is something like this:
User Region
A FRANCE
B USA
C GERMANY
D SPAIN
D PORTUGAL
User D only sees SPAIN details.
Is there any step that I missed? Would really appreciate your help with this!
Many thanks!
Pooja,
My example only allows one role per employee. You would need to change the SharePoint list to accept multiple values in the Role column.
Then use this code to set user roles:
Set(varRole, wUserRecord.Role.Value)
And check if the user has any roles with:
If(IsEmpty(varRole), true_code, false_code)
It’s a start but you need to do more work after that…
Dear Matt,
Can I pull the employee, manager and administrator records from SharePoint list instead of O-365? as I have a scenario wherein users are not in Azure AD. Pls advise.
Asheer,
Yes, you can do that.
The above worked for me, however when I list multiple If functions in the formula it is unable to filter the information. So, I was trying to have it as
IF(varRole=“Marketing”, IF(VarRole=“Accounting”,If(varRole=“Human Resources”, and so on…
and then the filter function is listed after it. When I tested it out it wouldn’t populate the data in the Gallery. Then when I tested it out with only having one IF function it worked and I was able to see the data for let’s say only Marketing.
Is there a way to fix this issue?
Thank you!
This is great! But what if the image and the username controls are in a component and shared on several screens? How can I make it work?
Thanks for all of these great posts! This was a great help for a side-project of mine. I am having an issue. I am having an issue with not being able to get the Role variable to work. I cannot get it to display nor work in Visible control formulas, and everything matches your example, minus my variables are customizes for my situation, as are the column names and values in my SP list. I even gave changing all the variables to match the example, just in case I was missing a typo somewhere.
Any thoughts of what might be a problem I should check?
Hi Matt, thank you for your amazing work. I’ve been trying to use
If(
varRole=”Reviewer”,
Filter(‘SharePointList’, Reviewer.DisplayName=varUser.DisplayName),
‘SharePointList‘
)
But somehow my App does not recognise the Person type column “Reviewer”. In fact it throws me an error. Is there anything else I can try?
Thank you in Advance.
Bruno
Bruno,
If you created it in SharePoint while the app was open, refresh the datasource to make it available for use.
man, thank u very much for this post! I have been reading your blog for like 1 month, and i have learned a lot. Amazing work! Nice solutions!
Grzegorz,
You’re welcome. I’m glad you liked it.
Awesome work Matt and I want display user roles form office365 group only dynamically so how can i do that
Is it possible somehow to check the role through Office365User object in the power app(without using a separate sharepoint list)?
Surendra,
Yes, you could refer to the user job title, although it’s not the same as a role. I would not recommend this path.
The other way to do it is referring to the Security Roles Dataverse table. However, it’s premium.
wondering if you solved that since i also donot want to mention emails in the SharePoint list but use like a Sharepoint group or security group
Hello Matt,
I’m trying to build a power app based off what you’ve done. But when I’m trying to find the user with a matching email, I’m getting an error ” Invalid use of ‘.’ ” where I’m looking up the User.Email and the Role.Value. Am I missing something?
Thanks,
How did you get your gallery to display the data like that? I’ve had nothing but issues trying to get the same look.
what about using security roles iin power platform for achieving the same. I have not yet been able to understand how to use that.