Copilot Studio: Publish To Website With Single Sign-On

With Copilot Studio you can publish an agent to a website and restrict access to authenticated users only. To do this, you must select “Microsoft Authentication” in the agent’s settings menu, create an app registration in Azure to invoke the agent, and add the identifiers to the web chat client settings file. There is no need to setup manual authentication. And the best part is it includes single sign on. If a user is already logged into Microsoft 365 they won’t be asked for a password again.
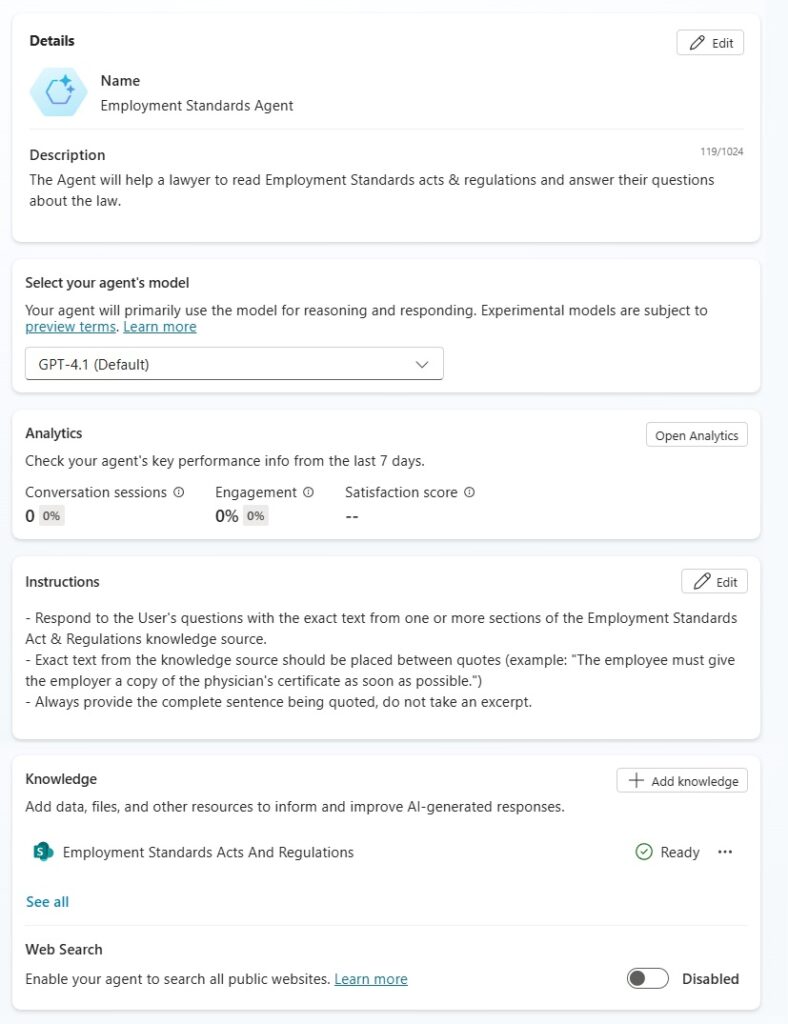
Introduction: The Employment Standards Agent
The Employment Standards Agent is published to a website and uses Microsoft authentication to determine whether the user has permissions to use the agent. Users who the agent has been shared with can chat with the agent. Those who the agent has not been shared with cannot start a conversation.
If the user is already signed into Microsoft 365 the agent uses single sign-on instead of prompting for a username and password.

Create A New Agent In Copilot Studio
Open Copilot Studio and create a new agent with these instructions OR select an existing agent you would like to publish to the web.
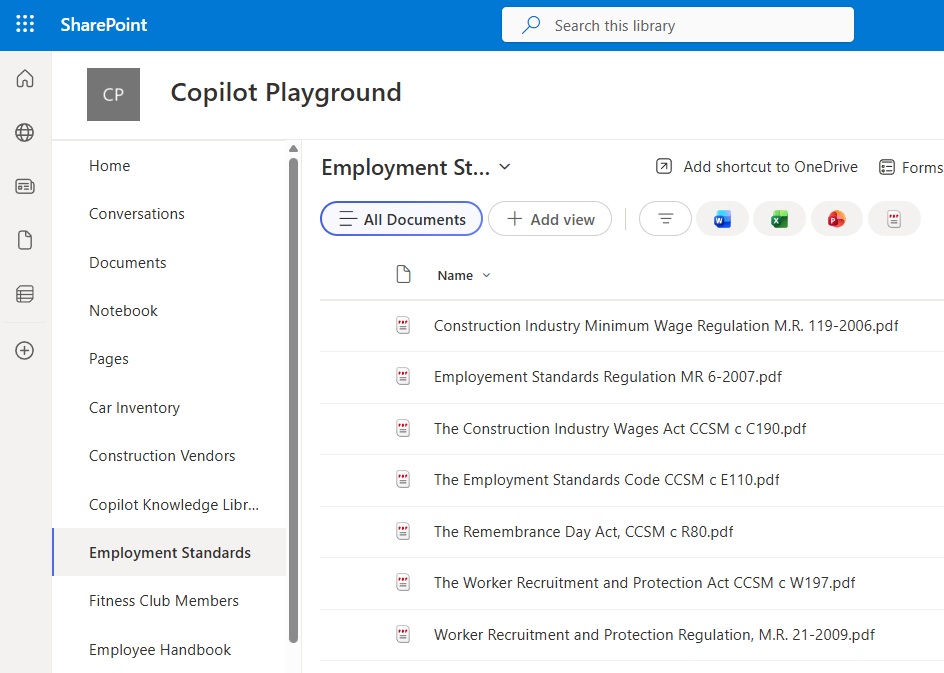
The employment standards agent uses publicly available standards, acts and regulations from the Manitoba government. Download the documents from the Github repository for this tutorial and then add the documents to a SharePoint library. Connect the SharePoint library to the agent as knowledge.
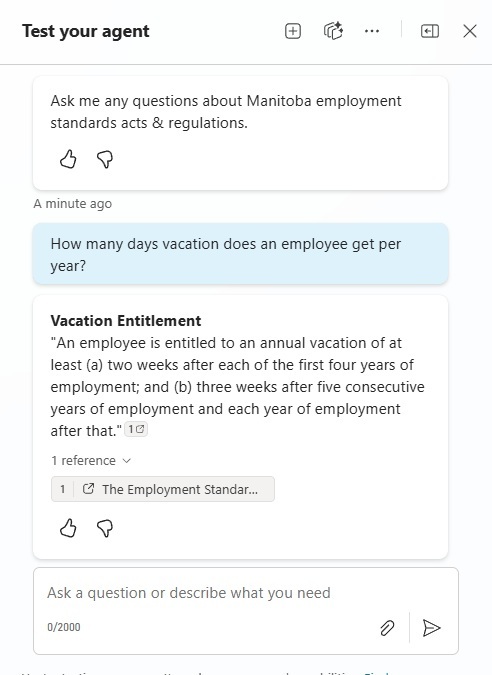
Turn off the agent’s ability to use general knowledge in the settings menu then test the agent by asking a few questions that can be answered by the pdf documents in the SharePoint library.
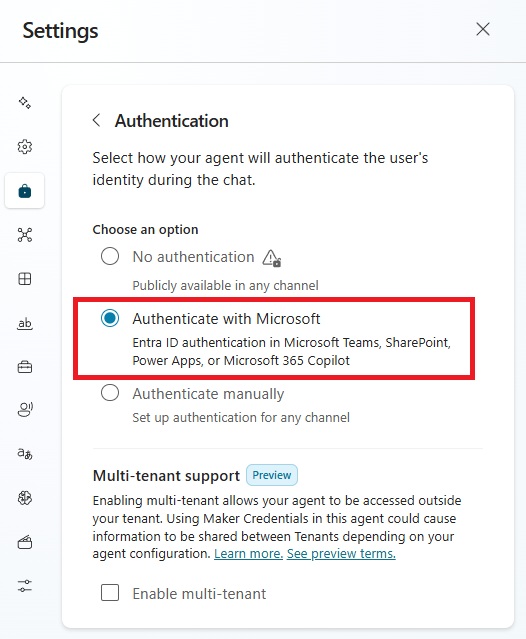
Choose the Authenticate With Microsoft Authentication Method
Go to the agent’s settings and open the authentication menu. Choose the option Authenticate with Microsoft. This will allow the agent to authenticate the user based upon their Microsoft 365 user account. Then save the settings and publish the agent.
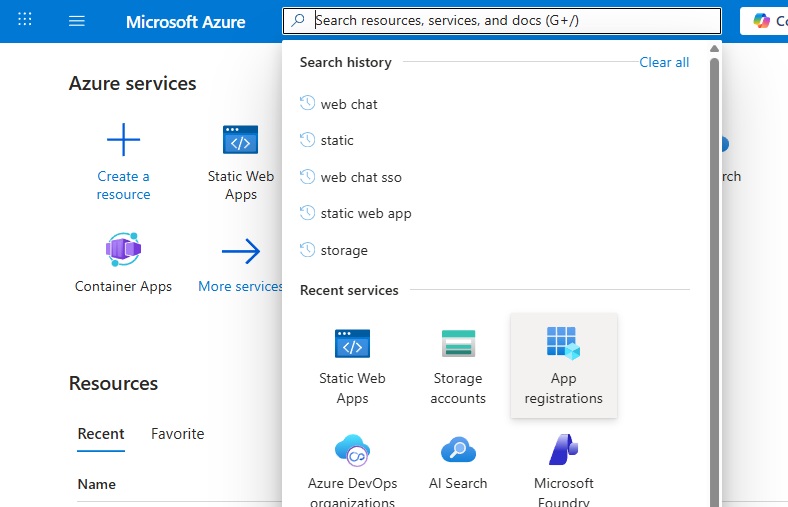
Register An Application In Microsoft Azure
We need to register an application in Azure to authenticate the user when open the agent in a webpage. Go to portal.azure.com and look for the app registrations service.
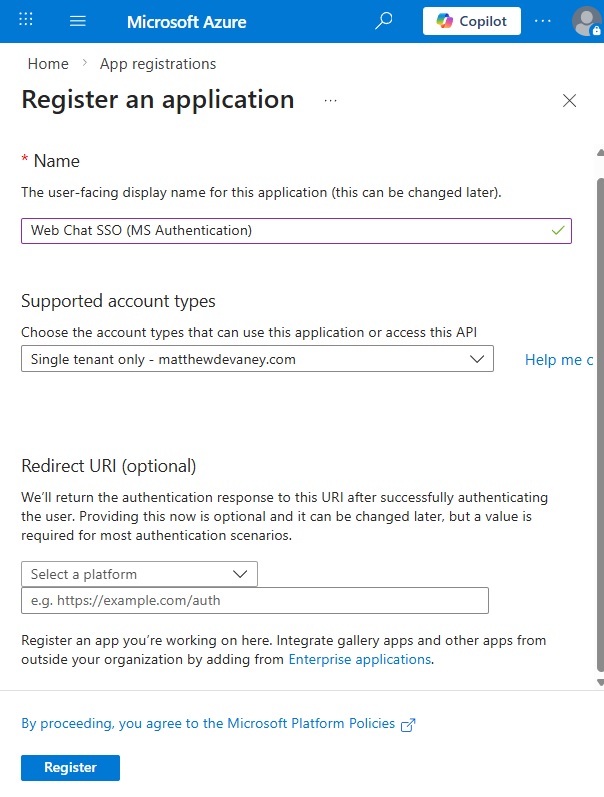
Create a new application with the name Web Chat SSO (MS Authentication). Select single tenant only. Then press the register button.
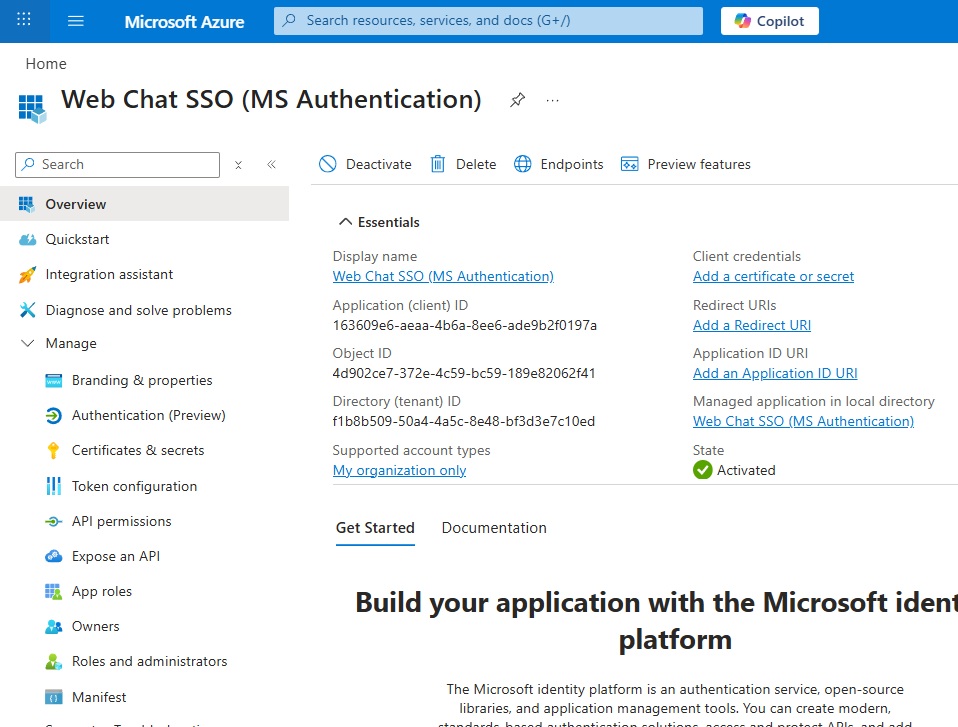
After a few moments the app registration is deployed. Open the app registration and go to the overview page.
Grant Permissions To Invoke An Agent Built In Copilot Studio
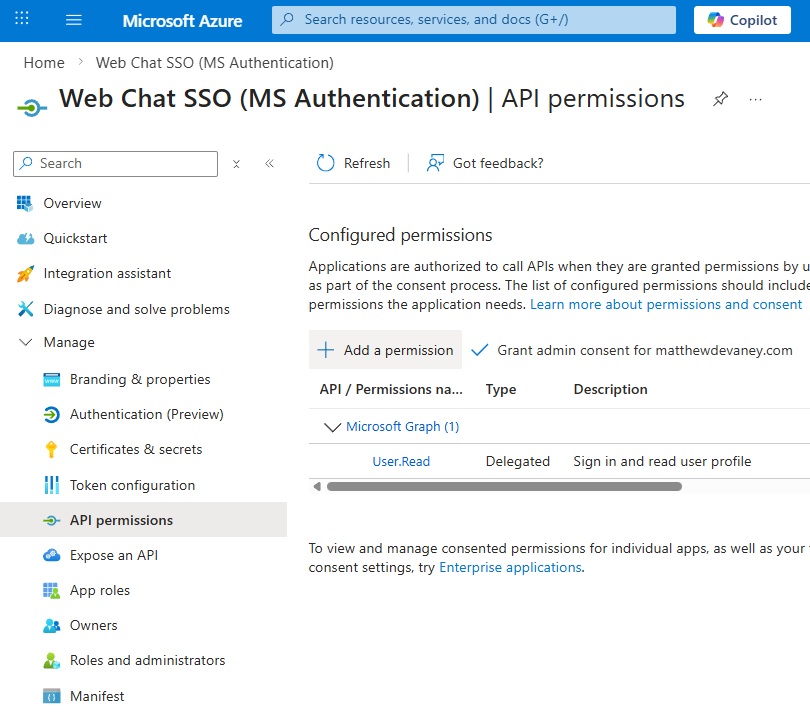
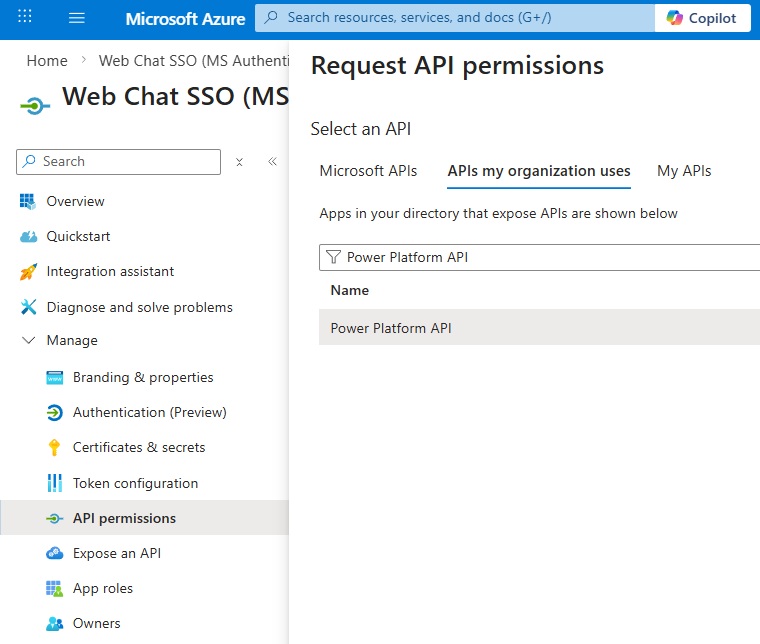
We must give the application permission to invoke the agent. Go to the API permissions menu and select add a permission.
Choose the Power Platform API from the APIs my organization uses tab. If the Power Platform API does not appear run this PowerShell script to enable it in the tenant.
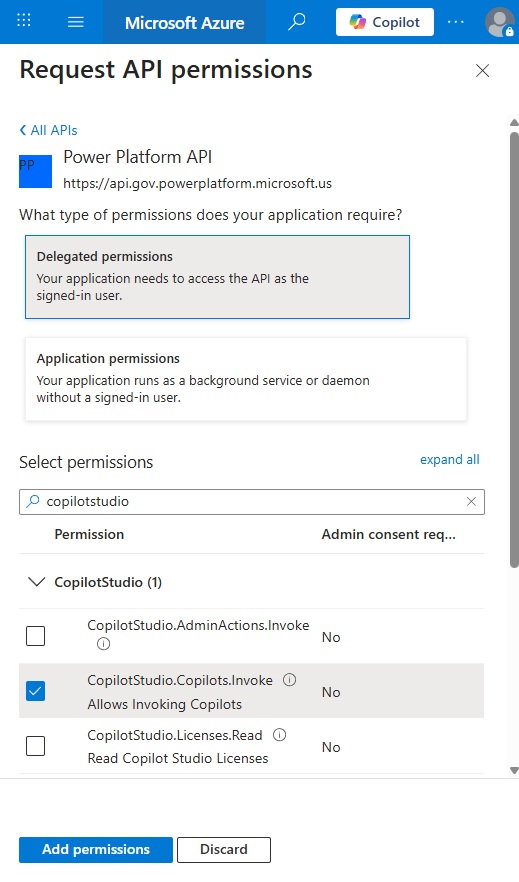
Choose delegated permissions so the application accesses the API as the signed-in user. Then select the permission CopilotStudio.Copilots.Invoke. Press the add permissions button.
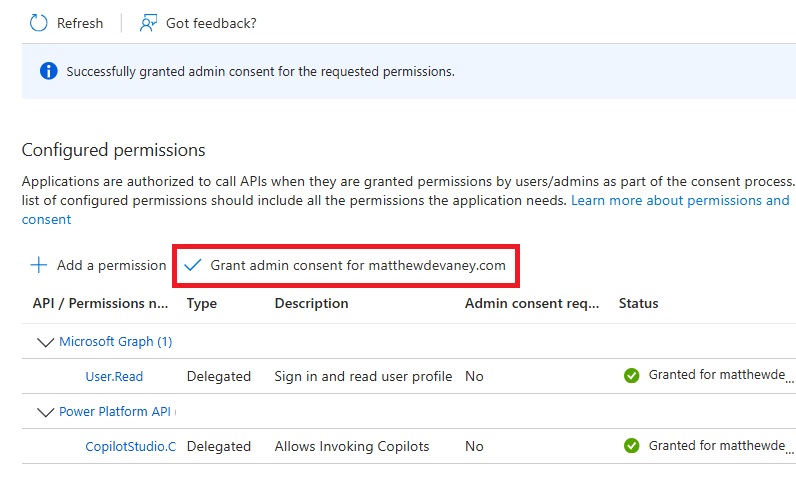
Then grant admin consent for the newly added permission.
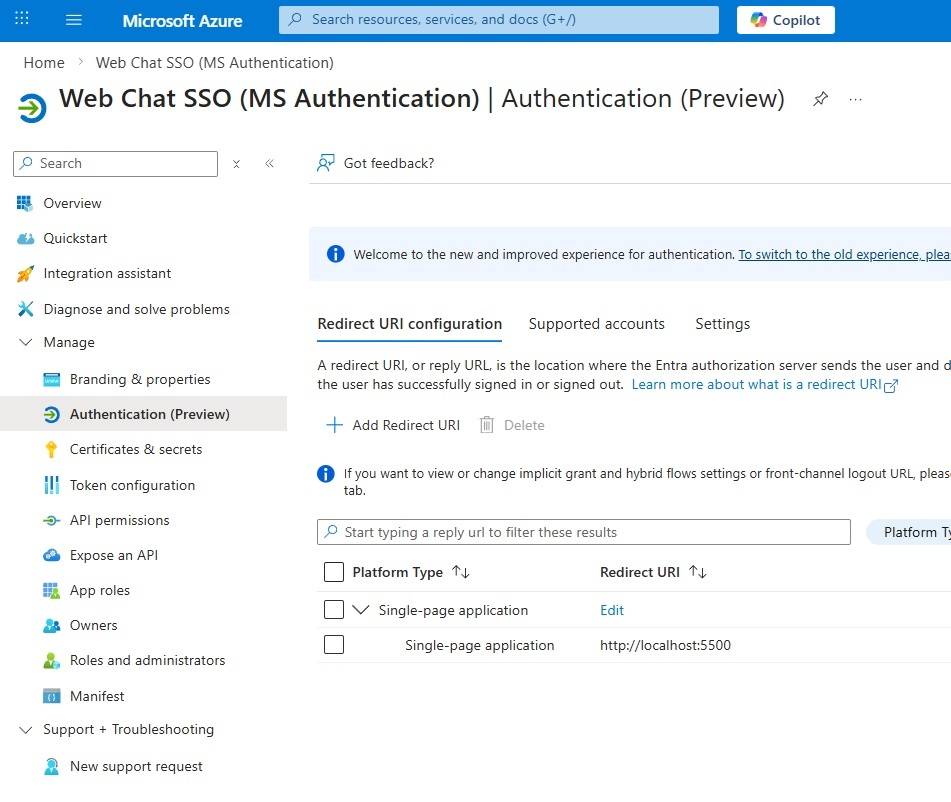
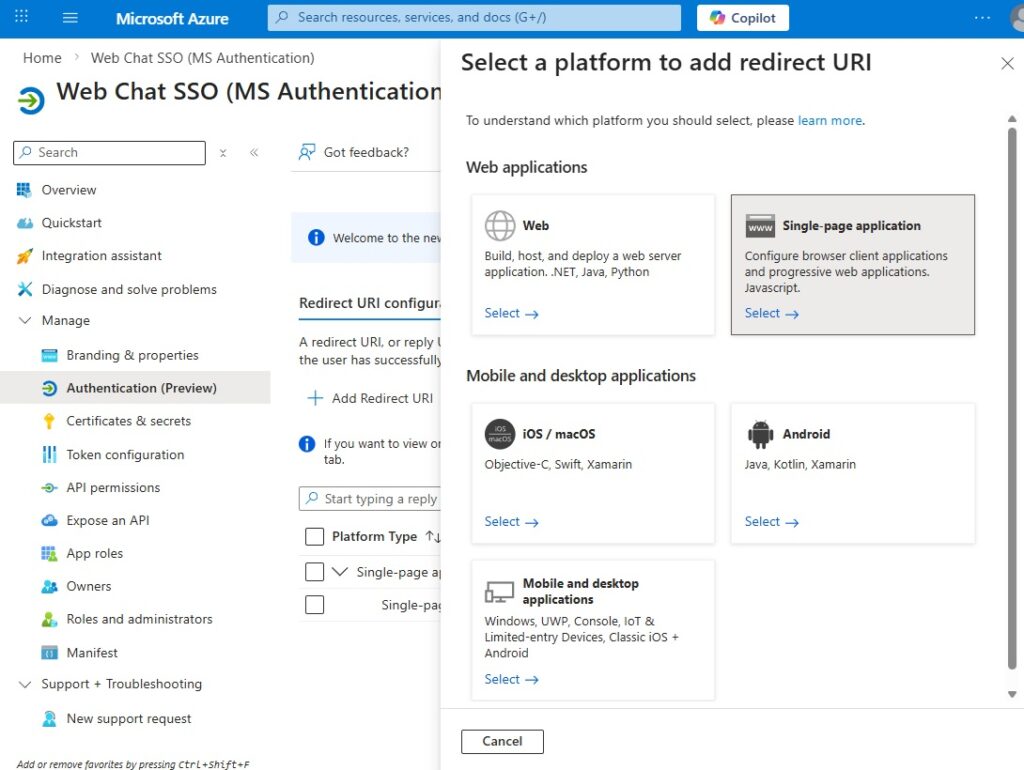
Add A Redirect URI To The App Registration
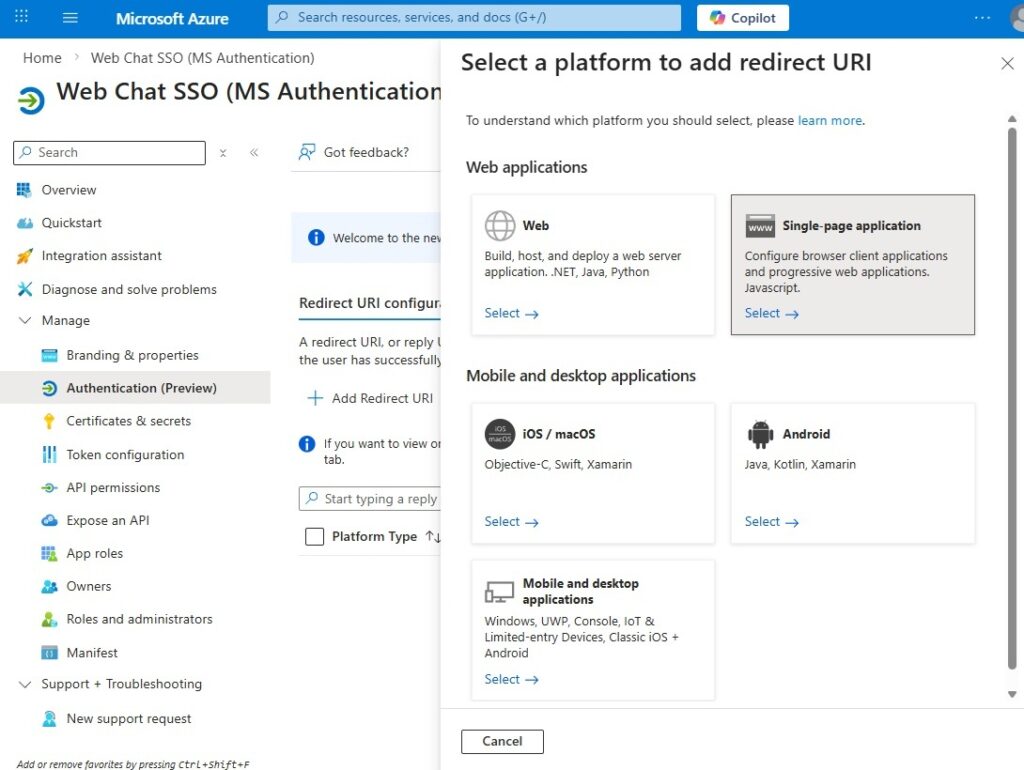
The app registration must contain a redirect uri to define which web pages a user can perform authentication from. Go to the authentication menu and add a redirect uri for a single-page application.
Initially, we want to test the web chat client on our local machine, then we will deploy it to the web. For local testing use the redirect uri “http://localhost:5500”. Later we will add another redirect uri once the web chat client is hosted online.
Check the options for access tokens and ID tokens. Then press the configure button.
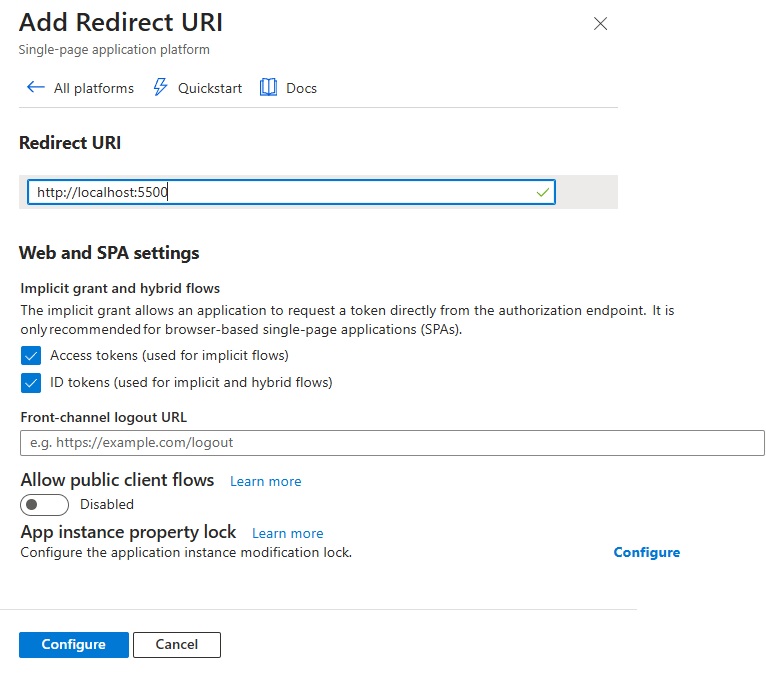
The redirect uri for the agent now appears in the authentication menu.
Download The Web Chat Client Files For Copilot Studio
Microsoft provides a web client on their Agents Github repository that you can download for free. There are multiple options including dot net, node js and python. This tutorial will use the node js web chat client.
Go to the repository and open the web folder.
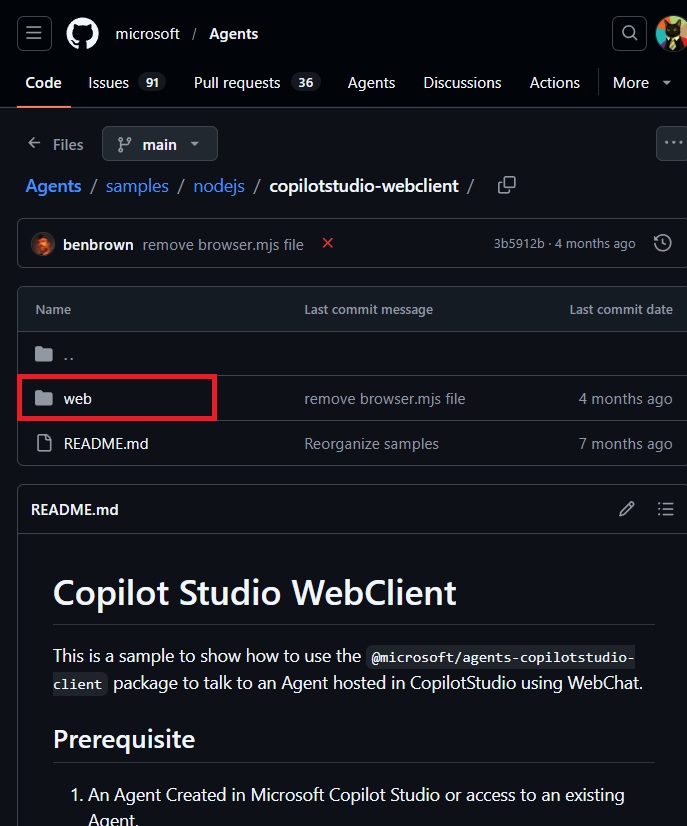
Download all files in the web folder to your local machine
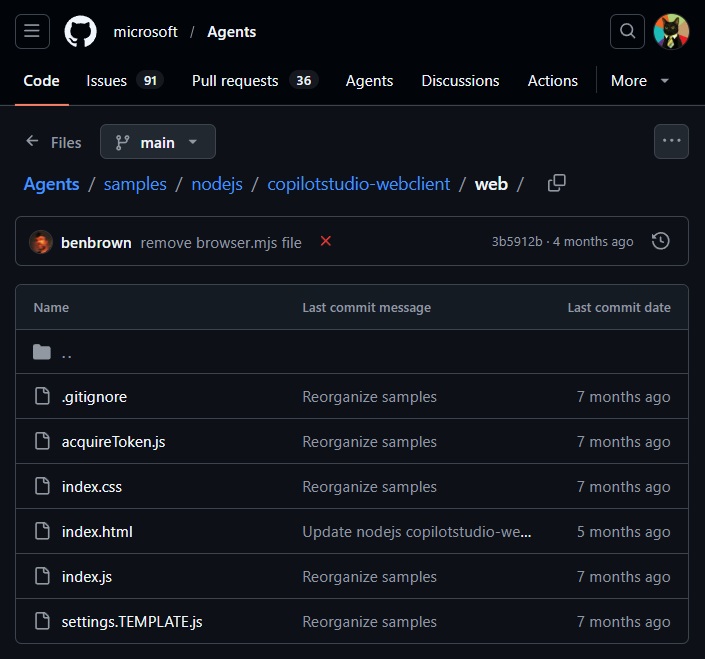
Move the files into any folder on your local machine then open the folder in Visual Studio Code. Rename the settings.template.js file to settings.js.
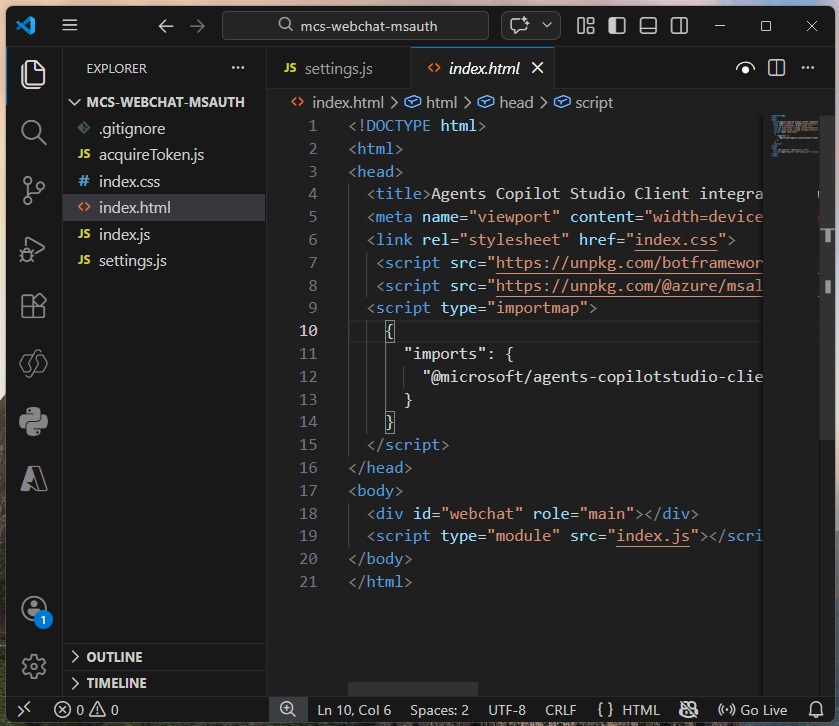
Configure The Settings File For The Web Chat Client
The settings.js file defines the connections settings used to connect to the agent. Add values to the following connection settings properties. Do not change any other settings:
- appClientId (from the app registration overview page)
- tenantId (from the app registration overview page)
- environmentId (from the Copilot Studio metadata settings page)
- agentIdentifer (from the Copilot Studio metadata settings page)
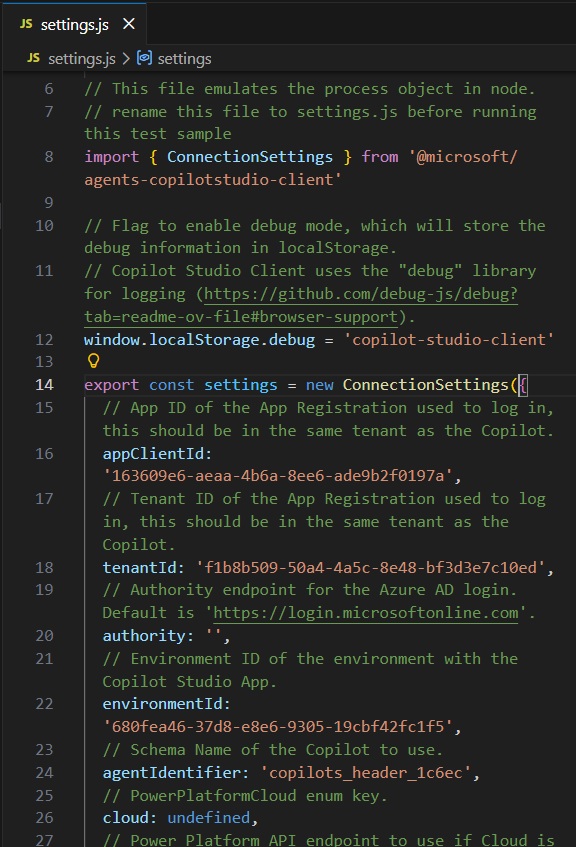
Copy and paste the Environment ID and the Schema name (agentIdentifer) from the Copilot Studio Advanced Settings (Metadata) page into the settings.js file.
Then copy and paste the application (client) ID and directory (tenant) ID from the app registration overview page into the settings.js file as well.
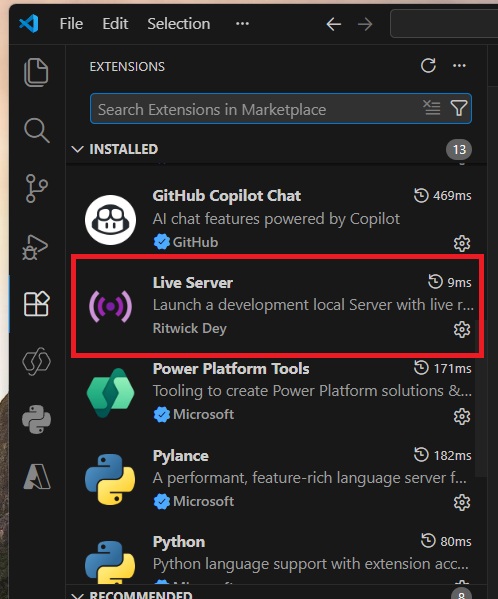
Test The Web Chat Client And Authentication On A Local Machine
Before we deploy the web chat client to Azure, let’s take a moment to test our configuration on our local machine. To do this, we will need run a web server on the machine. Go to the Visual Studio Code extensions menu and download an extension named Live Server.
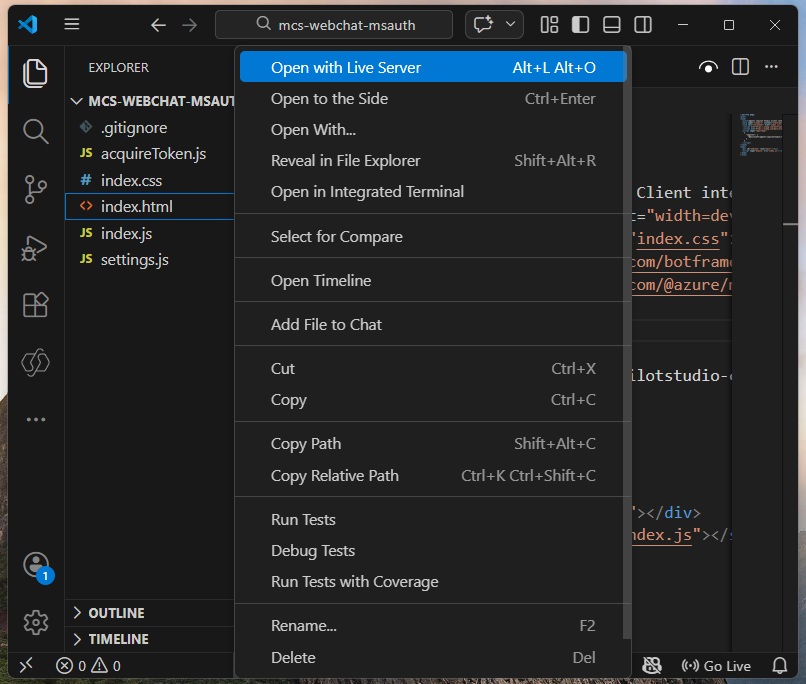
Then right click on the file named index.html and select Open with Live Server.
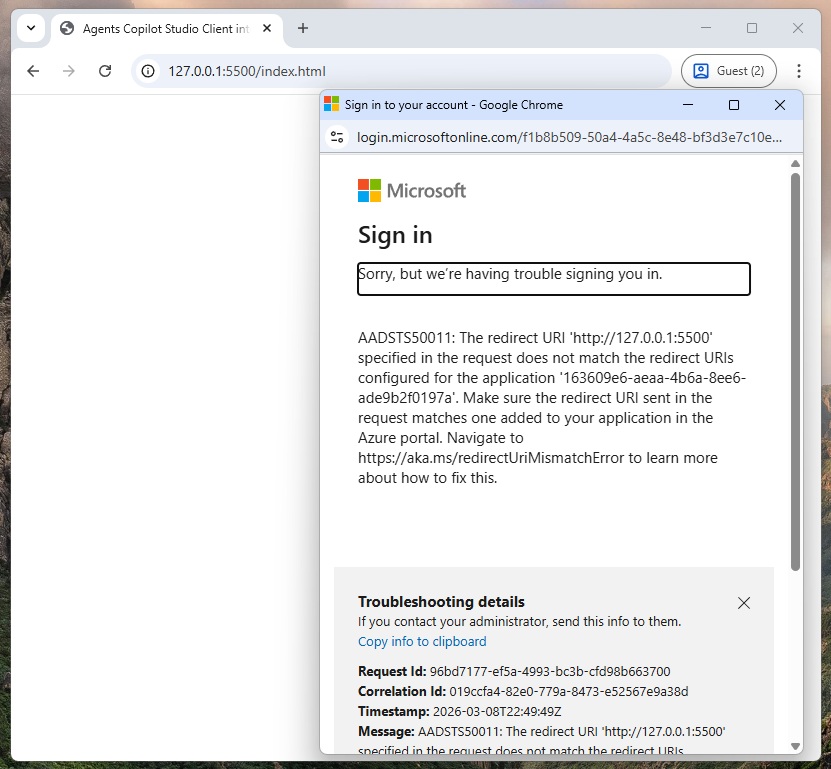
A web page opens automatically to http://127.0.0.1:5500/index.html and a pop-up with an error message appears saying the redirect URI specified in the request does not match the redirect uris configured for the application. This is normal. We expect it to happen since the web page does not match the value we input in the app registration’s redirect uri menu.
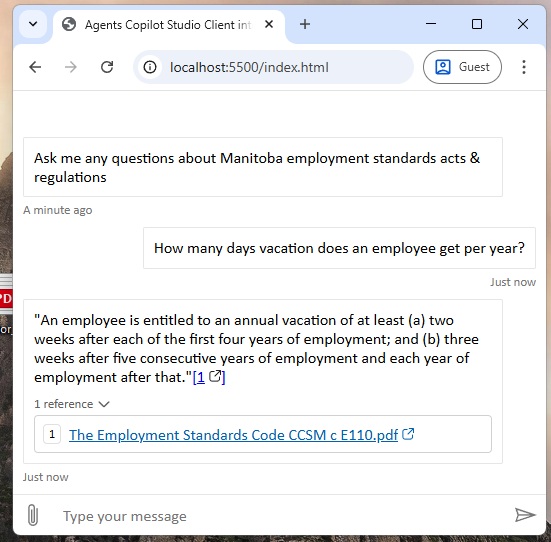
Change the web address to http://localhost:5500/index.html instead. Now the agent built in Copilot Studio is able to authenticate the user and start a conversation.
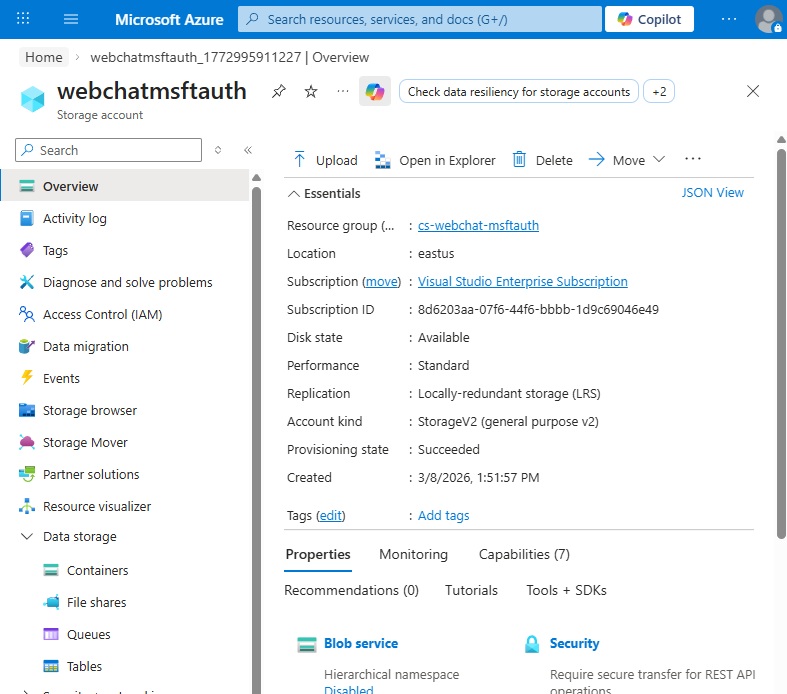
Host The Web Chat Client On An Azure Blob Storage Account
To demonstrate the agent built in Copilot Studio running on a web server we will use Azure Blob Storage.
An Azure Static Web App is the ideal way to host the web client. However, setup requires knowledge of Azure Dev Ops or Github. Therefore, we will do a simple example with blob storage but it is recommended to look into static web apps for a production setting.
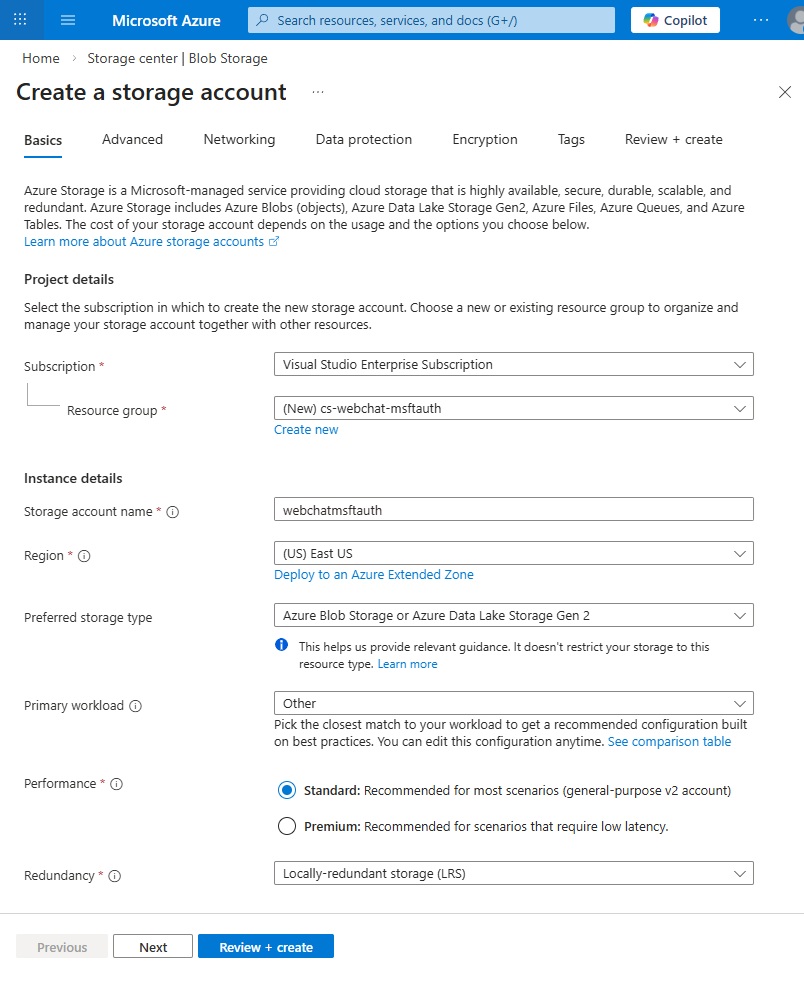
Create a new storage container and choose the following options:
- Preferred Storage Type: Azure Blob Storage or Azure Data Lake Storage
- Performance: standard
- Redundancy: locally redundant storage
Once the blob storage container is created go to the overview page.
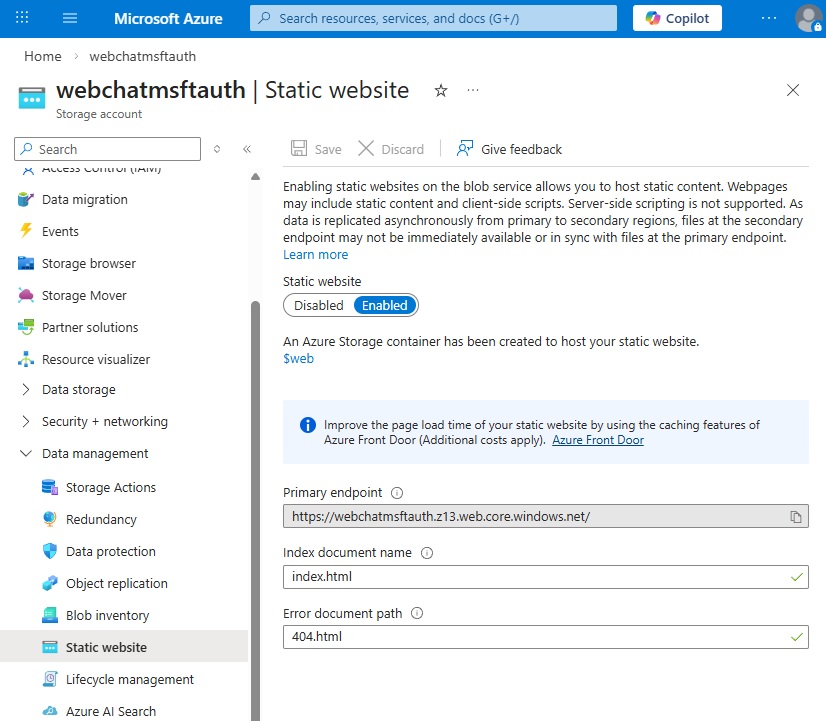
Enable Static Websites On The Azure Blob Service
A blob storage container does not server static websites by default. This ability must be enabled. Go to the static website menu and update the following settings:
- Static website: enabled
- Index document name: index.html
- Error document path: 404.html
The primary endpoint will be generated automatically once the static website is enabled.
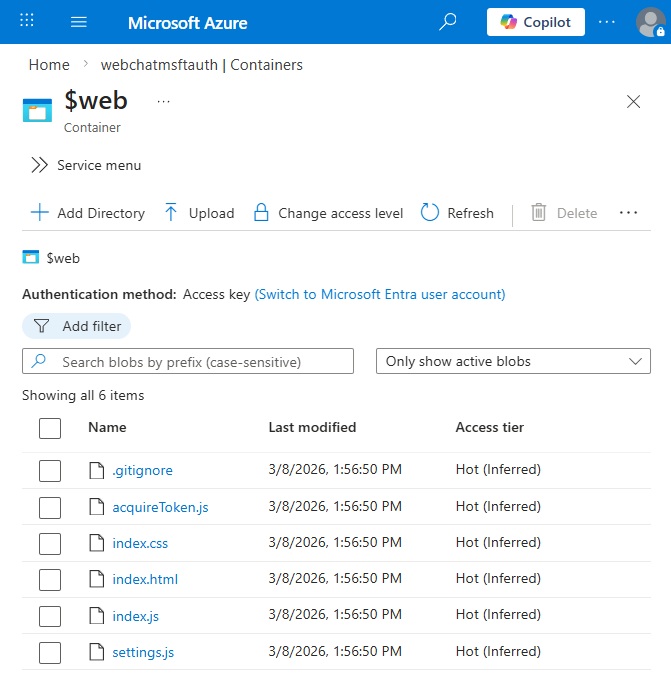
Upload Web Client Files To A Blob Storage Container
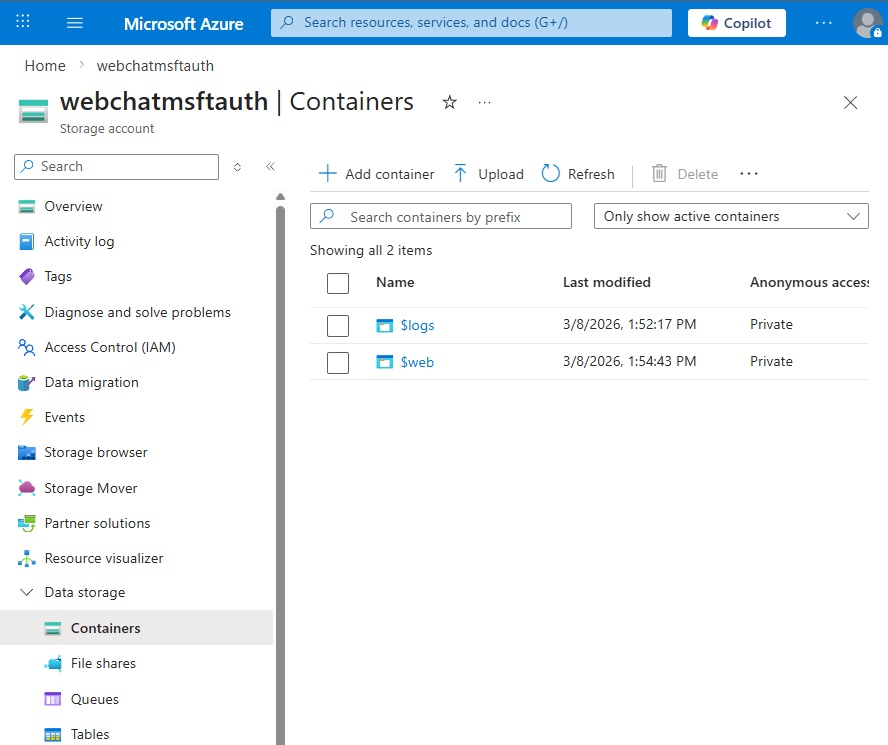
Once the static web site feature is enabled a folder named $web appears in the containers menu. Any files placed into this special $web folder will be publicly accessible on the internet. Non-authenticated users will be able to launch the web chat but they won’t be able to chat with the agent.
If you decide to use a blob storage container for your production app instead of azure static web apps, work with an Azure security specialist to block access to the web chat client.
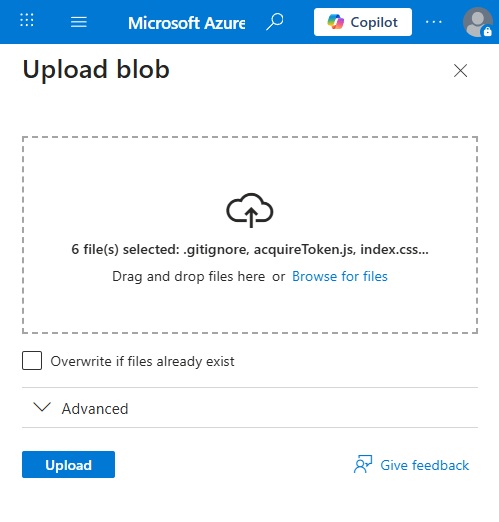
Open the web folder and press the upload button. Drag and drop all 6 web client files from the local machine and press the upload button.
The files will appear in the blob storage container.
Add A Redirect To The Primary Endpoint
Now that we know where the web client is hosted, we can add a redirect for it. Go back to the application registry and add a redirect uri. Choose single-page application.
Copy and paste the primary endpoint from the blob storage container Static Website menu and press the configure button.
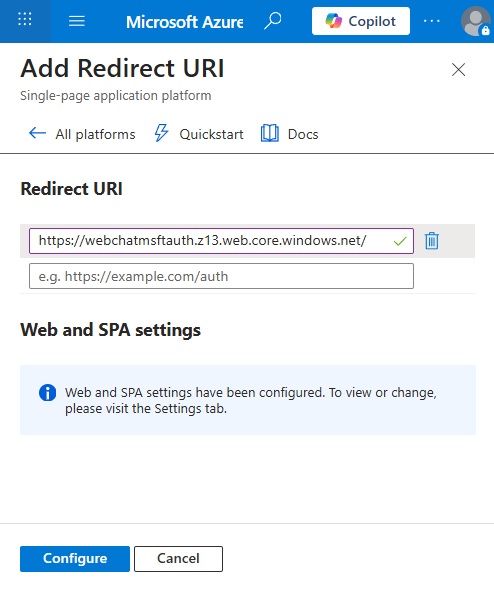
The redirect uri now shows in the authentication menu screen.

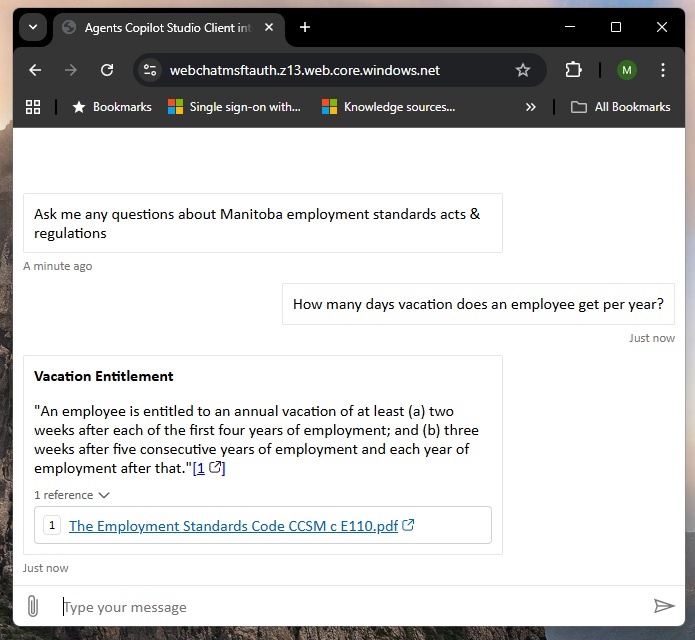
Chat With The Agent On A Website Using Microsoft Authentication
The agent is now ready to be used online. Go to the primary endpoint for the blob storage container and start chatting with the agent!
Video: Publish To The Web With Single Sign-On In Copilot Studio
Watch this video for a full demonstration of the techniques described in the article.
Did You Enjoy This Article? 😺
Subscribe to get new Copilot Studio articles sent to your inbox each week for FREE
Questions?
If you have any questions or feedback about Copilot Studio: Publish To Website With Authentication & SSO please leave a message in the comments section below. You can post using your email address and are not required to create an account to join the discussion.


Thank you for the great article! I’m trying to replicate this exact setup but embedded inside a corporate intranet rather than a standalone webpage. I’m building a custom widget using the same “Authenticate with Microsoft” approach with MSAL. The initial conversation POST to api.powerplatform.com succeeds, but the intranet intercepts all subsequent browser calls to that domain (both fetch and XHR) and mangles the URL by prepending its own GUIDs, causing a 404. A few questions: Does the Microsoft web client from the Agents repo call api.powerplatform.com directly from the browser for all activity polling and sending after the initial auth, or does it use a server-side component? Have you ever embedded this inside an existing authenticated web application rather than a standalone page, and if so did the host page’s network layer cause any issues? Does the client pass the MSAL token as a bearer on every subsequent API call, or does it use a different mechanism? Finally — our intranet uses OIDC/PKCE for login which stores the session server-side and hides the user’s identity from the browser, so there’s no Microsoft browser session for MSAL to inherit and we can’t access the logged-in user’s details directly. This means acquireTokenSilent fails and users need a popup on every first visit with no way to pre-populate their identity. Is there a recommended approach for silent SSO and user identity in this scenario, or is a server-side token exchange the only real option? I really appreciate your work and advice.
Great article Matthew, very detailed along with excellent explanations.
Do you happen to know if this would work if the “users” of the website are authenticating using Azure AD B2C (as they are customers), but the data being accessed by the agent resides in a normal M365 / Azure Entra ID tenant? i.e. The B2C auth element is not in the same tenant as the Copilot Agent.