Power Automate: Instant Low-Code Plugins To Run PowerFx Code

Power Automate can run PowerFx code by calling an instant low-code plugin. An instant low-code plugin can take inputs from Power Automate, perform operations using PowerFx and then return the result to Power Automate. This is exciting because you can use the PowerFx language you know and love from elsewhere in Power Platform while not having to remember any Power Automate functions.
And as a bonus you can also call an instant low-code plugin from Power Apps to execute complex logic server-side instead of on-device.
Table of Contents
• Introduction: The Net Work Days Instant Plug-in
• Install The Dataverse Accelerator App
• Create An Instant Low-Code Plugin
• Define Input And Output Parameters For A Low-Code Plugin
• Write A PowerFx Expression For The Low-Code Plugin
• Save The Low-Code Plug-in To A Solution
• Test The Low-Code Plug-In In The API Playground
• Call The Instant Low-Code Plug-In From A Power Automate Flow
• Run The Power Automate Flow And Get The Low-Code Plug-in Output
Introduction: The Net Work Days Instant Plug-in
An instant low-code plugin is used in a Power Automate flow to calculate net work days in similar manner to the Excel NETWORKDAYS function.
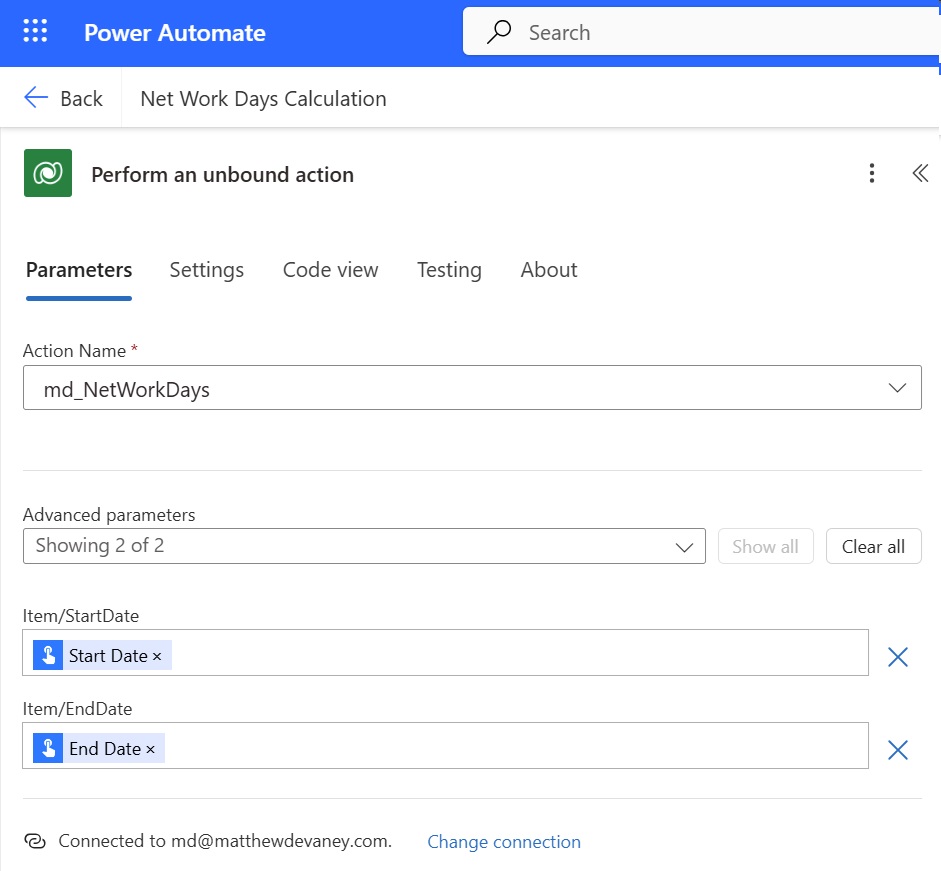
The low-code plug-in takes a start date and end date as inputs and outputs the net work days as an integer value.
Install The Dataverse Accelerator App
Low-code plugins are built using the Dataverse Accelerator app which comes pre-installed with new environments. An older environment may not have it installed. To install the Dataverse Accelerator app go to the Power Platform Admin Center, then browse to Resources > Dynamics 365 Apps. The Install the app named Dataverse Accelerator.
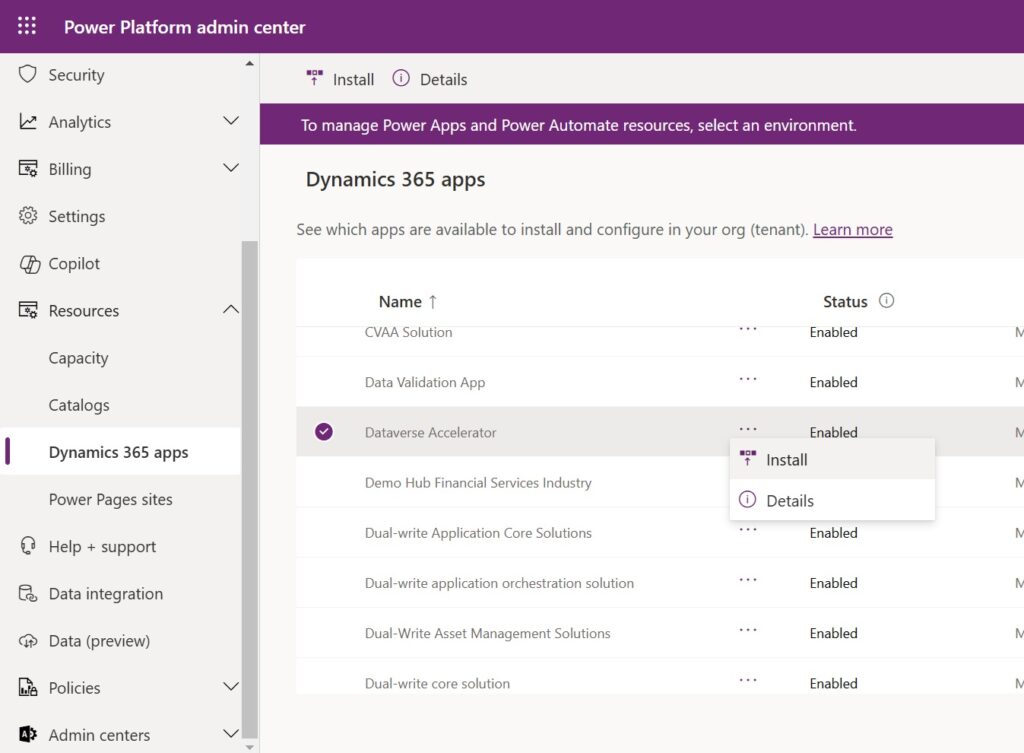
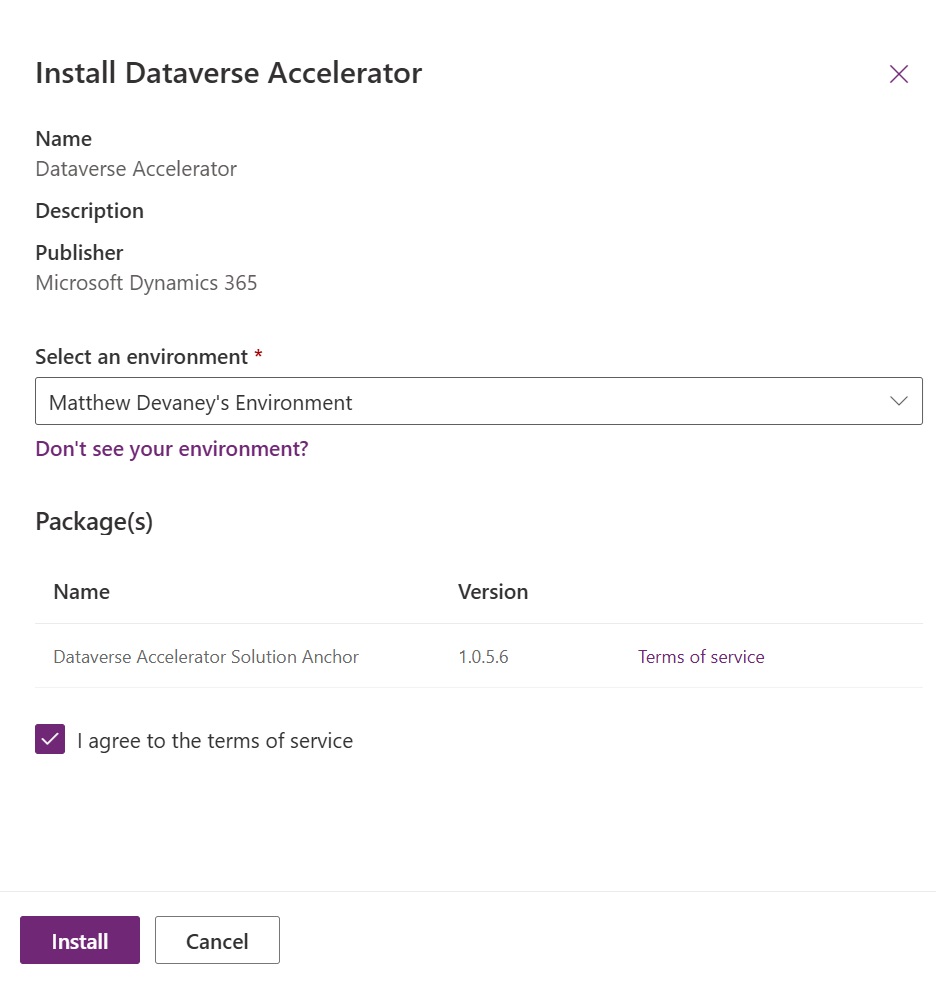
Select an environment and press the Install button.
After the Dataverse Accelerator is installed a new application called Dataverse Accelerator App appears in the environment.
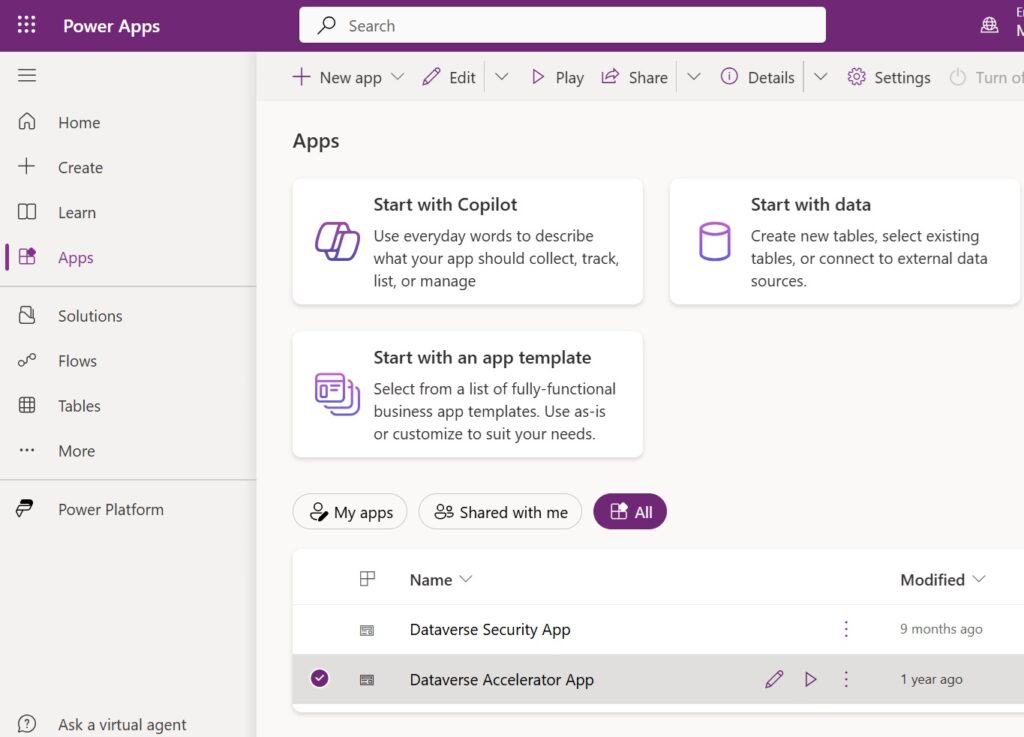
Create An Instant Low-Code Plugin
There are two types of low-code plug-ins: Instant and Automated . An instant plug-in is triggered manually by performing an unbound action in Power Automate or Power Apps. An automated plug-in is triggered when a record in the specified table is created, updated or deleted.
We want to make an instant plug-in. Open the Dataverse Accelerator app and create an instant plug-in.
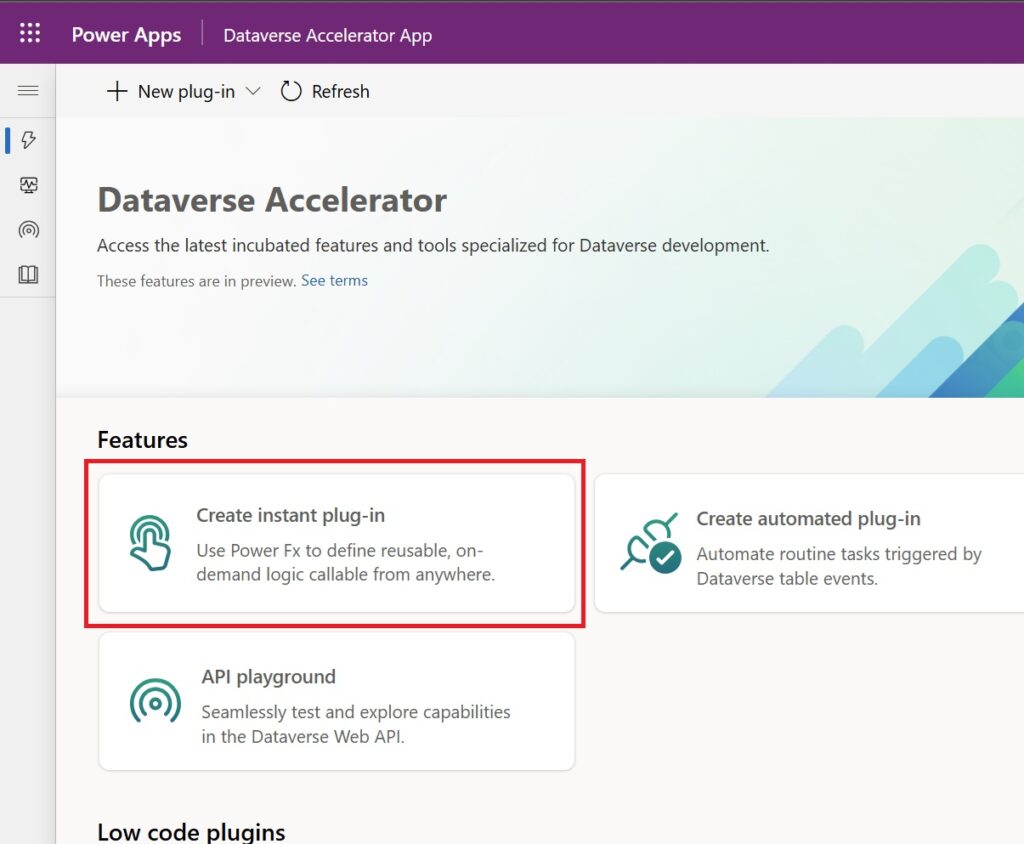
Define Input And Output Parameters For A Low-Code Plugin
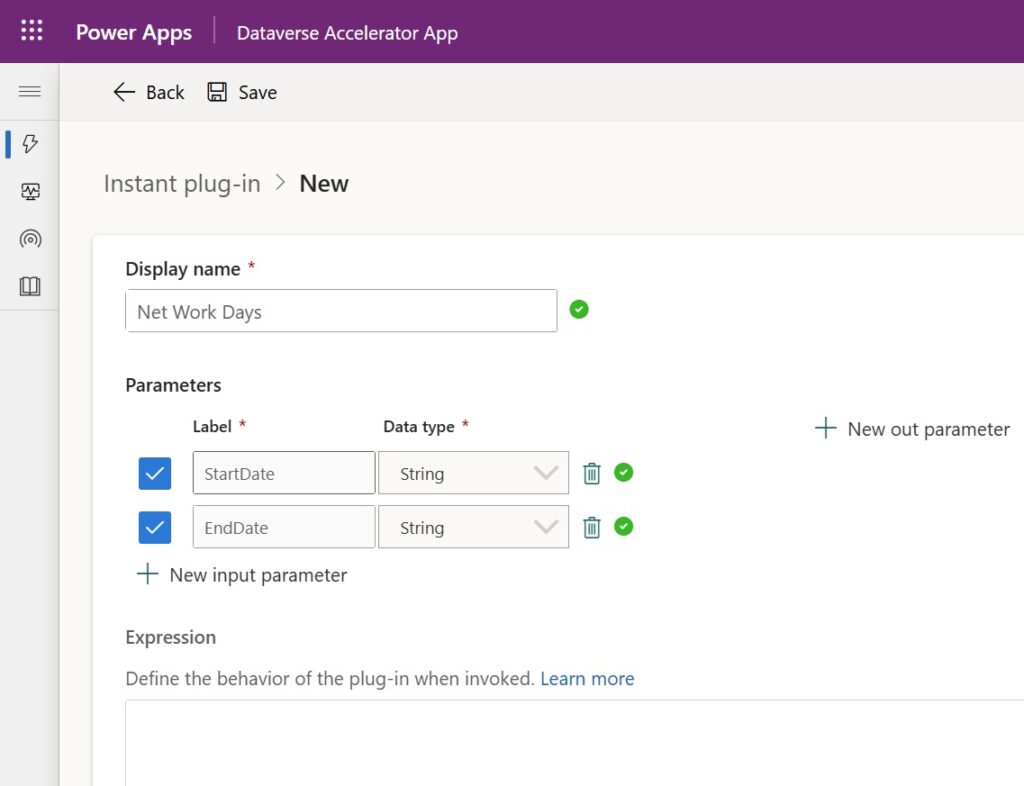
A low-code plugin can include input parameters and output parameter. To calculate the net work days we will need both.
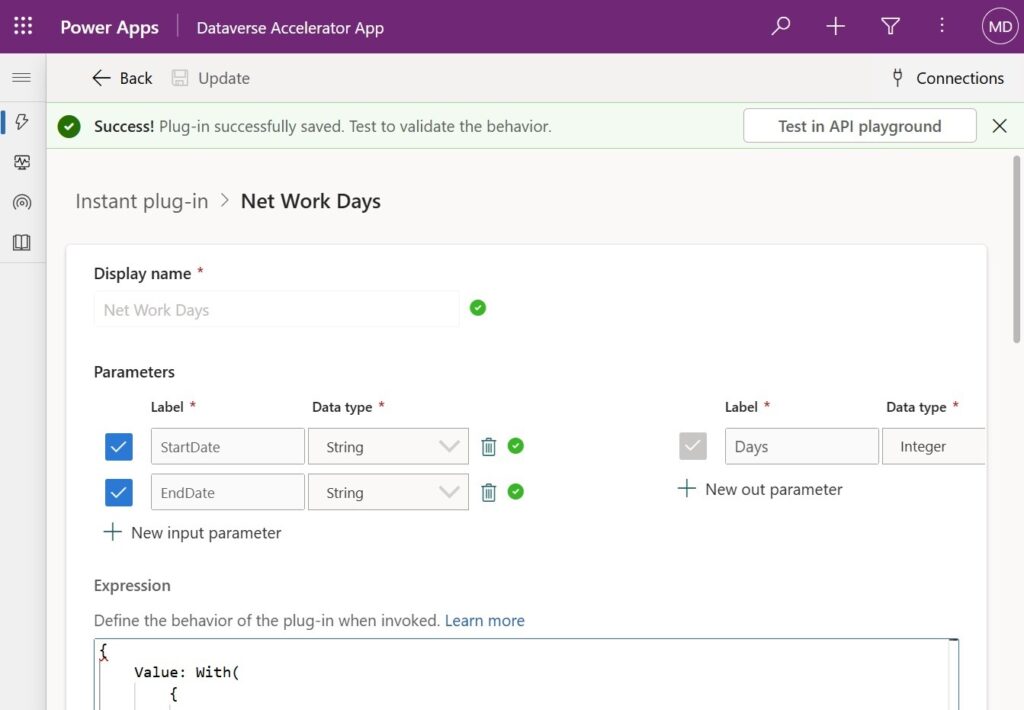
Name the instant plug-in “Net Work Days”. Then add two string type parameters Start Date and End Date. We will use a string data type because Power Automate does not have a data type for dates.
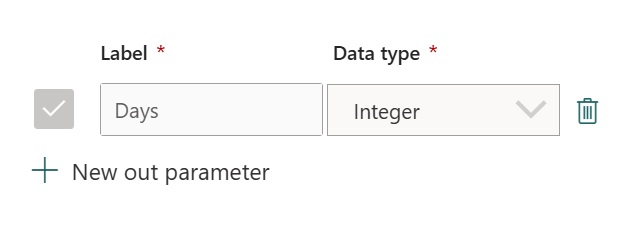
Then create an outputs parameter with an integer data type named Days. The plugin will take a start date and end date as inputs and output the net work days as a whole number.
Write A PowerFx Expression For The Low-Code Plugin
Plugins use PowerFx code to perform operations and return a result. In a prior article, I showed how to calculate the business days excluding weekends in Power Apps. We can re-use the same code from that app inside the low-code plugin.
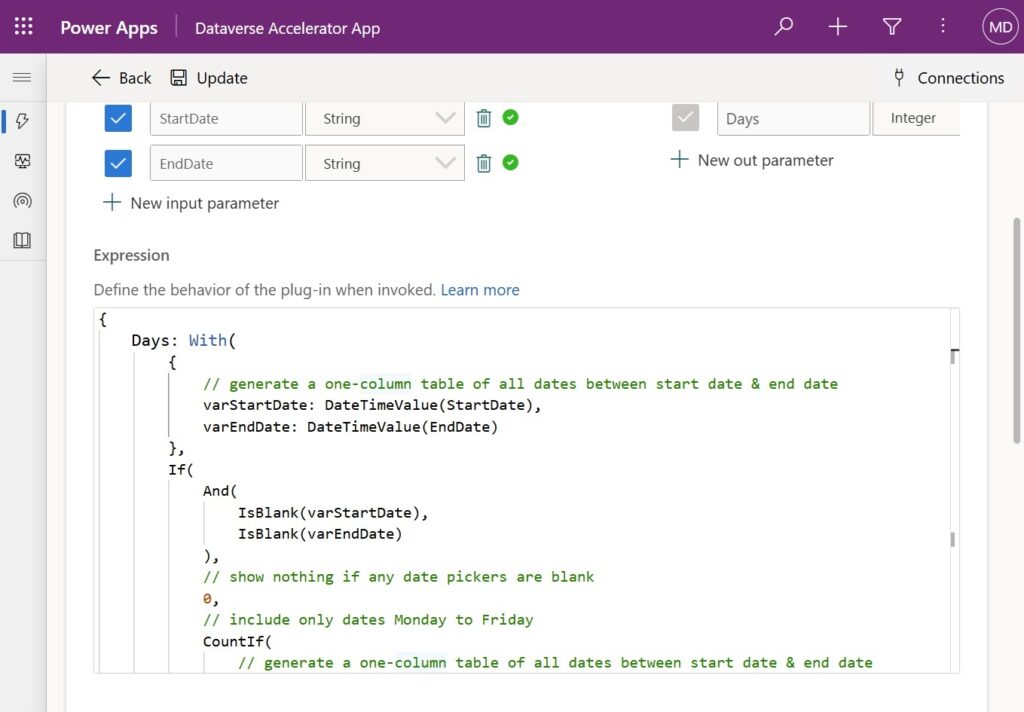
Copy and paste this code into the Expression field of the instant low-code plugin. To output the net work days we include a record with the parameter with Days as a field.
{
    Days: With(
        {
            // generate a one-column table of all dates between start date & end date
            varStartDate: DateTimeValue(StartDate),
            varEndDate: DateTimeValue(EndDate)
        },
        If(
            And(
                IsBlank(varStartDate),
                IsBlank(varEndDate)
            ),
            // show nothing if any date pickers are blank
            0,
            // include only dates Monday to Friday
            CountIf(
                // generate a one-column table of all dates between start date & end date
                ForAll(
                    Sequence(varEndDate - varStartDate + 1),
                    varStartDate + Value - 1
                ),
                Weekday(Value) in [2, 3, 4, 5, 6]
            )
        )
    )
}
Save The Low-Code Plug-in To A Solution
Once the low-code plugin setup is completed we want to save it to a solution. Choose a solution from the dropdown and give the plugin a description. Select the global scope because the low-code plugin is not associated with any specific table.

Save the low-code plugin.
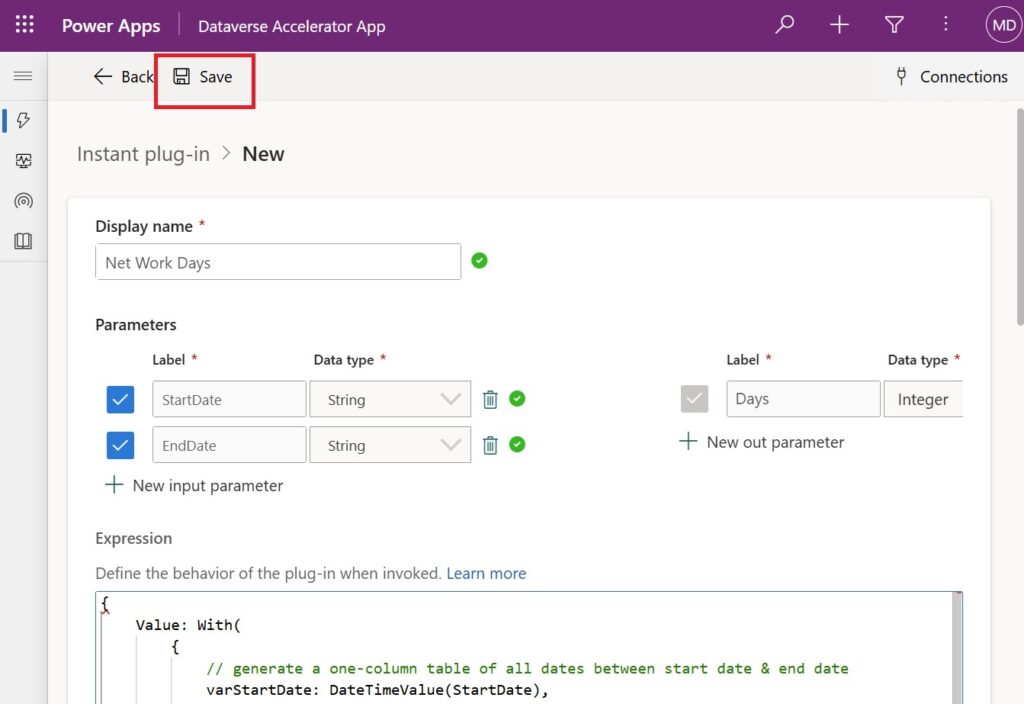
A success notification appears at the top of the page.
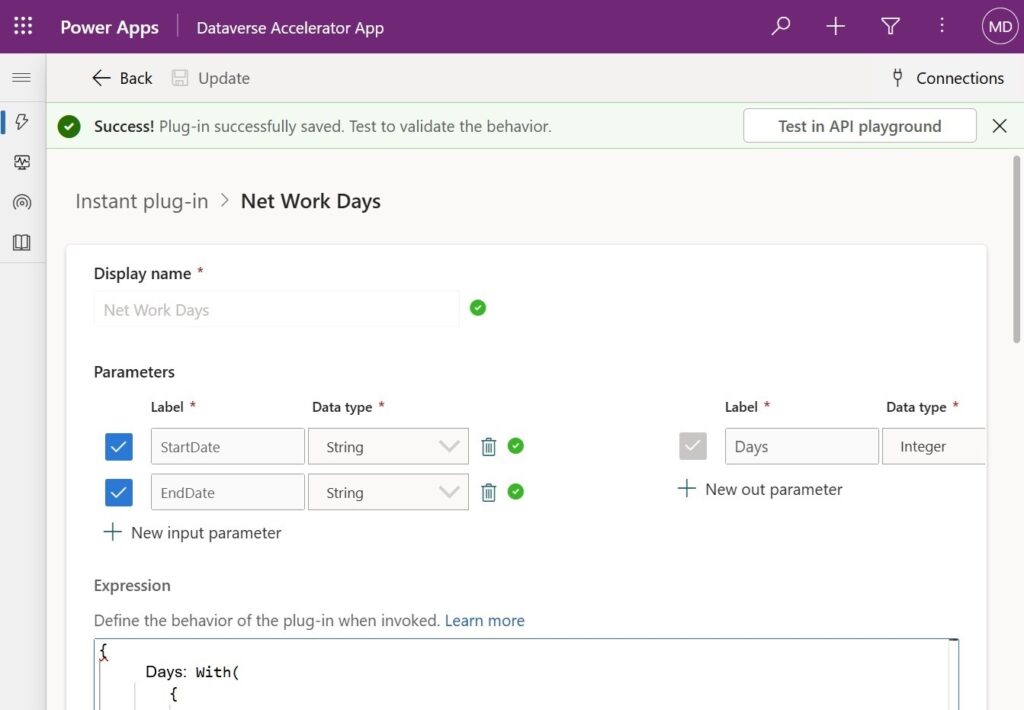
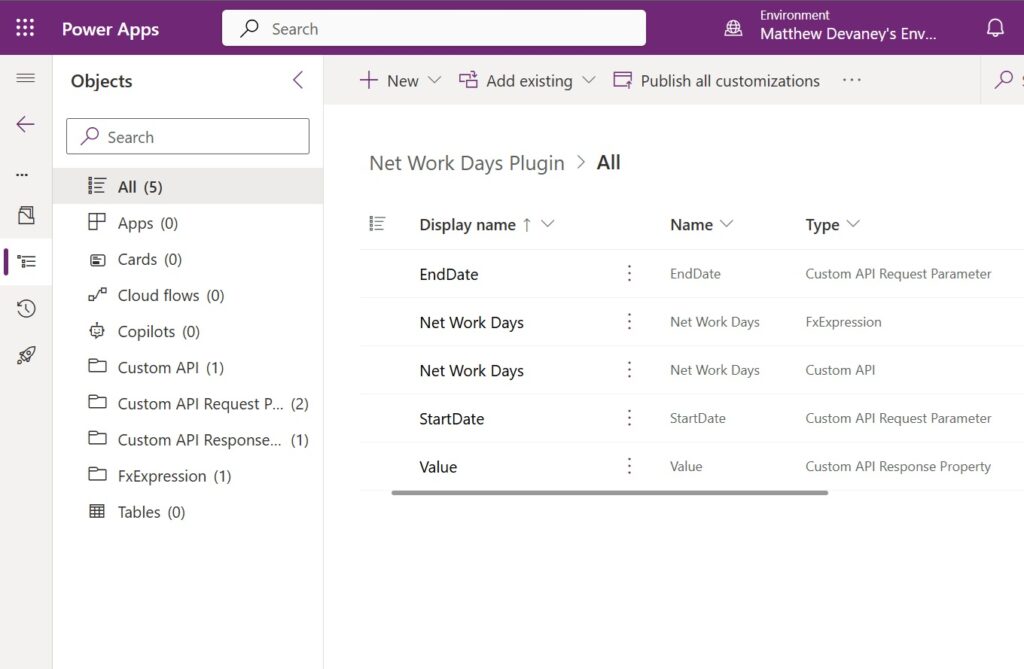
And the plugin is added to the solution along with its other component parts.
Test The Low-Code Plug-In In The API Playground
A low-code plug-in can be tested before using it in Power Automate or Power Apps. Go to the API Playground by pressing the Update icon and clicking the Test in API Playground button that appears in the success notification.
Dates in Power Automate are expressed as a text string. For example, the date November 1, 2024 could be shown as “2024-11-01” or “2024-11-01T00:00:00Z”.
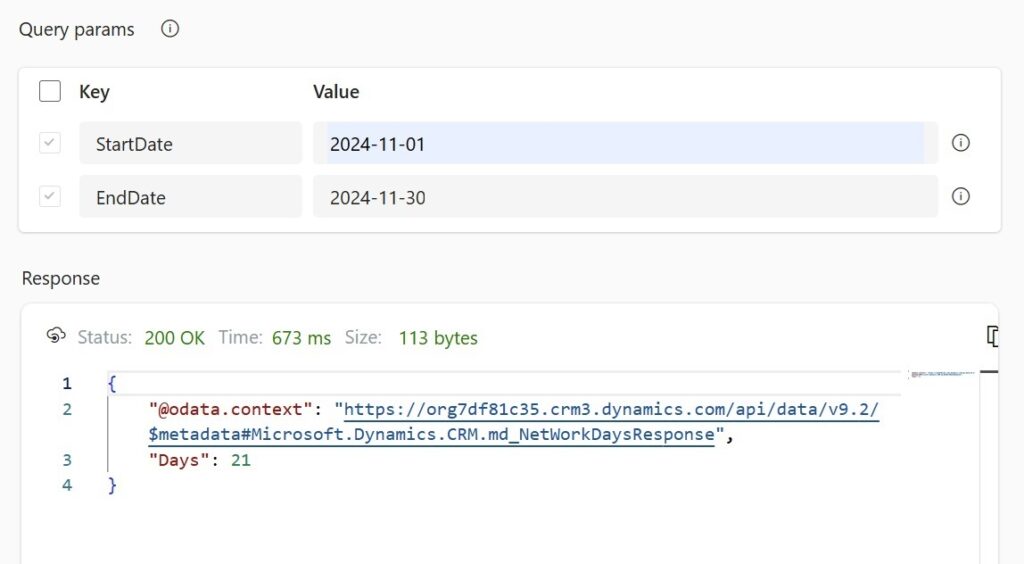
Choose the Net Work Days instant plug-in, fill in the query parameters with these values and then press send:
- StartDate: 2024-11-01
- EndDate: 2024-11-30
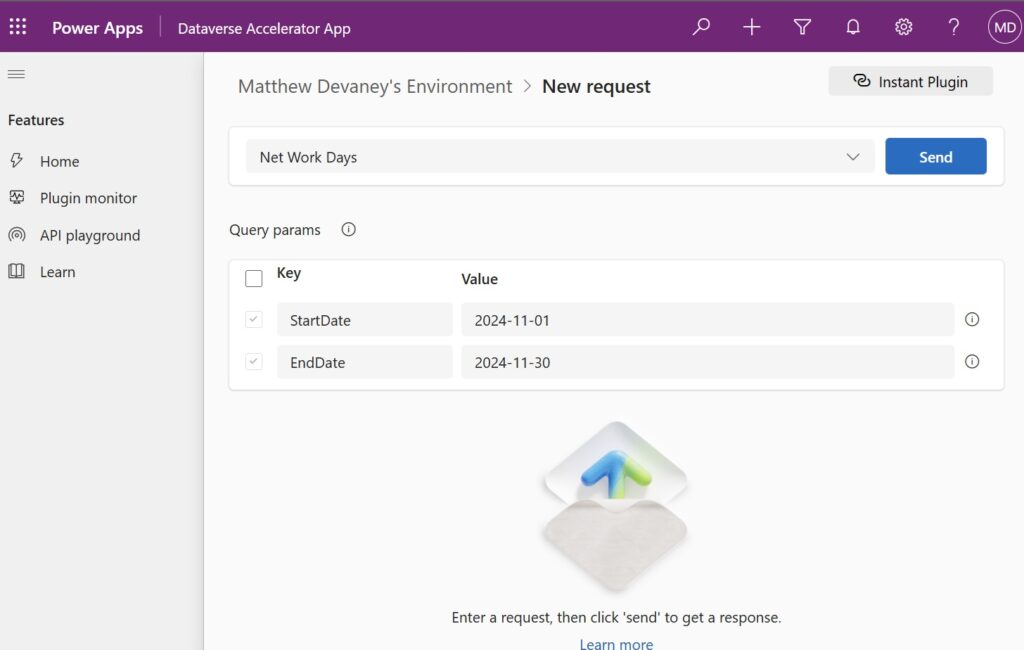
The instant low-code plugin outputs a responses with Days equal to 21.

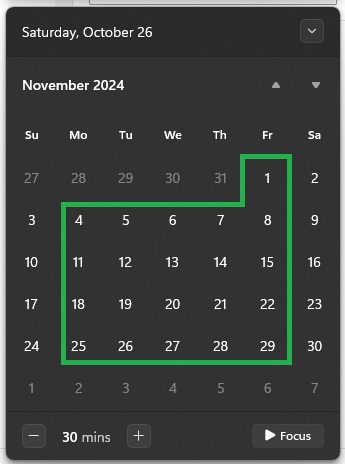
The work days for November 2024 are shown on this calendar. There are 21 work days.
Call The Instant Low-Code Plug-In From A Power Automate Flow
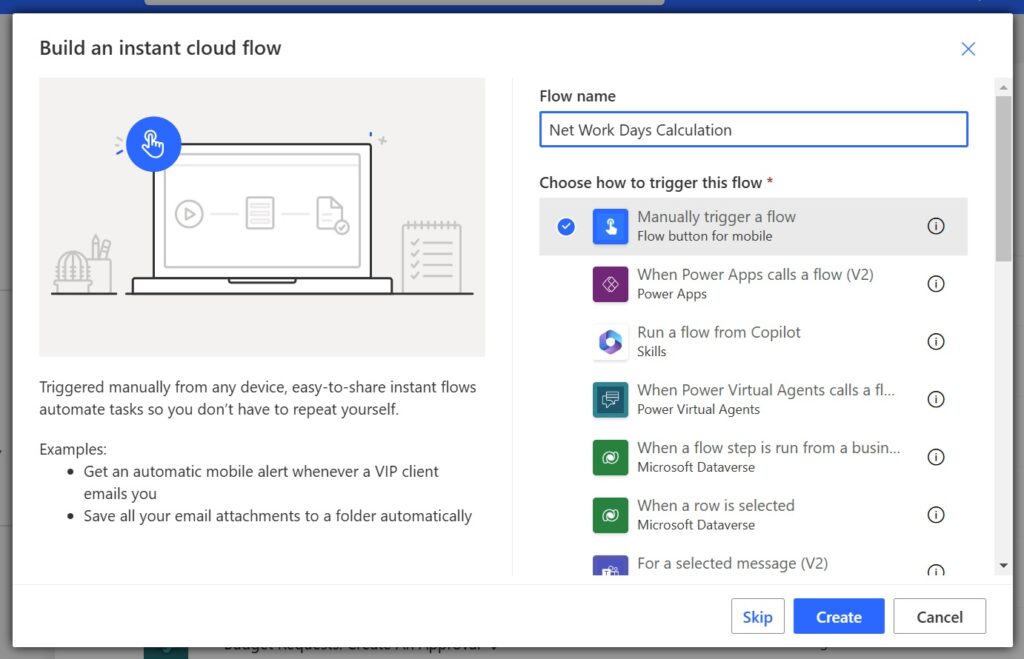
The low-code plugin is completed. Now we want to call it from a Power Automate flow. Create a new instant flow named Net Work Days Calculation.
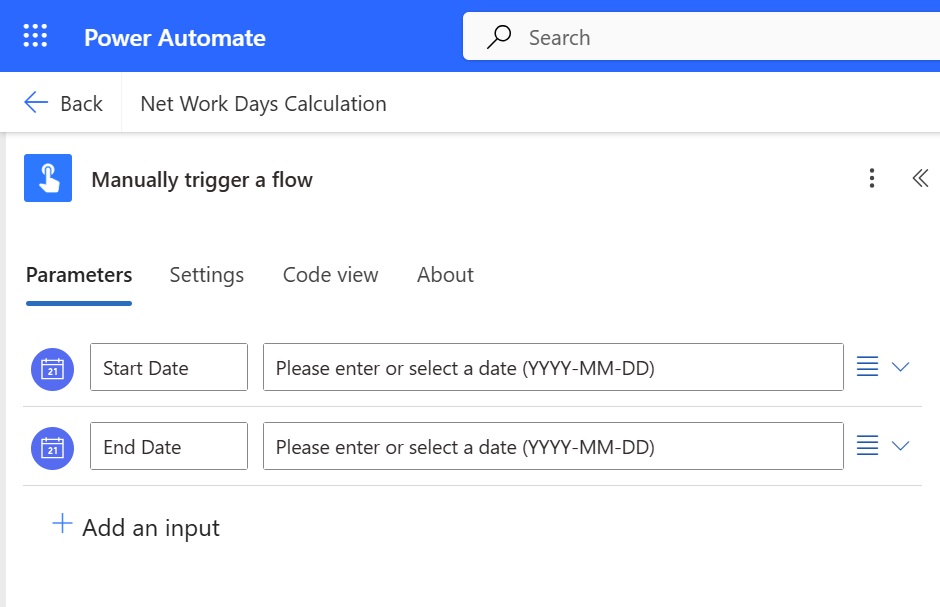
Include two date type parameters in the flow trigger: Start Date and End Date.
Instant low-code plugins can be called as unbound actions in Dataverse. Add a Dataverse – Perform an unbound action to the Power Automate flow.
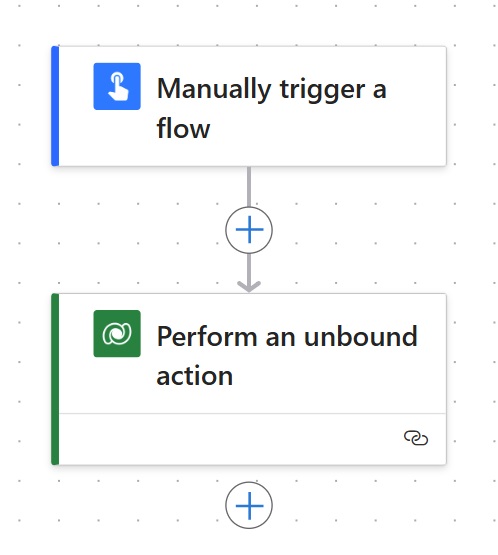
Select the action named NetWorkDays. Supply the Start Date and End Date from the flow trigger as parameters.

Run The Power Automate Flow And Get The Low-Code Plug-in Output
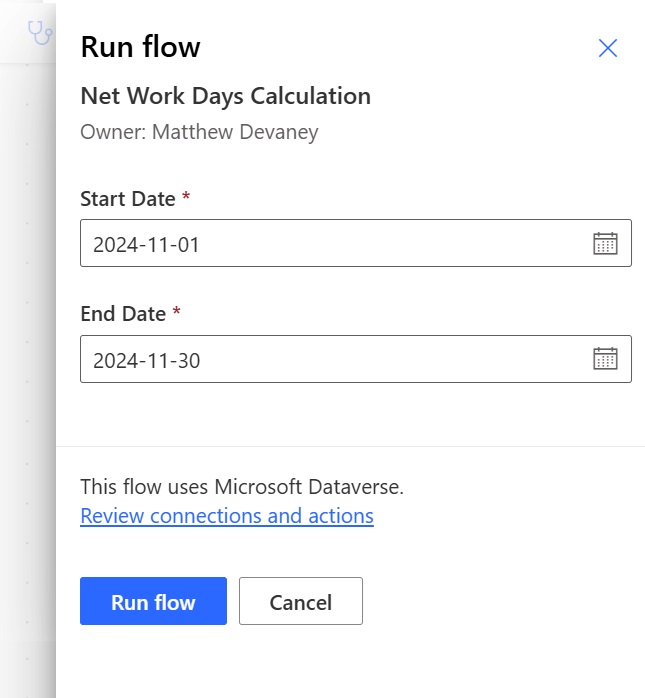
We’re done. It’s time to test our instant low-code in the Power Automate flow. Run the flow and choose a Start Date of 2024-11-01 and an End Date of 2024-11-30.
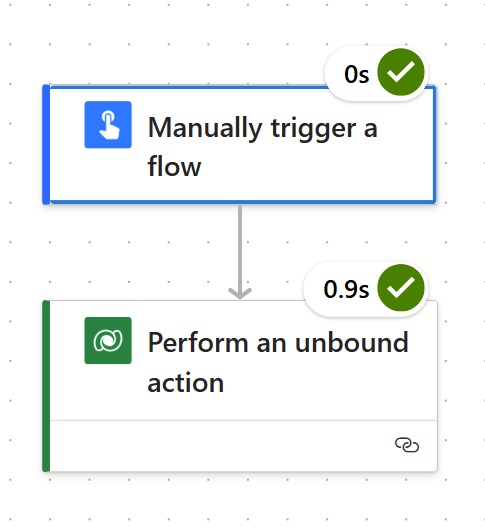
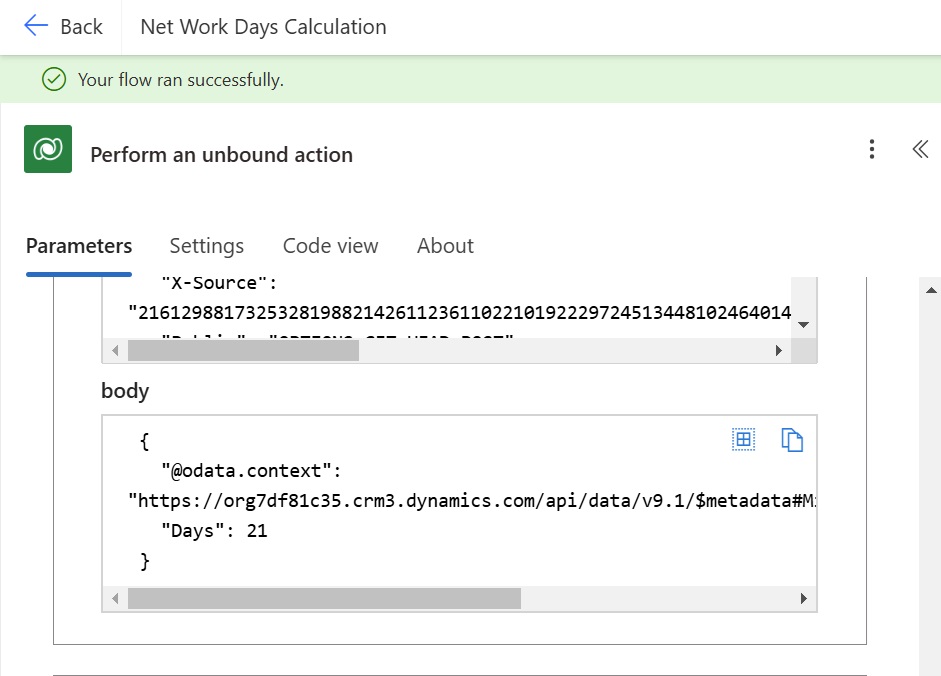
The flow run completes successfully.
And “Days”: 21 can be found in the perform an unbound action outputs.
Did You Enjoy This Article? 😺
Subscribe to get new Power Apps & Power Automate articles sent to your inbox each week for FREE
Questions?
If you have any questions or feedback about Power Automate: Instant Low-Code Plugins To Run PowerFx Code please leave a message in the comments section below. You can post using your email address and are not required to create an account to join the discussion.


Thanks for the article, Matthew
As low-code plugins are in preview, I suppose this functionality is not meant to be used in production.
Do you agree?
Thanks
John,
I’ve built a few low-code plugins and deployed them into production. My opinion is you can launch preview features into production if you verify they work & have demonstrated stability. The reason I say this is some features stay in preview for many years while being totally fine. Case in-point, check out the PDF viewer in Power Apps. That thing has stayed in preview for 4 years and works great.
I appreciate the reply and your view, thanks, Matthew. It seems to be a practical and flexible approach to features in preview
I appreciate the reply and your view, thanks, Matthew. It seems to be a practical and flexible approach to features in preview
I would generally agree with Matthew. However, changes to features, or even broken ones, do happen and you have to accept more risk with features that are *recently* added to preview.
For example, although this article isn’t about the similar capability to run automated plugins, you may be tempted to experiment with that as I did. At the time of this writing, an automated plugin, such as one that fires when a record is created, can’t currently reference “ThisRecord”, even though you’ll see tutorial videos where it works fine. Even the built-in suggestion to use “Set(NewRecord.<fieldname>,<newvalue>)” doesn’t work. It was working at one time, but not now. If you were using automated plugins in production, you’d have a big mess on your hands with no workarounds.
Matthew… I hope you do a tutorial on automated plugins once they’re working again! 🙂
Bob,
Yes, I think I will do an article on automated plugins. I am waiting until they add “filter attributes” to make the plugins only run when a specific field is updated. There’s no guarantee they will do it. But I’m holding out hope.
Incredibly useful and helpful as always, Matthew! How would I allow 2 outputs though? I am trying to take in 5 dates in Excel format (INT) and output 5 corresponding Dataverse dates (yyyy-MM-dd) but can’t seem to get it to work.
Aaaaaactually the issue was that the plug-in code checker is VERY slow and I kept making changes that were eventually accepted as valid code. Once I learned to be patient it was easy.
Thanks for sharing Mattew
Hi Matthew,
Thanks for the article. It’s great to see that we can leverage low-code plugins in Power Automate similarly to .NET plugins.
Just one question: What is your general experience with low-code plugins in relation to ALM? I might consider using them only if they can be properly versioned in GIT and deployed via ADO pipelines.
Thanks as always for the awesome content!
One thing I always struggle with is knowing when to use which tool or technique. The Power Platform is fantastic and growing/evolving SOOO quickly. With all of the tools available to us as developers, it can be daunting to decide which design pattern would be best. I’m working on sorting this out for my organization, but I’d be curious to hear your thoughts Matt. When should one consider low-code plugins and in which scenarios might one steer clear? What are the potential downsides, if any?
Andy,
Automated low-code plugins are great for when there is logic that must be executed when a record is created/updated/deleted and you don’t want anyone to bypass it. They are great for making sure data is maintained consistently. Also, if you are performing only Dataverse operations in the plugin you can remove the need for any Power Automate license. It cuts costs down.
Instant plugins are great in Power Apps for forcing code to execute on the server-side. This can speed up really heavy calculations and improve app stability.
Hi Matthew, Nice article.
How we can use Holiday Calendar Dataverse entity to Calculate Business Days Excluding Weekends & Holidays in PowerFx Expression.
Thanks,
I actually wrote the Power Automate expression to calculate Weekdays for a table of Start and End dates in a Select action… but it was super messy!
I ended up adapting the code you provided to take in a JSON array like:
[{“Id”:52463,”StartDate”:”2024-11-12″,”EndDate”:”2024-12-03″},{“Id”:52464,”StartDate”:”2024-11-12″,”EndDate”:”2024-11-03″}]
Returning a JSON array with Weekday calculations:
[{“Id”:52463,”Weekdays”:15},{“Id”:52464,”Weekdays”:6}]
Hi Matthey, is it possible to send an array of numbers from Power Automate to a fx function to sum the numbers?
Is anyone else getting errors? I get “something went wrong” in a red box at the top of the screen when I try to save. I have copied your example exactly except for the display name and the description.