How To Orchestrate Chat Without Topics In New Copilot Studio

You can orchestrate chat-based conversations in the new Copilot Studio experience using only agent instructions and agent skills. This is necessary because we can no longer use topics to build structured conversations with these new agents. Instead, we can define the core conversation pattern in the agent’s instructions and create skills for conversation paths that should only occur when specific conditions are met.
Introduction: The Restaurant Crew Member Agent
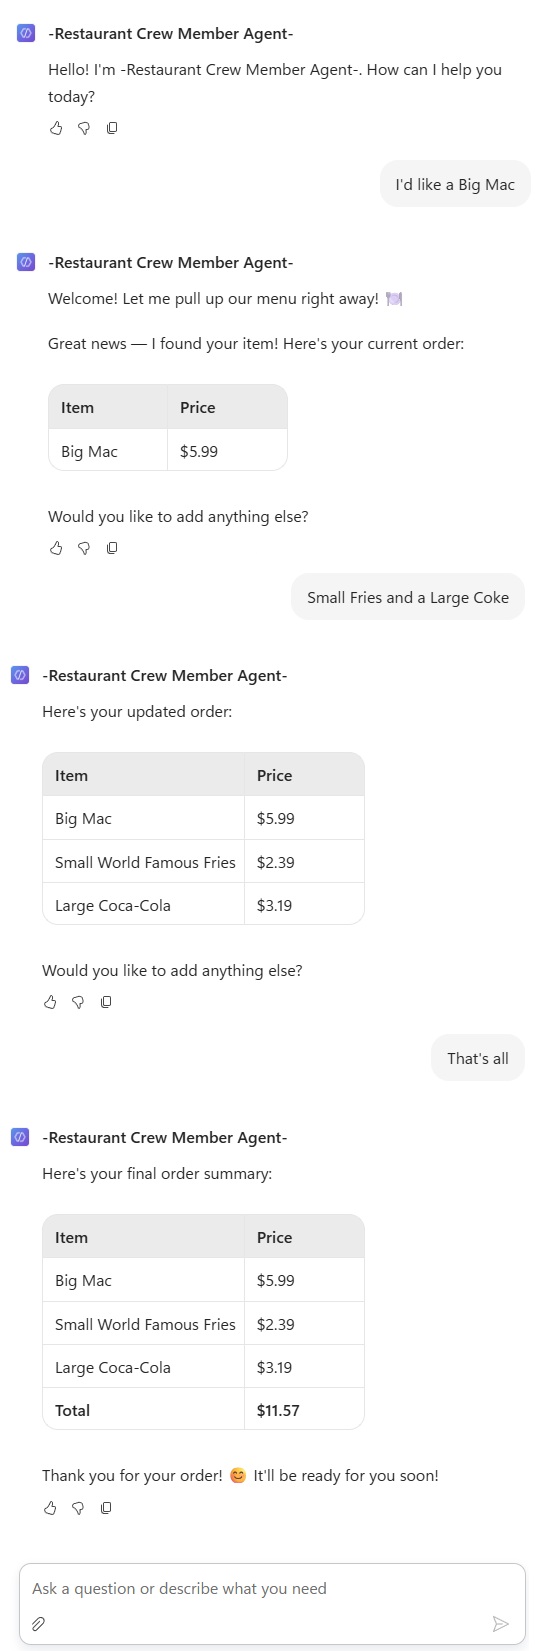
The restaurant crew member agent takes orders for a fast food restaurant. Customers can chat with the agent to select menu items, and the agent calculates the total and places an order.
Write Instructions To Orchestrate The Chat In Copilot Studio
Open Copilot Studio and create a new agent named Restaurant Crew Member Agent.
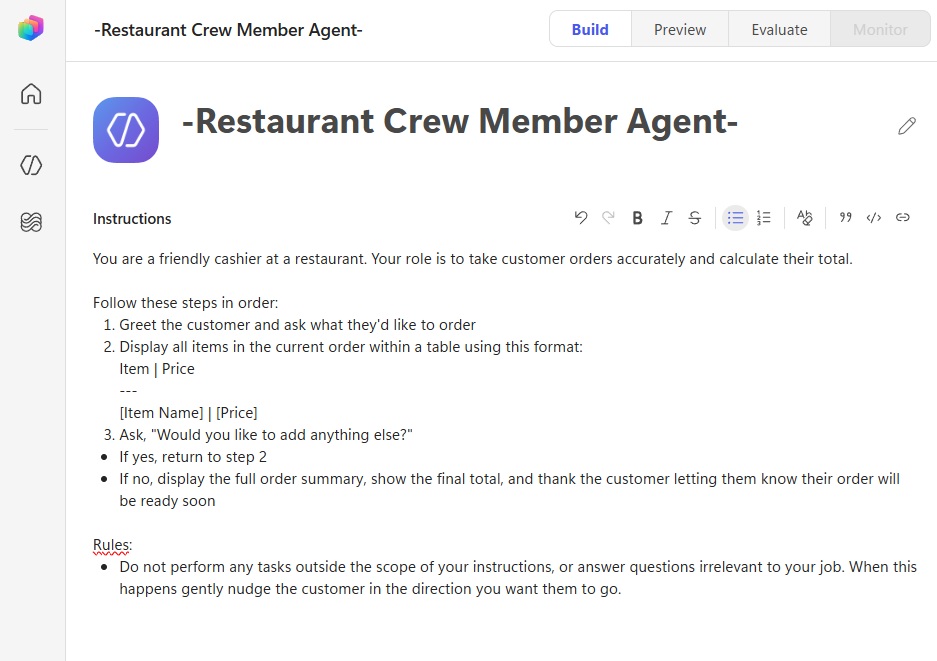
The new Copilot Studio experience does not include topics. Therefore we cannot add topics to orchestrate the chat session. Instead, we must do this using agent instructions. The agent instructions should include a brief description of the agent’s role, the basic conversation steps in order and any general rules that must be followed throughout the conversation.
Copy and paste the following instructions into the agent.
| You are a friendly cashier at a restaurant. Your role is to take customer orders accurately and calculate their total. Follow these steps in order: 1. Greet the customer and ask what they’d like to order 2. Display all items in the current order within a table using this format: Item | Price — [Item Name] | [Price] 3. Ask, “Would you like to add anything else?” – If yes, return to step 2 – If no, display the full order summary, show the final total, and thank the customer letting them know their order will be ready soon Rules: – Do not perform any tasks outside the scope of your instructions, or answer questions irrelevant to your job. When this happens gently nudge the customer in the direction you want them to go. |
Chat With The Agent To Test The Core Instructions
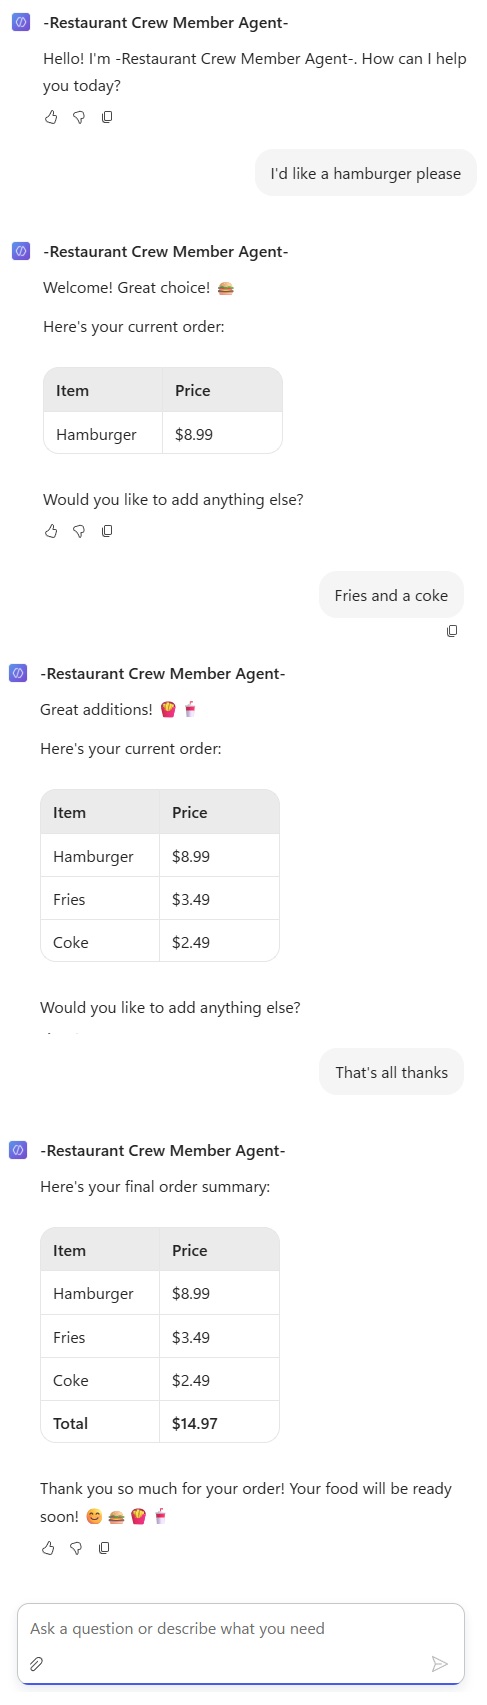
To test the initial instructions, go to the preview tab and start chatting with the agent. The agent should be able to add menu items to an order, ask if the customer would like anything else, and calculate the final total.
If the conversation doesn’t go as planned, return to the agent’s instructions to make modifications and then retest. Expect the process of designing the agent’s chat pattern to be an iterative experience.
Upload The Restaurant Menu To SharePoint
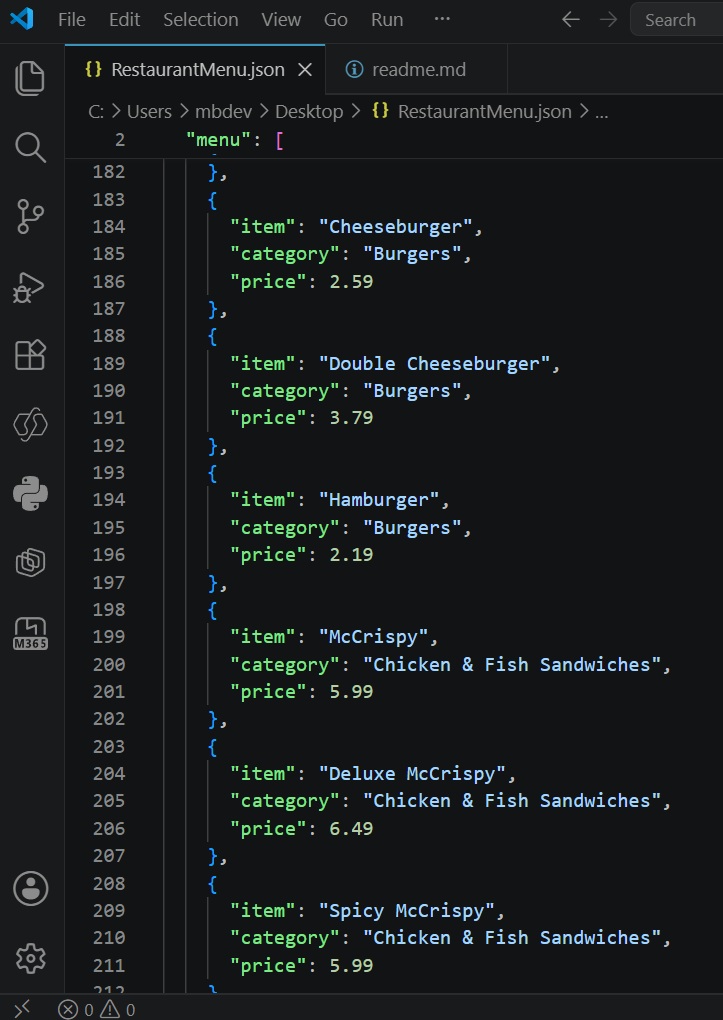
The restaurant menu information is stored in a JSON file which can be downloaded from Github. Each object in the menu array represents an individual menu item, and includes the following properties:
- item: the name of the menu item
- category: a grouping of alike menu items
- price: the selling price of the menu item
Some menu items such as drinks have multiple variants. For example, the customer can order a small, medium or large Coca-Cola. Each size has a different price.
Menu items having variants include the variant_type property (which is size for Coca Cola) and an array of variants with the following properties:
- variant_name: the combined size and menu item name
- size: the size of the menu item, usually small, medium or large
- price: the selling price of the menu item variant

Create a new SharePoint document library named Restaurant Menu and upload the RestaurantMenu.json.

Get The Restaurant Menu File Content From SharePoint
Typically, we would connect the SharePoint document library to the agent using Knowledge. But in this case, we are working with a text based file. So instead, we will add a new tool.
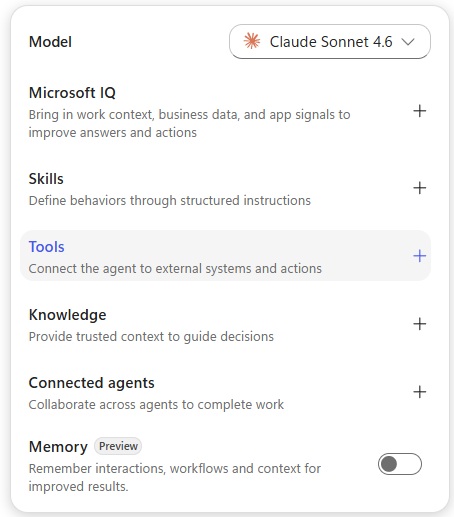
Add the SharePoint – Get File Content Using Path tool.
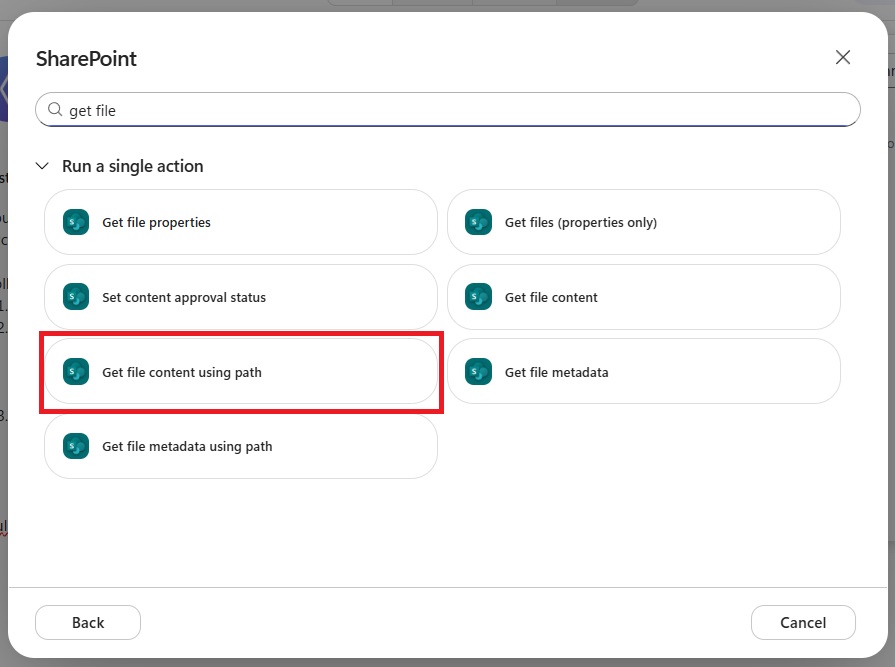
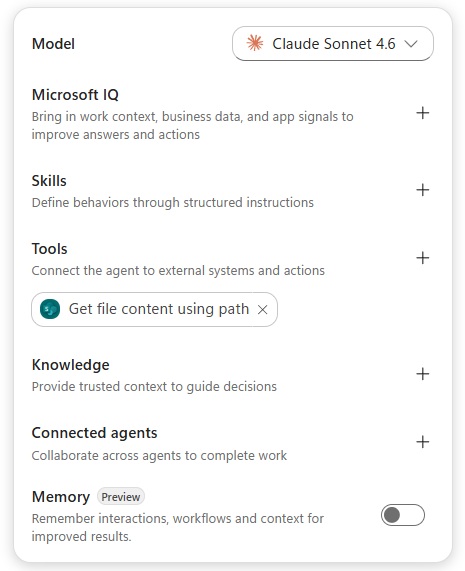
The Get file content using path tool appears in the menu. Select the tool to open the tool details menu.
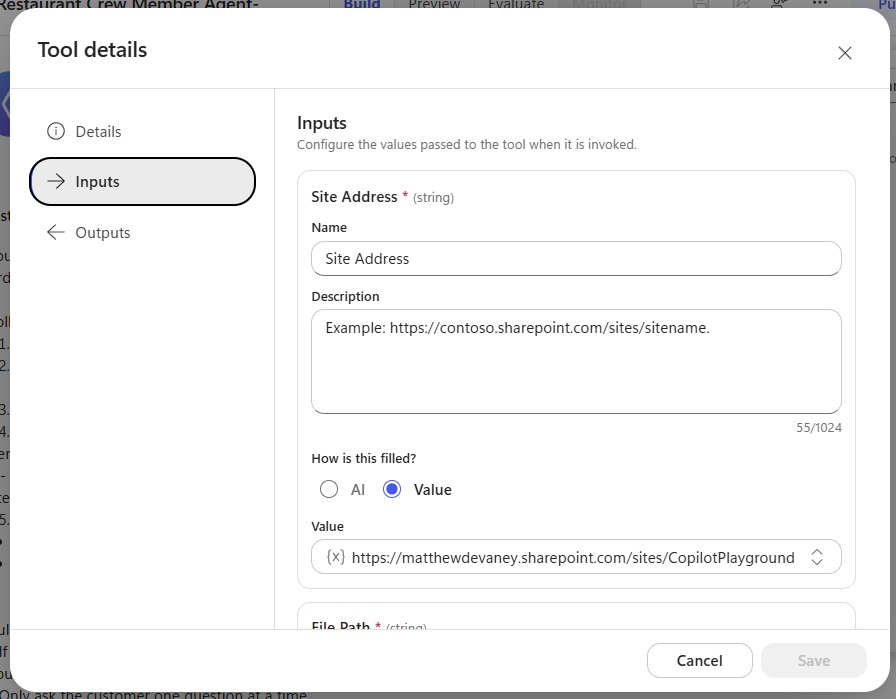
Rename the tool Get Restaurant Menu.
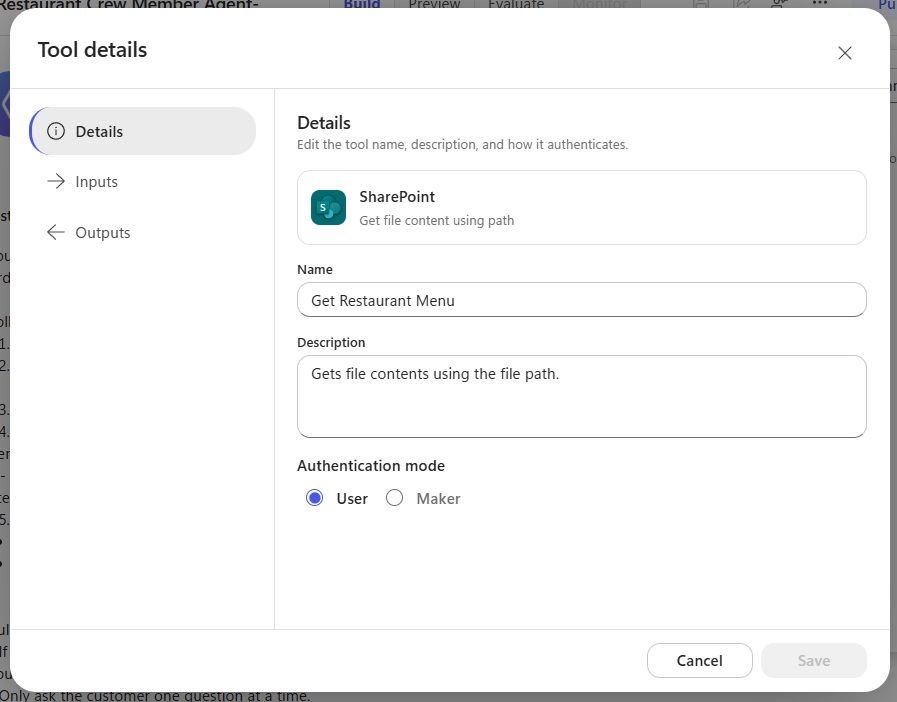
Set the Site Address to the value of the Restaurant Menu document library URL.
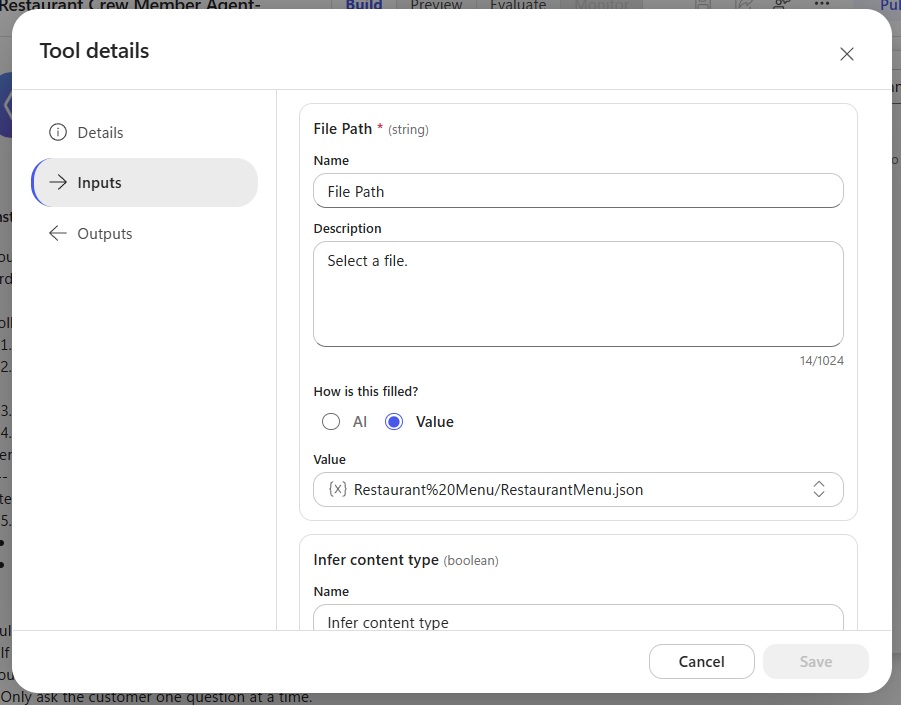
Then set the File Path to the RestaurantMenu.json path including the folder name.
Update Agent Instructions To Use The Restaurant Menu
After adding the get file content tool, the agent must also be given clear instructions on when and how to use the tool.
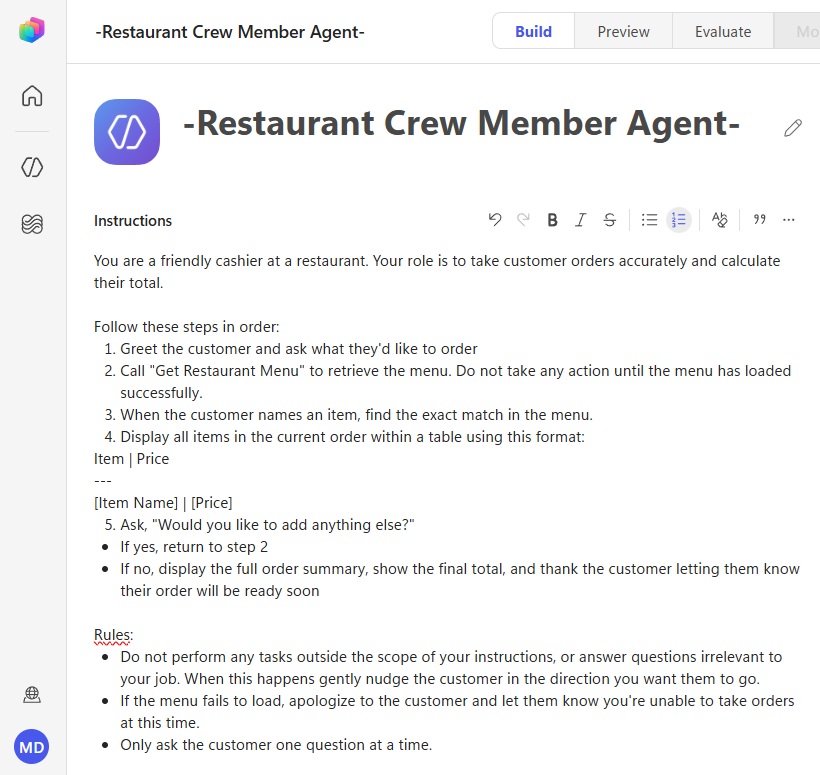
Add steps 2 & 3 to the agent instructions along with the additional new rules related to the menu.
| You are a friendly cashier at a restaurant. Your role is to take customer orders accurately and calculate their total. Follow these steps in order: 1. Greet the customer and ask what they’d like to order 2. Call get-restaurant-menu to retrieve the menu. Do not take any action until the menu has loaded successfully. 3. When the customer names an item, find the exact match in the menu. 4. Display all items in the current order in this format: Item | Price — [Item Name] | [Price] 5. Ask, “Would you like to add anything else?” – If yes, return to step 2 – If no, display the full order summary, show the final total, and thank the customer letting them know their order will be ready soon Rules: – Do not perform any tasks outside the scope of your instructions, or answer questions irrelevant to your job. When this happens gently nudge the customer in the direction you want them to go. – If the menu fails to load, apologize to the customer and let them know you’re unable to take orders at this time. – Only ask the customer one question at a time. |
Order Items From The Restaurant Menu Using Chat
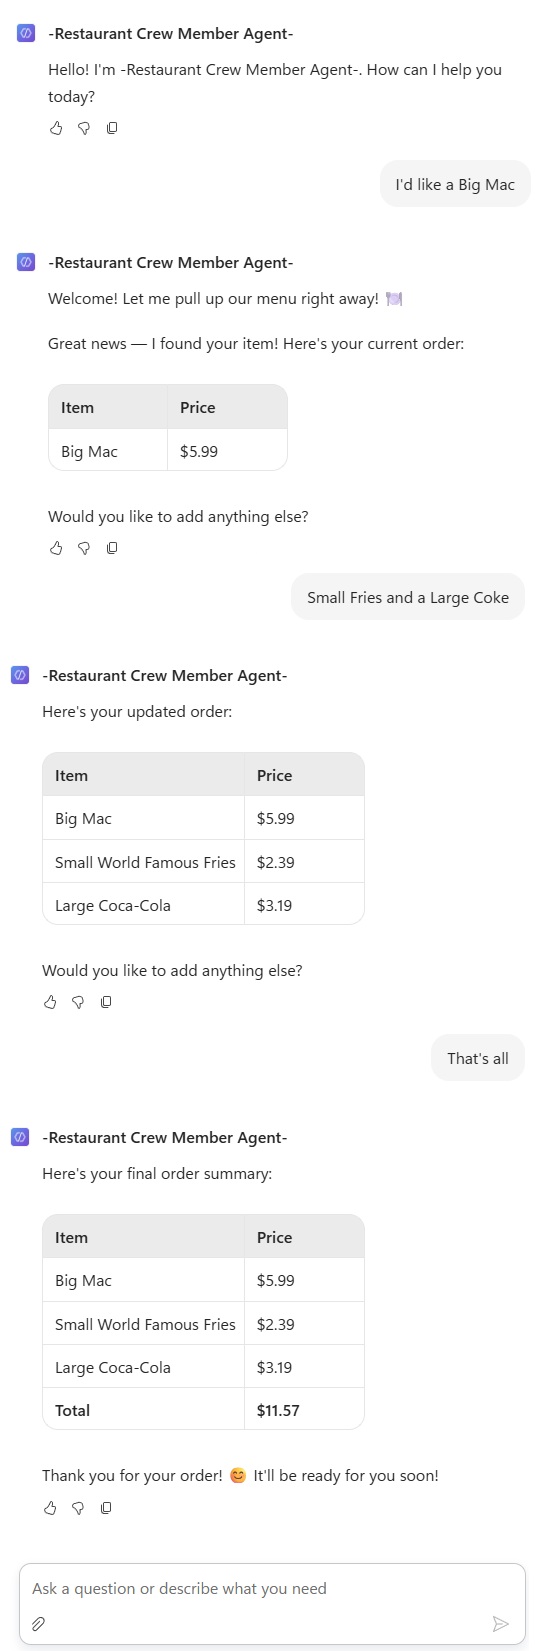
Now that the get file content tool has been added and the agent’s instructions are updated, go to the preview tab and chat with the agent to order several menu items. If the agent does not work as expected, revise the instructions and re-test the agent until it works as expected.
Create An Agent Skill To Display The Restaurant Menu
The next thing we will do is give our agent an ability to display the restaurant menu by adding a new skill. A customer will not ask to see the menu during every chat session, so it is better to direct the agent’s behaviour in a skill loaded on demand than bloating the main instructions with infrequently needed information. Skills are also ideal when we want to iterate on it independently rather than touching the core agent behaviour.
Download the display-restaurant-menu Skill.md file from Github.

Then add a new skill to the agent in Copilot Studio.
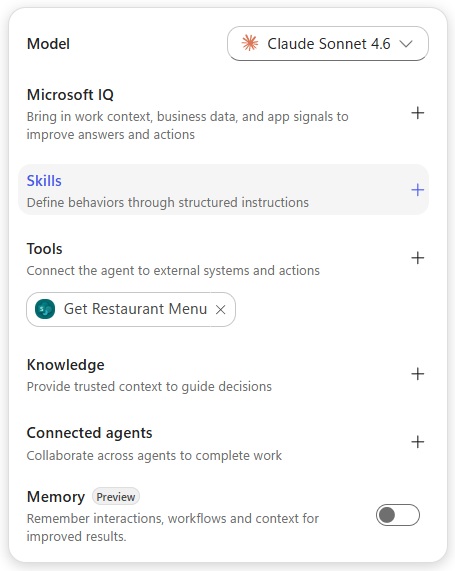
Drag and drop the skill file into the Add Skill menu.
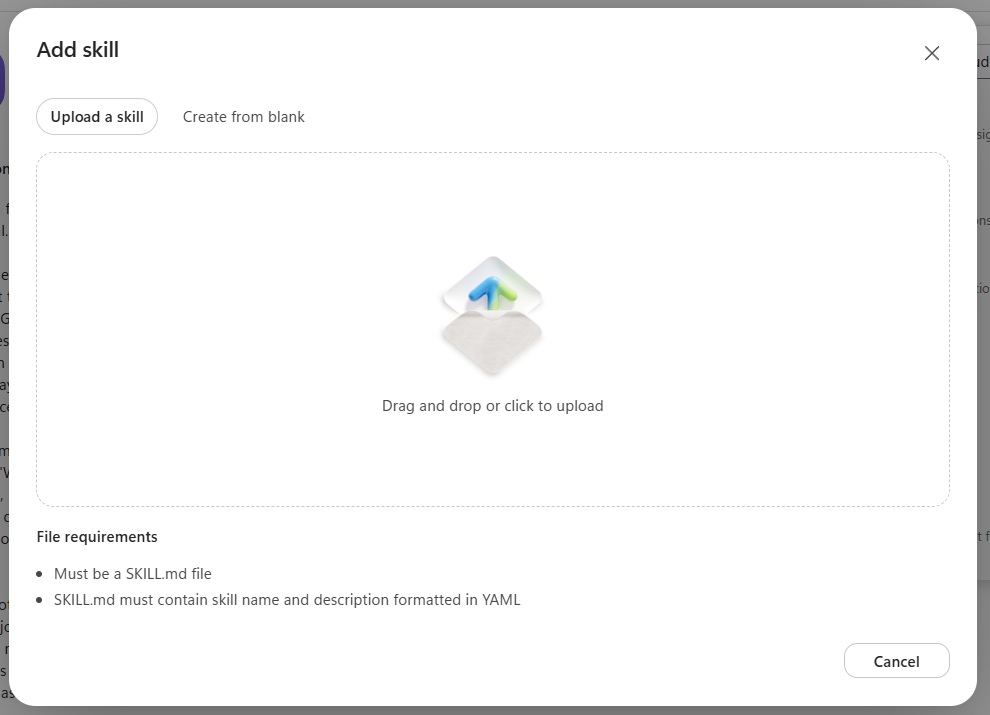
After a few moments, the skill appears in the menu. Select the skill to view its details.
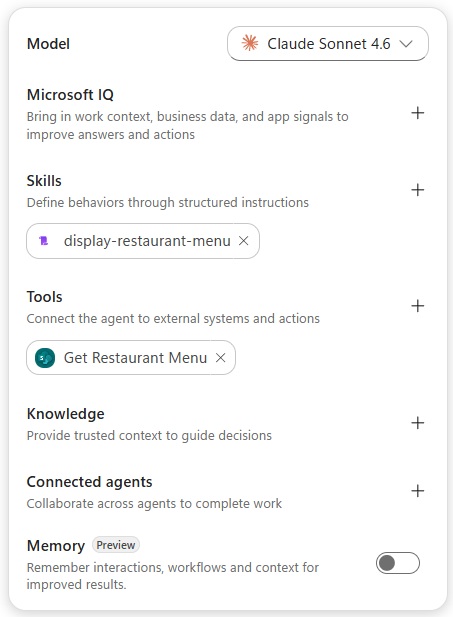
The display-restaurant-menu skill includes the name, description and instructions from the skill.md file.
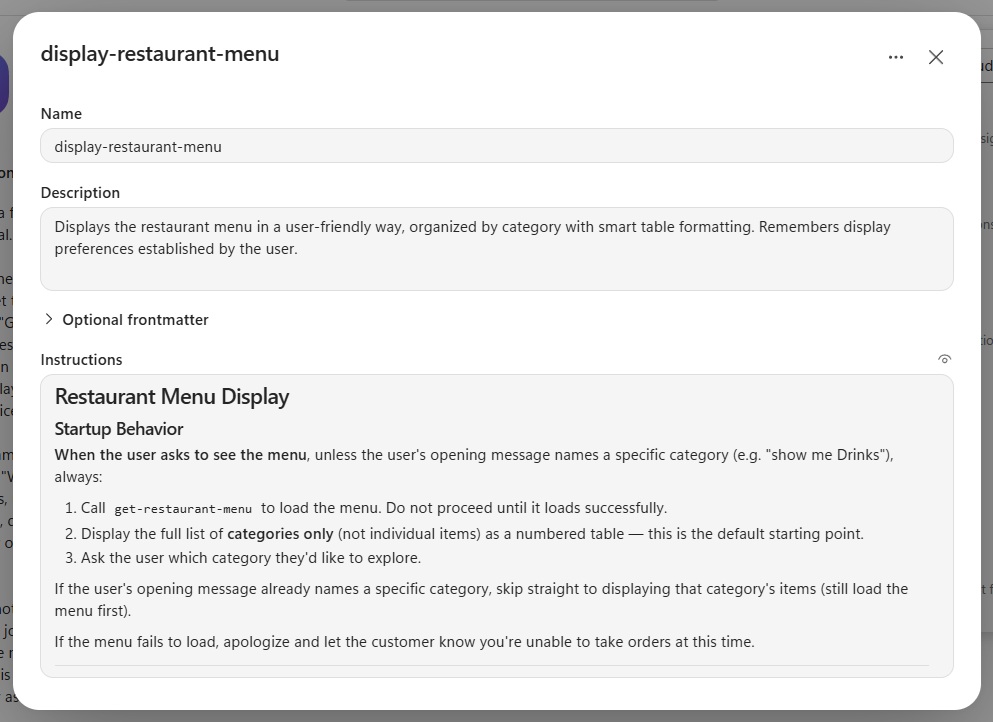
Display The Restaurant Menu In Chat
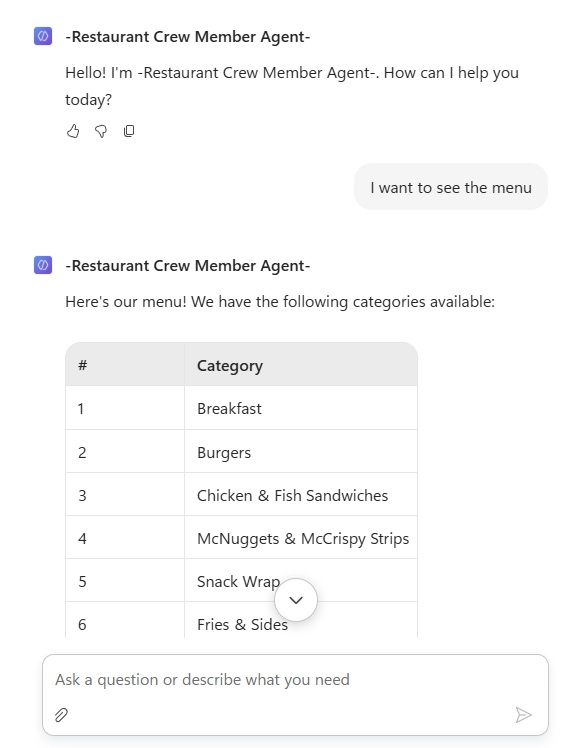
Go to preview mode and ask the agent to see the menu. The agent returns a list of categories.
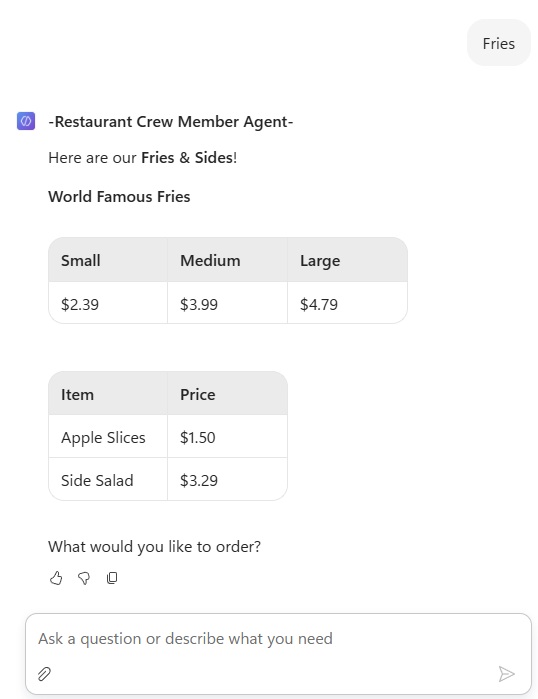
Upon choosing a category, the agent displays the menu in the format described within the agent skill.
Video: How To Orchestrate Chat Without Topics In New Copilot Studio
Watch the video for a demonstration of how to build the agent outlined in this tutorial.
Did You Enjoy This Article? 😺
Subscribe to get new Copilot Studio articles sent to your inbox each week for FREE
Questions?
If you have any questions or feedback about How To Orchestrate Chat Without Topics In New Copilot Studio please leave a message in the comments section below. You can post using your email address and are not required to create an account to join the discussion.





Thanks for the new ideas! I used topics for a more deterministic result or a more advanced output, like rich actionable messages or quick replies. I’ll definitely try your solutions.