Absolute Best Way To Make Multiple Page Forms In Power Apps

Multiple page forms allow data entry to be spread across many app screens. When there a large number of form fields placing one section on each screen makes it feel less overwhelming. The Power Apps form control is typically used to create a single-page form on only one screen. But I will show you how to create multiple page forms in Power Apps by splitting the form over more than one screen. I’ll also reveal how to pass form data from page-to-page, submit form data on the final page and perform data validation at each step along the way.
Introduction: The Work Orders App
The Work Orders app is used by office staff at a plumbing services company to track all of the repair jobs that need to be done. Work orders are very long so the data entry form is split over 3 screens in the app.
Setup A SharePoint List
Create a new SharePoint list called Work Orders with the following columns 12 columns:
| Column Name | Column Type |
| FirstName | Single-line text |
| LastName | Single-line text |
| Address | Single-line text |
| Address2 | Single-line text |
| PhoneNumber | Single-line text |
| Province | Single-line text |
| City | Single-line text |
| PostalCode | Single-line text |
| WorkOrder | Number |
| Issue Reported | Multiple-line text |
| AppointmentStart | Date & Time |
| MaterialsRequired | Multiple-line text |
Create A New Power Apps Form
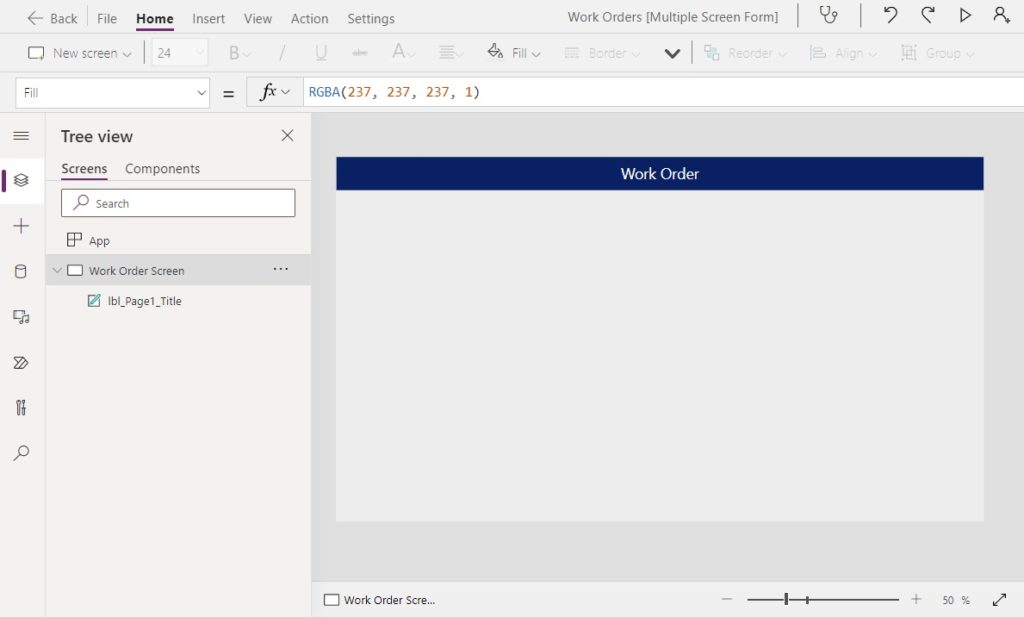
Open Power Apps Studio and create a new app from blank. Insert a label with the words “Work Order” at the top of the screen to serve as a titlebar.
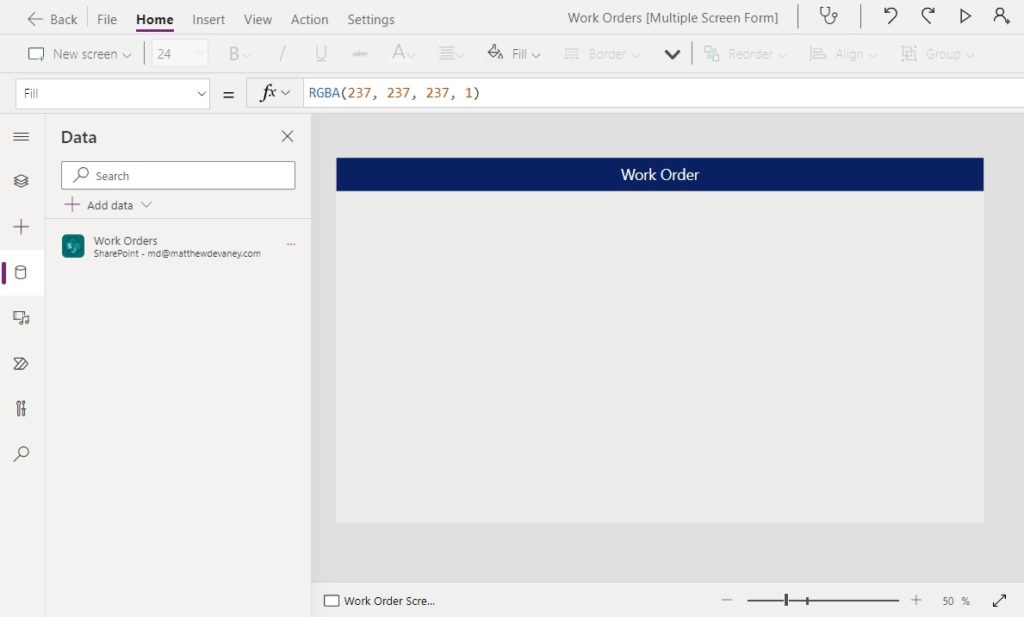
Go to the Data tab on the left-navigation menu and add the Work Orders SharePoint list as a datasource.
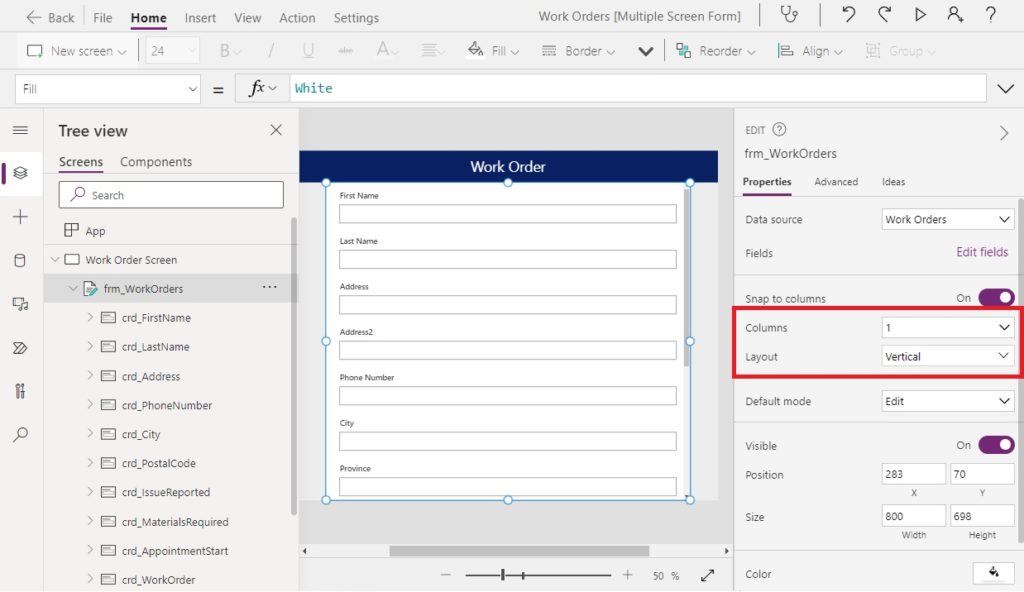
Then place an Edit Form in the center of the screen and connect it to the Work Orders SharePoint list.
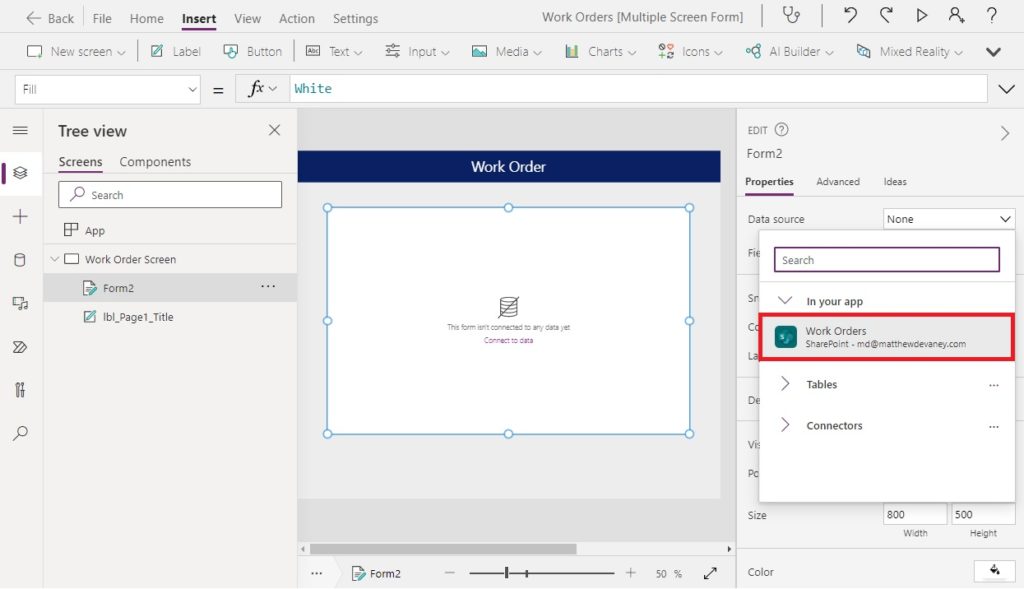
The form will automatically include all of the SharePoint list columns as fields. Delete the Title and the Attachments fields. Then change the form’s Columns property to 1 and the Layout property to Vertical. Now all of the form’s fields should be stacked in a single vertical column.
Duplicate The Screen To Make Multiple Forms
The Work Orders form is very long and has too many fields to fit on a single page. To solve this problem we will display sections of the form over three separate screens. The easiest way to do this is to setup our form as a whole, copy the screen as many times as necessary and then remove any unwanted form fields.

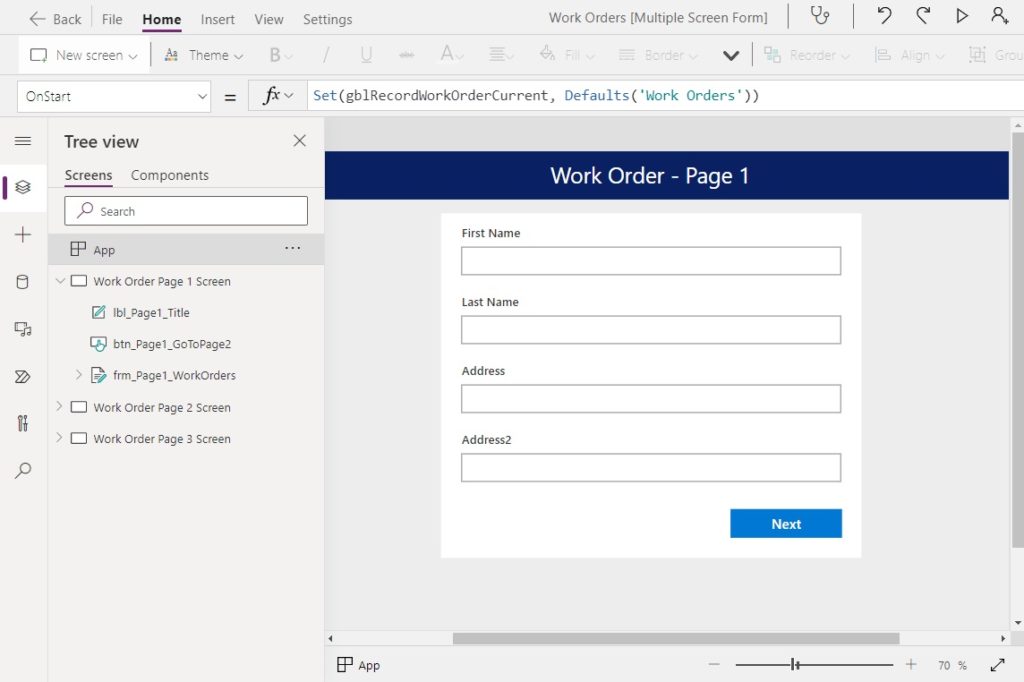
Before we copy the screen, write this code in the OnStart property of the app to store a empty row inside a variable.
Set(gblRecordWorkOrderCurrent, Defaults('Work Orders'))Code language: JavaScript (javascript)
Go back to the form and write this code in the Item property to control what record it displays.
gblRecordWorkOrderCurrent
Also update the form’s DefaultMode property to New so it defaults to creating a new entry.
FormMode.NewCode language: CSS (css)
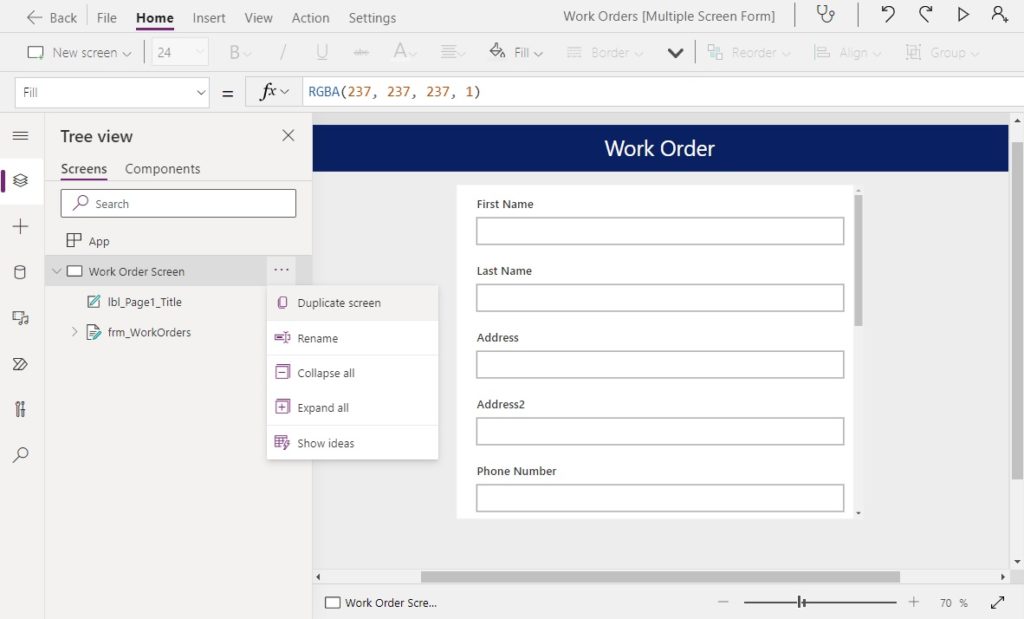
Then select the three dots beside the Work Order Screen and click Duplicate Screen. Do this twice.
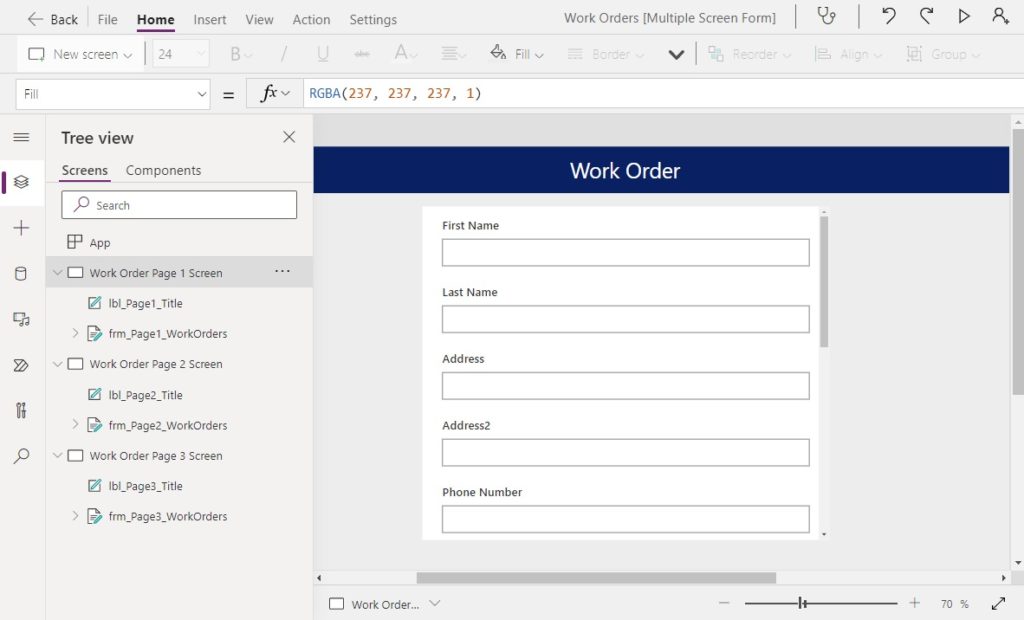
Now we have 3 screens that are exactly the same. Take this opportunity to rename the controls on each screen so we don’t get confused.
Select The Fields To Display On Each Form Page
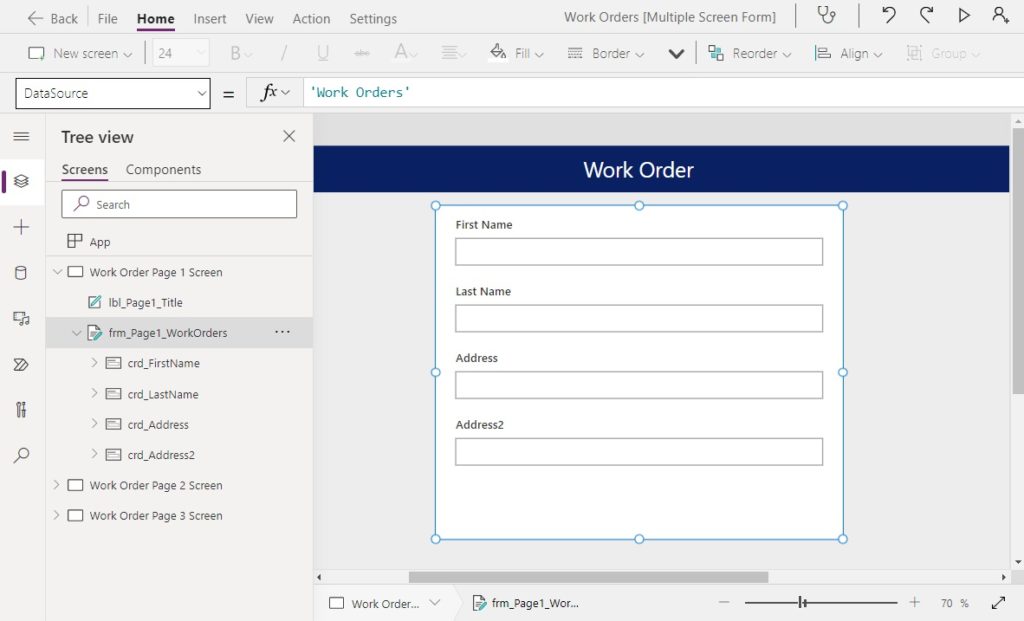
Every screen we duplicated has a form with the 12 fields. We only want to show a subset of those on each screen and delete the rest. On Page 1 keep First Name, Last Name, Address, Address 2 and remove anything else.
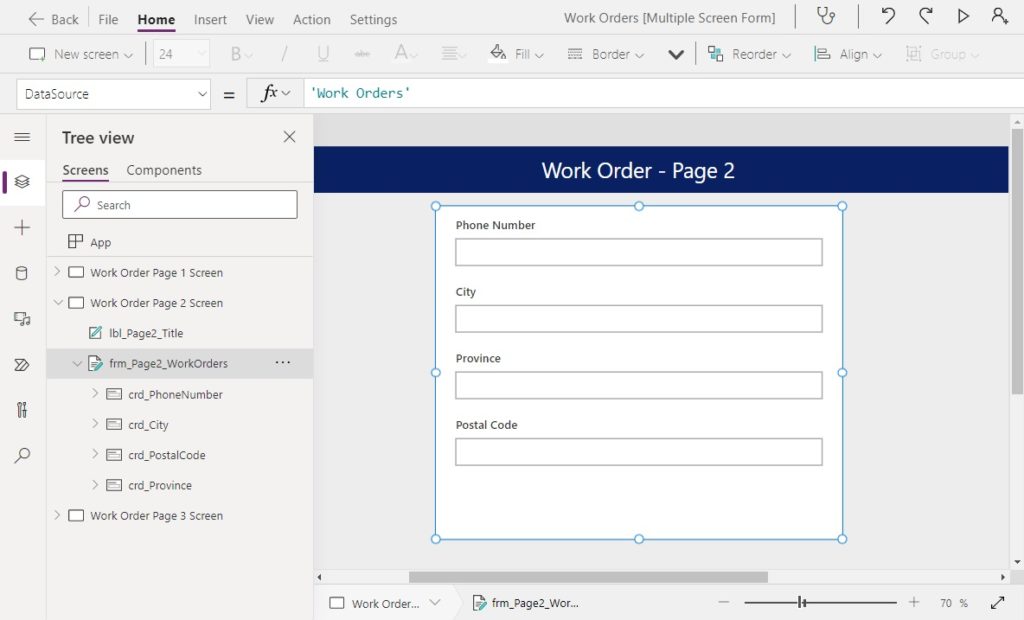
On Page 2 keep only Phone Number, City, Province and Postal.
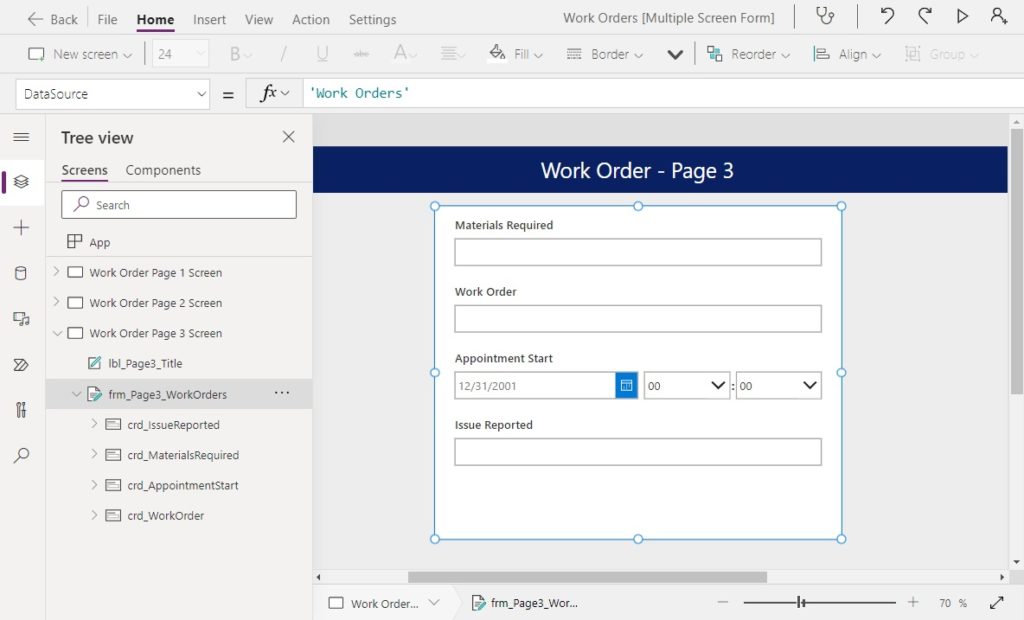
And on Page 3 keep only Materials Required, Work Order, Appointment Start and Issue Reported. Now we have 3 screens, with three separate forms and each contains fields that are unique. It was easy to maintain the same look and feel for each form because we always started from the same original form.
Store Data From Multiple Page Form In A Record Variable
Saving the data single from a single form is easy – we would just write a SubmitForm function in the OnStart property of a button and when clicked its data would be recorded in SharePoint. For a multiple page form we must use a different technique. We will store the form data in a variable and add to it as we navigate through each page. On the final page we will use a Patch function to write all of the data to a new list item in SharePoint.
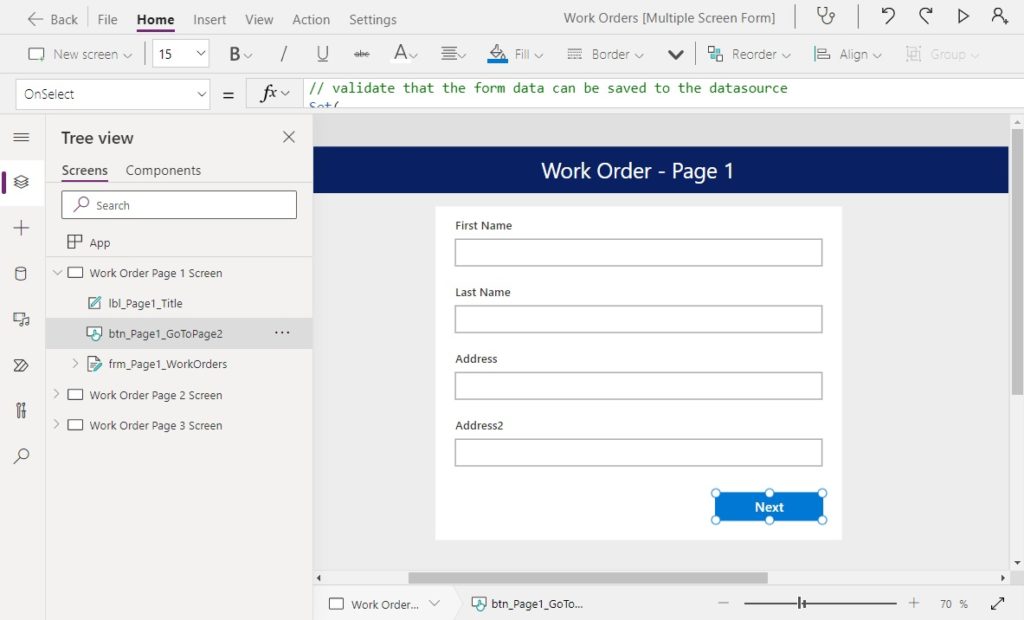
Insert a button onto the screen labelled “Next” and use this code in the OnSelect property. If the form is in New mode or Edit mode it validates whether data entered into the form can be written back to the SharePoint list. This is important because we don’t want to finish the form only to find out there is an error. If data validation is successful, it stores the form data in our gblRecordWorkOrderCurrent variable and goes to the next screen. Otherwise, an error message is shown.
If(
    // check the form mode
    frm_Page1_WorkOrders.Mode=FormMode.View,

    // if view mode, go to next screen
    Navigate('Work Order Page 2 Screen'),

    // if new or edit mode, validate that the form data can be saved to the datasource
    Set(
        varValidateForm,
        Validate(
            'Work Orders',
            Defaults('Work Orders'),
            frm_Page1_WorkOrders.Updates
        )
    );

    // if validation is passed goto the next screen, otherwise, show an error.
    If(
        IsBlank(varValidateForm),

        // store the form data in a variable
        Set(
            gblRecordWorkOrderCurrent,
            Patch(
                gblRecordWorkOrderCurrent,
                frm_Page1_WorkOrders.Updates
            )
        );
        Navigate('Work Order Page 2 Screen'),

        // show an error message
        Notify(
            varValidateForm,
            NotificationType.Error
        )
    )
)Code language: JavaScript (javascript)
Copy the button from Page 1 to Page 2…
…and write this similar code in the OnSelect property.
If(
    // check the form mode
    frm_Page2_WorkOrders.Mode=FormMode.View,

    // if view mode, go to next screen
    Navigate('Work Order Page 3 Screen'),

    // if new or edit mode, validate that the form data can be saved to the datasource
    Set(
        varValidateForm,
        Validate(
            'Work Orders',
            Defaults('Work Orders'),
            frm_Page2_WorkOrders.Updates
        )
    );

    // if validation is passed goto the next screen, otherwise, show an error.
    If(
        IsBlank(varValidateForm),

        // store the form data in a variable
        Set(
            gblRecordWorkOrderCurrent,
            Patch(
                gblRecordWorkOrderCurrent,
                frm_Page2_WorkOrders.Updates
            )
        );
        Navigate('Work Order Page 3 Screen'),

        // show an error message
        Notify(
            varValidateForm,
            NotificationType.Error
        )
    )
)Code language: JavaScript (javascript)
Submit The Multiple Page Form
On the final page of the form we must submit the data from all 3 pages. Once again, copy the button from Page 2 to Page 3 and change the text to “Submit.”
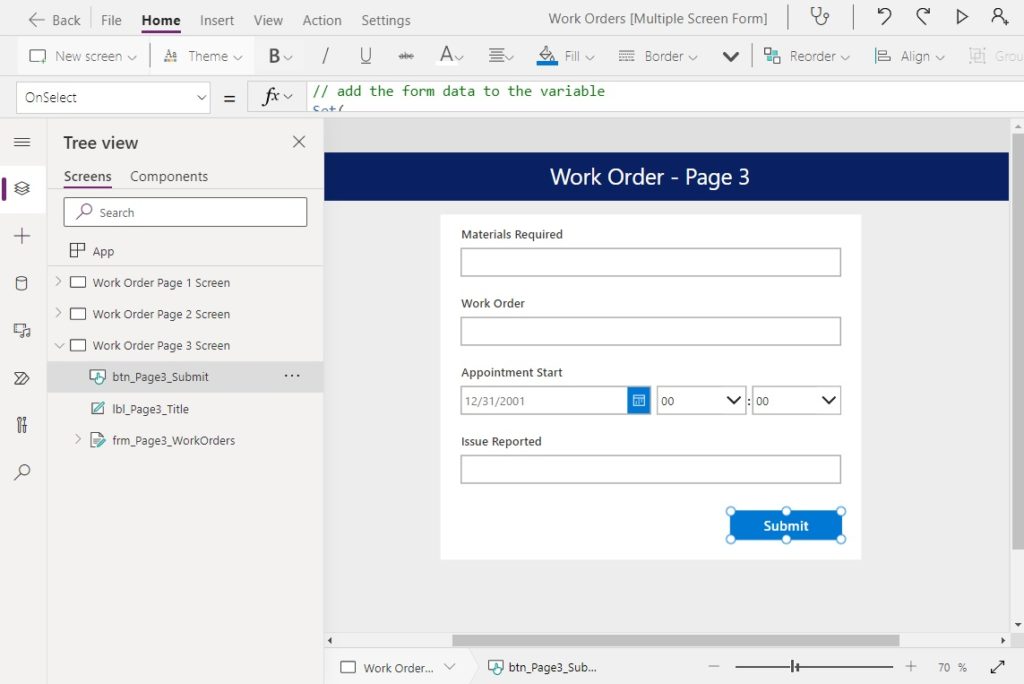
Use this code in the OnSelect property of the Submit button. Instead of the SubmitForm function we use the Patch function to insert a new row into the SharePoint list. We no longer need to validate the form data in this code block because if the patch function fails we will stay on the same page and not lose the ability to correct data entry mistakes.
Note: we will build the Work Orders List Screen referenced in the Navigate function next.
// add the form data to the variable
Set(
    gblRecordWorkOrderCurrent,
    Patch(
        gblRecordWorkOrderCurrent,
        frm_Page3_WorkOrders.Updates
    )
);
// if validation is passed goto the next screen, otherwise, show an error.
IfError(
    Patch('Work Orders', Defaults('Work Orders'), gblRecordWorkOrderCurrent),
    Navigate('Work Orders List Screen'),
    Notify(varValidateForm,NotificationType.Error)
);Code language: JavaScript (javascript)
We’ve now finished building the multiple page form. Go ahead and give it a try to ensure it writes data back to the SharePoint list!
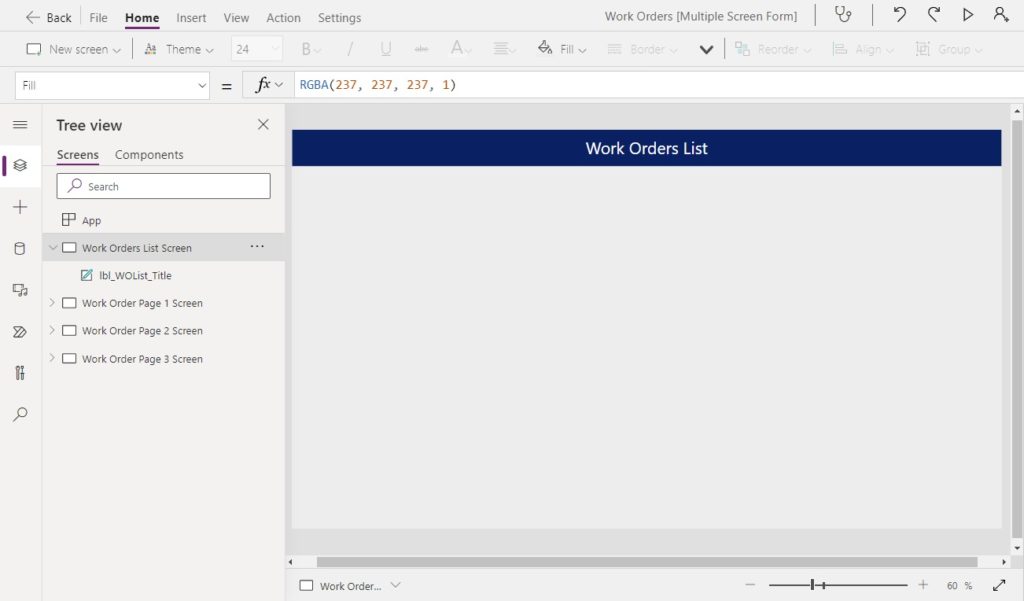
Build A Gallery To Display To Show All Submitted Work Orders
Once a form is submitted we need a way to view all of the past work orders entered and view their data. To do this, create a new screen called Work Orders List Screen and place a the same titlebar as the other screens at the top.
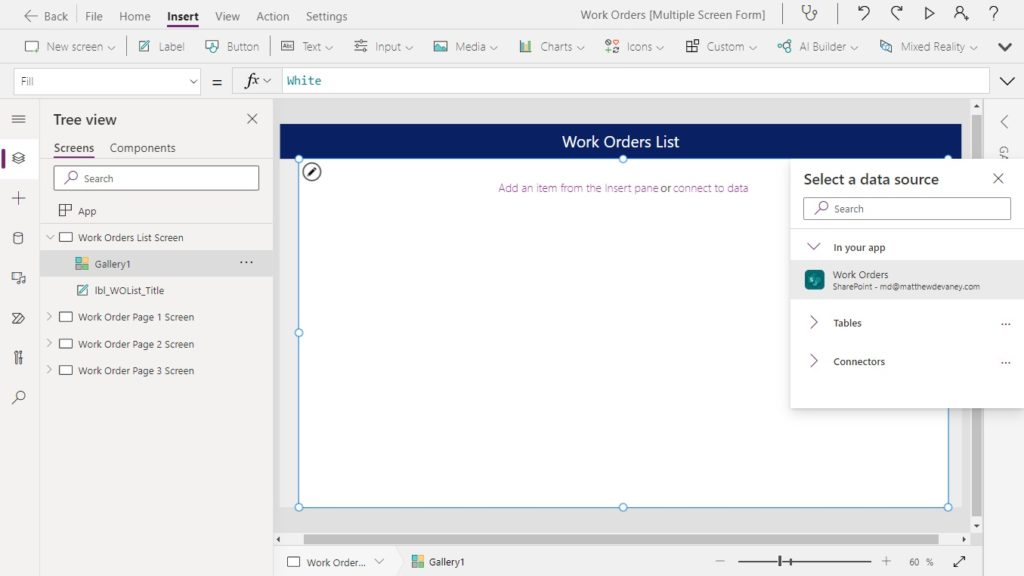
Insert a new gallery onto the screen and choose the Work Orders SharePoint list as the datasource.
Then choose the Layout Title, subtitle, and body from the right-side properties menu.
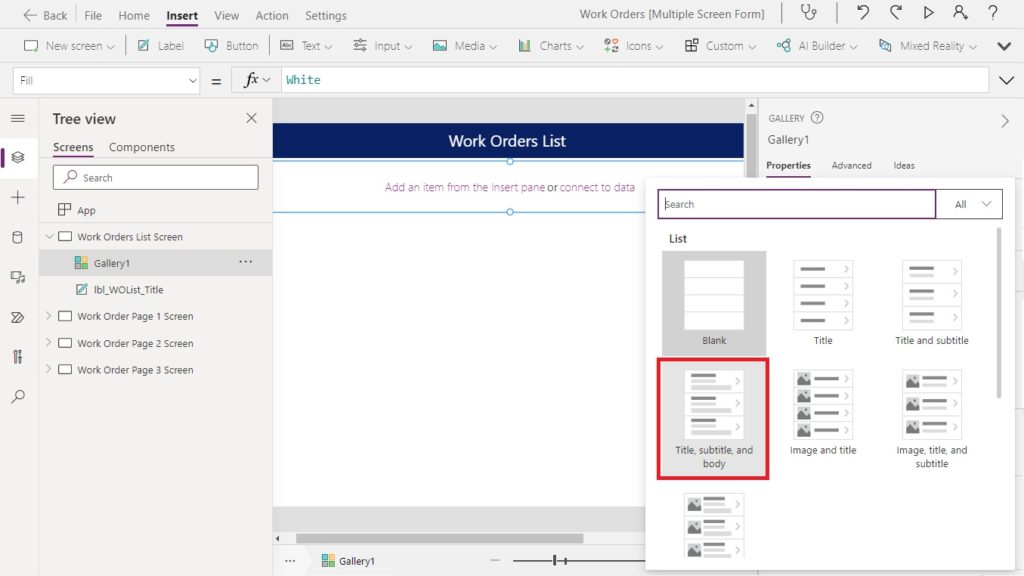
Use the following code in the Text property of the gallery’s labels:
| Field | Data |
| Title | ThisItem.FirstName&” “&ThisItem.LastName |
| Subtitle | ThisItem.Address |
| Body | WorkOrder |
View A Previously Entered Form
To view a Work Order from the SharePoint list the user click on an item in the gallery.
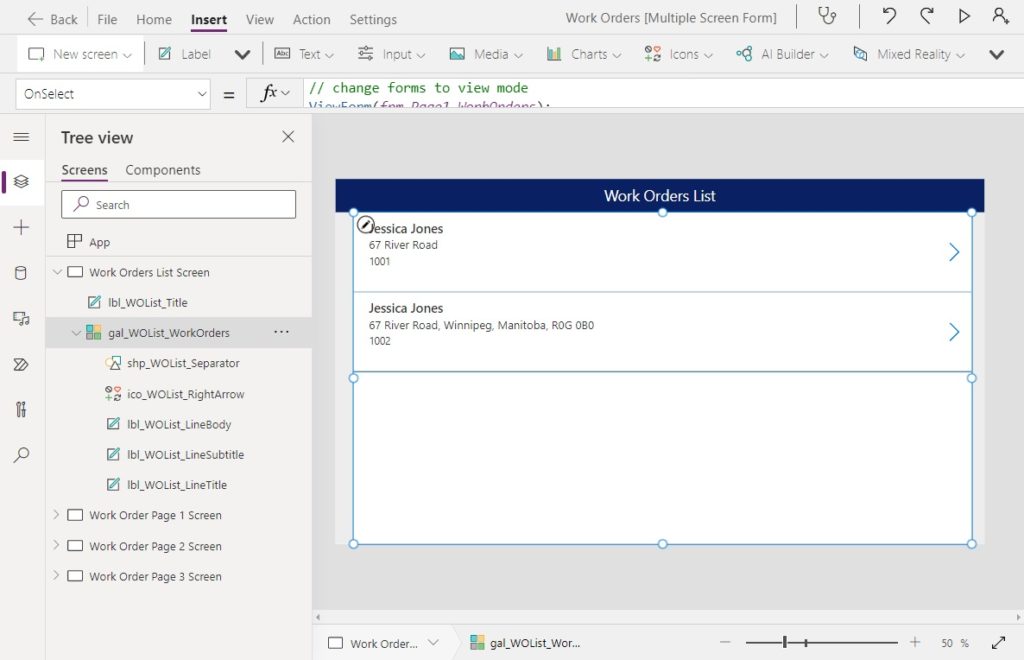
Use this code in the OnSelect Property of the gallery to change the forms on Page 1, 2 and 3 to view mode, retrieve the form data, store it in a variable and then navigate to Page 1 of the form.
// change forms to view mode
ViewForm(frm_Page1_WorkOrders);
ViewForm(frm_Page2_WorkOrders);
ViewForm(frm_Page3_WorkOrders);
// get form record
Set(gblRecordWorkOrderCurrent, LookUp('Work Orders', ID=ThisItem.ID));
// go to form page 1
Navigate('Work Order Page 1 Screen');Code language: JavaScript (javascript)
Now we can view any previously entered work order. Click on a work order a review each form to make sure our code works.
Create A New Multiple Page Form
We also need to give users a way to make a new work order. Insert a button at the top left of the gallery with the text “New Work Order.”
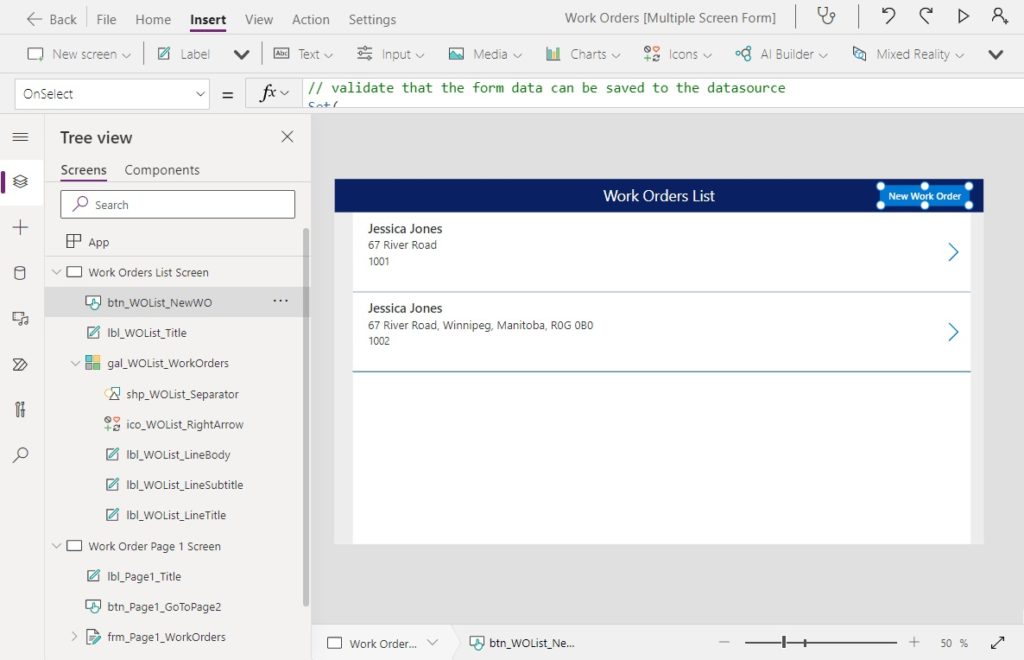
Use this code in the OnSelect property of the button to change the forms on Page 1, 2 and 3 into new mode, save a empty variable to store the form data in and navigate to form Page 1.
// change forms to view mode
NewForm(frm_Page1_WorkOrders);
NewForm(frm_Page2_WorkOrders);
NewForm(frm_Page3_WorkOrders);
// get form record
Set(gblRecordWorkOrderCurrent, Defaults('Work Orders'));
// go to form page 1
Navigate('Work Order Page 1 Screen');Code language: JavaScript (javascript)
At this point its a good idea to click new work order the new work order button and test the functionality we added.
Add A Go To Previous Screen Button
The ability to go back to the previous screen in a form is the final feature we are missing. Go to the Work Order Page 2 Screen and place a button at the bottom of the form with the text “Previous.”
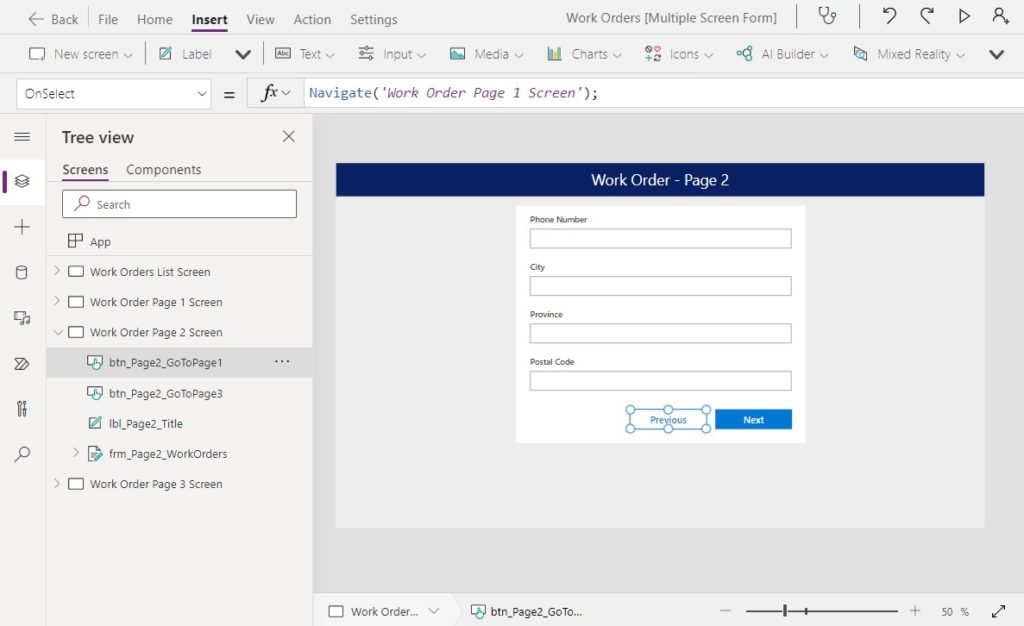
Use this code in the OnSelect property of the form to return to Page 1.
Navigate('Work Order Page 1 Screen')Code language: JavaScript (javascript)
Copy the button to Page 3…
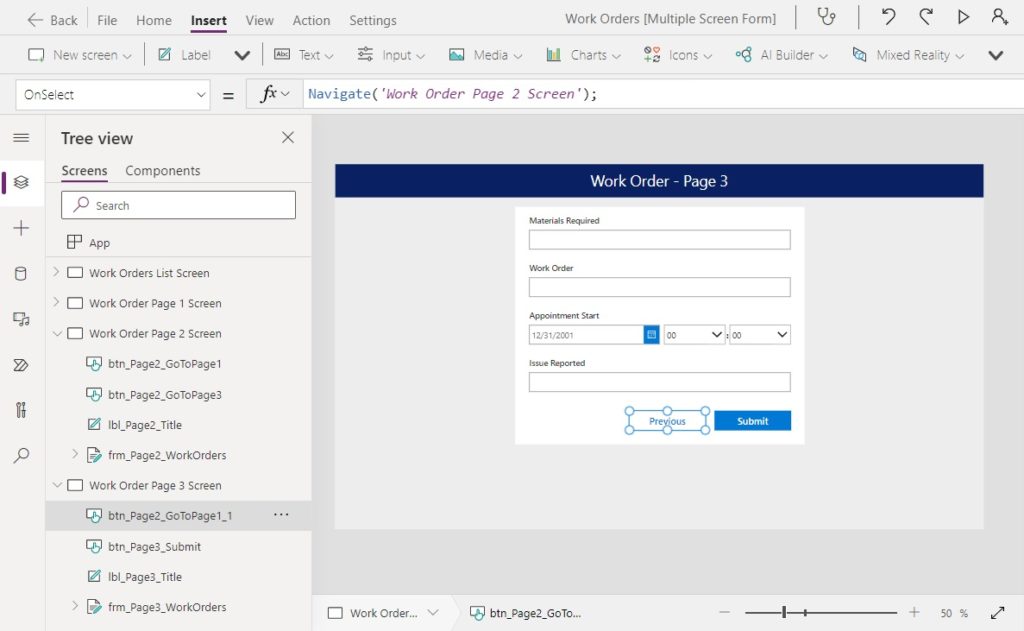
…and change the OnSelect property code to return to Page 2.
Navigate('Work Order Page 2 Screen')Code language: JavaScript (javascript)
As a final touch, we don’t want the Submit button on Page 3 showing when the form in view mode.
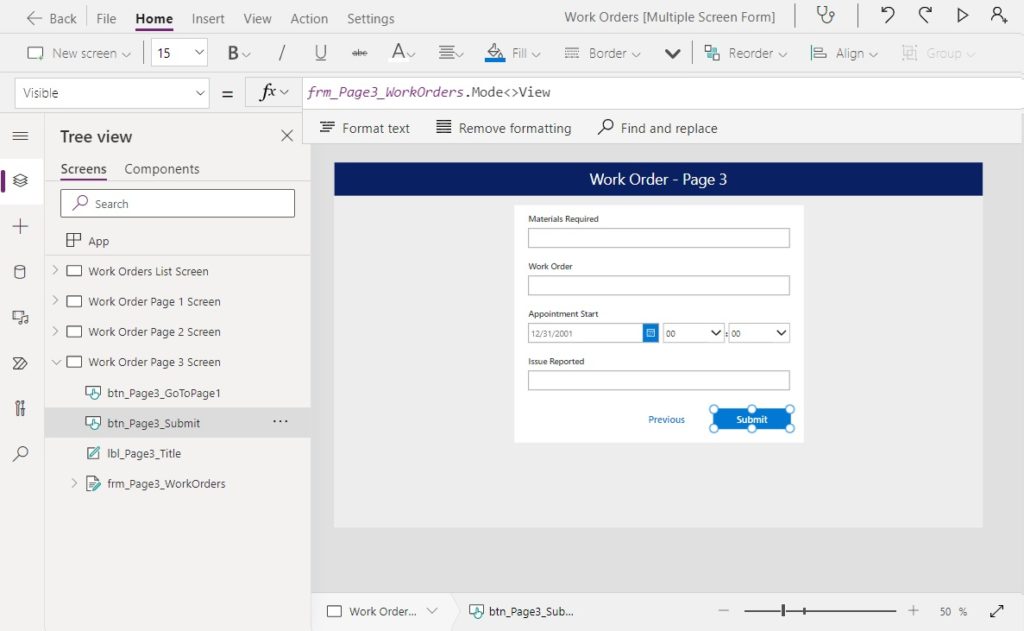
Use this code in the Visible property of the button to hide it when its not needed.
frm_Page3_WorkOrders.Mode<>ViewCode language: HTML, XML (xml)Did You Enjoy This Article? 😺
Subscribe to get new Copilot Studio articles sent to your inbox each week for FREE
Questions?
If you have any questions about Absolute Best Way To Make Multiple Page Forms In Power Apps please leave a message in the comments section below. You can post using your email address and are not required to create an account to join the discussion.


Hi Matthew, thanks for another great blog post. My question is about the formula you used on the previous button. Can we also use “Back()”?
Olu,
Yes, you can also use the Back function in this scenario. But I always like to reference the specific screen name when I know it. That way I can guarantee the form will always behave properly as I build more features into my app. I only use the back function when I can’t predict the screen a user came from.
Hi Matthew, is it possible to do the same App but from a Document library? What issues should I be careful of?
Jamie,
It is 100% the same process to build multiple page forms for a SharePoint document library 🙂
Hello Matthew, thanks for this great blogpost. In the chapter “Store Data From Multiple..” there is a little error. You write that the command must be entered in the OnSelect property of the app, but your screenshot shows the OnStart property.
My question is now:
how can I change an existing data record using this method and then save it?
RoScha,
Fixed. Thanks for the tip 🙂
You’re welcome.
And for my question “how can I change an existing data record using this method and then save it?”
Have you already written a blog post about it that I just need to adapt? 😉
Nice, another great one Matthew. Thank you.
In my current use case, I would like to save each screen to the DB as they progress, so they can close the app and pick up from their last saved point when they log back in.
Kylz,
Yes, that is another way you could design this same form. However, there are two additional scenarios you will need to code
1. After the first form you’ll want to save a new record. But if you come back to that form you’ll need to update the record instead.
2. If the user leaves the form before final submit you’ll want to mark the form as incomplete and give the user a way to go back to it.
Yes, this would work perfectly. Thank you.
In the section where you describe how to go about storing data from the forms it says “Begin by writing this code in the OnSelect property of the app to store a empty row inside a variable.” – Should that be the OnStart property of the app?
Robert,
Yes, thanks for pointing that out. It’s now fixed!
Bummer. Sorry to see you use the patch function on the form! This breaks the functionality of the form (OnSuccess, On Failure, LastSubmit, etc.) and wastes the features (Unsaved, Valid, etc) that the form brings to the table.
When using a form, the SubmitForm function should be used to submit the form. If splitting the form, it should still be done this way and is easily done without breaking the functionality. I have a full video on my channel https://youtu.be/2E4FXNPLVXw on doing this without breaking the form.
You can obviously do it with patch, just hate seeing people waste the features of the form.
I agree with that, don’t waste any features. However, I stayed with Matthew’s approach because I can use the variables and also edit the form in each page or section. You can’t edit the form doing it the way that’s suggested in video. You might be able to but I didn’t find a way and just stayed with Matthew’s approach.
I was having the same issue with the same error but instead of deleting the fields, I set the Visible property to false to hide the fields in each page. When I get to the 3rd page I took advantage of the submit button with SubmitForm function as you mentioned and it worked great. Matthew’s approach worked best for me but I only had to make a few adjustments.
Hi Matthew first and foremost I would like to say thank you. Your blog is absolutely amazing and it is very helpful.
I am currently working on a Form,and I would like to make multiple submissions using your patch method. For example, if the user selects option A. This will take the user to a different screen , and they can answer the questions they need to answer and submit the form details onto SharePoint. The same goes for option B and C.
I have three buttons for each option that navigates the user to the next page. In each button it has this code in respect to its option.
For example:
On App start I have the following:
Set(varRecord,Defaults('Accident Form Test'))On the “Next” Button. I have the following
If (Form1.Mode=FormMode.View && DataCardValue18.Selected.Value = "Accident (go to part A)",Navigate(FormScreenA),Set(varValidateForm,Validate('Accident Form Test',Defaults('Accident Form Test'),Form1.Updates)));

If (IsBlank(varValidateForm) && DataCardValue18.Selected.Value = "Accident (go to part A)",Set(varRecord,Patch(varRecord,Form1.Updates));Navigate(FormScreenA),Notify(varValidateForm,NotificationType.Error));
Please click here to see the Error On the Next Button
On the “Submit” Button. I have the following:
Set(varRecord,Patch(varRecord,FormPartA.Updates));

IfError(Patch('Accident Form Test',Defaults('Accident Form Test'),varRecord),Navigate(HomePage),Notify(varValidateForm,NotificationType.Error));.
Please click here to see the Error On the Submit Button
However, I got these errors on each of my buttons which I don’t understand, I am hoping for some assistance.
Thank you.
Teddy,
Did you add any custom cards to your form that might have changed the schema? I’m trying to decide why this happened.
Hi Matthew, I have the same errors / issues as in this post but yes I need to customize most of my datacards so I’m troubled as to what is wrong or how to fix it.
I noticed that I get incompatible type error even when declaring the variable
Set(gblRecordCurrent,Defaults(‘SuperPlus Change Management’))
I’m getting the same error on my buttons saying it is expecting a table value. I did alter the display names on some fields, but I’m getting that error on ALL buttons.
Kari,
I think I will refactor this tutorial by the end of this year. Multiple commenters are having issues with it.
I just tested this with 7 screen and received the same error. 🙁
Hi Matthew,
Any updates to solve this error ?
Thanks, Max
Max,
Sorry, I have no current plans to refactor the tutorial at this time. If I get more comments on it I will take a look at a later date.
Huge bummer Matthew – this was so helpful until I got the same error.
Monica,
I’m sorry to hear you encountered this error. I’m considering doing a rewrite of this article to come with a different approach. I’ve already done one revision of this article but maybe it’s time to start fresh.
I got this same error. I found that it was b/c we started with an integrated form and then decided to go with an app instead. It’s trying to call on the same variables and fields somewhere else in the list. I had to disable the custom form for the errors to go away in the app.
For anyone running into this error where the global variable is showing as an incorrect type in the Patch() function. Checkout this video below.
Accomplishes the same multiscreen app design as this blog and seemed a much easier way to go about patching the item across those multiple screens!
Video Link: https://www.youtube.com/watch?v=SKWu5lajWaM
Hope it helps some of you out like it did me!
the video was uploaded 4 years ago. do you know if it’s still valid in 2025?) i am asking this because I followed the instructions from this post and got the same error, but I thought i was doing smth stupid, so I was checking and checking, re-reading and re-reading, re-doing and re-doing. so I’ve wasted so much time until i decided to check every comment here and found out that the instructions are NOT working anymore (would be nice if Matthew would’ve put some alert-notification about this at the beginning of the post).
Hi Matthew
as always a awsome post from you! I would like to follow your concept for a SharePoint Power Apps form (in SharePoint via Power Apps => Customize forms), but I think that is not usefull because a SharePoint form always has its own Save button which I can’t hide. Or do you see a possibility there?
Thank You!
Hi Matthew,
After adding your gallery screen, I believe you should set the item property of your different forms to : gblRecordWorkOrderCurrent or Gallery1.SelectedItem
.. and thanks for all your great content !
regards
rudi
Rudi,
Excellent point. That’s a miss on my part. I’ve now updated the article. Please continue to share any bugs you find 😉
Hi Matthew, I’m new to Power Apps so this was a great write up. I went through step by step to build this along with you as practice, but I’m finding that my Submit button doesn’t actually do anything. I’m able to enter all the data on pages 1-3, but when I click Submit nothing happens.
The error shown in Power Apps Studio is {Attachments}: Field ‘Id’ is required
Location:
Button1_3.OnSelect
This is what I have for the OnSelect formula of the Submit button (note that my datasource is named Multi-Screen Work Orders, so it’s slightly different from yours):
// add the form data to the variable Set( gblRecordWorkOrderCurrent, Patch( gblRecordWorkOrderCurrent, frm_Page3_WorkOrders.Updates ) ); // if validation is passed goto the next screen, otherwise, show an error. IfError( Patch('Multi-Screen Work Orders', Defaults('Multi-Screen Work Orders'), gblRecordWorkOrderCurrent), Navigate('Work Orders List Screen'), Notify(varValidateForm,NotificationType.Error) );Hi Matthew,
Thanks for this post – so helpful!
I have 1 ‘General’ form, and 6 form with fields specific to 6 teams in my department.
My ‘Next’ button on the first form has the code below, directing users to the form they selected in a radio button control.
I’m not sure how I can maintain this form selection and also use the code/technique you describe in this post. Do you have a suggestion?
“$” & Switch(
rdoTeamAssigned.Selected.Value,
“Analytics & Reporting”,Navigate(Analytics_Reporting,ScreenTransition.Fade),
“Automation”,Navigate(Automation,ScreenTransition.Fade),
“Sustain”,Navigate(Sustain,ScreenTransition.Fade),
“Group”,Navigate(Group,ScreenTransition.Fade),
“Testing”,Navigate(Testing,ScreenTransition.Fade),
“Other”,Navigate(Other,ScreenTransition.Fade)
Sincerely,
Mike
Hi Matthew, thanks for this. As well as a view only, I tried to do a gallery which will allow me to edit previous entries and copied the code for the view only mode and changed ‘viewform’ to ‘editform’ but it does not seem to be saving any edits – are you able to help me understand why?
Hi Matthew,
Very good article. I followed it to build my own multiple page forms. Thank you very much.
I have one question about it. There are some columns in Sharepoint List, which are not set from the data entry. Instead, they are set by the software automatically before it Patch to the Sharepoint List. For example, “Login User”. I want PowerApp automatically set User().FullName. It seems I only can update “Title” which is the default column in Sharepoint List. Every time after I update “Login User”, the system complains about the global variable “gblRecordWorkOrderCurrent”. Do you have any idea? Thank you very much.
Jason
Jason,
What “complaint” is Power Apps having? Please share your error message.
This is an excellent article to get started. Is there a separate tutorial to include editing a record while in View mode coming from the gallery and viewing a single item?
Elle,
Yes, please check out this tutorial for for more directions on working with form modes.
https://www.matthewdevaney.com/power-apps-form-modes-newform-editform-and-viewform/
This works like a charm, thanks! One question: I have a recurring error on submit because SharePoint complains a particular field has duplicate values (this is the only column in that list that requires unique values). But each submit only creates one SharePoint item and there are no duplicate items in the SharePoint List before submitting. Could you imagine a possible explanation?
Joost,
Pop open Power Apps monitor to check if its submitting twice. Also ensure auto-disable on select is turned on in the button properties to prevent double clicks.
I get a field id is required error when I try to update the record using the patch function, despite this error it does update the list. Im baffled as to why?
When I try to edit an existing item it creates a new item instead. I tried adding an update button thats only visible in edit mode (while the submit is only visible in new mode), but I cant figure out the correct code in either scenario to make the item update.
Hi Matthew,
How would you write this if you are dealing with 2 or more forms per screen. Your example only caters to one form per screen?
Thanks
If( // check the form mode frm_Page1_WorkOrders.Mode=FormMode.View, // if view mode, go to next screen Navigate('Work Order Page 2 Screen'), // if new or edit mode, validate that the form data can be saved to the datasource Set( varValidateForm, Validate( 'Work Orders', Defaults('Work Orders'), frm_Page1_WorkOrders.Updates ) ); // if validation is passed goto the next screen, otherwise, show an error. If( IsBlank(varValidateForm), // store the form data in a variable Set( gblRecordWorkOrderCurrent, Patch( gblRecordWorkOrderCurrent, frm_Page1_WorkOrders.Updates ) ); Navigate('Work Order Page 2 Screen'), // show an error message Notify( varValidateForm, NotificationType.Error ) ) )Sujata,
Write the same code again but for a another screen.
Thanks for creating this page, it’s been very useful! I’m afraid I’m struggling with my PowerApp with the gblRecord, I’ve named it gblRecordRMS but for some reason it isn’t liking it within the Item in each page. Is there a specific naming convention that I should be using for the gblRecord please?
Hi, pls how do you print to a zebra (e.g. ZD421) printer from powerapps?