Power Apps Send Email Using Outlook – The Complete Guide

Want to learn how to send an email in Power Apps? You’ve come to the right place. In this handy-guide I’ll show you all of the techniques I know for sending email with the Office 365 Outlook connector. We’ll start with the basics, then look at how to include file attachments, use rich text formatting, embedded images, HTML tables and web links.
Email Basics
The Setup
We will start by creating a basic app and then decide which email features to add. Open Power Apps Studio and create a new mobile app from blank. Add the Office365Outlook connector to the app.
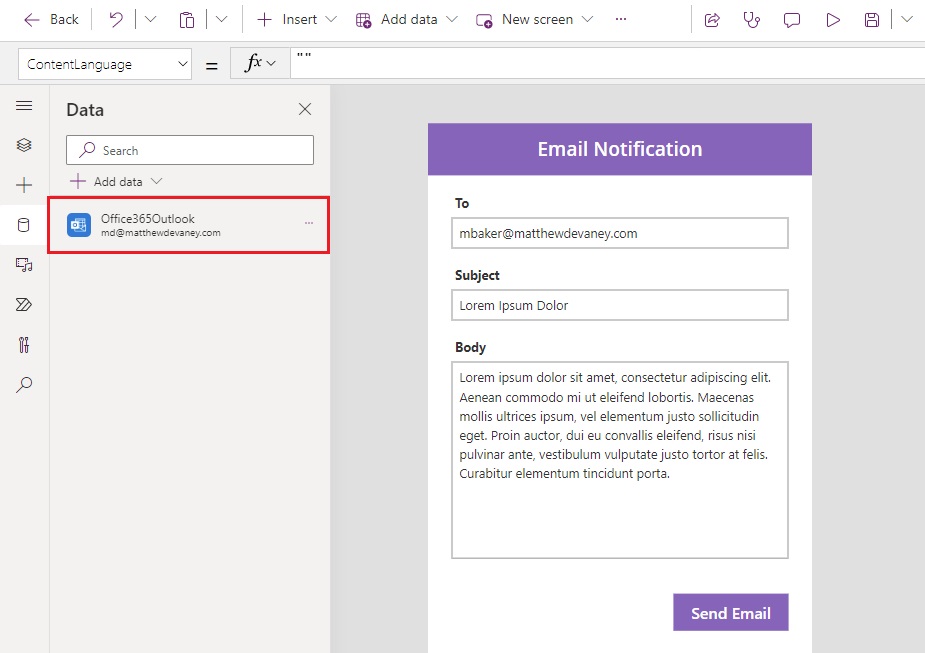
Insert the following controls onto the screen. Arrange the controls to look like the image above.
| Name | Control | Purpose |
| lbl_EmailTo | Label | Title for the Email To text input |
| txt_EmailTo | Text Input | Write the email address of recipients |
| lbl_Subject | Label | Title for the Subject text input |
| txt_Subject | Text Input | Write the subject line |
| lbl_Body | Label | Title for the email Body |
| txt_Body | Text Input | Write a message in the email body |
| btn_SendEmail | Button | Press to send an email |
Email To, Subject and Body
Every email must have a recipient, a subject and a message.
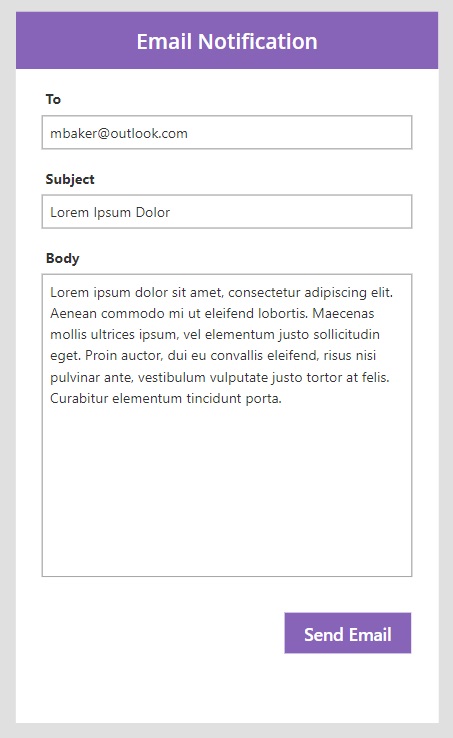
Write this code in the OnSelect property of the button to send an email.
Office365Outlook.SendEmailV2(
    txt_EmailTo.Text,
    txt_Subject.Text,
    txt_Body.Text
);Code language: CSS (css)
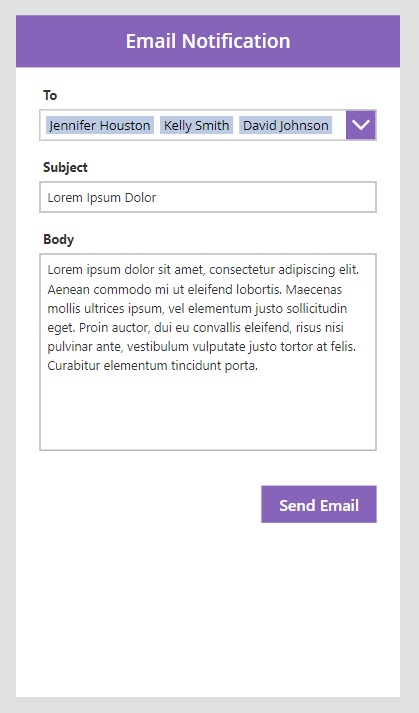
Email To Using A People Picker
When sending an email to members of your own organization, we can choose who receives the email using a people picker. Replace the txt_EmailTo text input with a combo box named cmb_EmailTo.
Add the Office365Users connector.

Allow the user to send a message to multiple people by setting the SelectMultiple property of the combo box to true.
trueCode language: JavaScript (javascript)
Use this code in the Items property to retrieve a list of names when the user types in the search box. We only show the user the top 10 results to ensure only the most relevant results are returned.
Office365Users.SearchUserV2(
    {
        searchTerm: Self.SearchText,
        top:10,
        isSearchTermRequired:false
    }
).valueCode language: CSS (css)
Set the DisplayFields property to this code. This tells the combo box to show the first name and last name of each person.
["DisplayName"]Code language: JSON / JSON with Comments (json)
Enable the IsSearchable property to allow users to search a person’s name.
trueCode language: JavaScript (javascript)
Update the SearchFields property to this code. The combo box will only return people with matching first names or last names.
["DisplayName"]Code language: JSON / JSON with Comments (json)
Write this code in the OnSelect property of the Send Mail button to send the message. The Concat function joins together all email addresses for the people selected separated by a semi-colon.
Office365Outlook.SendEmailV2(
    Concat(cmb_EmailTo.SelectedItems, Mail&";"),
    txt_Subject.Text,
    txt_Body.Text
);Code language: CSS (css)
Email With CC and BCC
The email Cc field (carbon copy) sends a copy of the message to those email addresses listed. The Bcc field (blind carbon copy) also sends a copy of the message but the recipients name will not appear for others who receive the email.
Add two text input controls to the app called txt_EmailCc and txt_EmailBcc.
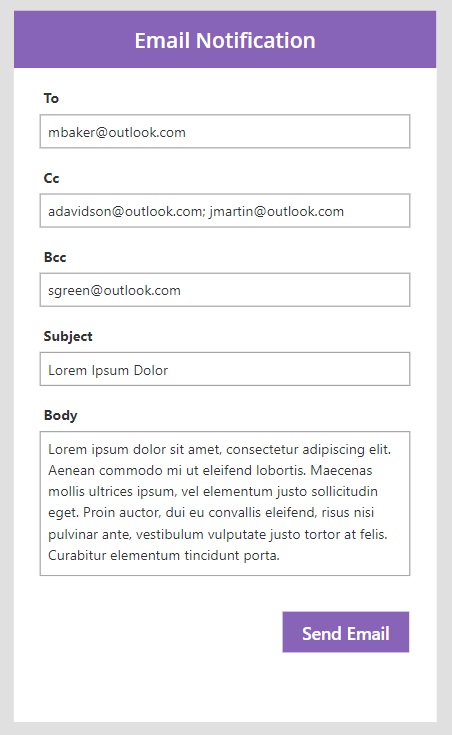
Use this code in the OnSelect property of the Send Email button to include Cc and Bcc recipients.
Office365Outlook.SendEmailV2(
    txt_EmailTo.Text,
    txt_Subject.Text,
    txt_Body.Text,
    {
        Cc: txt_EmailCc.Text,
        Bcc: txt_EmailBcc.Text
    }
);Code language: CSS (css)
Email Attachments
Email File Attachments
Files can be attached to an email message. Add an attachments control to the app called att_Attachments. The attachments control cannot be found in the Power Apps Insert control menu. We must create an Edit Form connected to a datasource and take the attachments control that appears inside it.
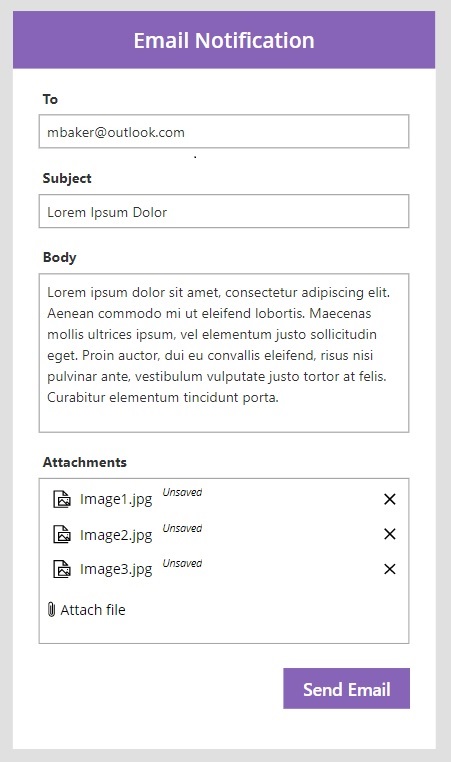
Increase the number of files that can be attached by editing the MaxAttachments property of the attachments control.
5
Then write this code in the OnSelect property of the Send Email button. The ForAll function loops over each file in the attachments control and assigns a name & file content
Office365Outlook.SendEmailV2(
    txt_EmailTo.Text,
    txt_Subject.Text,
    txt_Body.Text,
    {
        Attachments: ForAll(
            att_Attachments.Attachments,
            {
                ContentBytes: Value,
                Name: Name
            }
        )
    }
);Code language: CSS (css)
Email Image Attachments
An image can be attached to an email using the attachments control. Or it can also be done using the add picture control. Insert an add picture control into the app and rename the image control grouped with it to img_AddPicture.
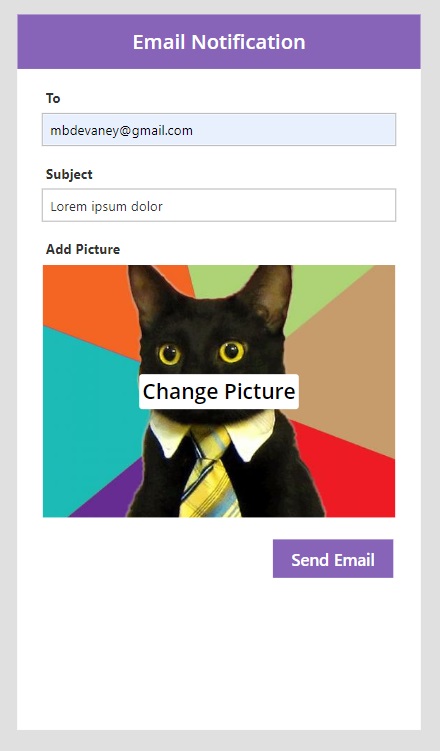
Use this code in the OnSelect property of the Send Email button to attach the image to the email message.
Office365Outlook.SendEmailV2(
    txt_EmailTo.Text,
    txt_Subject.Text,
    txt_Body.Text,
    {
        Attachments: {
            ContentBytes: 'img_AddPicture'.Image,
            Name: "MyPicture.jpg"
        }
    }
);
Code language: CSS (css)
Email Formatting
Email Rich Text Messages
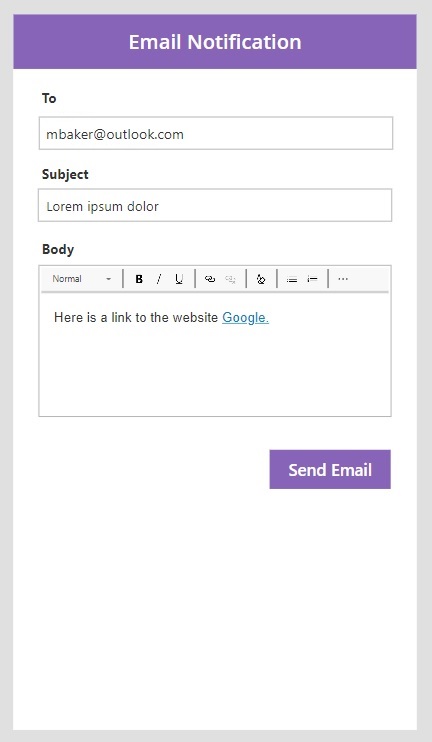
An HTML email message can have multiple text styles: fonts, sizes, colors, weights, etc. To write a formatted text add the rich text editor control to the app and name it rte_RichTextBody.
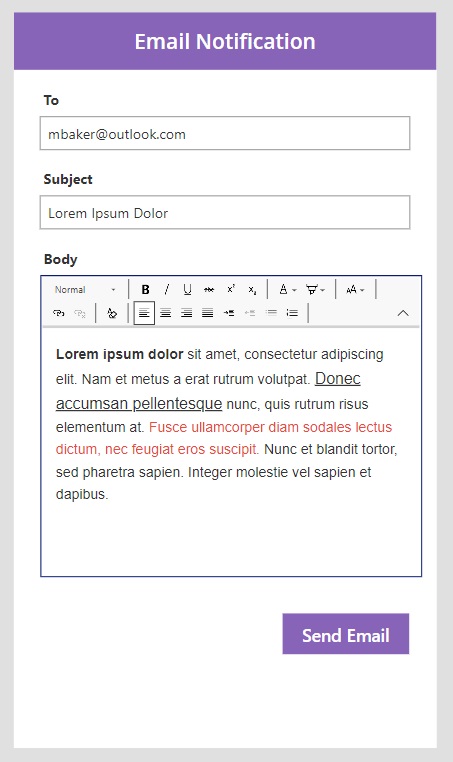
The HtmlText property of the control will convert text shown in the editor into HTML code. The following code was generated based upon values in the image above.
<p><strong>Lorem ipsum dolor</strong> sit amet, consectetur adipiscing elit. Nam et metus a erat rutrum volutpat. <u><span style="font-size:24px">Donec accumsan pellentesque</span></u> nunc, quis rutrum risus elementum at. <span style="color:#e74c3c">Fusce ullamcorper diam sodales lectus dictum, nec feugiat eros suscipit.</span> Nunc et blandit tortor, sed pharetra sapien. Integer molestie vel sapien et dapibus. </p>Code language: HTML, XML (xml)
Write this code in the Send Email button to send the rich text message.
Office365Outlook.SendEmailV2(
    txt_EmailTo.Text,
    txt_Subject.Text,
    rte_BodyRichText.HtmlText
);Code language: CSS (css)
Email Embedded Images Using Rich Text Control
An image shown in the body of an email is known as an embedded image. We can include an embedded image in an email using the rich text editor control. Drag and drop an image file into the editor and watch it appear on the screen.
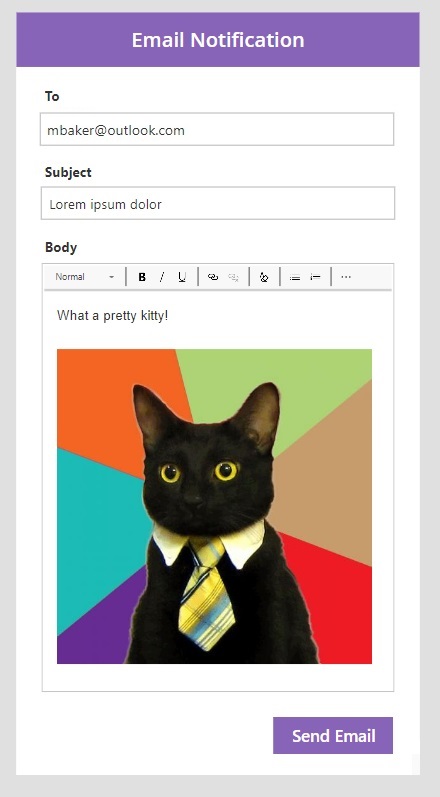
Use this same code in OnSelect property of the Send Email button as we did to send a message having only text. The image will appear in the email body.
Office365Outlook.SendEmailV2(
    txt_EmailTo.Text,
    txt_Subject.Text,
    rte_BodyRichText.HtmlText
);Code language: CSS (css)
Email Embedded Images Using Add Picture Control
Images can also be added to an email using the add picture control. Insert an add picture control into the app an rename the image control to img_AddPicture.

Set the CalculateOriginalDimensions property of the Image control to true.
trueCode language: JavaScript (javascript)
Then write this code in the OnSelect property of the Send Email button to embed the image in the email body. We use the JSON function to encode the image as Base64.
Office365Outlook.SendEmailV2(
    txt_EmailTo.Text,
    txt_Subject.Text,
    $"<img height={""&img_AddPicture.OriginalHeight&""} width={""&img_AddPicture.OriginalWidth&""} src={""&JSON(img_AddPicture.Image, IncludeBinaryData)&""}>"
);Code language: JavaScript (javascript)
Email An HTML Table
Data stored in collections or a datasource (i.e. a SharePoint list) can be displayed using an HTML table. Use this code in the OnStart property of the app to create a collection.
ClearCollect(
    colSampleData,
    {Header1: 1001, Header2: "Notebook", Header3: 25},
    {Header1: 1002, Header2: "Crayons", Header3: 15},
    {Header1: 1003, Header2: "Binders", Header3: 10},
    {Header1: 1004, Header2: "Pencils", Header3: 21},
    {Header1: 1005, Header2: "Erasers", Header3: 30}
);Code language: JavaScript (javascript)
Then insert a Table control into the app as shown below which uses colSampleData in its Items property.

Use this code in the OnSelect property of the Send Email button to include an HTML table in the email. The Concat function creates as many rows in the table as there are in the collection.
Office365Outlook.SendEmailV2(
    txt_EmailTo.Text,
    txt_Subject.Text,
    "<table>
        <tr>
            <th>Header1</th>
            <th>Header2</th>
            <th>Header3</th>
        </tr>
        "&Concat(
            colSampleData,
            $"<tr>
                <td>{Header1}</td>
                <td>{Header2}</td>
                <td>{Header3}</td>
            </tr>
        ")&"
    </table>"
);Code language: HTML, XML (xml)
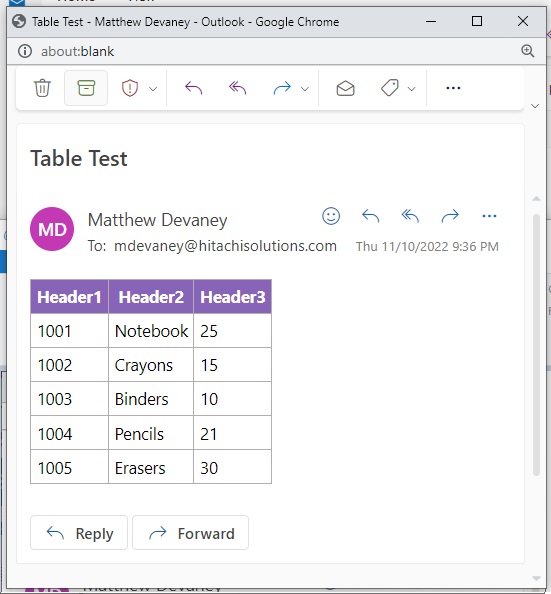
The email message looks like this.

We can also format an html table with different fonts, colors, sizes, etc. with the help of an online HTML Table generator tool. Using this code instead will show an HTML table with a purple header row.
Office365Outlook.SendEmailV2(
    txt_EmailTo.Text,
    txt_Subject.Text,
    "
    <head>
    <style>
        table {
            border: 1px solid #b3adad;
            border-collapse: collapse;
            padding: 5px;
        }

        table th {
            border: 1px solid #b3adad;
            padding: 5px;
            background: #8764b8;
            color: #ffffff;
        }

        table td {
            border: 1px solid #b3adad;
            text-align: left;
            padding: 5px;
            background: #ffffff;
            color: #000000;
        }
    </style>
</head>
<body>
    <table>
        <tr>
            <th>Header1</th>
            <th>Header2</th>
            <th>Header3</th>
        </tr>
        "&Concat(
            colSampleData,
            $"<tr>
                <td>{Header1}</td>
                <td>{Header2}</td>
                <td>{Header3}</td>
            </tr>
        ")&"
    </table>
</body>"
);Code language: HTML, XML (xml)
The email message now looks like this.
Email Links
Email With Links
A link to another website can be included in an email. To do this, create a new text input called txt_WebsiteLink.
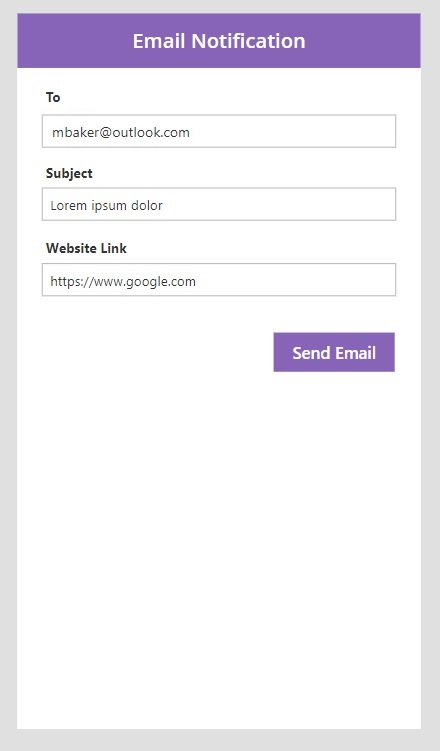
Then write this code in the OnSelect property of the send email button. The HTML a tag defines what hyperlink will be applied to some text.
Office365Outlook.SendEmailV2(
    txt_EmailTo.Text,
    txt_Subject.Text,
    $"<a href=""{txt_WebsiteLink.Text}"">Click here to go to the website</a>"
);Code language: HTML, XML (xml)
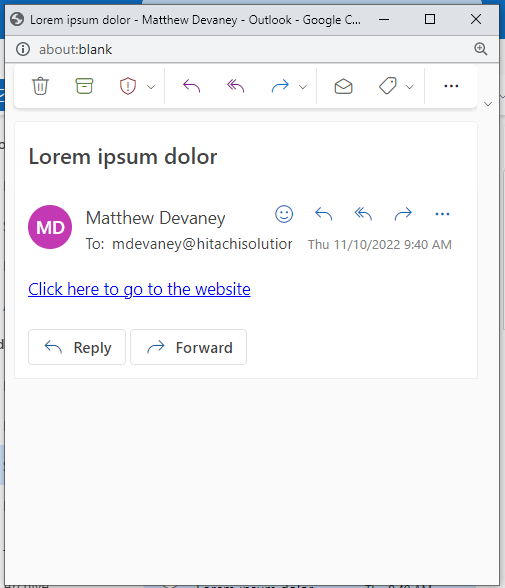
The email message looks like this.
Email With Links Using Rich Text Control
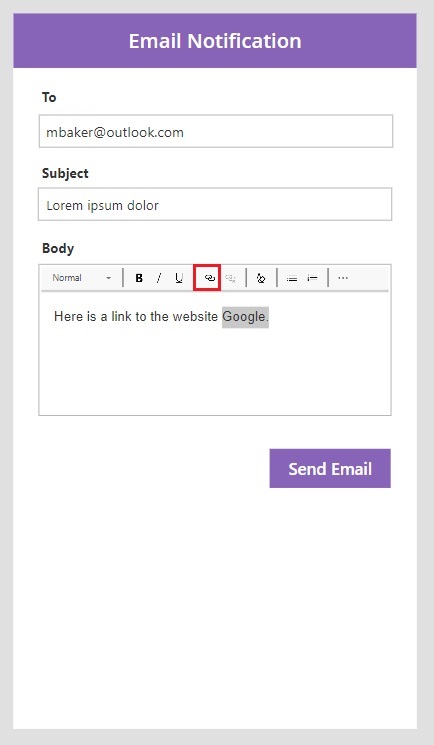
Links can also be included in email using the rich text editor control. Add a rich text editor control to the app named rte_BodyRichText. Write the words from the image below into the editor then select the link button.
Supply an URL for the link then click OK.
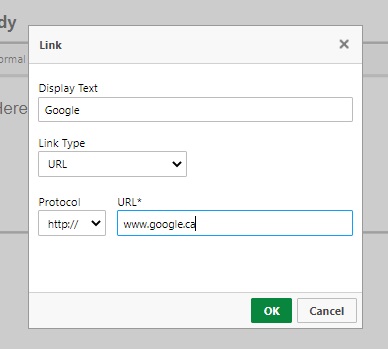
The text now shows a link in one of the words.
Use this code in the OnSelect property of the Send Email button to send a message with a link in it.
Office365Outlook.SendEmailV2(
    txt_EmailTo.Text,
    txt_Subject.Text,
    rte_BodyRichText.HtmlText
);Code language: CSS (css)
Email With Deep Links To Power Apps
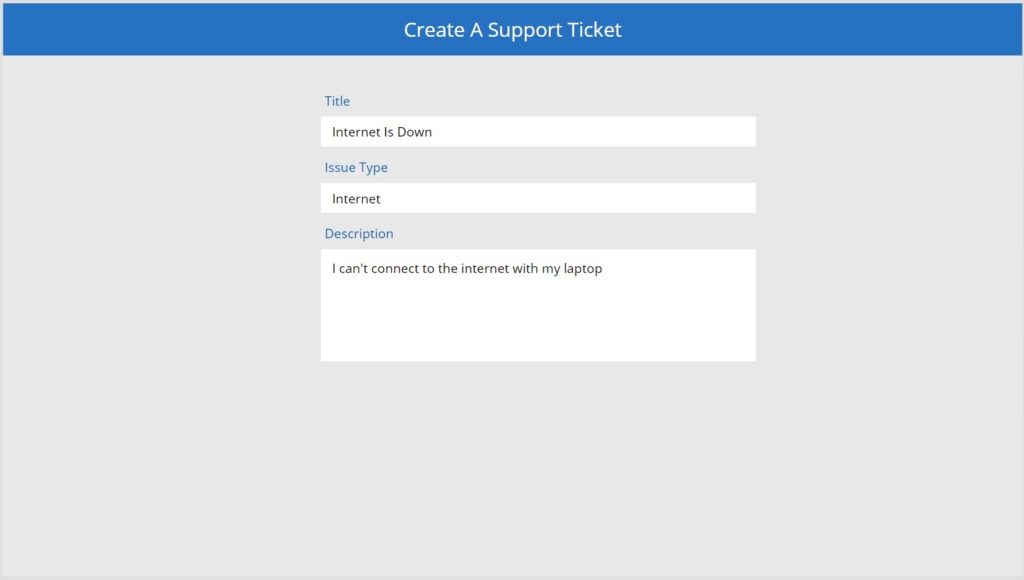
Deep links are a type of hyperlink that sends an user to Power Apps and opens a specific record or screen. They can be embedded in an email. In this example, the user clicks on a link to open the support ticket in Power Apps.
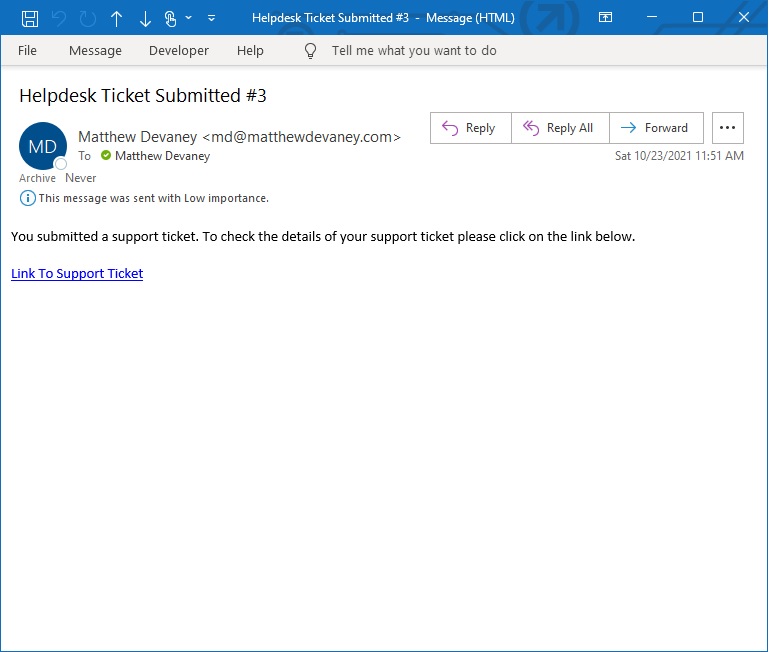
When the app opens it shows the details of the support ticket. A full tutorial on how to setup a deep links in an email message can be found here.
Did You Enjoy This Article? 😺
Subscribe to get new Copilot Studio articles sent to your inbox each week for FREE
Questions?
If you have any questions about Complete Guide To Send Email In Power Apps please leave a message in the comments section below. You can post using your email address and are not required to create an account to join the discussion.


Thank you for sharing this excellent documentary. Users expect quality news and information from the apps.
Just a quick note to tell you how much I appreciate your blog posts. Love informative they are and how well they are laid out. Thank you!
Is there anyway you’ve found to send images and file attachments on the SAME email ?
Mary,
Can’t say I’ve tried that before. Have you given combining my methods in this tutorial a shot?
I’ve also got a bit of code to share. We cannot use the Json/base64 to embed graphics. but this will work for us. (This is for a gallery of images with a caption for alt text). The trick is the “cid:’ included in front of the file name. This apparently tells outlook to use the content id (CID:) filename.jpg to find the attached file and embed. It has been working pretty reliably for me, but your mileage may vary. I’ve never seen it described anywhere and it may be legacy to our systems, but if the Json tricks don’t work… try it.
Concat(
Gallery6.AllItems,
”
ecord.Gal6Caption.Text &
”
)
Mary,
Excellent tip. Thanks for sharing 🙂
awesome as usual..Thank you so much!
Hi
Please help
I am trying to append the “Total :” & “& Total.Text &” to my powerapps email and I get 00.00 in return. I want to see the total for the items in the colgallery.
Thanks
Nozi,
Maybe you can get the total like this:
Sum(colgallery.AllItems, PriceColumnName)
Hi Matthew
The “Total” field is outside the gallery.
I tested using the “Balance” field which is also outside the gallery and it works.
The only difference between these fields are, the “balance” field is a list field pulling information from a SharePoint list whereas the “Total” field is the sending information to that list.
Would the column type makes a difference?
I’m sorted!!!!!
I had the reset(colgallery) before the email syntax and that was clearing everything in the gallery before it could send an email.
Thank you!!!!
You can append the “Total :” & the value of the “Total” field to your PowerApps email by using the following expression in the “body” property of the “Send email” action:
“Total : ” & colgallery.Total.Text
This should display the total of the items in the “colgallery”.
If you are still encountering issues, consider using our product, ‘PowerTextor SMS Connector,’ to send SMS messages instead of email. This could help resolve the formatting issue and provide a more reliable means of communication.
Dear Mr. Devaney,
I have created a PDF file in an application and want to send it to selected email addresses in the same application, using your email template(,,Email To Using A People Picker”) above. How do I do this?
Orhan,
Look at the section of this article titled Email File Attachments and you will find the answer.
Thank you very much Mr. Devaney!
But how do I get the pdf file to be automatically attached to the email?
Fritz, I know it’s been a while since you’ve posted, but this suggestion (https://damobird365.com/create-a-draft-email-in-outlook/) may work to create a draft email automatically then you can encrypt before sending
Maybe there is a way to write code to encrypt the email, but I’m not sure
Good luck!
can we send a No-reply email from outlook?
I’m not sure if this will meet your needs, but you can send an email on behalf of someone else using Power Automate using the “From (send as)” field or you can use the “Reply To” field in the advanced options of “Send an email (V2) action”
This is a long link but shows the fields in detail throughout: https://citizendevelopmentacademy.com/blog/power-automate-send-emails/
Good luck!
Hi, anyone knows how to set ‘sent from’-adderes? I need my emails to be sent from a certain predefined mailaccouint that’s not mine. Possible? Apprciate any input 🙂
Sorry - found out myself
    {
        From:"[email protected]"
    }
)
Preben,
I’m glad you figured it out. Sometimes when I start typing a message to my colleagues for help I come to an answer. I’ve heard it called ‘talking to a duck.’
Here’s a unique maybe off the beaten path requirement:
We have PnP Modern Page Search Web part(s), the need is for users after PnP Search box search to be able to select certain PnP search results with a ‘tick’ mark then ‘export’ to PowerApps web part where the Powerapps web part using SendEmail is also on the same moderns Sharepoint page (*using Office365Outlook.SendEmailv2).
Is this within the realm of possibility ?
Ram Balani
[email protected]
Ram,
Sorry, I have not used the SharePoint PnP or the Power Apps web part 🙁
No problems–thanks for the reply Matt.
We are managing sort of with Gmail.SendEmailv2 connector within a PowerApps webpart and relying on the fact that most mobiles, tablets and laptops enable screenshot sharing.
Ram B
How to Bcc mail in that
Dinesh,
Not sure if this will help, but please see attached screenshot to add bcc to email
Good luck!
In the embed via picture control, the JSON command is missing JSONFormat. in front of IncludeBinaryData
src={“”&JSON(img_AddPicture.Image, IncludeBinaryData)
Robert,
Thank you for reporting this. Power Apps changed this requirement for a JSONFormat prefix earlier last year. So the article was correct at the time of writing but became outdated in this respect.
Hi,
I had a problem implementing the attachments until I realised that by default the attachments control had set the Value to the SharePoint Id. Changing the Value to Value in the attachment control advanced properties (just under Items) solved the problem.
Hi Matthew,
Thank you for this guide.
I would like to ask, how about when I need to send attachment with the Cc and Bcc together?
Hi Matthew,
Is it also possible to have a mail trail for the same item?
Mayowa,
There is a conversation id which you can use in Power Automate. It tracks threaded conversations.
Hi Matthew,
Can you please share more details regarding trail mail for same item.
Or is there any blog for that please share.
Hi! Thanks for all.
Is there a way to schedule the sending of emails with this function?
Francisco,
No, you’d want to use Power Automate for this and more specifically the Delay Until action.
Hi, Mr. D. Your site is one of my go-to sources for Power Apps information. I like the list format – very direct, saves me a lot of time. Keep up the good work!
Regarding the Outlook 365 connector, is there anything resembling an OnError() function that you can use to determine if the email was sent correctly? If not, how would you recommend getting this information?
Sam,
The Send Email V2 action will always return a successful response even for an undeliverable email. I don’t know of a way to expose an undeliverable message back to Power Apps directly. Perhaps you could use an Outlook inbox rule to move the undeliverable emails to another folder and email the sender directly?
If you want check for a valid email address use this technique:
https://powerusers.microsoft.com/t5/Building-Power-Apps/Response-if-email-has-sent-or-not/td-p/1462836
I have written HTML for my email body, however, I can’t wrap my head around where PowerApps expects the various ” and & operators. As your example in the ‘Email An HTML Table’ section. do you have an article that explains this further?
Claire,
I do not have any article that explains this further. But the tail end of this Shane Young video might help.
https://www.youtube.com/watch?v=vpYkOccwn4Y
Hi Matthew. Love your blog!! So much great stuff here, you are a true inspiration to the community!
The issue I have: I can send an email and embed a graphic, and the image shows up just fine. At first.
A day later, it seems like the image has “expired” somehow, from some cache, and is no longer visible in the email.
Any idea what’s going on here? Anything I can do to address in PowerApps or elsewhere?
Many thanks for your always-insightful comments!
Ted,
This is strange. Where is the image being stored?
Excellent job, thank you so much!
Ryan,
You’re welcome 🙂