Multiple Power Apps developers can now work together on the same canvas app and see each other’s changes! This is an exciting new feature Power Apps developers have wanted for a long time. We can open the same app as another developer without seeing a locked for editing message and we no longer need to create multiple copies of an app during development. In this article I provide step-by-step instructions for setting co-authoring for canvas apps and explain the new concepts you’ll need to know including: git, Azure Dev Ops, version control and repositories.
Table Of Contents:
• Introduction
• What Is Git And How Does It Provide Version Control?
• Enable Collaboration With Git Version Control
• Connect Power Apps to A Git Repository
• Choosing A Git Repository Host
• Sign Up For A Free Github Account
• Create A New Repository In Github
• Input Github Repository Information In Power Apps
• Create A Personal Access Token
• Sign In To The Github Repository
• Finish Git Version Control Setup
• Sharing Power Apps With Another Developer As A Co-Owner
• Login To A Power Apps App At The Same Time As Another Developer
• Commit Changes And Check For Updates
• View Power Apps Source Code In A GitHub Repository
• Additional Considerations For Power Apps Co-Authoring
Introduction
With Power Apps multiple developers can work on an app at the same time to speed up the development process. Here’s what collaboration between two developers looks like in Power Apps.
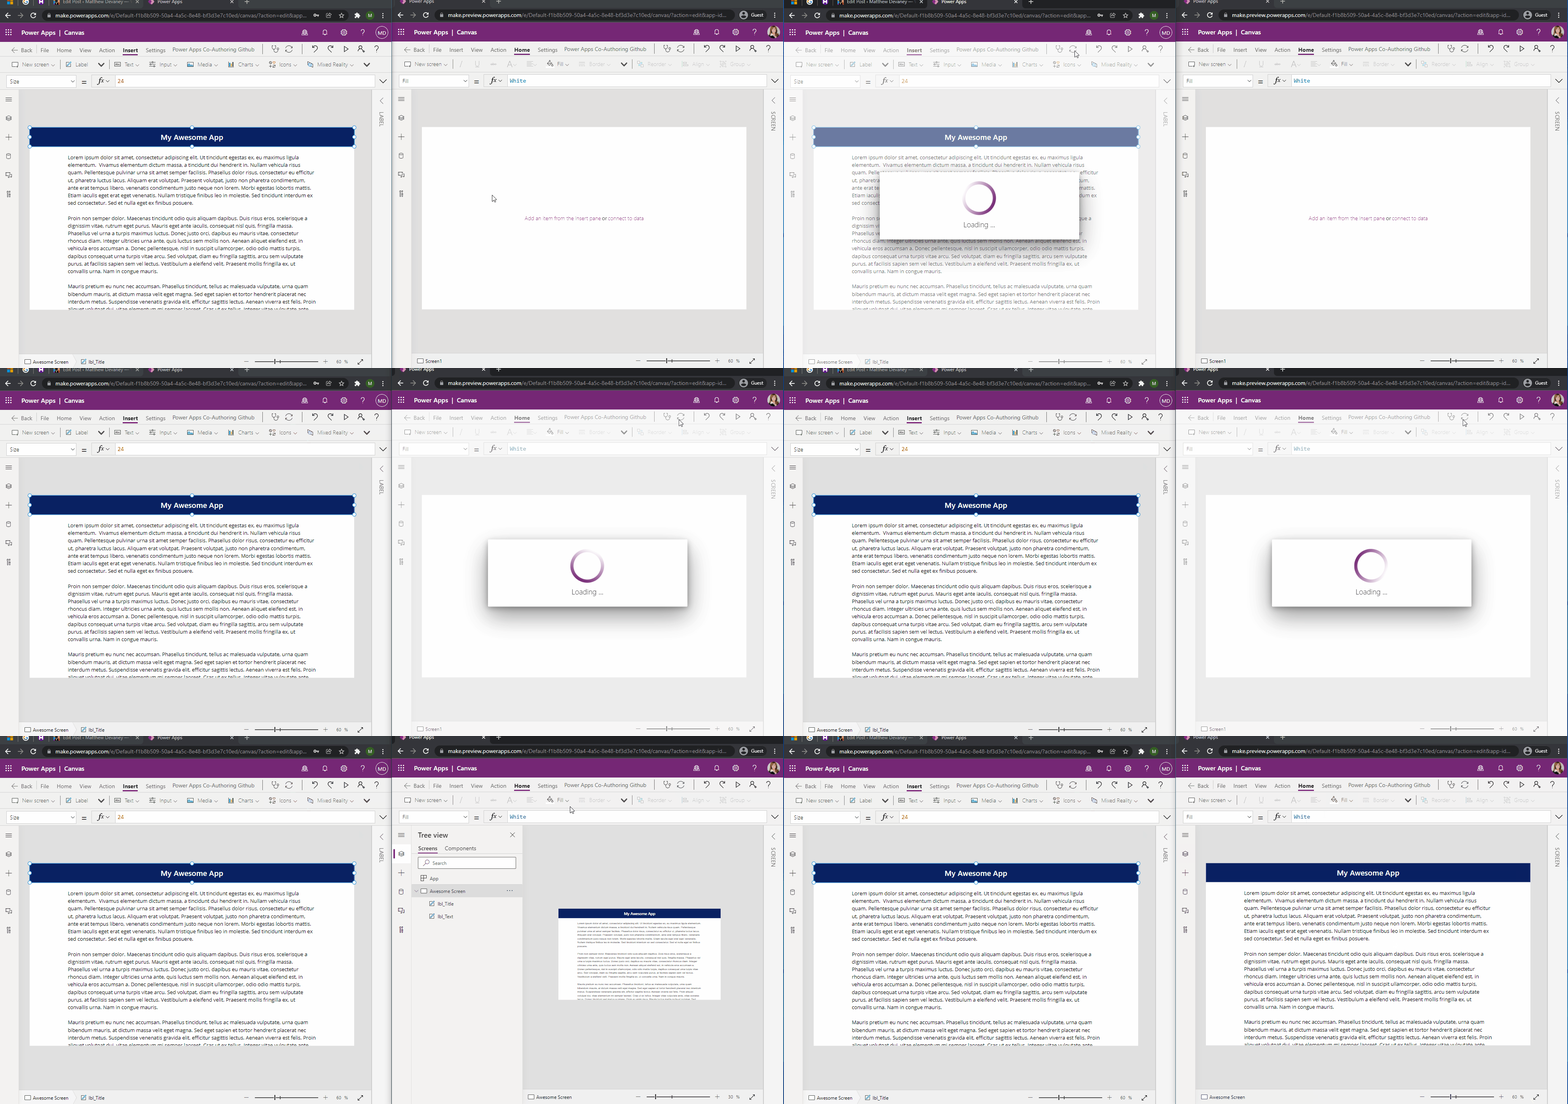
Both developers in the example below have the same app open. The 1st developer on the left side adds a titlebar to the screen and some text. Then the 1st developer presses the sync button to save and commit the changes. The 2nd developer on the right-side wants to see the changes made by the 1st developer. So the 2nd developer also presses the sync button and the titlebar & text appear.
What Is Git And How Does It Provide Version Control?
For multiple developers to collaborate in Power Apps the experimental Git Version Control setting must be turned on. Git is a tool software developers use for version control – a way to track who made what changes to an app and when. It also allows developers who are working on their own instance of the app the ability to merge their code with one another. If an issue arises with the app’s code, the developers can use Git to compare the changes between each app version and revert to a previous one.
Enable Collaboration With Git Version Control
If more than one developer tries to open the same app the message “Power Apps is locked for editing. Contact the user or wait for them to close the app” will appear.
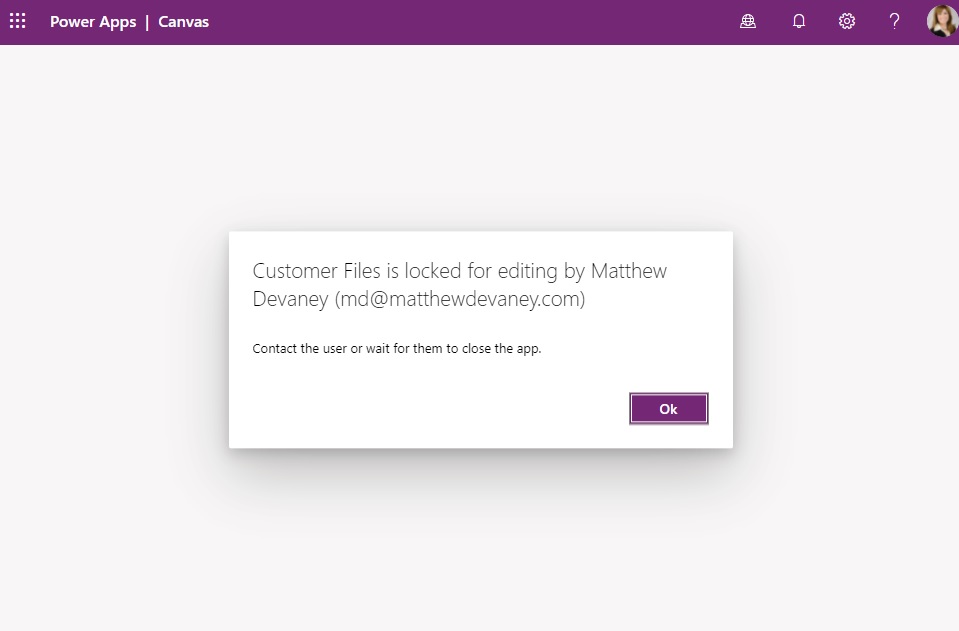
When Git version control is enabled multiple developers can work on the same app and the locked for editing message will no longer appear. How is this made possible? Power Apps opens a separate instance of the app in Studio Mode for each developer. Each time a developer saves their work it gets committed (i.e. saved) to a shared Git repository (a folder). Saving merges the new code with existing code in the repository contributed by other developers. Then the freshly merged code is downloaded into Power Apps Studio for the developer to continue working on.
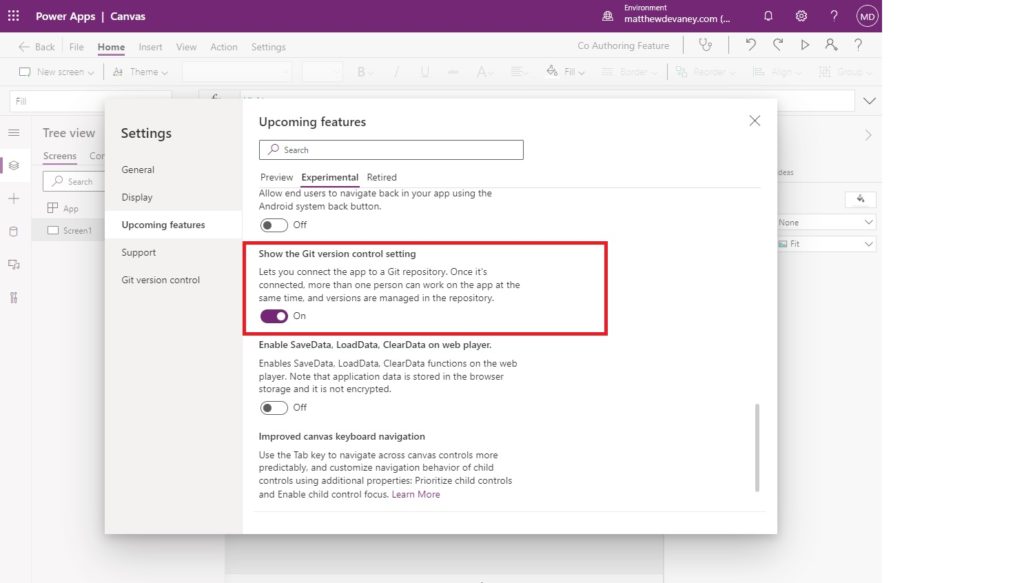
Go to the Settings menu in Power Apps then browse to the Upcoming Features section. Look for the Show the Git version control setting in experimental features and turn it on.
Connect Power Apps to A Git Repository
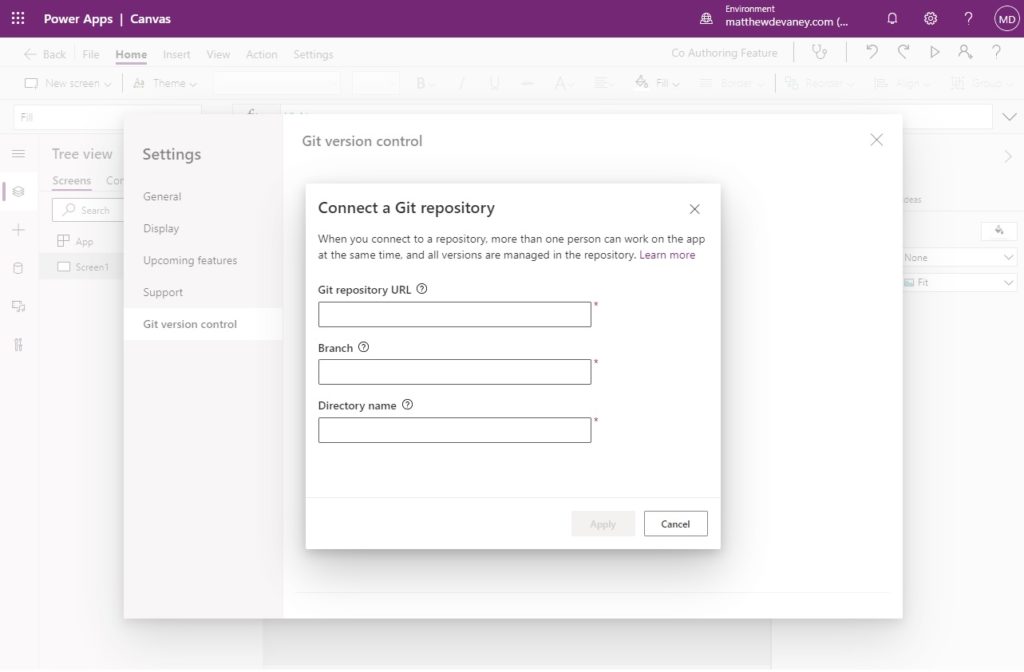
Once the show the Git version control setting is switched we must connect Power Apps to a Git repository. Navigate to the Git Version Control section of the settings menu and select Connect.
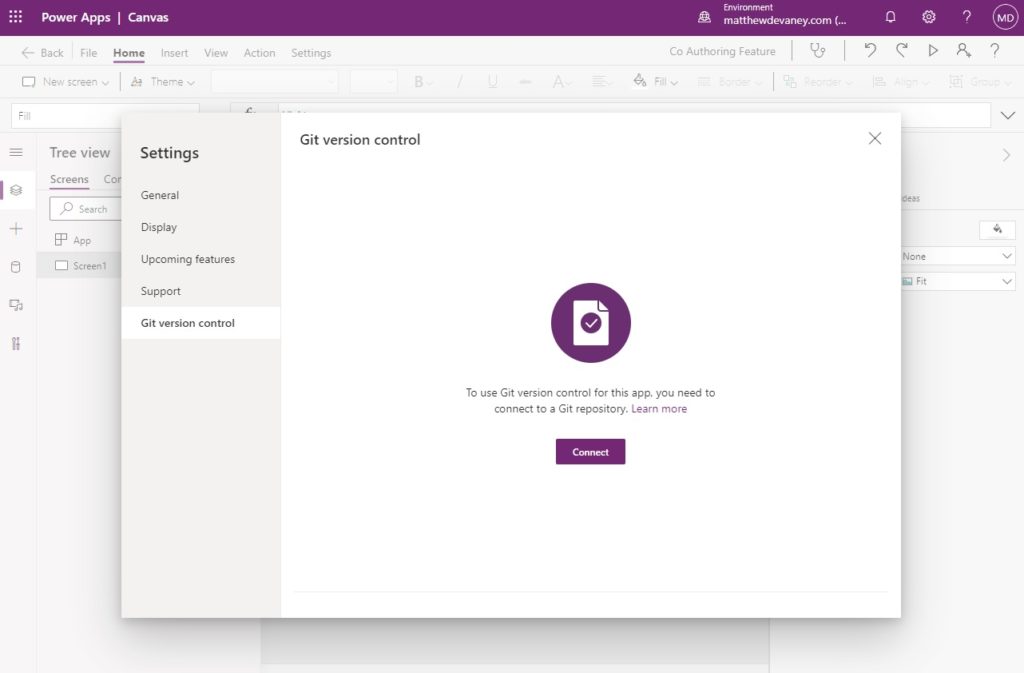
A form appears asking for the Git repository URL, branch and directory name. To fill-in these fields, first we will need to create a Git repository. This is something done outside of Power Apps.
Choosing A Git Repository Host
Git is a generic tool and there are many online services that can host a git repository. Which host should you choose for Power Apps? I recommend these two services offered by Microsoft and each one has a free tier:
- Github – the most popular open-source community in the world
- Azure DevOps – a collaboration tool for developers which also includes git repositories
For this tutorial, we will use Azure DevOps because this is Hitachi Solutions preferred option.
Important: If you choose an alternate service please note that Power Apps co-authoring does not support on-premise repositories at this time.
Sign Up For A Free Azure DevOps Account
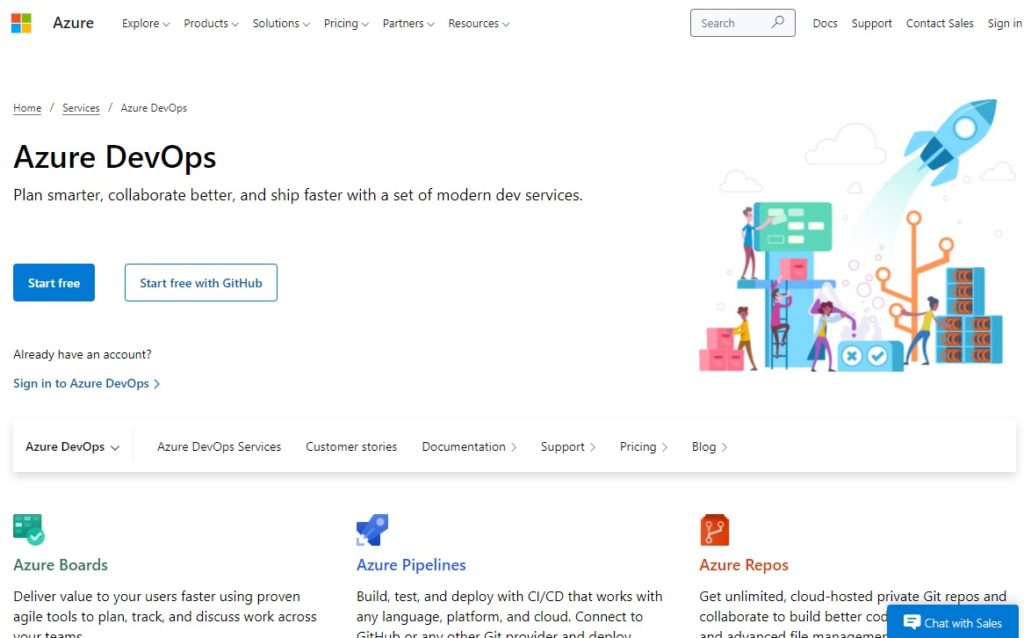
Go to dev.azure.com and login to your account. If you don’t have an Azure Dev Ops account you can sign up for free. We only require the free-tier to setup a git repository for multiple developers to collaborate in Power Apps.
Create A New Repository In Azure Dev Ops
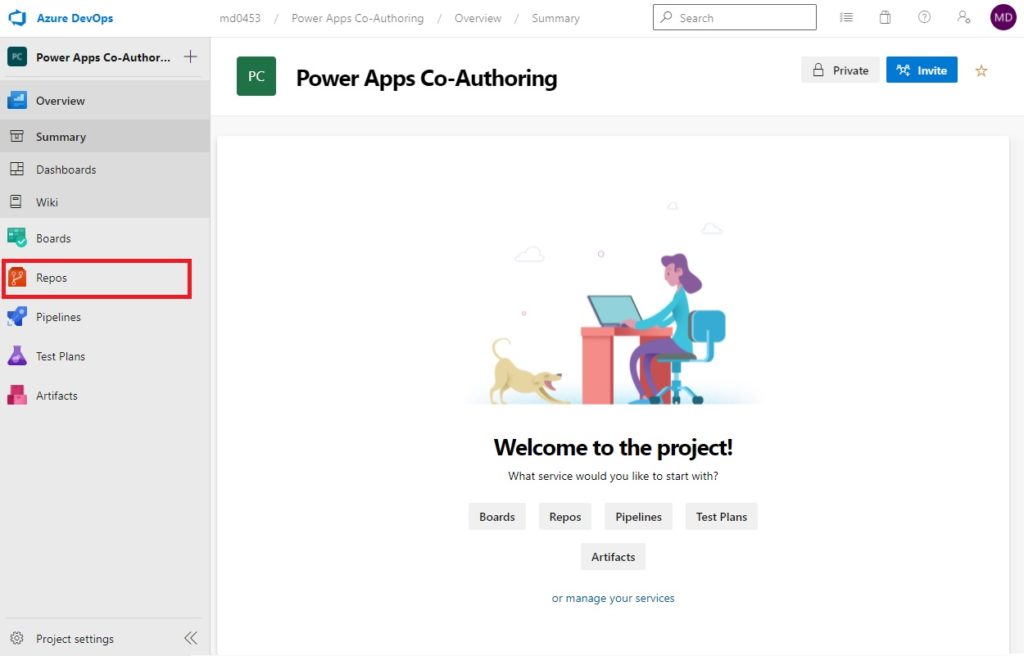
Next we create a new repository to hold our Power Apps app. Create a new project in Azure Dev Ops. Then select Repos from the left-navigation menu.
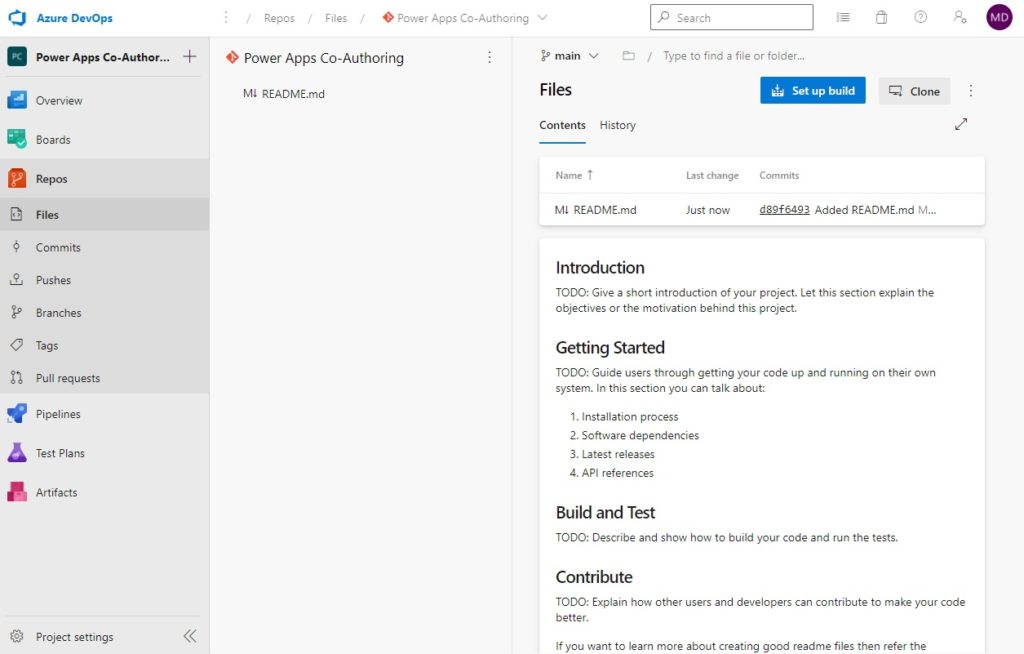
Initialize the repository’s main branch with a README.md file.
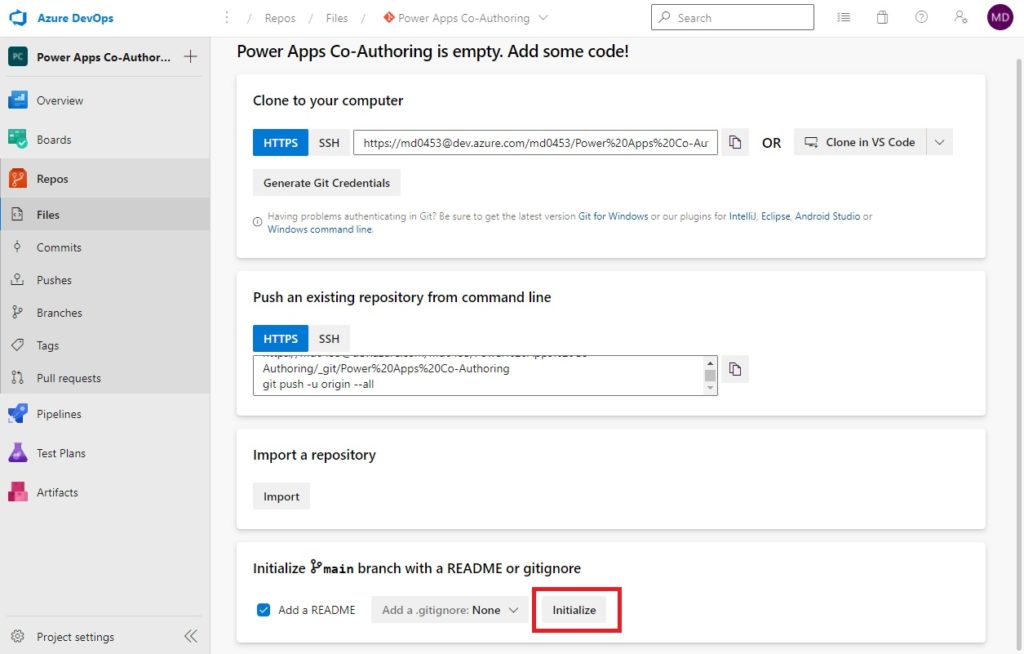
The Azure Dev Ops repository is now created. We can get the location of the repository from the URL in the address bar of our web browser.
Input Github Repository Information In Power Apps
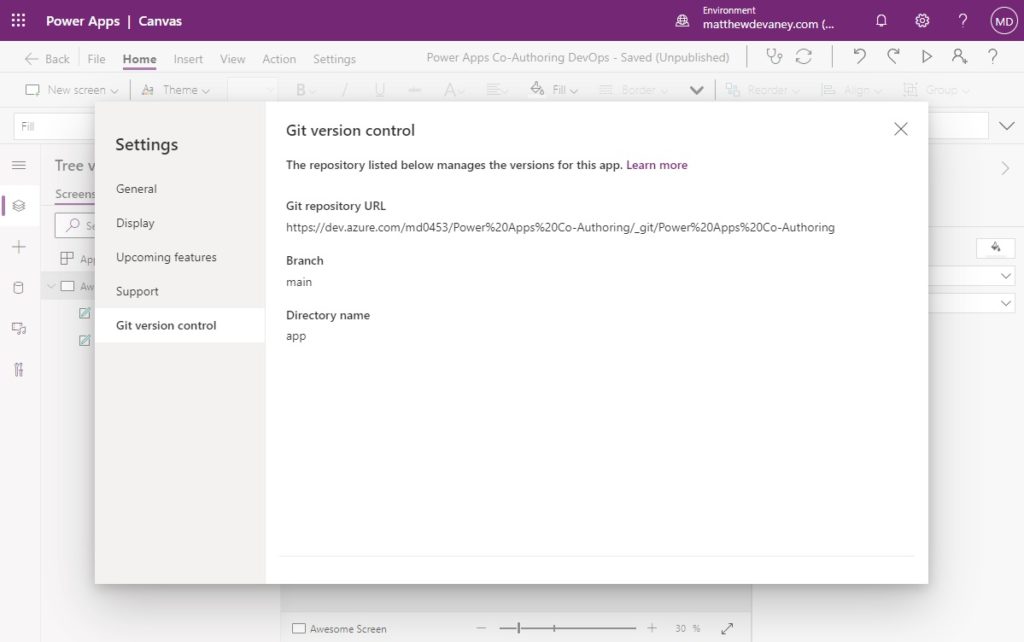
Switch back to Power Apps and fill-in the Connect a Git repository form with these values. Click apply when done.
| Field | Value |
| Git repository URL | https://dev.azure.com/organization_name/project_name/_git/repo_name Example: https://dev.azure.com/md0453/Power%20Apps%20Co-Authoring/_git/ Power%20Apps%20Co-Authoring |
| Branch | main |
| Directory Name | app |
The Git repository URL is a web address we can type into to our web browser to view the repository. App is the name of the folder where our Power Apps source code will be stored. Power Apps does not allow the source code to be stored in the repository’s root folder.
Main is the name of the default development branch. In traditional software development branches (i.e. copies) of the app are made to work on specific features and then are merged back into the main branch once the feature is complete. Power Apps only operates on the main branch.
Important: we must choose a directory name that does not currently exist in the repository and allow Power Apps to create it. If the directory name already exists Power Apps will fail to connect.

Create A Personal Access Token
A special type of password called a personal access token is required for Power Apps to sign into the Azure Dev Ops repository. One developer will make the personal access token and share it with the rest of the development team. We must go back into Azure Dev Ops to create one.
Important: a personal account token is not your Azure Dev Ops account password.
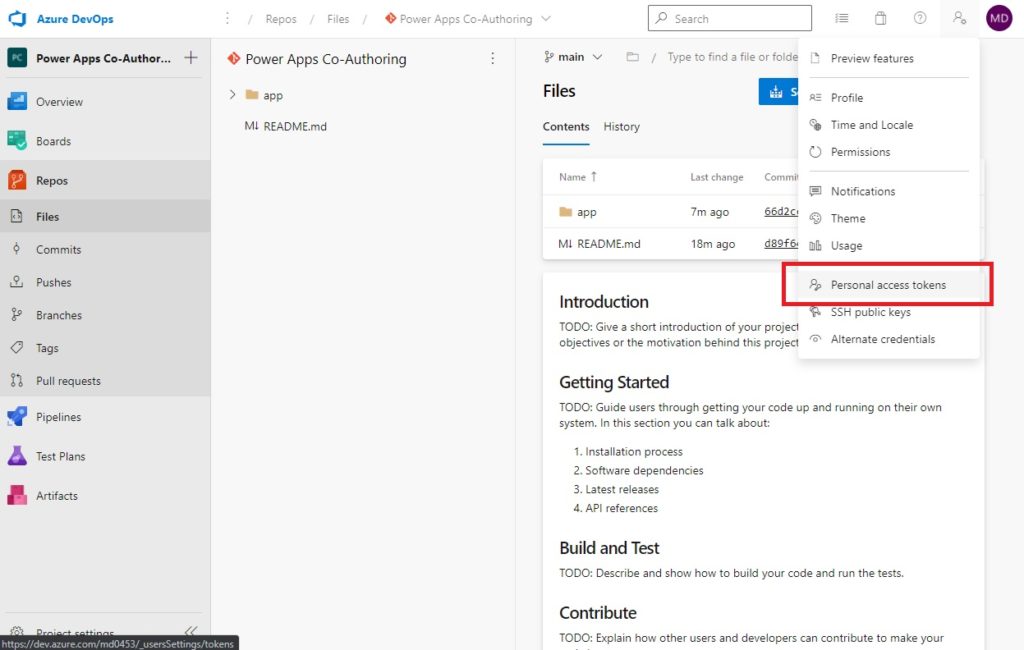
Open Azure Dev Ops and click on the avatar in the top-right corner. Select Personal access tokens.
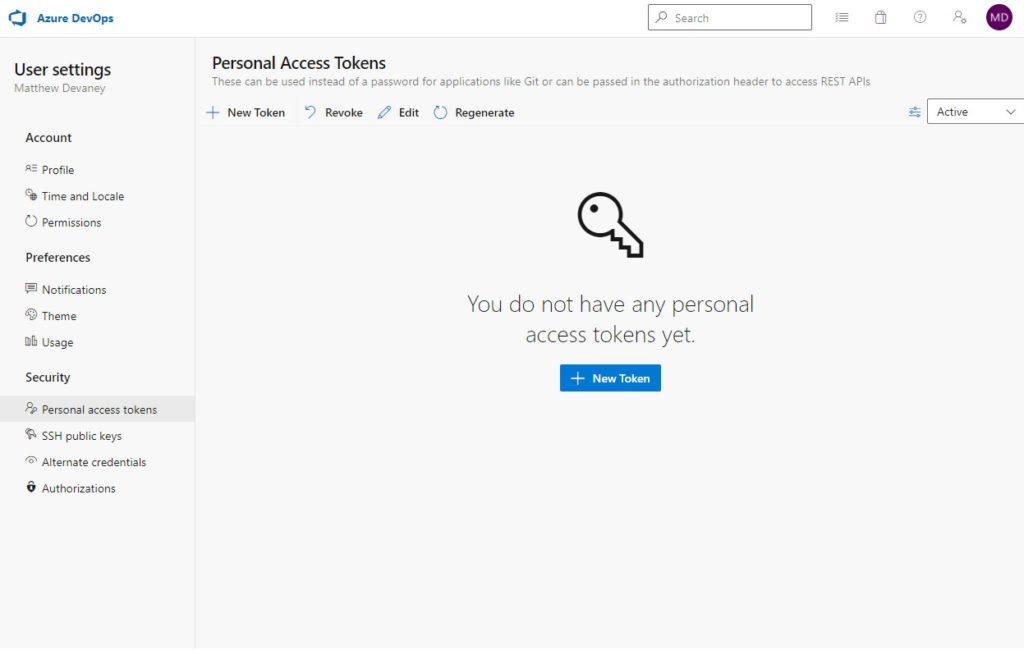
Create a new token.
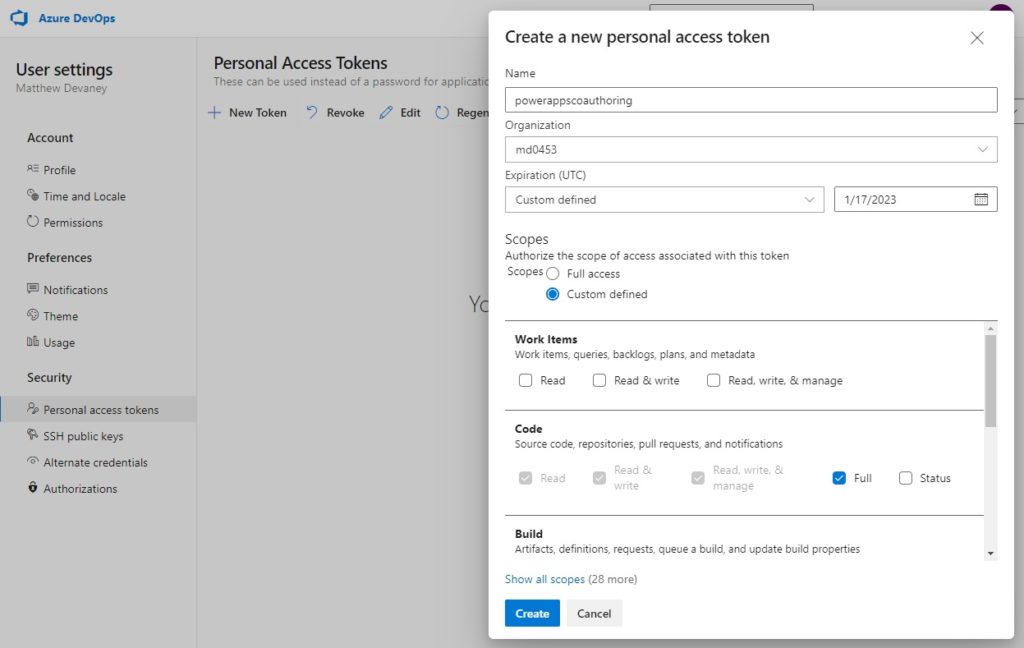
Name the personal access token, choose an expiration and check the full checkbox to give Power Apps full control over the source code and then click Create.
Sign In To The Azure Dev Ops Repository
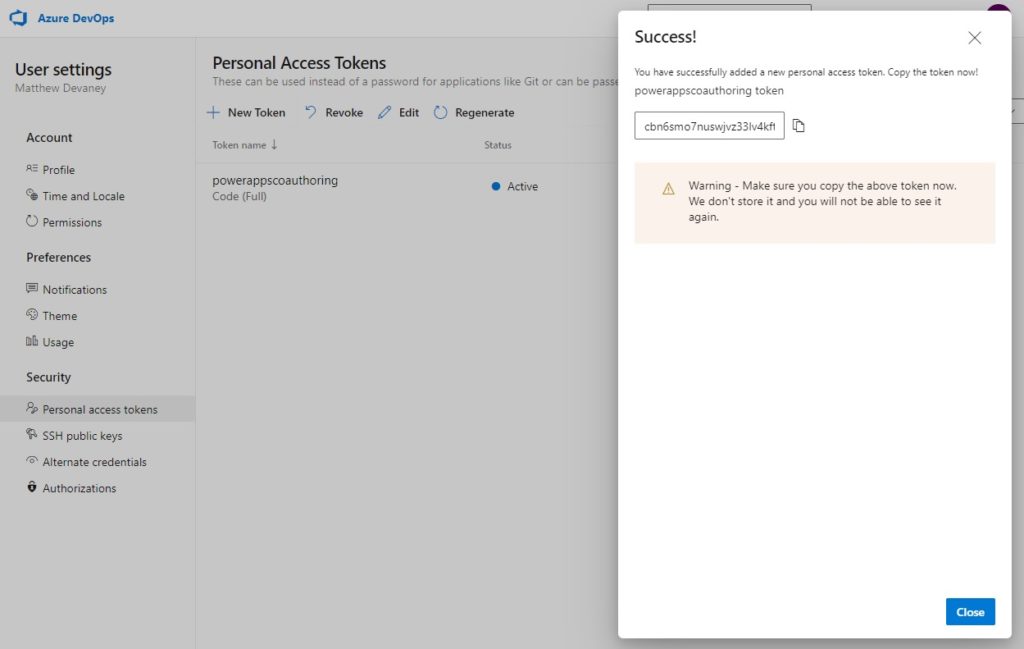
Azure Dev Ops will open to the Success screen after clicking Create token. Copy the personal access token to the clipboard.
Important: make sure you save the personal access token for future use. We can only see the token once. It will be needed each time any developer opens the app to make an edit.
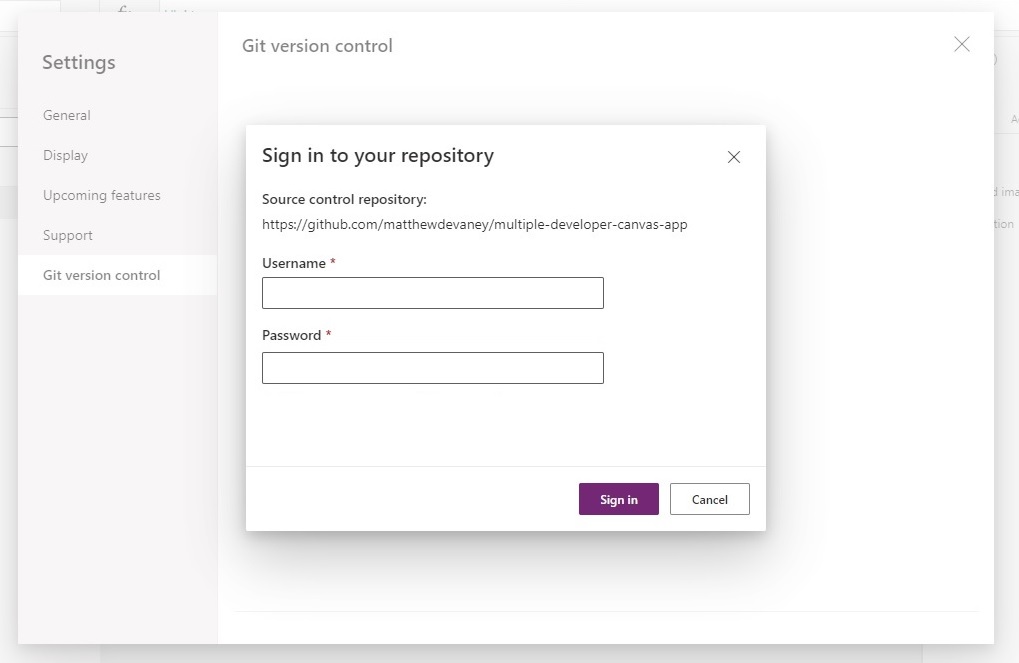
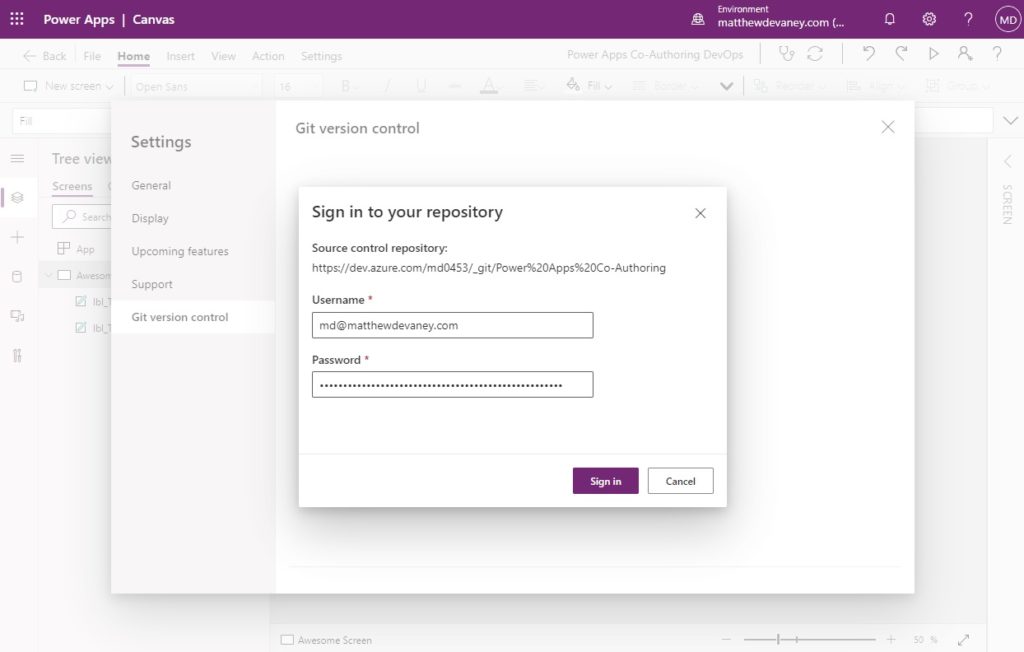
Then go back to Power Apps and sign-in with your Azure Dev Ops username and your personal access token for the password.
Finish Git Version Control Setup
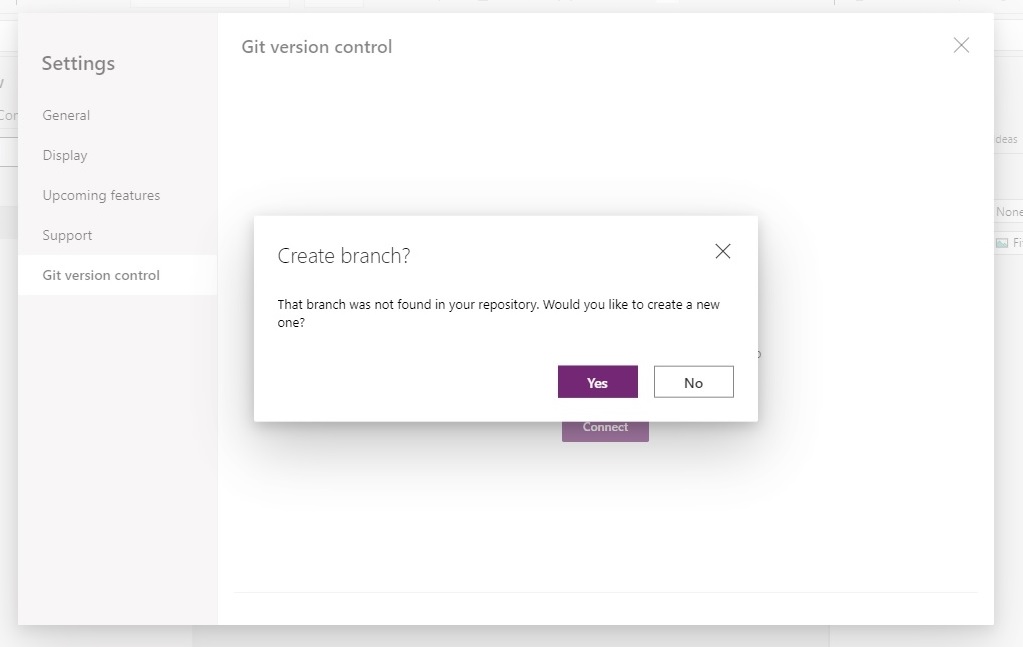
Almost done. One more prompt appears asking if we want to create a new branch in the repository. Select Yes.
We have now setup Git Version control setup in Power Apps.
Sharing Power Apps With Another Developer As A Co-Owner
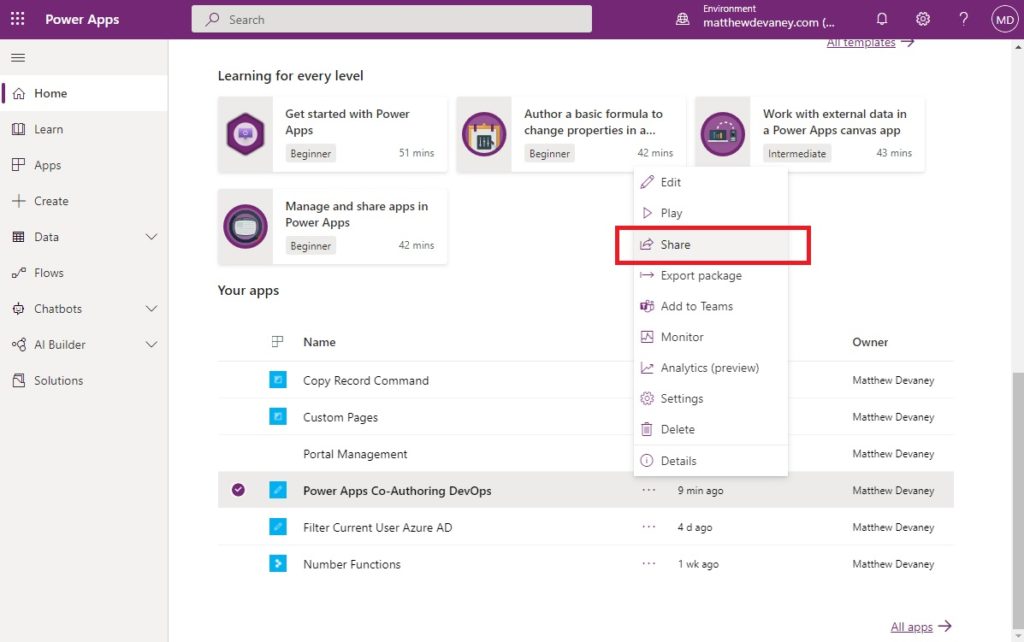
With git version control now setup multiple developers can now work on the same Power Apps app. But we still have to share the app and the Azure Dev Ops repository with those developers. Go-to make.powerapps.com, browse to the app we connected to Azure Dev Ops , click on the three dots and select Share.
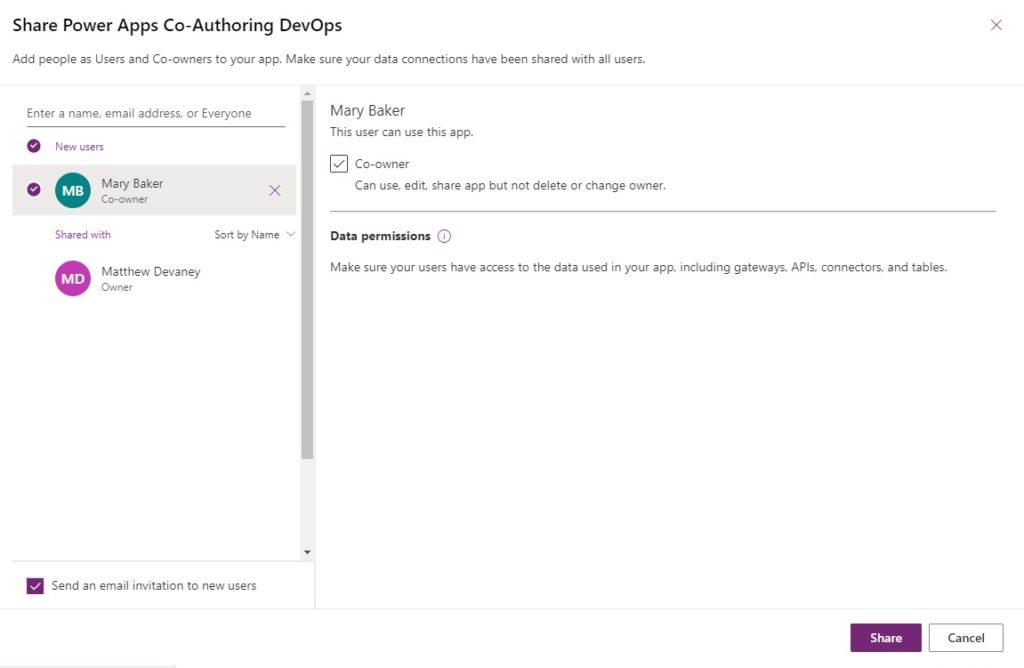
Search for the other developers you want to give access to app and click the checkbox to make them co-owners. Select Share when done.
Login To A Power Apps App At The Same Time As Another Developer
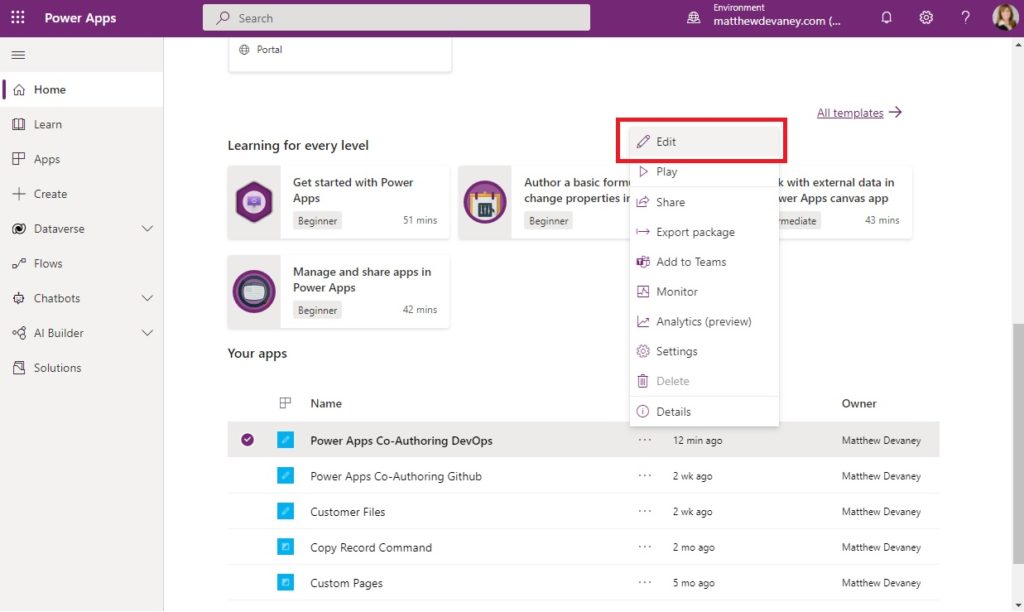
Multiple developers can now work on a single Power Apps at once. Let’s test the feature to ensure it is working. Ask the developer you shared the app with to open it in Power Apps Studio while we are logged-in.
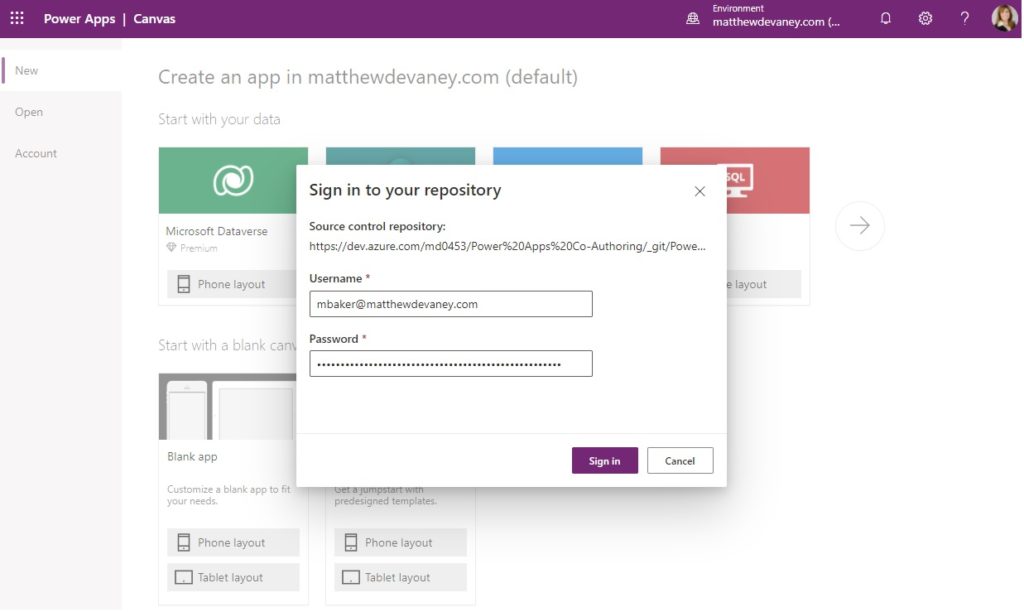
The 2nd developer will be prompted to sign into the Azure Dev Ops repository with a username and password.
- Username – this is the developer’s Azure Dev Ops account username, not their Power Apps user name. The developer will need to sign-up for an account if they don’t already have one.
- Password – this is the personal access token we previously created, not the developer’s Azure Dev Ops account password.
Once completed Power Apps will open normally.
Commit Changes And Check For Updates
Both developers are now working inside the same app. How can they view each other’s progress? Power Apps does not have a live-editing feature like Word, Excel or PowerPoint Online. Developers must save and sync their changes manually. This serves a purpose – we do not want to push unfinished code onto the other developers screen and cause errors.
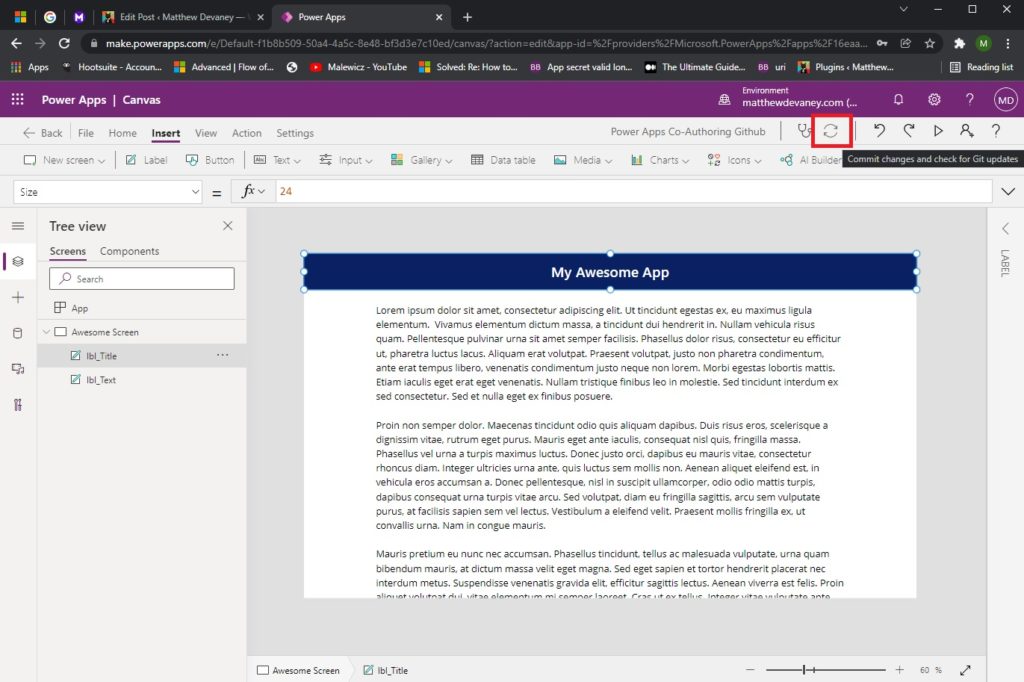
When have completed a feature we want to push it the the git repository so the other developer can update their instance of the app. To do this press the sync button on the top menu of Power Apps Studio. Doing this commits our changes to the repo, merges them with the existing code and updates our app to show any changes done by other developers.
Important: If two developers work on the same property of a control the last edit made wins. The older change gets replaced by the newer change. We need to plan in advance who is working on which features/sections of the app to ensure we don’t overwrite each others work.
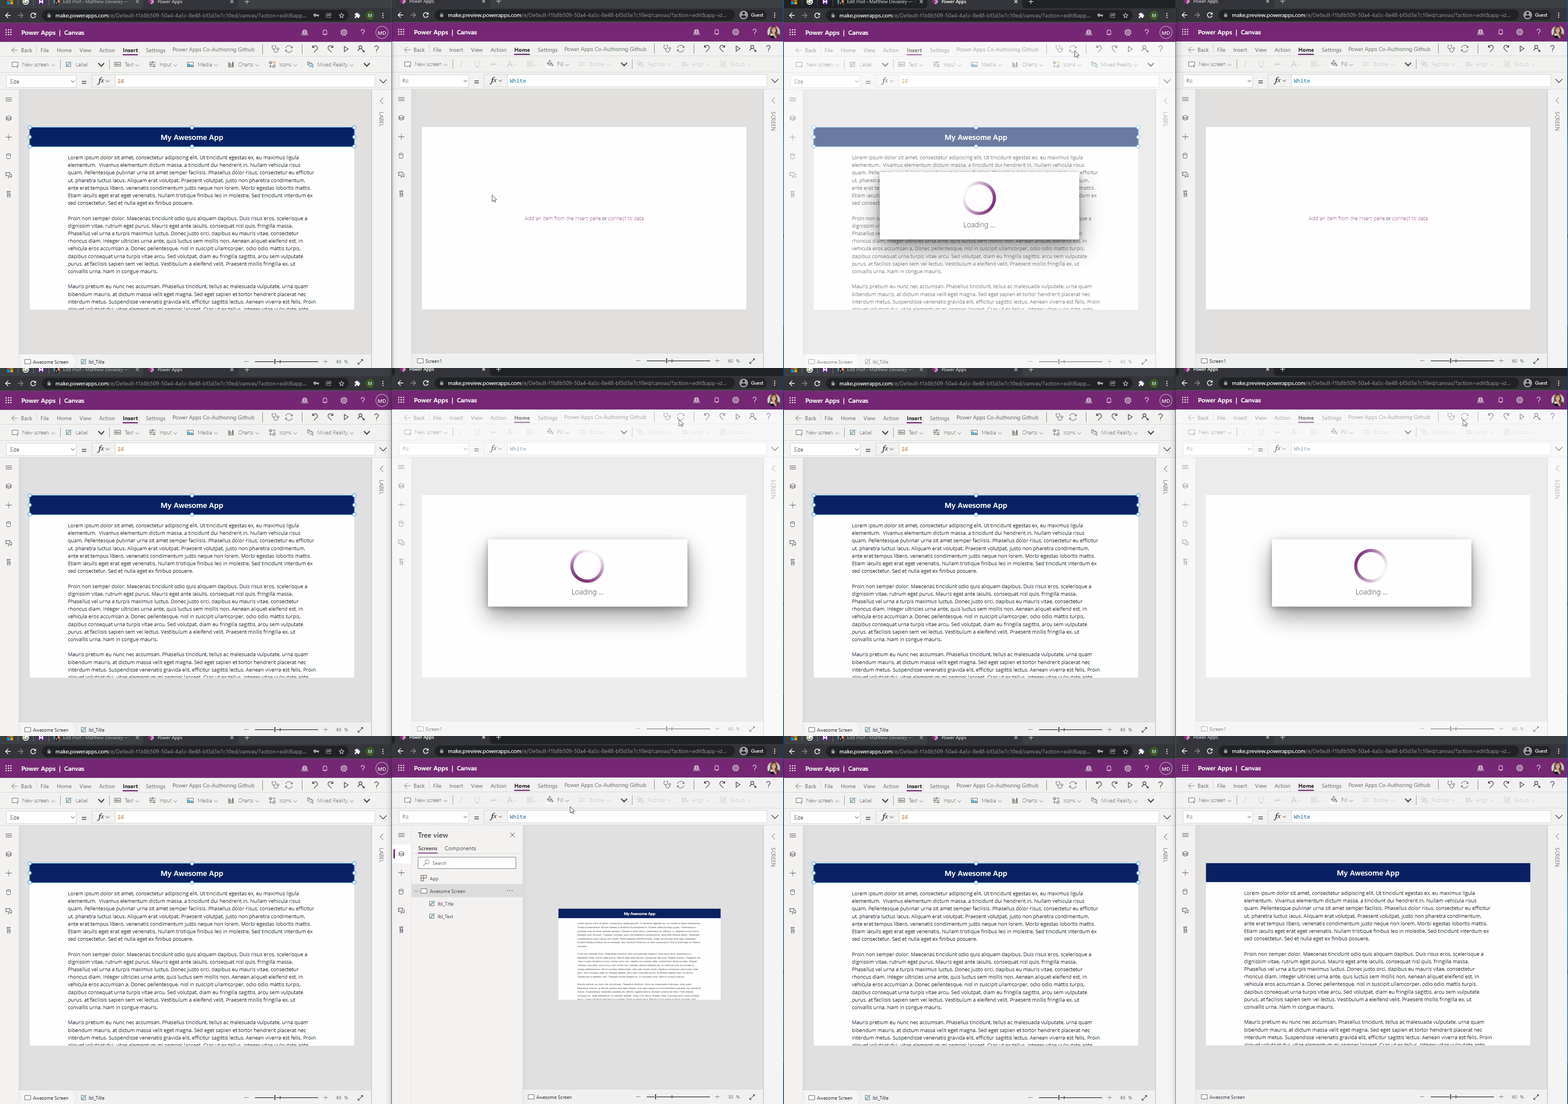
Here’s what the save & sync looks like for two developers working on the same app.
View Power Apps Source Code In An Azure Dev Ops Repository
After Power Apps Studio syncs the app to repository we can go view the source code in Github. Go the folder multiple-developer-canvas-app/app/Src and select the yaml file for the screen we edited in Power Apps. All code for the screen, its controls and their properties is found here.
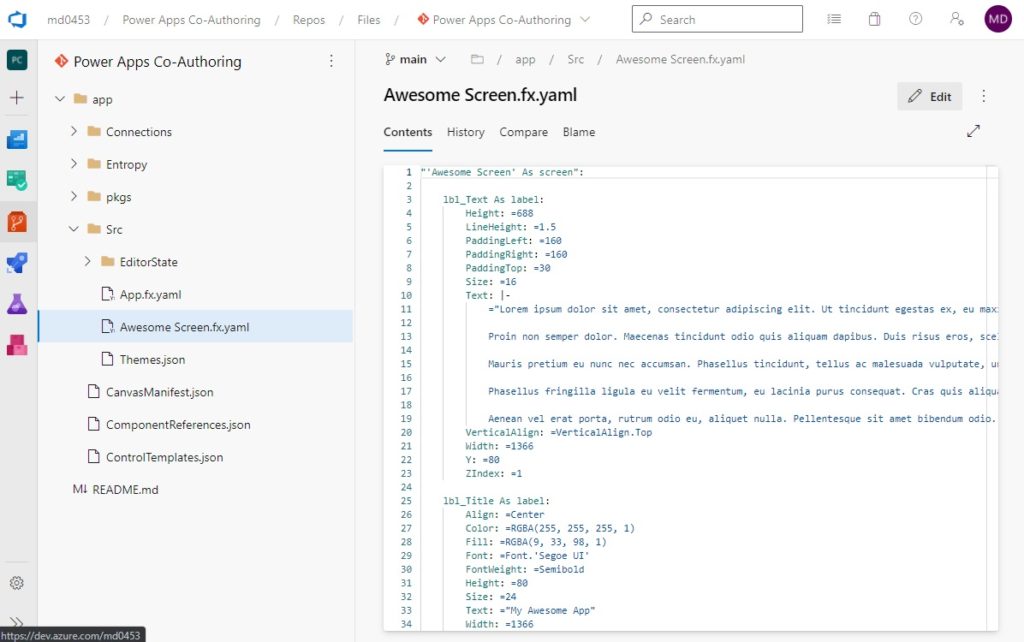
We can do some very useful things with the Power Apps source code in Github:
- Quickly conduct a code review – it is easier to review all of the code for a screen in Github than to browse each individual control and their properties in Power Apps
- Edit the raw code – if we press the period key (.) while looking at the screen in Github it will open the yaml file in an online Visual Studio Code editor. Once any updates are made we can press the sync button in Power Apps Studio to see the changes
- Rename Variables/Collections – Visual Studio code has the ability to find and replace text across all files and folders. This makes it easy to rename variables and collections for the entire app. Press the key combination CTRL + SHIFT + F to use the Find and Replace In Files feature.
- For more ideas on what we can do with Power Apps in the Visual Studio Code editor check out this article.
Additional Considerations For Power Apps Co-Authoring
There are few more things you should know about Power Apps co-authoring before using it:
- This is an experimental feature and it should be treated as such. Do not use it in a production app until you are sure it works. It is not the final product and more features/changes will be made before co-authoring is made generally available.
- New Power Apps must be setup for collaboration individually. There is no way to enable a global setting for all apps to allow multiple developers working at the same time.
- An app connected to git cannot be disconnected from it currently. The only option is to remove the git repository.
- There no setting is available to restrict a personal token’s access to a single repository. Once a personal access token is granted it gives access to all repositories under the same account. Each developer must use the same personal access token.
Did You Enjoy This Article? 😺
Subscribe to get new Power Apps articles sent to your inbox each week for FREE
Questions?
If you have any questions about Allow Multiple Power Apps Developers To Simultaneously Work On An App (Azure Dev Ops Version) please leave a message in the comments section below. You can post using your email address and are not required to create an account to join the discussion.