Secret Way To Create Excel File Using Copilot Studio Prompts

You can use Copilot Studio to create an excel file and output it to a chat window. The new code interpreter feature in Copilot Studio prompts allows you generate an Excel file as output. But to take advantage of it, you must also know how to upload a file to the chat window and where to get the Excel file location. This article will fully explain how to create an excel file in Copilot Studio from end-to-end.
Introduction: Create A Travel Expense Report Agent
Employees at a consulting firm use an Agent to generated travel expense reports. The employee uploads receipts to the chat window and the Copilot Studio agent creates an excel file with all expenses listed.
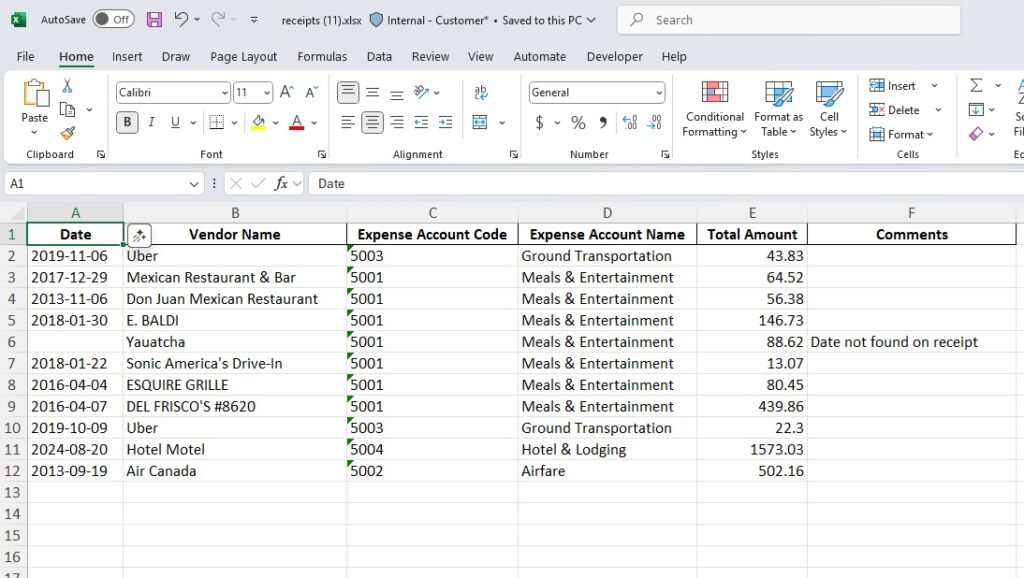
The Excel file produced by the Agent looks like this.
Create A New Travel Expense Report Topic
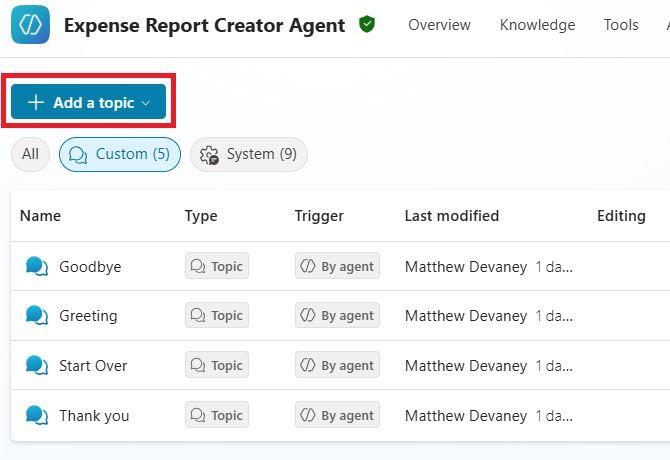
Open Copilot Studio and create a new Agent named Expense Report Creator Agent.

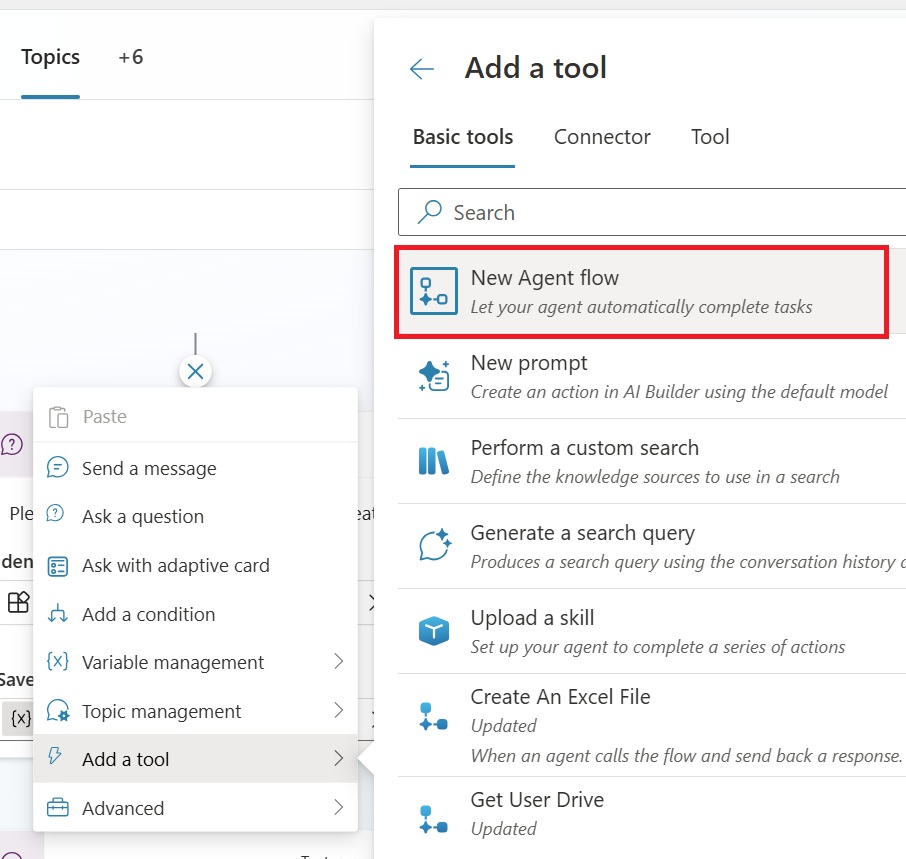
Go to the topics tab and select Add a topic.
Select the The Agent chooses trigger.
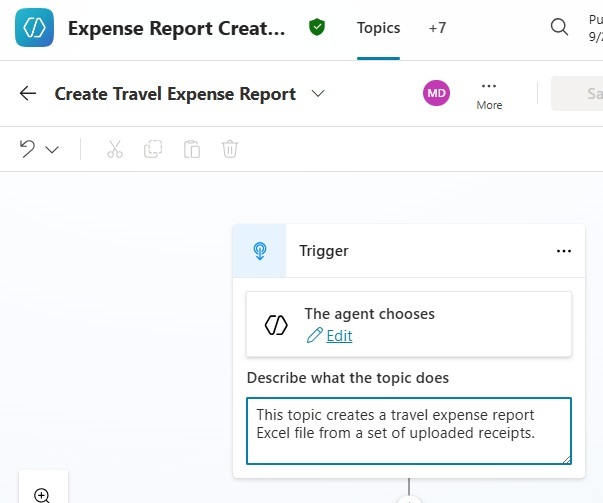
And use this description for the topic:
| This topic creates a travel expense report Excel file from a set of uploaded receipts. |
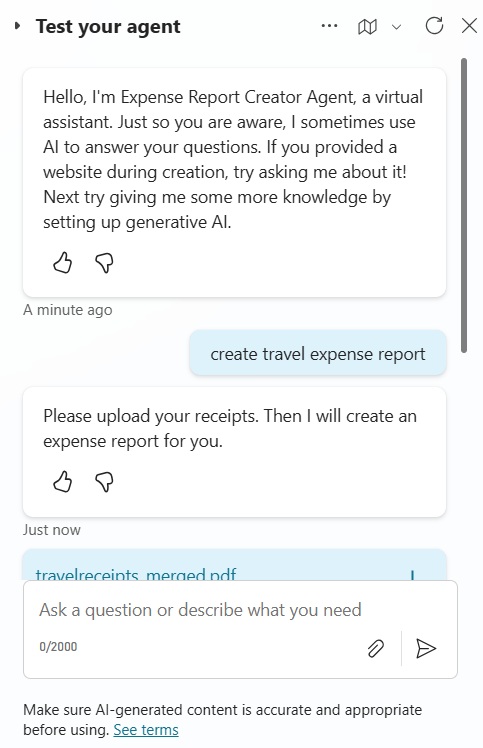
Upload The Receipts File Using A Question Node
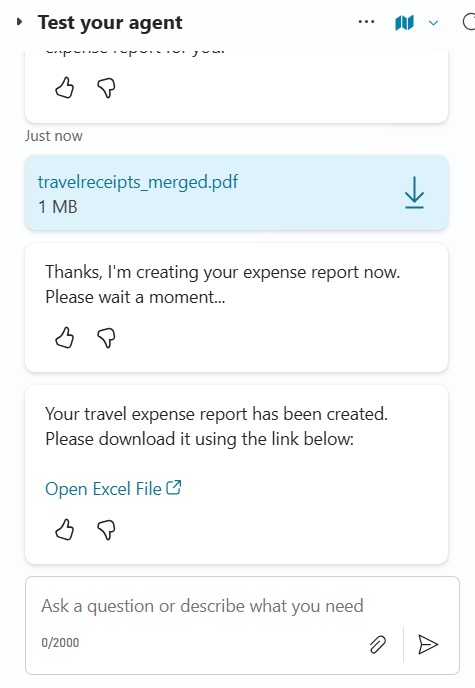
The user will upload receipts into the chat window as a pdf with one receipt on each page. Add a question node to the topic with the message “Please upload your receipts. Then I will create an expense report for you.”
Choose to identify a File entity type and rename the output variable to varReceiptsFile.
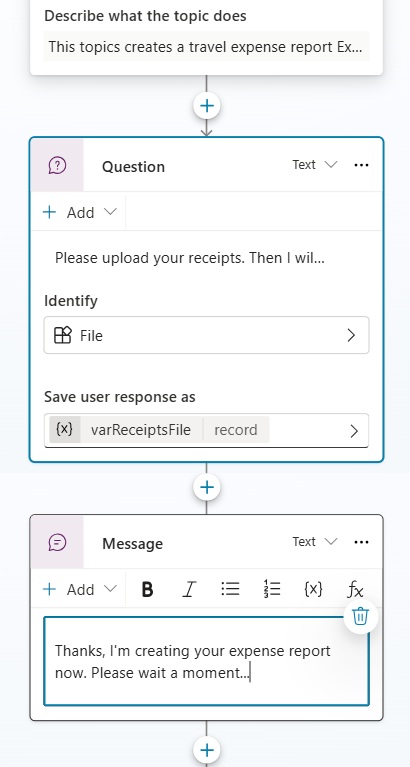
After the question node, right a message to tell the user their expense report is being created. We want to do this because generating the Excel file will take about 30 seconds.
| Thanks, I’m creating your expense report now. Please wait a moment… |
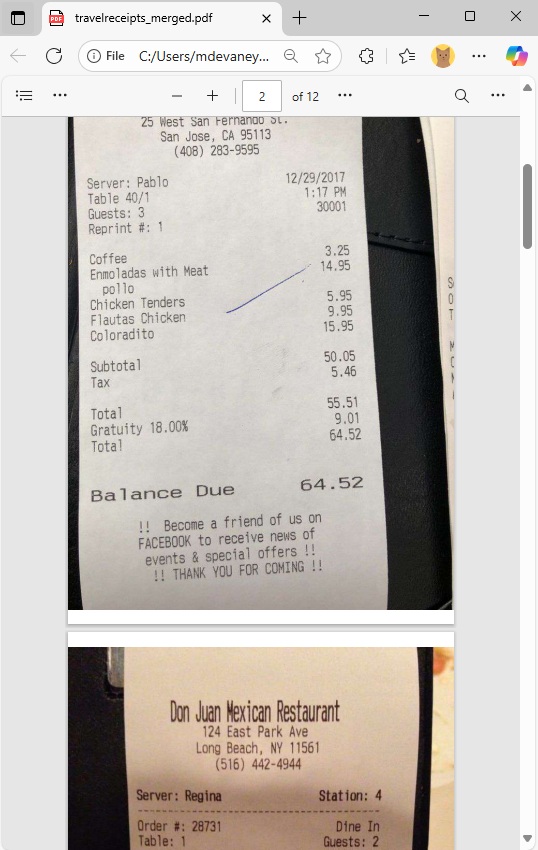
Here is an example of the receipts PDF used as input. You can download the receipts file from this link.
Add A New Agent Flow To Create An Excel File In Copilot Studio
To create the Excel file we will need to use an Agent Flow. Add a new Agent Flow node to the topic named Create An Excel File.
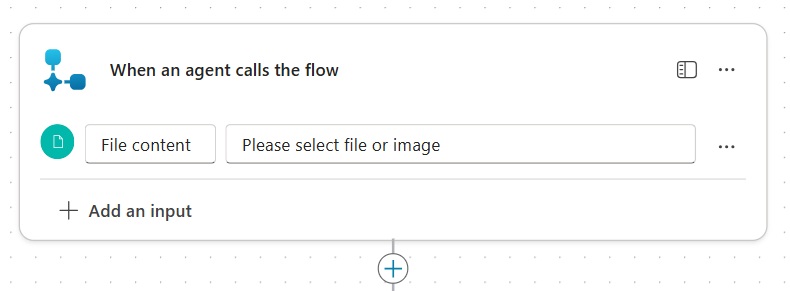
Then add a file type variable to the Agent Flow. We will use this to accept the pdf file of receipts as input.
Extract Receipts Data To JSON Using A Prompt Action
The Agent flow will extract the receipts data as a JSON and use it to generate an Excel file. It is necessary to split this in two prompt action because code interpreter does not do a good job of extracting the receipts data from the pdf.
Add a Run A Prompt action to the agent flow and add a new custom prompt.
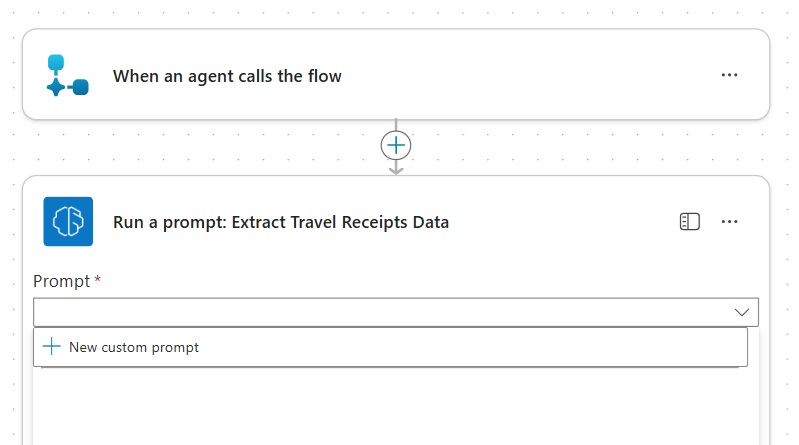
Name the prompt Extract Travel Receipts Data.
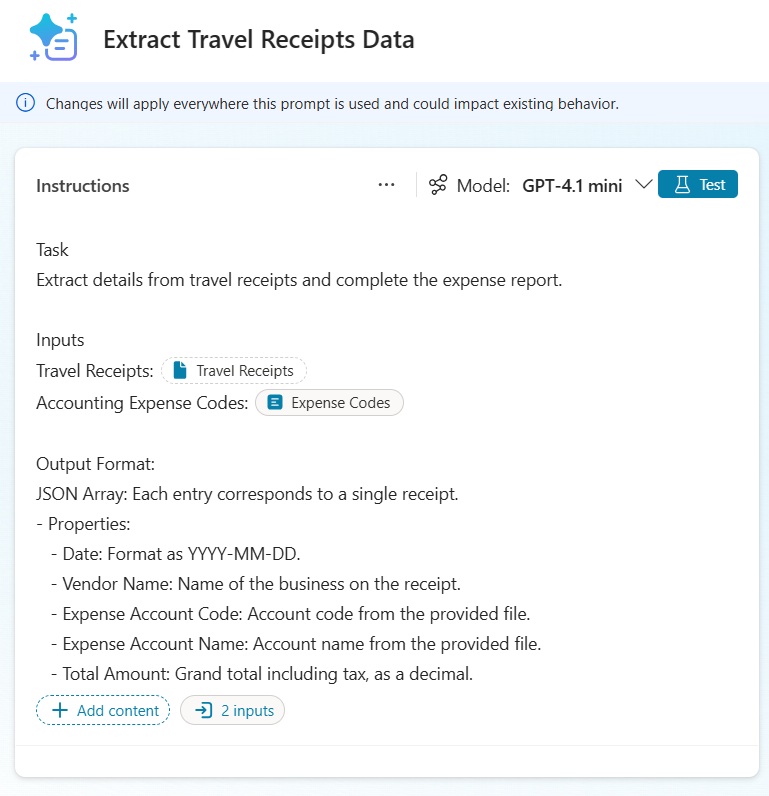
Copy and paste this text into the prompt instructions. Travel receipts is a document type variable and accounting expense codes is a text type variable.
| Task Extract details from travel receipts and complete the expense report. Inputs Travel Receipts: [Travel Receipts] Accounting Expense Codes: [Accounting Expense Codes] Output Format: JSON Array: Each entry corresponds to a single receipt. – Properties: – Date: Format as YYYY-MM-DD. – Vendor Name: Name of the business on the receipt. – Expense Account Code: Account code from the provided file. – Expense Account Name: Account name from the provided file. – Total Amount: Grand total including tax, as a decimal. Instructions: 1. Receipt Count: Record the total number of receipts processed. 2. Error Handling: If extraction fails, note the issue in the Comments and proceed with other receipts. 3. Expense Codes Application: Match and assign account codes and names from the provided file. If unidentifiable, leave blank. 4. Consistency: Ensure all entries are uniformly formatted and accurately reflect receipt data. |
Use this text to test the Accounting Expense Codes variable.
| Account Code Account Name Description 5001 Meals & Entertainment Expenses related to meals and entertainment for business purposes. 5002 Airfare Expenses incurred for flight tickets and other air travel-related costs. 5003 Ground Transportation Costs associated with transportation on the ground, such as taxis and buses. 5004 Hotel & Lodging Expenses for accommodation, including hotel stays and other lodging options. |
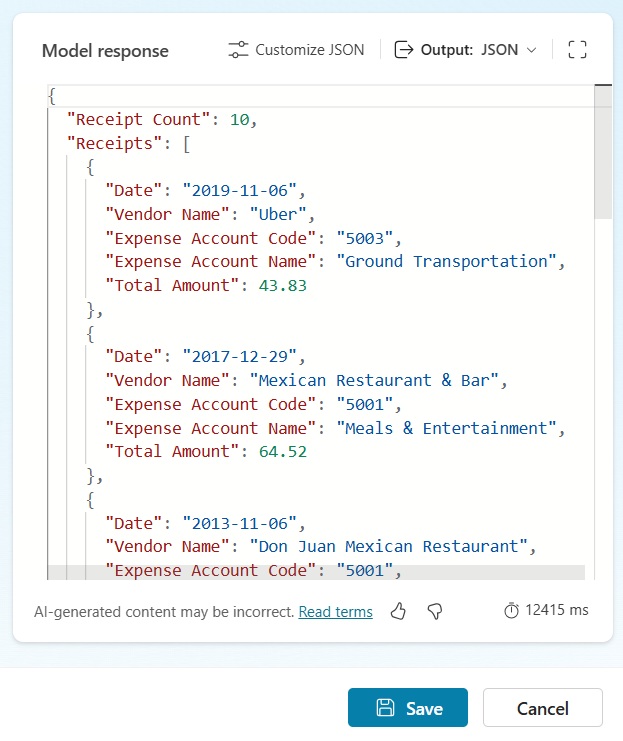
Test the prompt. The JSON output should be in the same format as below. Save and close the prompt designer.
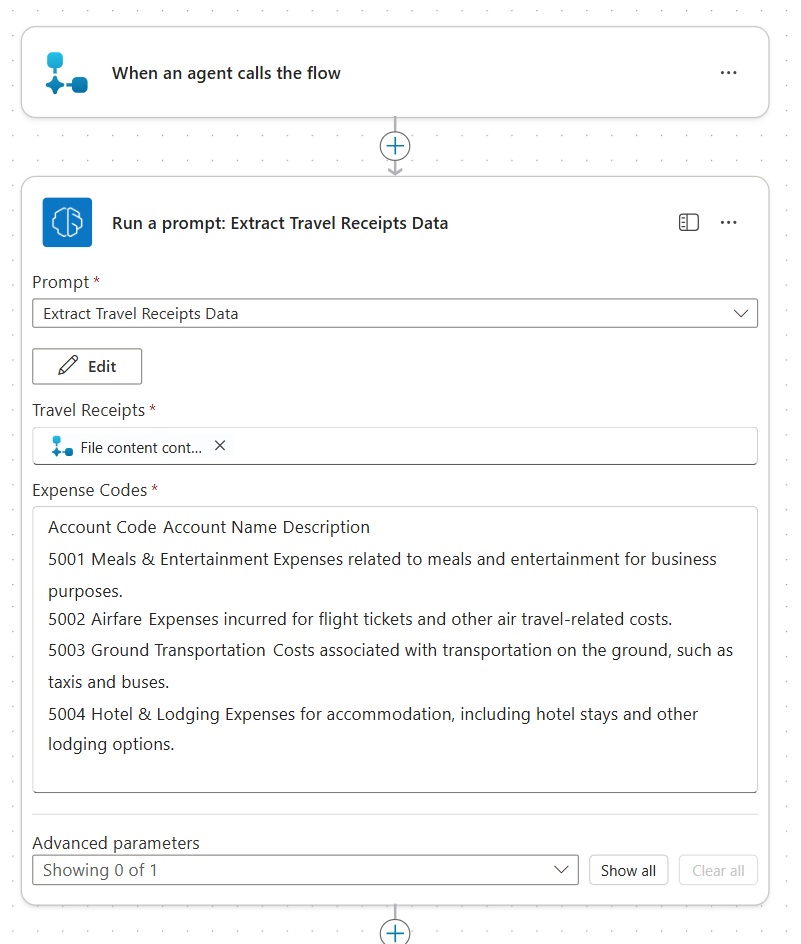
In the Agent flows editor, add the file content to the Travel Receipts input and copy and paste the Account Expense Codes text into the Expense Codes field.
Run A Code Interpreter Prompt Action To Create An Excel File
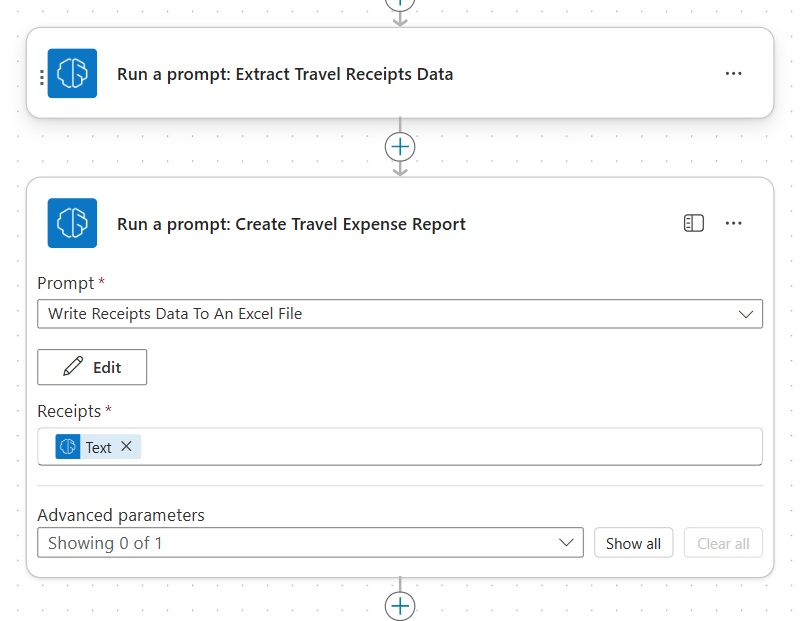
In the second prompt we will generate the Excel file from the receipts JSON. Add another prompt action the flow and add a new custom prompt.
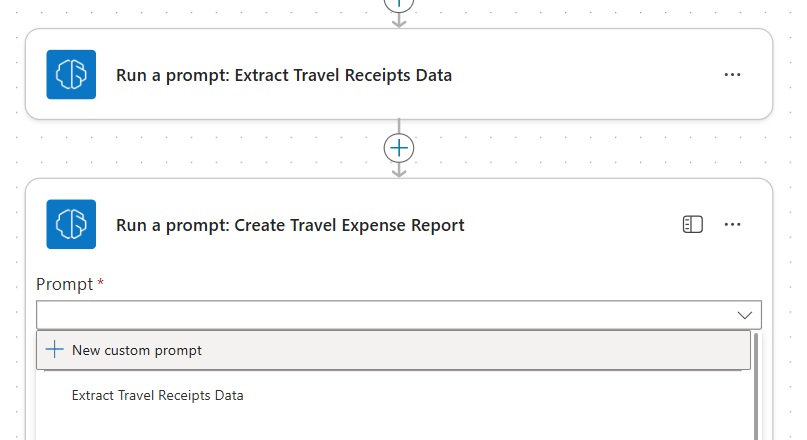
Name the prompt Write Receipts Data To An Excel File.
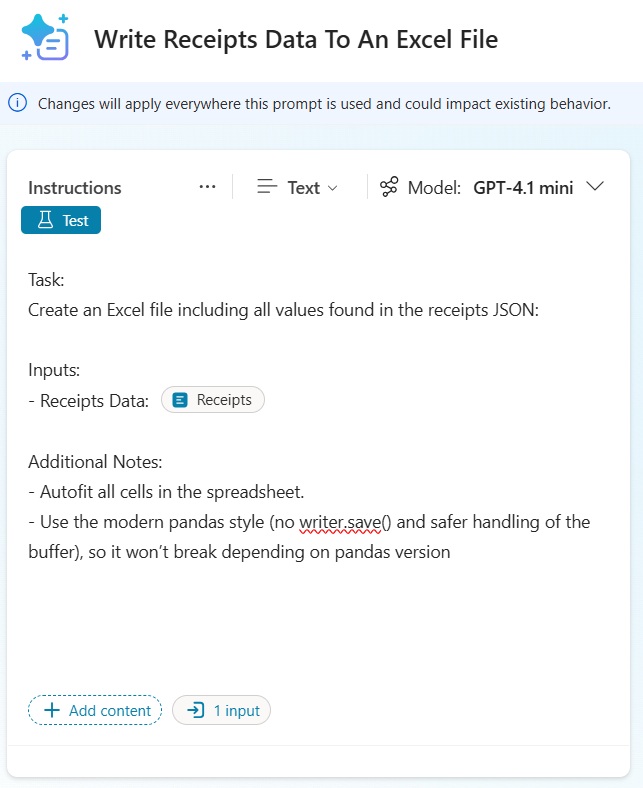
Use this text in the instructions field. The Receipts Data input variable should be a text data type.
| Task: Create an Excel file including all values found in the receipts JSON Inputs: – Receipts Data: [Receipts Data] Additional Notes: – Order of columns is: Date, Vendor Name, Expense Account Code, Expense, Account Name, Total Amount, Comments – Autofit all cells in the spreadsheet. – Use the modern pandas style (no writer.save() and safer handling of the buffer), so it won’t break depending on pandas version |
Go to the prompt Settings.
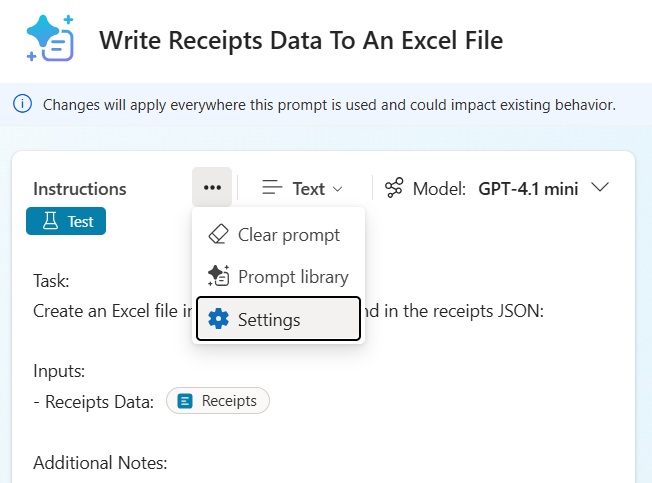
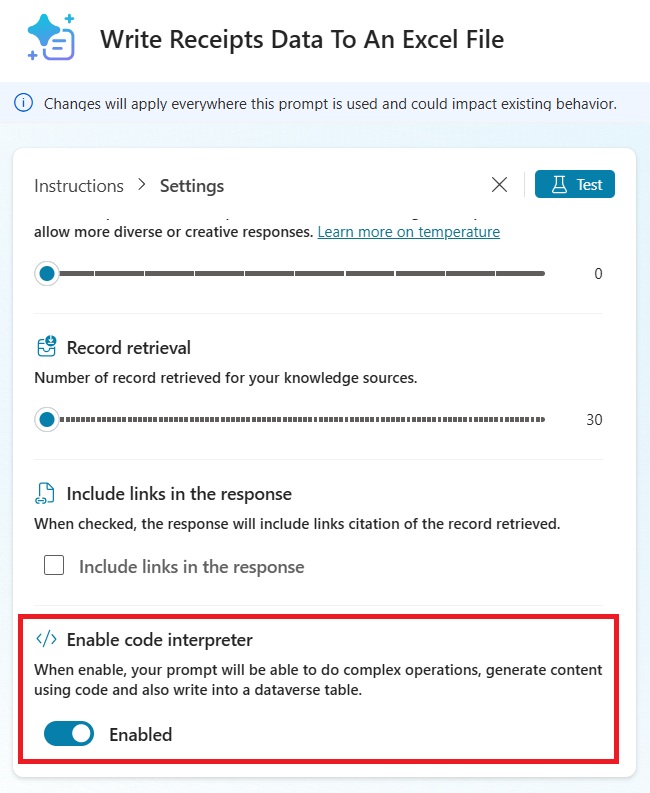
Then enable code interpreter. If the code interpreter toggle is disabled, follow the instructions in the next section to turn it on.
Enable Code Interpreter In A Power Platform Environment
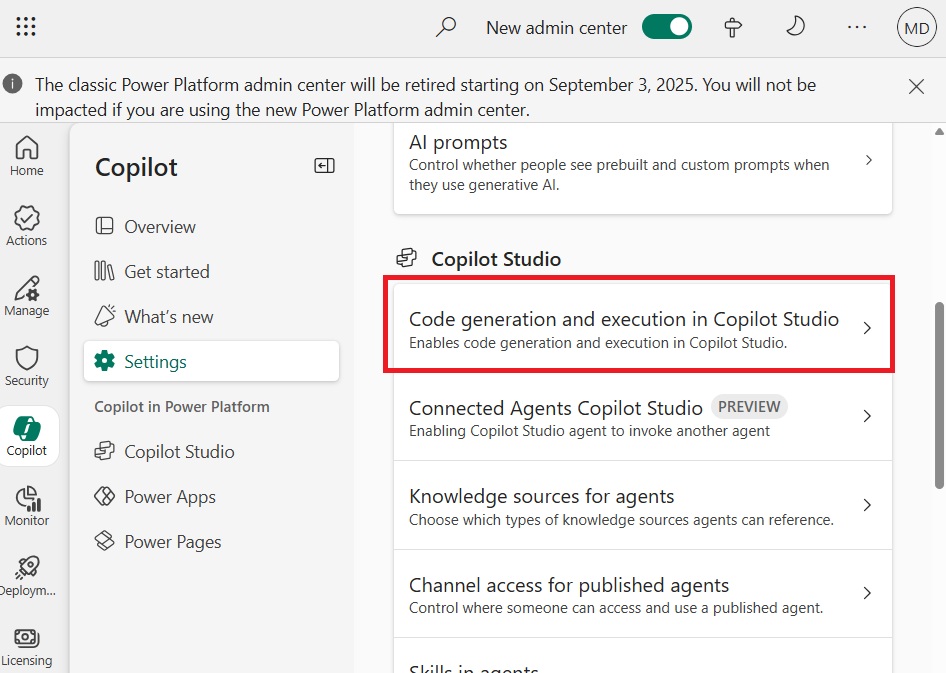
If code interpreter cannot be toggled on inside the prompt, we will need to enable it for the environment. Go to Power Platform Admin Center > Copilot > Settings. Then open the Code generation and execution in Copilot Studio menu item.
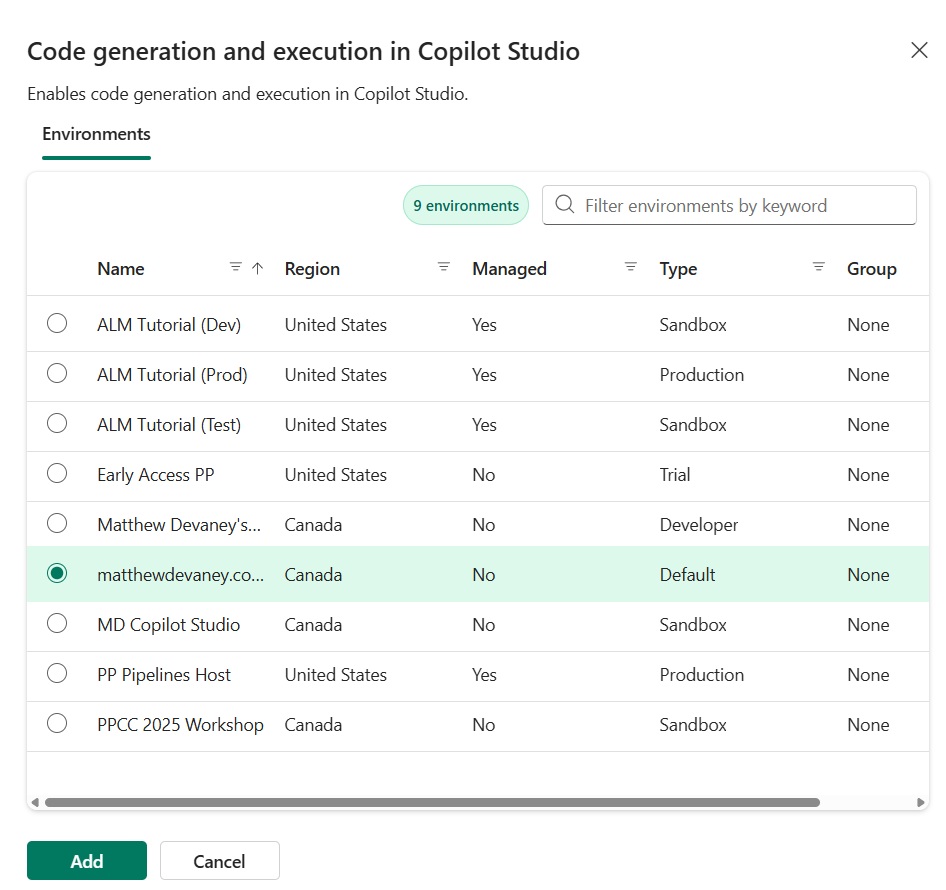
Select the environment.
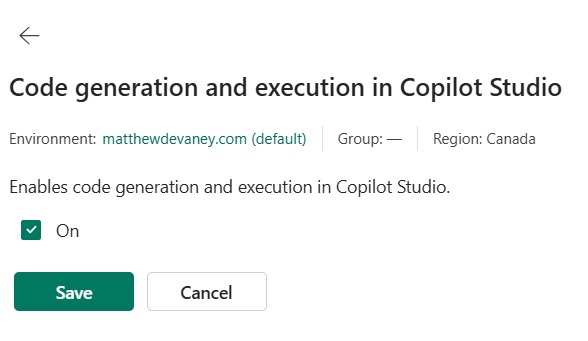
Check the On checkbox and press Save. Code Interpreter can now be selected for prompts in the environment.
Generate The Excel File Inside The Prompt Action
Once code interpreter is turned on test the prompt. Upon successful completion go to the Model response table and switch the menu to Documents/Images. Press the download button to preview the Excel file.
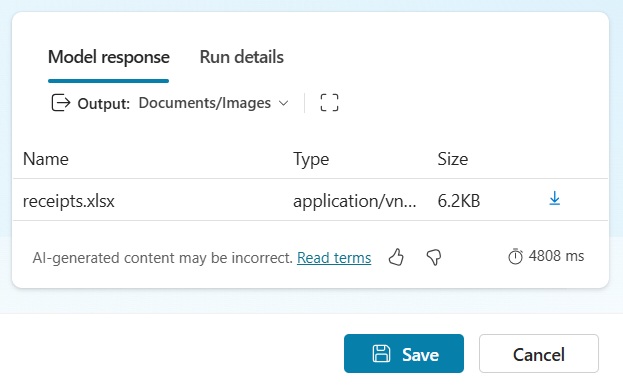
The output Excel file looks like this.

Close the prompt designer and return to the Agent flow. Populate the receipts field for the prompt action with the text output of the previous prompt action.
Save The Output Excel File To OneDrive
We want the user to download the output Excel file. Copilot Studio cannot display a file in memory, it must be saved to storage. Add a new OneDrive – Create File action to the agent flow and choose the folder Microsoft Teams Chat Files.
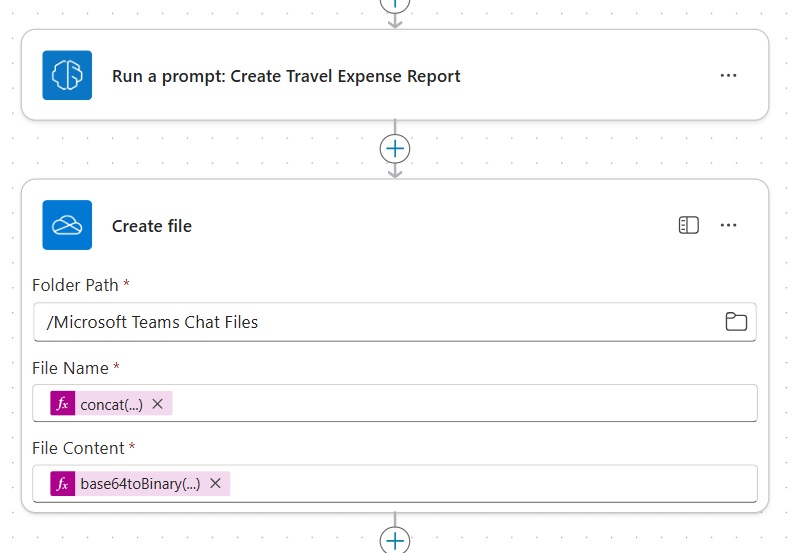
Use this code to generate a unique name for the Excel file with the format receipts_20250924073411.xlsx.
concat('receipts_',formatDateTime(utcNow(),'yyyymmddhhMMss'),'.xlsx')Code language: JavaScript (javascript)
Then supply the base64_content from the prompt which created the Excel file and place it inside a base64tobinary function.
base64toBinary(first(outputs('Run_a_prompt:_Create_Travel_Expense_Report')?['body/responsev2/predictionOutput']?['files'])['base64_content'])Code language: JavaScript (javascript)
Get The Excel File Path In OneDrive
To create the download link we will need to supply the file path. The full file path is not included in the create file action output. To get the full file path, insert an Office 365 Users – Send An HTTP Request action.
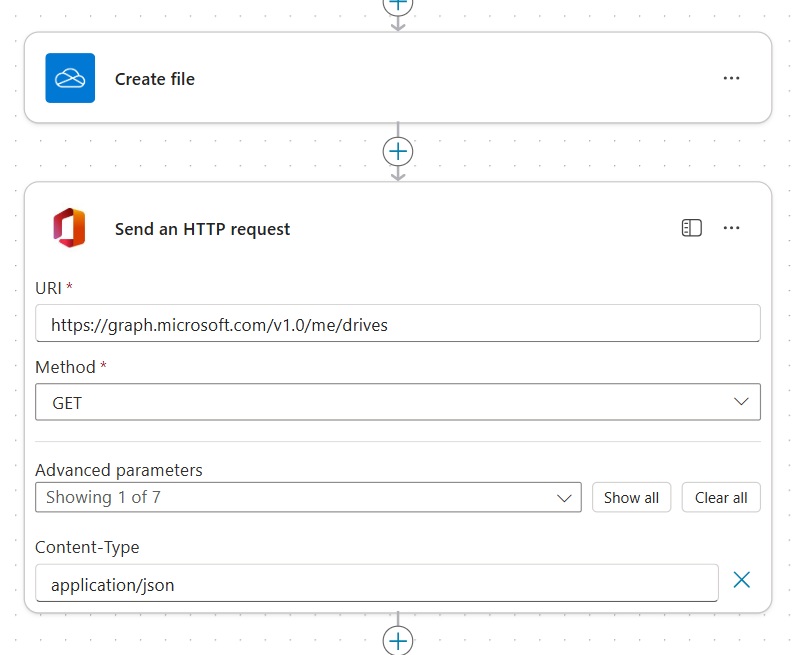
Use these value to get information about the current User’s drives.
| Field | Value |
| URI | https://graph.microsoft.com/v1.0/me/drives |
| Method | GET |
| Content-Type | application/json |
The Send An HTTP request action will return a list of drives the User has access to. We only want the OneDrive information. Add a Filter Array action to the agent flow. Populate the from field with the value variable from the previous action.
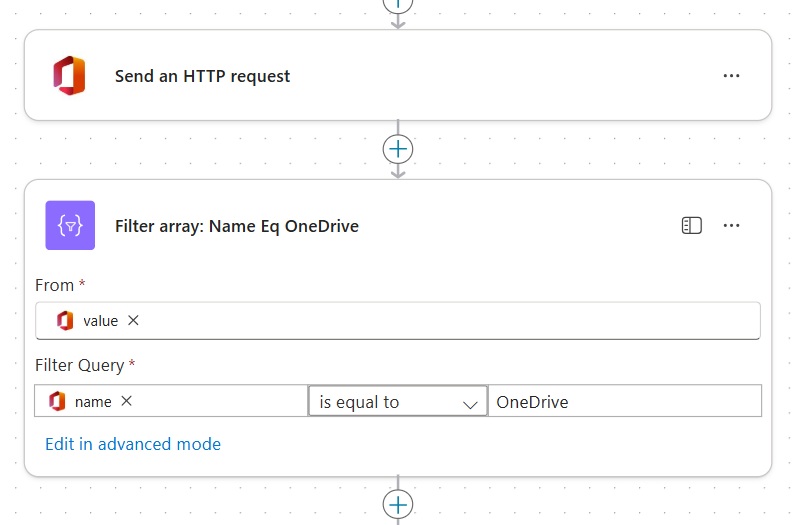
Write this code in the filter query to target the drive name and set the filter equal to OneDrive.
item()?['name']Code language: CSS (css)
Compose the full Excel file path as shown below by using two dynamic values.
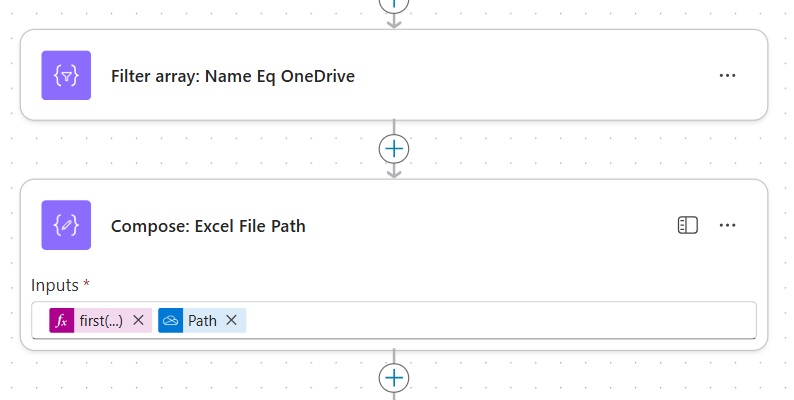
The first dynamic value holds the path to the User’s OneDrive.
first(body('Filter_array:_Name_Eq_OneDrive'))?['webUrl']Code language: JavaScript (javascript)
And the second dynamic value stores the path to the Excel file inside of OneDrive.
outputs('Create_file')?['body/Path']Code language: JavaScript (javascript)
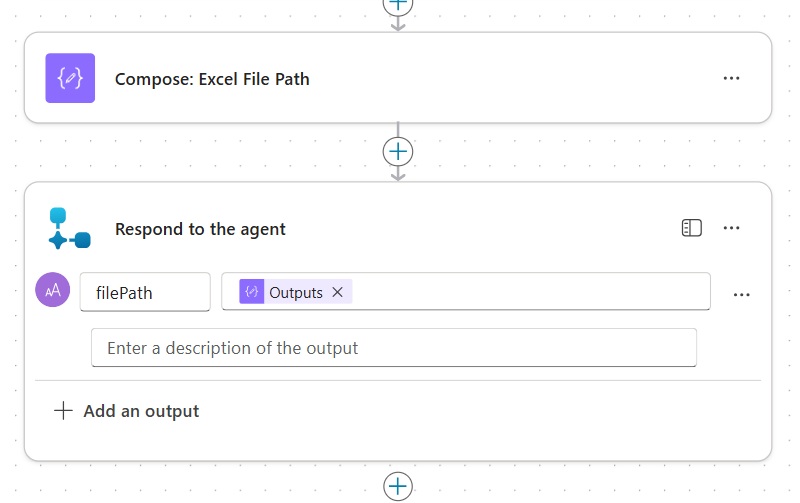
Send The Excel File Link To The User In The Chat Window
We now have a full path to the Excel file. Use the Respond To Agent action to send a text variable named filePath back to the Agent. Save and close the agent flow.
Enable file metadata
In Copilot Studio, update the agent flow’s inputs and outputs. Rename the output variable to varFilePath.
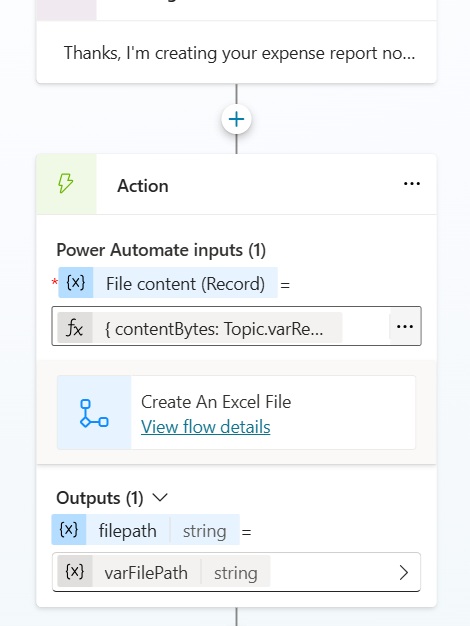
Use this code in the File Content property to pass the file to Power Automate.
{
    contentBytes: Topic.varReceiptsFile.Content,
    name: Topic.varReceiptsFile.Name
}Code language: CSS (css)
Add a message node to display the file link to the User.
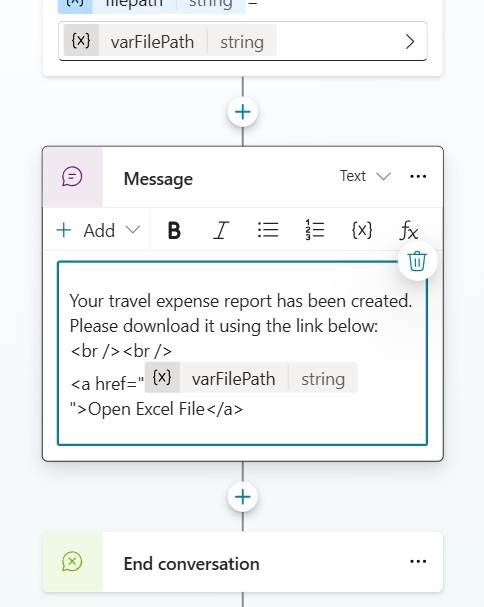
Use this HTML code to create the link.
Your travel expense report has been created. Please download it using the link below:
<br /><br />
<a href="varFilePath">Open Excel File</a>Code language: HTML, XML (xml)
Test The Agent Flow To Create An Excel File
We’re done. Trigger the travel expense file report in the chat window and upload a pdf file of receipts.
The Agent will output a message with an Open Excel File link.

The Excel file created by the Copilot Studio agent looks like this.

Video: Copilot Studio Create An Excel File Using Prompts
Watch this video for a full explanation of how to create an Excel file using Copilot Studio.
Did You Enjoy This Article? 😺
Subscribe to get new Copilot Studio articles sent to your inbox each week for FREE
Questions?
If you have any questions or feedback about Secret Way To Create Excel File Using Copilot Studio Prompts please leave a message in the comments section below. You can post using your email address and are not required to create an account to join the discussion.


Hey buddy, your video is great. For my learning can you share your pdf file where i can test?
Ash,
I’ve added to the article now Here’s a direct link. Thanks for asking.
https://github.com/matthewdevaney/Copilot-Studio-Tutorials/tree/main/Create%20An%20Excel%20File%20Using%20Prompts
THANK YOU FOR THIS! Total lifesaver. Exactly what I needed
Steve,
You’re welcome. More to come soon on Copilot Studio and Excel capabilities.
Hey Matthew, I am using SharePoint to save the file. What can I do, should I still use the Send and HTTP request action? Need your help on the next step I got lost in because I will need to use SharePoint instead of OneDrive. TIA!
Hey Matthew, I am using SharePoint to save the file. What can I do, should I still use the Send and HTTP request action? Need your help on the next step I got lost in because I will need to use SharePoint instead of OneDrive. TIA!
This is nice, I just have one error.. I get this everytime I run it InvalidTemplate. Unable to process template language expressions in action ‘Create_file’ inputs at line ‘0’ and column ‘0’: ‘The template language expression ‘base64toBinary(first(outputs(‘Run_a_prompt-_Create_Travel_Expense_Report’)?[‘body/responsev2/predictionOutput’]?[‘files’])[‘base64_content’])’ cannot be evaluated because property ‘base64_content’ cannot be selected. Please see https://aka.ms/logicexpressions for usage details.’.
getting below error while creating excel file from receipts data.Failed to create Excel file: type object ‘ExcelWriter’ has no attribute ‘_convert_to_excel_column’..Please ignore second run worked
Thanks for such a thorough step-by-step walkthrough! This is such a HUGE help.