Copilot Studio: ServiceNow Connect Knowledge Base + Incidents

Connecting a Copilot Studio and ServiceNow Knowledge Base allows an Agent to answer I/T support questions using a trusted-source. We can do this by setting up an application registry in ServiceNow and supplying the client id and secret to Copilot Studio. The same connection can also be used to perform read/write actions on structured data sources such as the Incidents table where I/T support ticket details are stored.
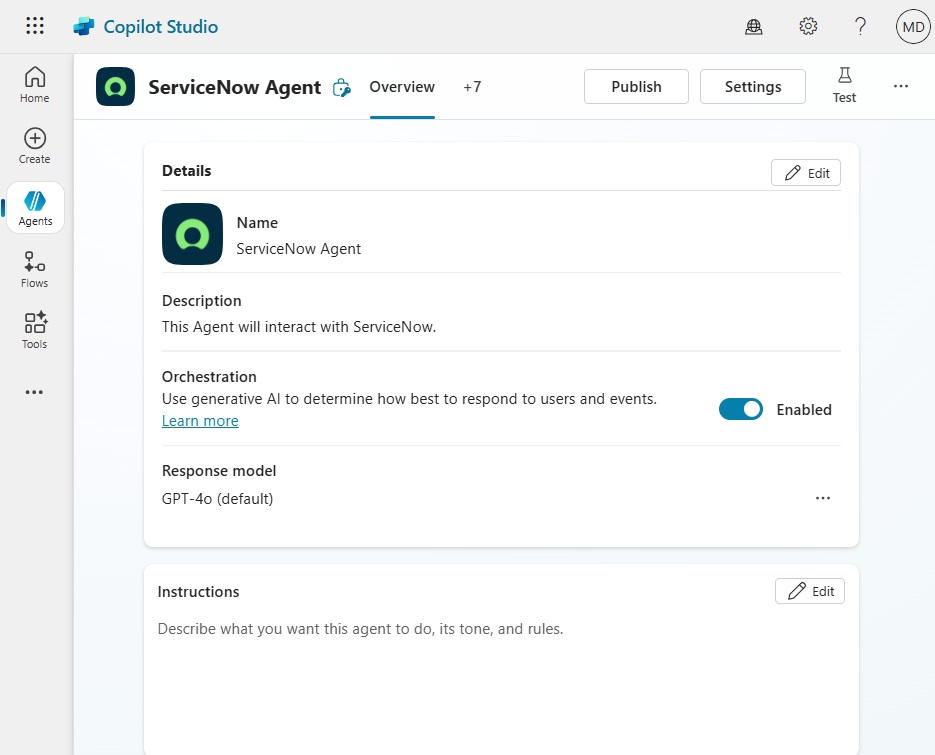
Introduction: Copilot Studio ServiceNow Agent
A Copilot Studio agent is connected to a ServiceNow instance using OAuth2.
The Copilot Studio Agent uses a ServiceNow knowledge base as knowledge to answer User’s technical questions.
The Agent can also access the Incidents table to give the User information about their support tickets
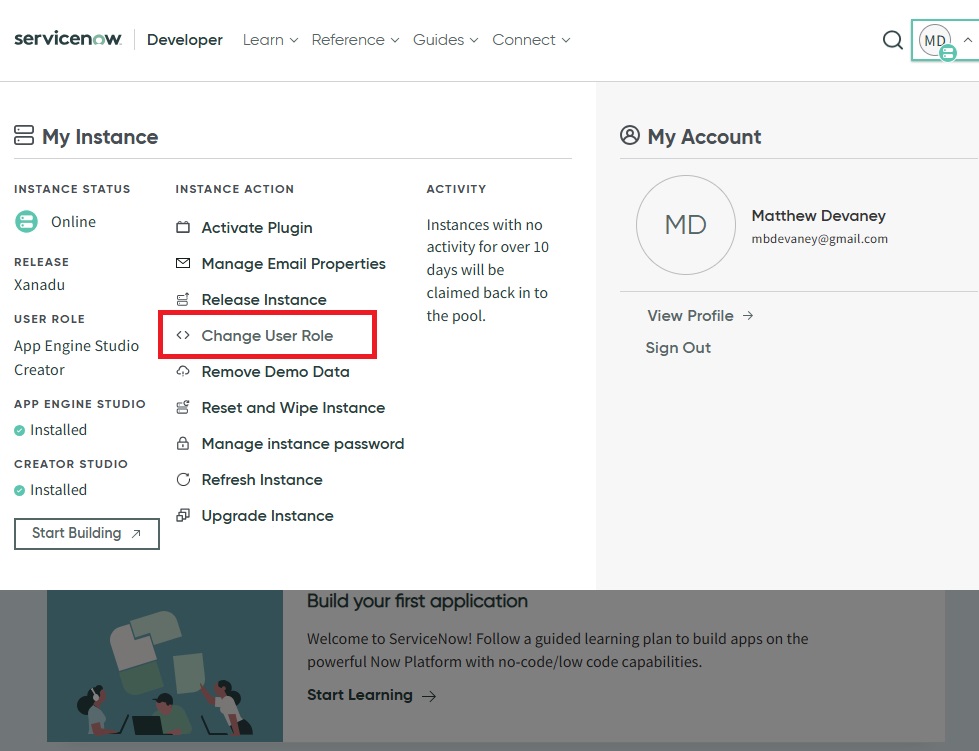
Login To ServiceNow As An Administrator
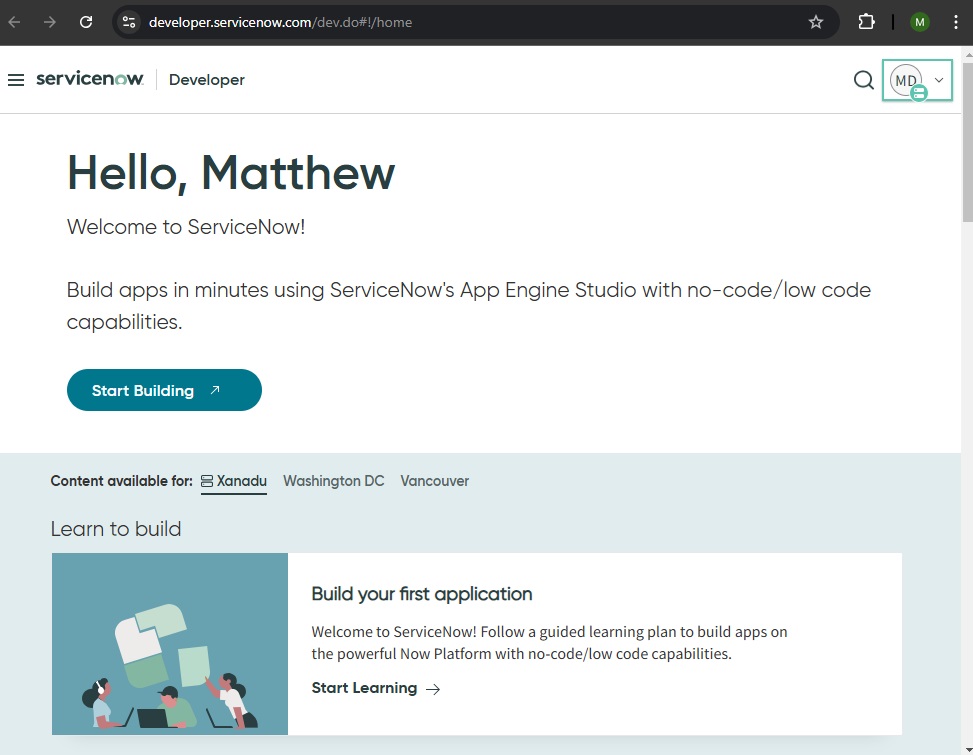
To setup the OAuth2 connection in ServiceNow our user must be an Admin. To check if we have the admin role, navigate to developer.servicenow.com and click on the avatar icon in the top right corner.
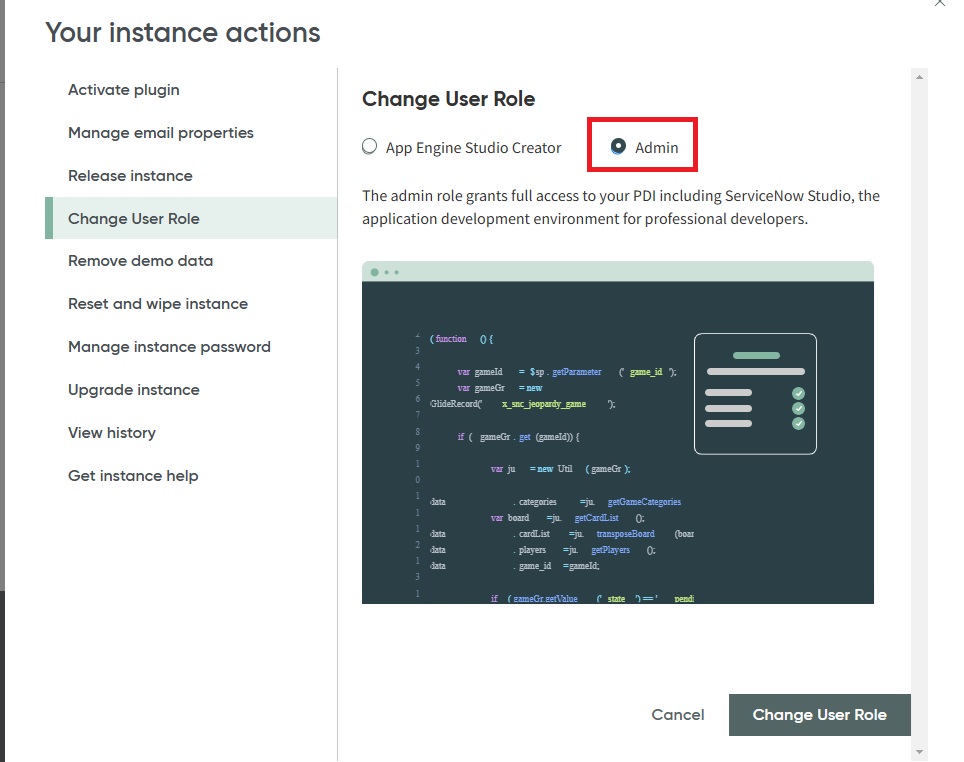
Select Change User Role.
Set the user role to Admin and select Change User Role if the User account is not already an admin.
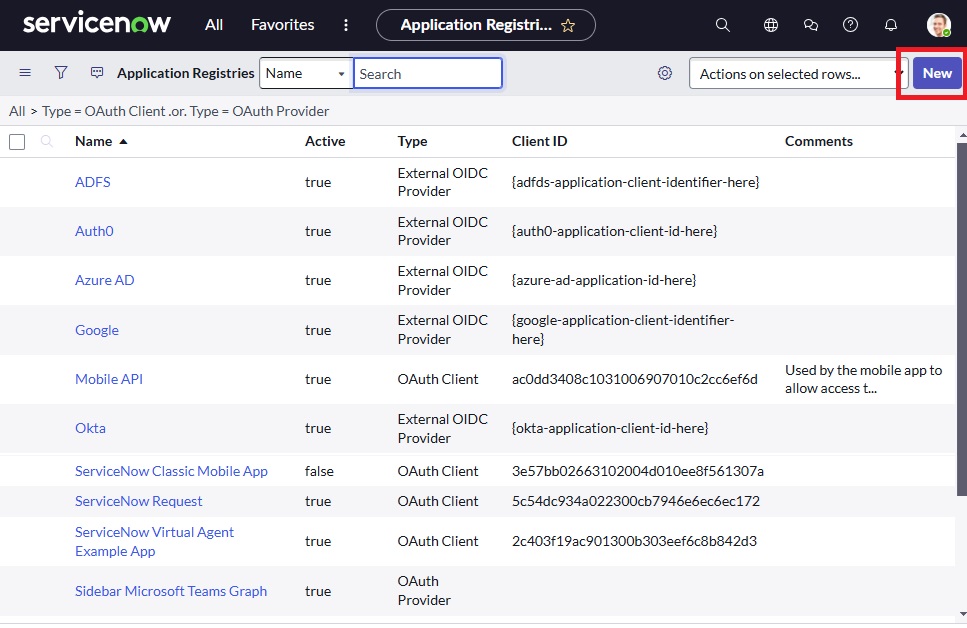
Create A New Application Registry In ServiceNow
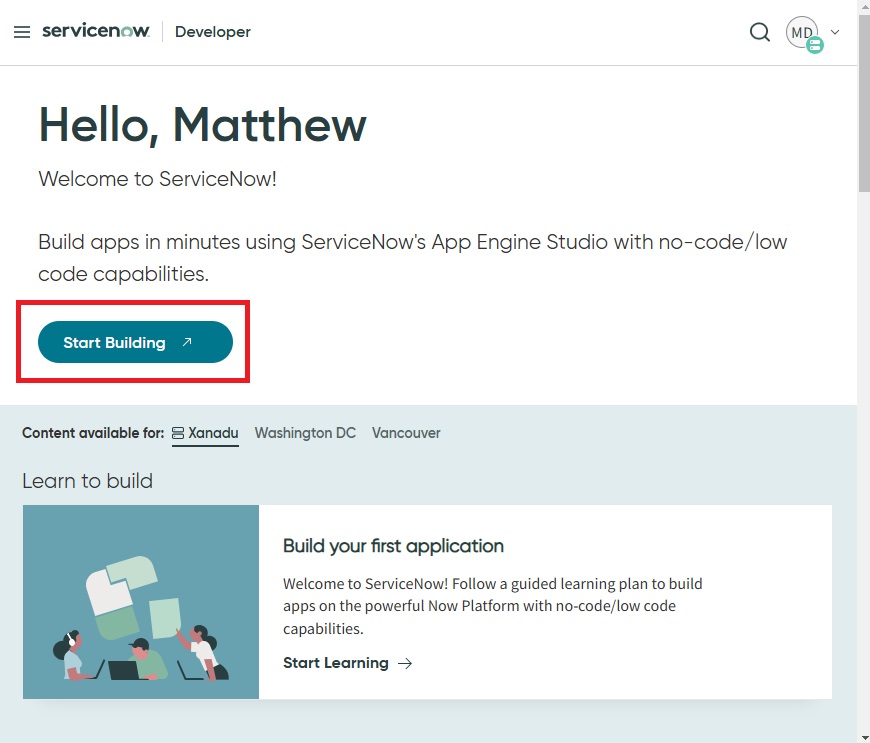
Now that our account has the Admin role we can create an Application Registry (OAuth2) to use in Copilot Studio. Press the Start Building button to go to the ServiceNow Creator Studio.
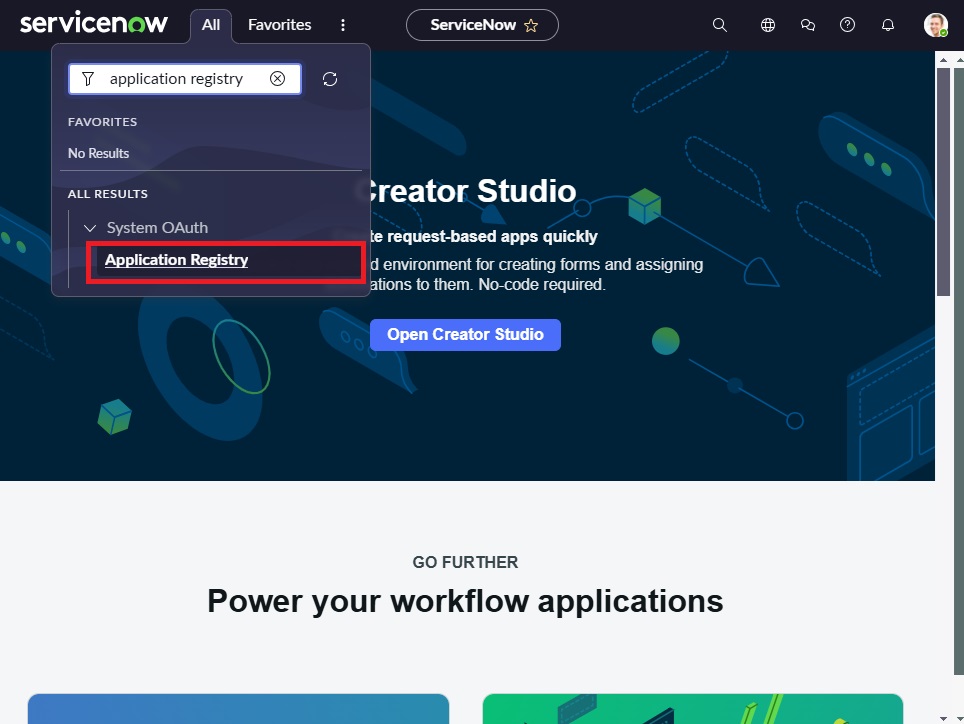
Select Application Registry within the All tab on the top navigation.
Create a new OAuth2 application registry.
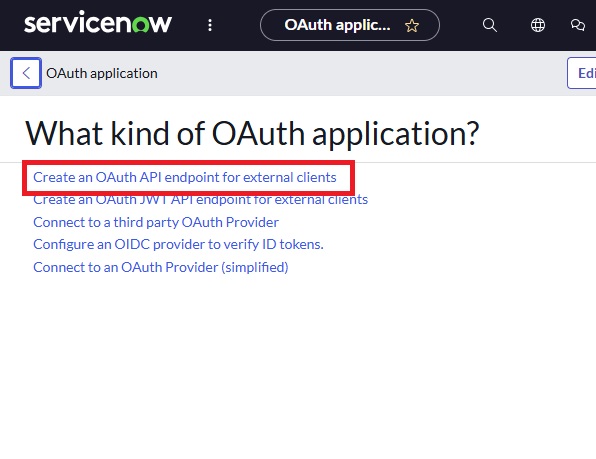
Select Create an OAuth API endpoint for external clients. On the next screen name the application CopilotStudioSPN and press the Save button.
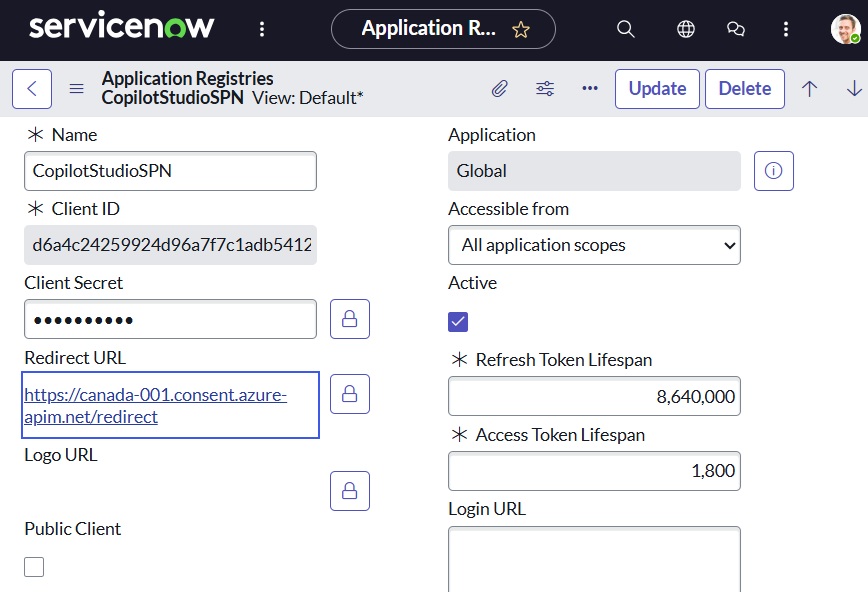
Get The Client ID, Secret, And Redirect URL
On the CopilotStudioSPN details page we must gather the following information needed to create the connection in Copilot Studio.
- Client ID
- Client Secret
- Redirect URL (we must supply this)
- Instance Name
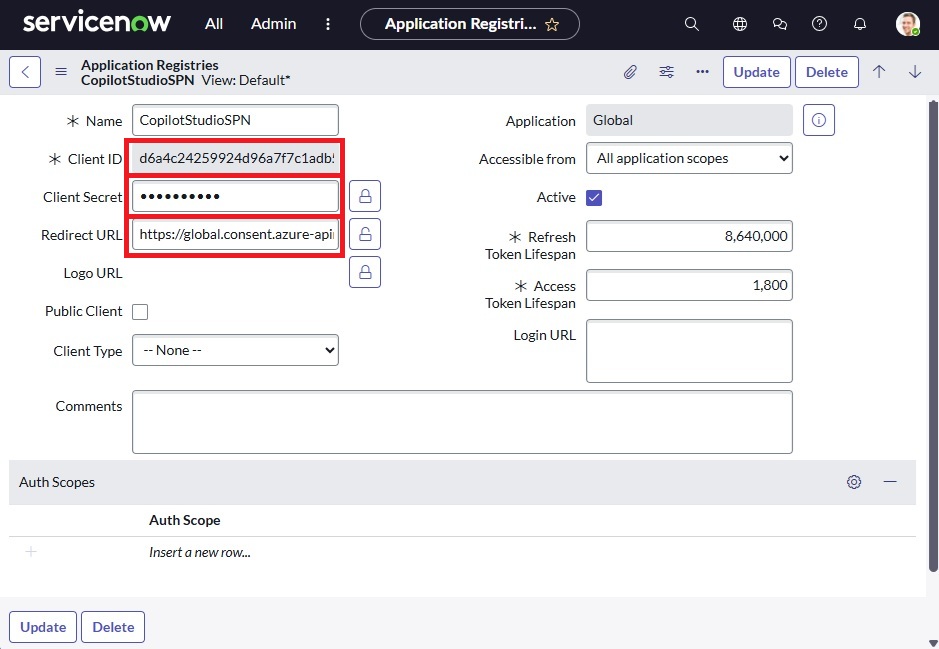
Use this address for the Redirect URL. It is the redirect URL for the United States. If you are in another region you may need a different redirect URL.
https://global.consent.azure-apim.net/redirectCode language: JavaScript (javascript)
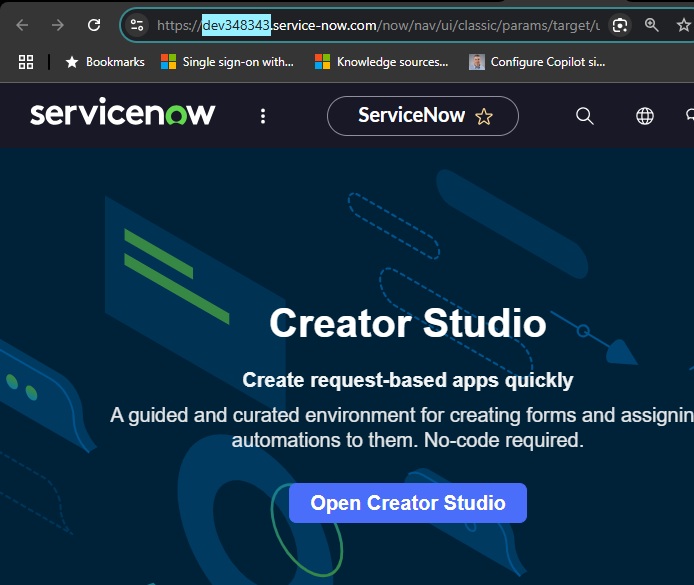
The ServiceNow instance name is not found in the CopilotStudioSPN details page. Instead, obtain the instance name by copying the subdomain from the web browser as shown below.
Example: https://dev348343.service-now.com
Create A ServiceNow Agent In Copilot Studio
The Application Registry setup is now completed in ServiceNow. We can move onto creating the Copilot Studio Agent and connecting it to the Service Now knowledge base. Open Copilot Studio and create an Agent named ServiceNow Agent.
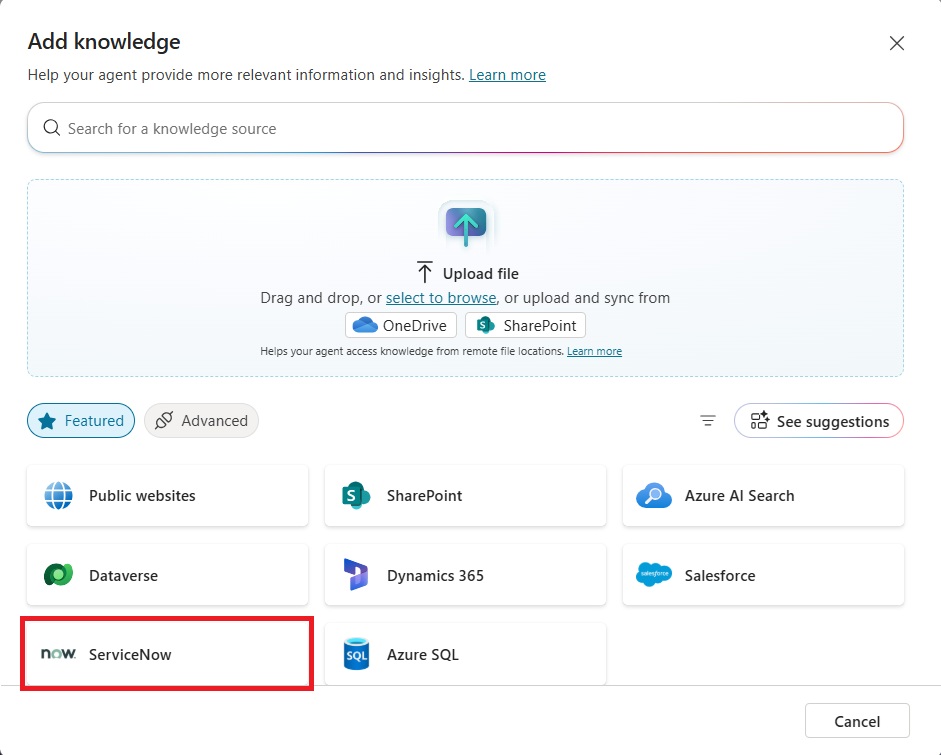
Add ServiceNow Knowledge Base As Knowledge In Copilot Studio
Go to the Knowledge tab and select ServiceNow as the knowledge source.
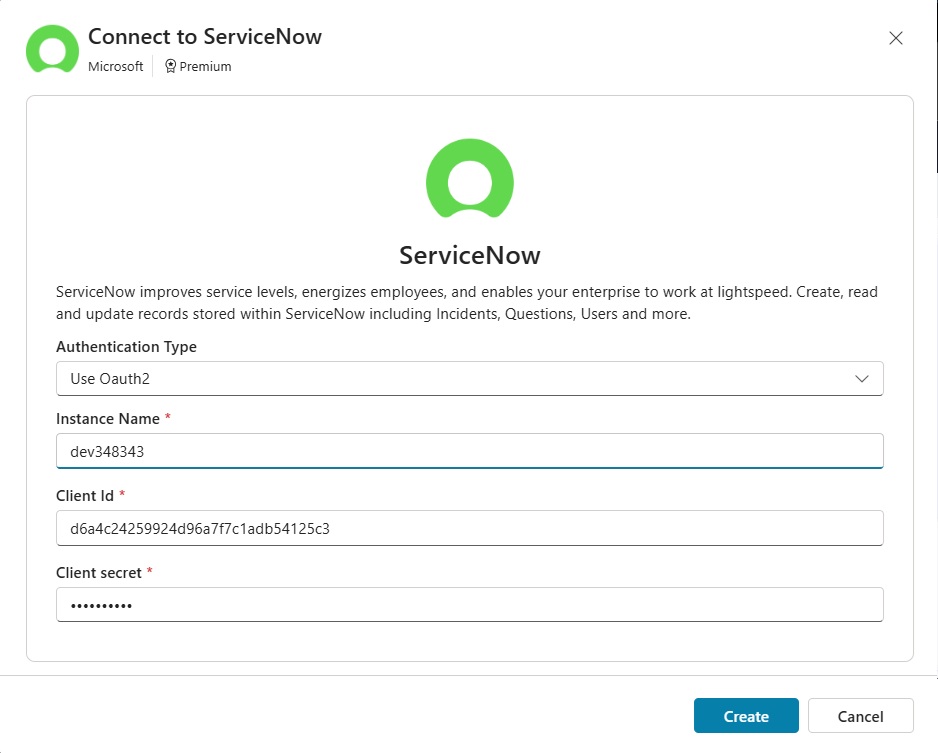
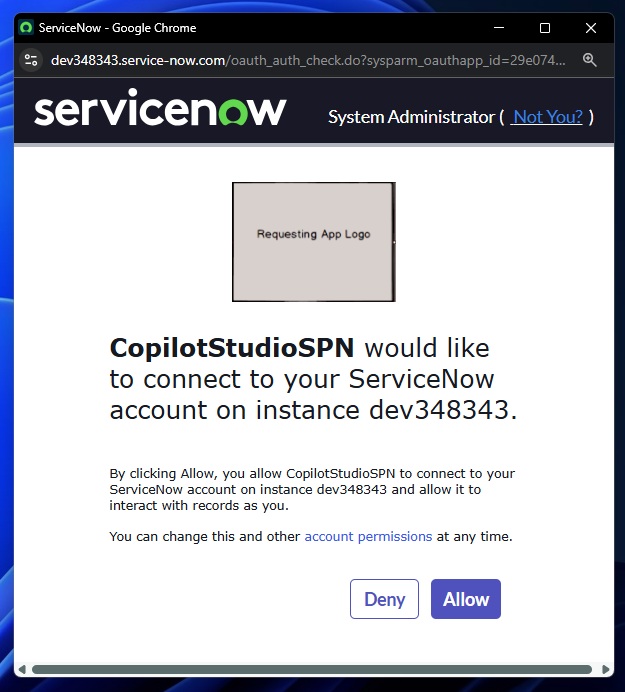
Choose the authentication type Use OAuth2 and input the ServiceNow connection details
- Instance name: dev348343
- Client Id: <client id from ServiceNow>
- Client Secret: <client secret from ServiceNow>
When the ServiceNow consent dialog appears select Allow.
If you see the message Invalid redirect_uri then it means an Redirect URL was entered in ServiceNow. Yu will need to replace the subdomain global with the subdomain found in the dialog’s address bar.
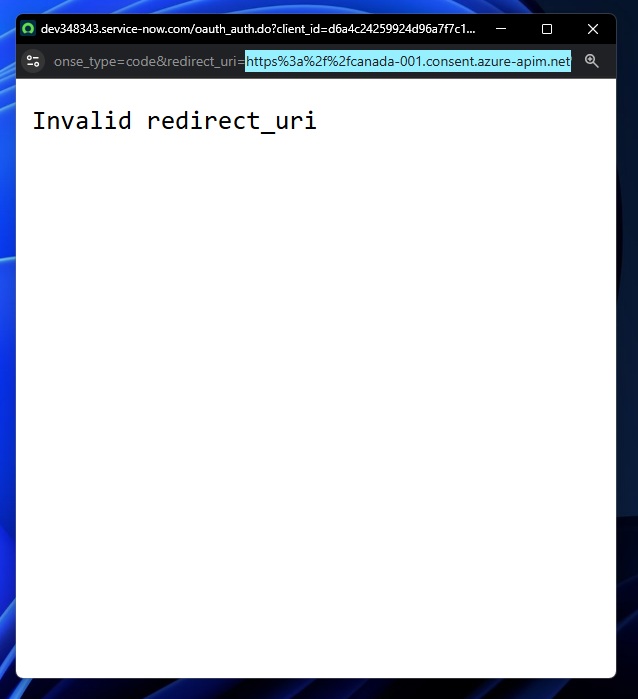
For example, as a Canadian I changed “https://global.consent.azure-apim.net/redirect” to “https://canada-001.consent.azure-apim.net/redirect” and the redirect was successful.
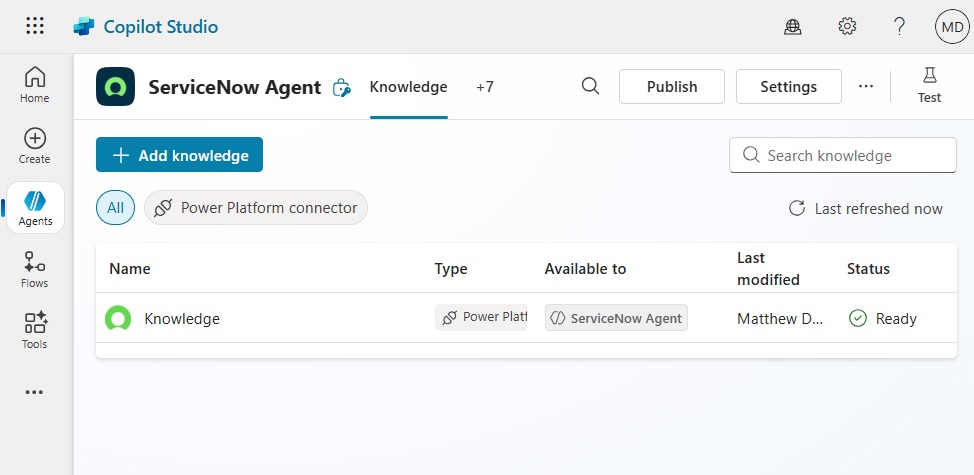
After successfully granting consent a list of ServiceNow tables will appear. Select the table named Knowledge and press the Add To Agent button. The knowledge base table contains knowledge base articles.
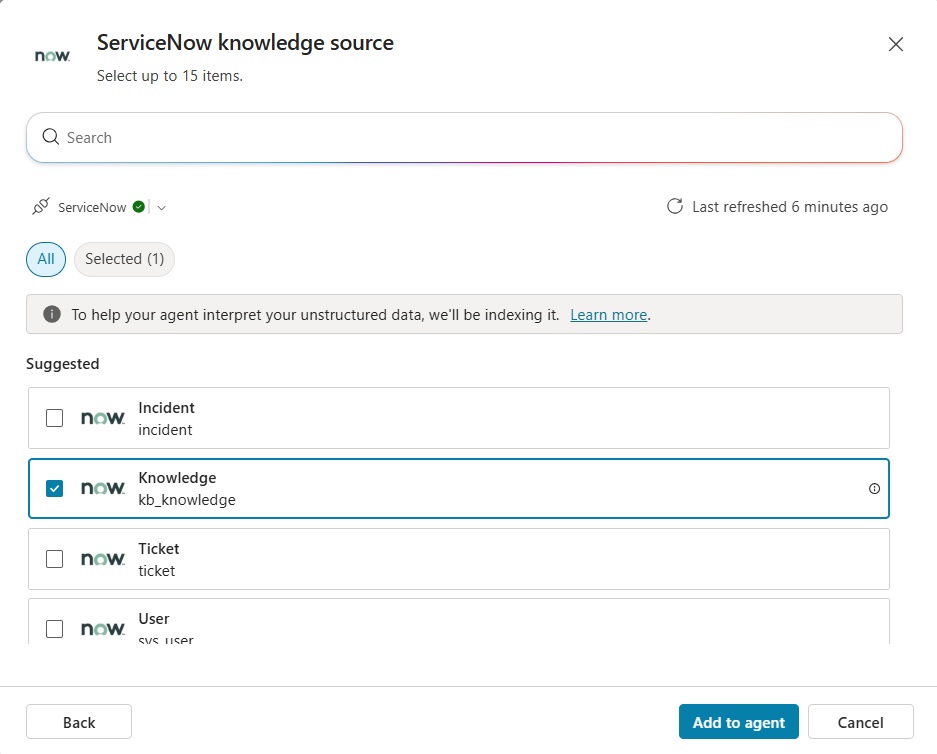
Then wait until the Knowledge table has the Ready status. This could take awhile for large knowledge based because Copilot Studio is indexing the files.
Search ServiceNow Knowledge Base Articles With Copilot Studio Agent
The Copilot Studio Agent can now read ServiceNow knowledge base articles. To check what’s in the current knowledge base, go to ServiceNow and open the Knowledge page.
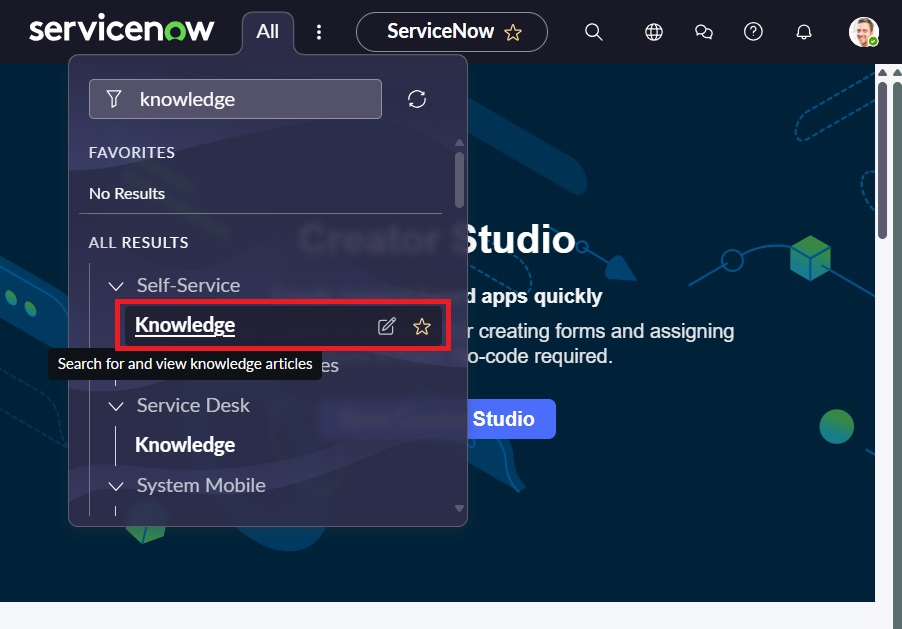
The knowledge base page will show all of the articles contained in the ServiceNow instance.
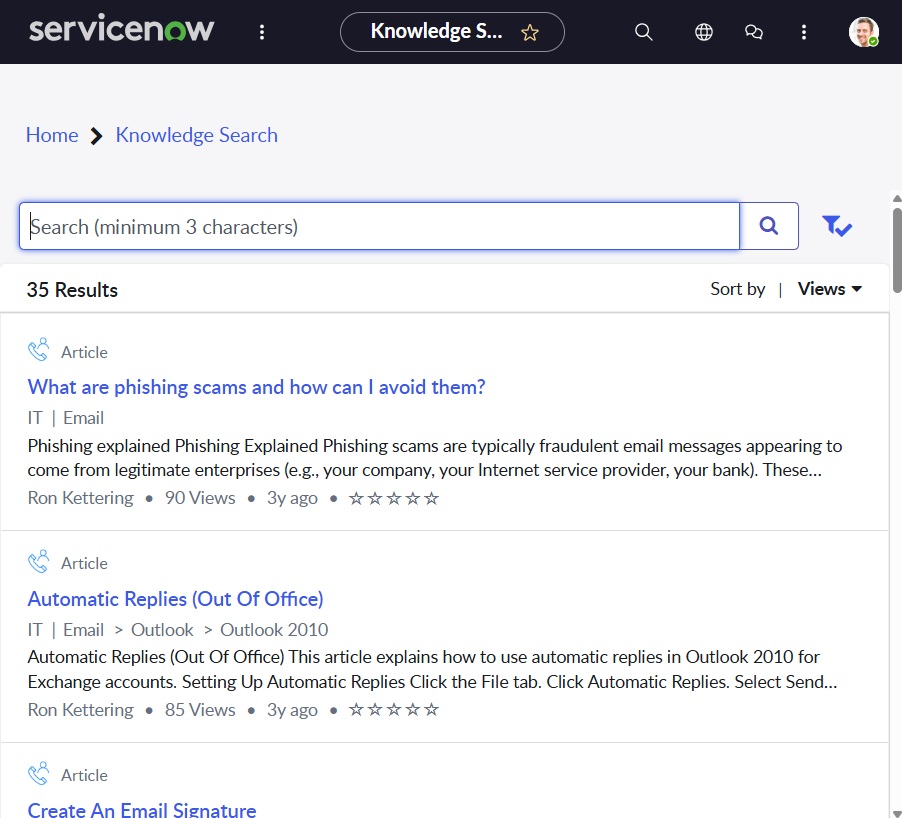
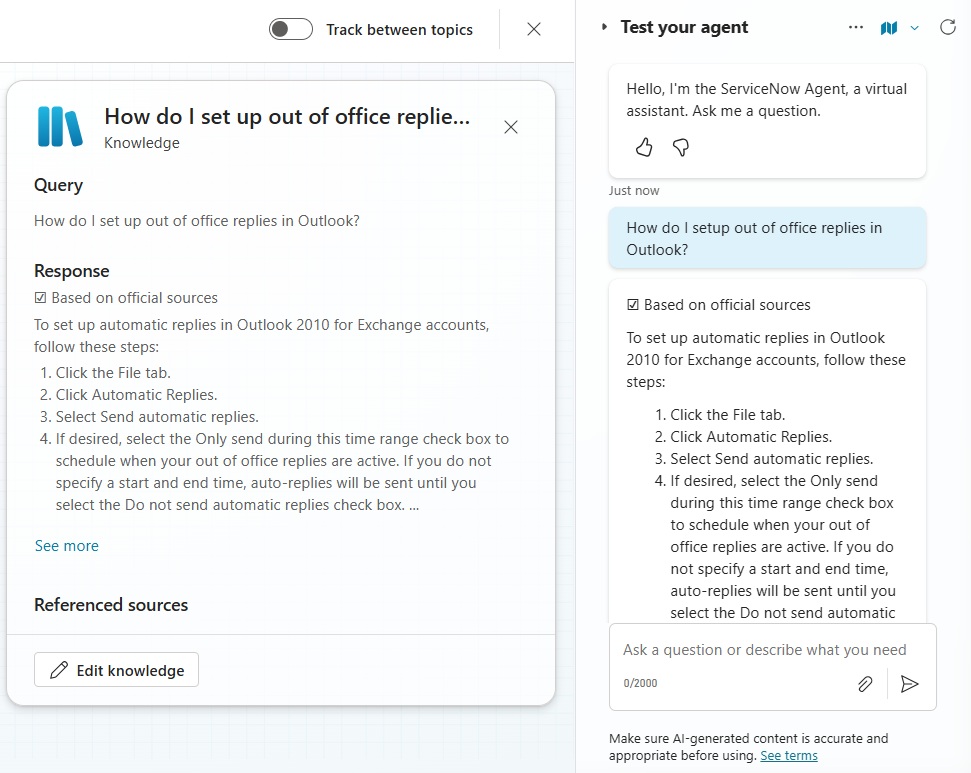
Try using the Copilot Studio Agent to look for one of the articles. In the example below, we ask the Agent “How do I setup out of office replies in Outlook?” The Agent returns a response based on the official source in ServiceNow and provides citations to the specific agent.
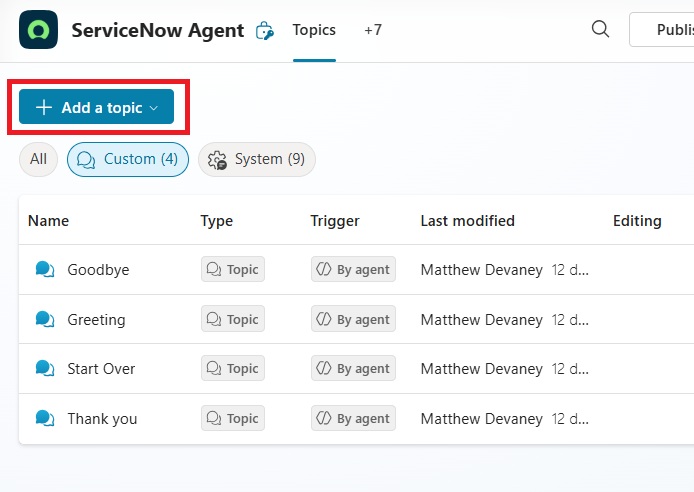
Add A Topic To Get The User’s Recent Service Now Tickets
Another thing a User might want to do with a ServiceNow agent is get a list of their most recent tickets. Go to the Topics tab in Copilot Studio and add a new topic named Get My Recent ServiceNow Tickets.
Use the Agent chooses trigger and use the following description:
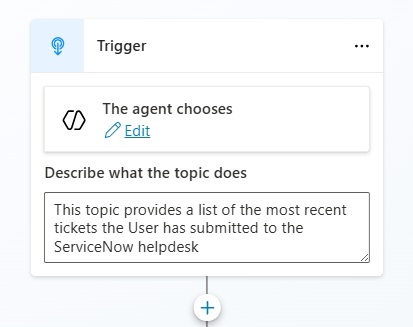
| This topic provides a list of the most recent tickets the User has submitted to the ServiceNow helpdesk. |
Retrieve A List Of Most Recent Tickets For The User
We want to get the most recent tickets for the User logged into Copilot Studio. To do this, we will need to find the User record in ServiceNow. Add a ServiceNow List Records node by selecting Add A Tool > Connector > List Records (ServiceNow).
Choose the same connection that we setup earlier to add the knowledge base information. And select maker-provide credentials so the User will not need to provide any username/password.
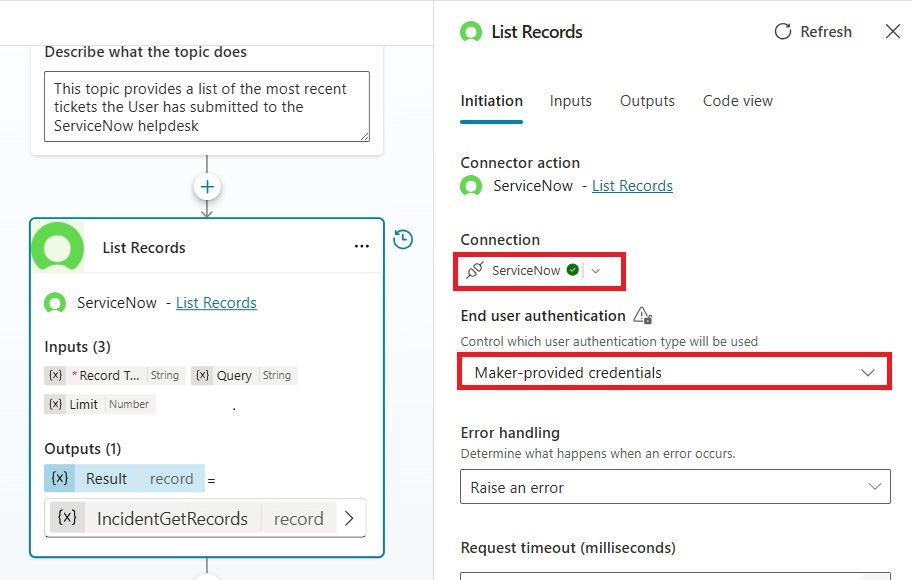
Go to the Input tab and select the Record Type Incident.
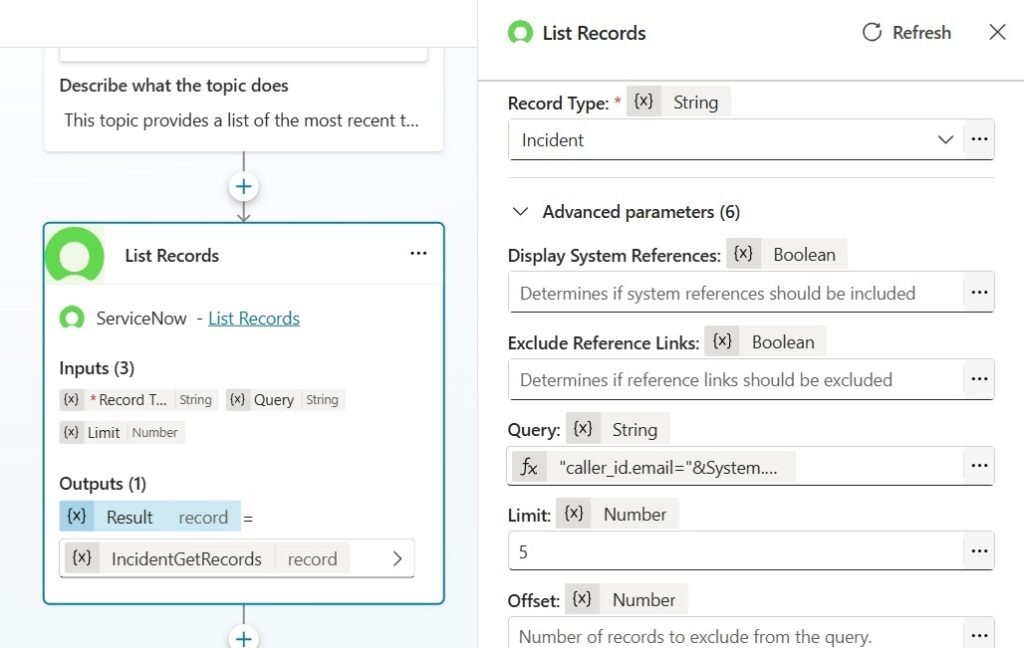
Use this query to only return tickets for the current User. The caller_id field is a lookup to a related table named User in ServiceNow. The User table has an email field which we can use to filter based on the Agent user’s email. Then we add an order by clause to sort the tickets by newest to oldest. Also, set the limit field to 5.
"caller_id.email="&System.User.Email&"^ORDERBYDESCopened_at"Code language: JavaScript (javascript)
Display The List Of Most Recent Tickets In A Message
The Agent will show the User a list of their 5 most recent tickets from newest to oldest in a chat message. Add a new message node to the Agent with the text “Here’s a list of your most recent tickets:”
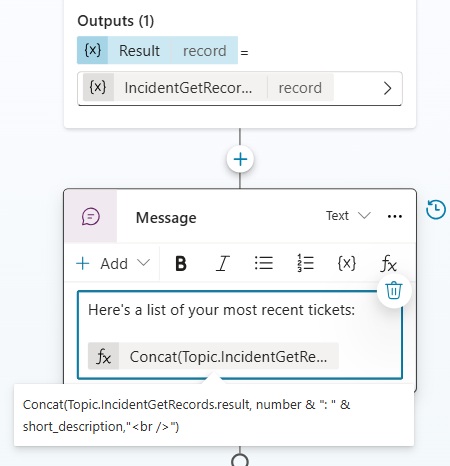
Then use this formula to display the tickets in a bulleted list:
Concat(Topic.IncidentGetRecords.result, number & ": " & short_description,"<br />")Code language: JavaScript (javascript)
Confirm The User Has Support Tickets In ServiceNow
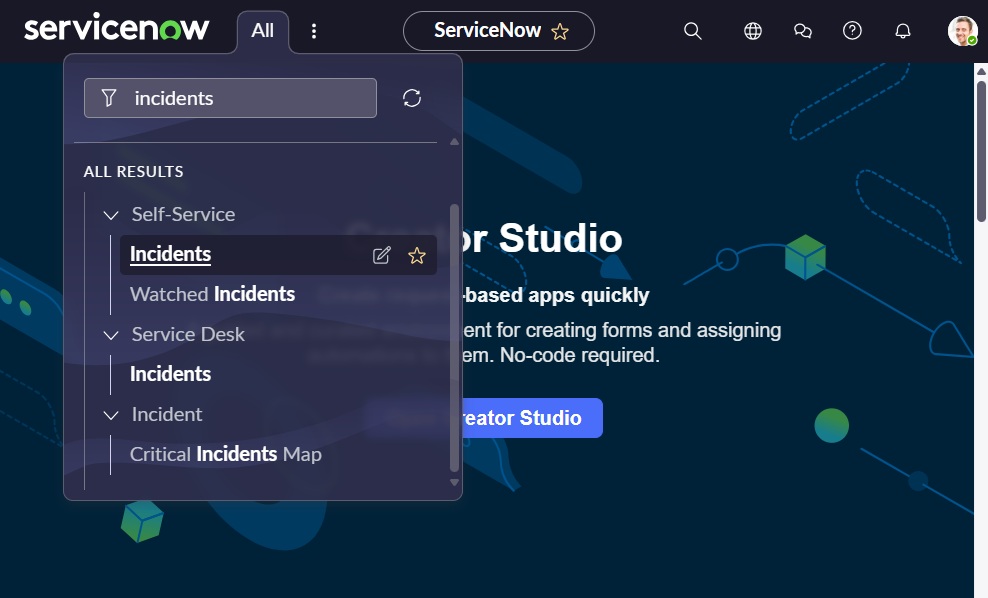
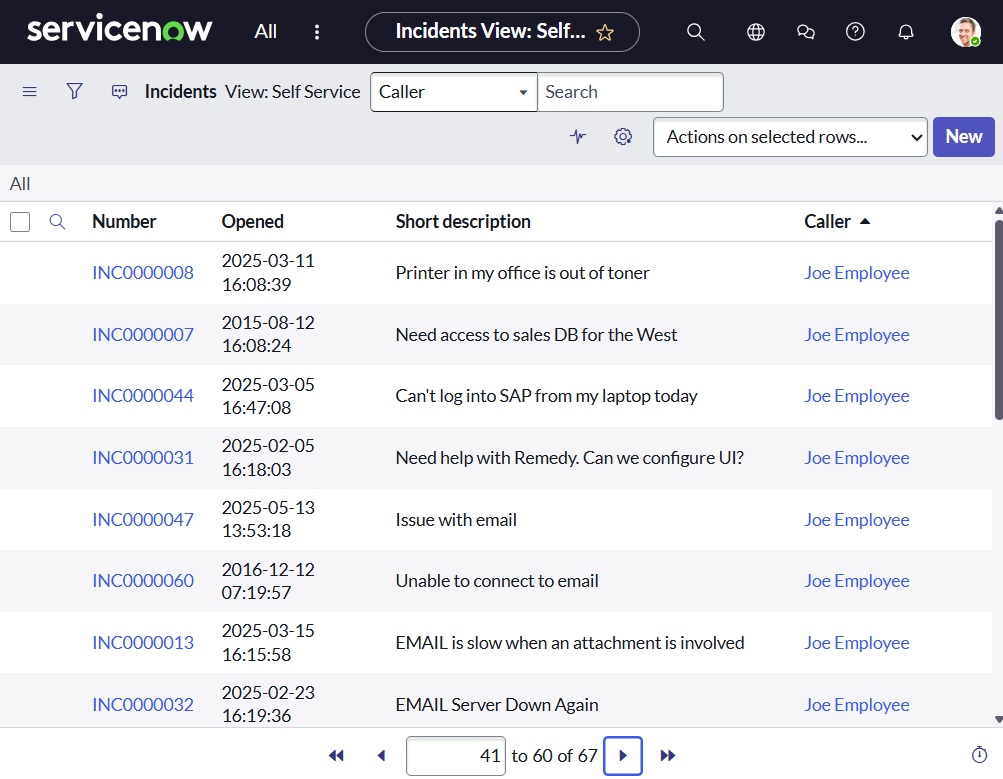
Before we test the Agent, we must confirm the logged in User has support tickets in ServiceNow. To do this, go to the Incidents table.
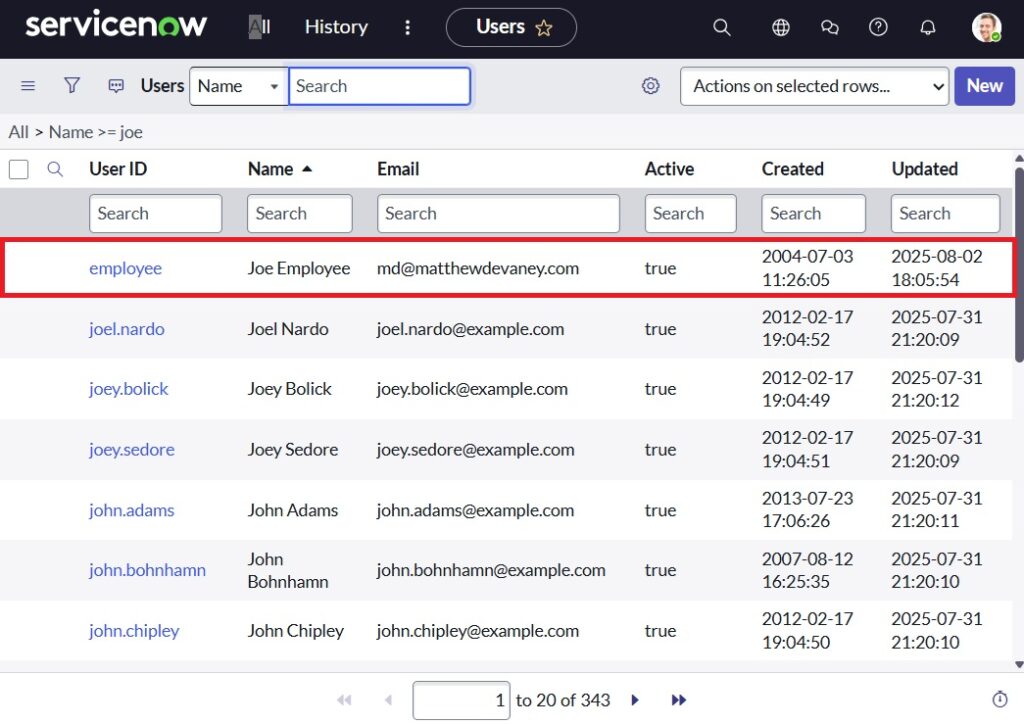
In my example, I did not have any support tickets so I decided to test by changing a few Incidents to have the caller Joe Employee (a fake user).
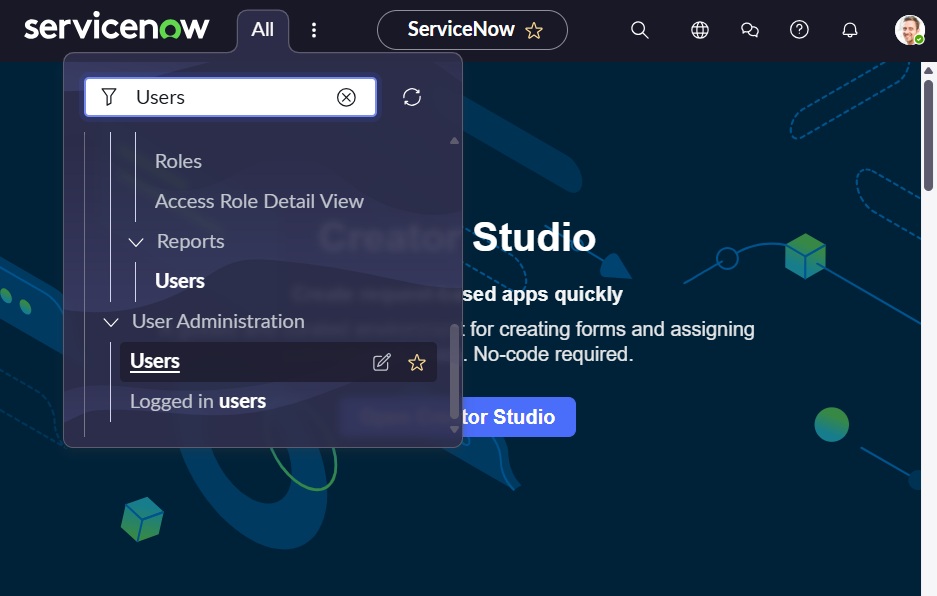
Joe Employee must have the same email as the User you are testing with. To view Joe’s email, navigate to the Users table.
Then select the record for Joe employee and change the email to be the same as the User’s Microsoft 365 account.
Test The Agent’s Ability To Show Recent Support Tickets
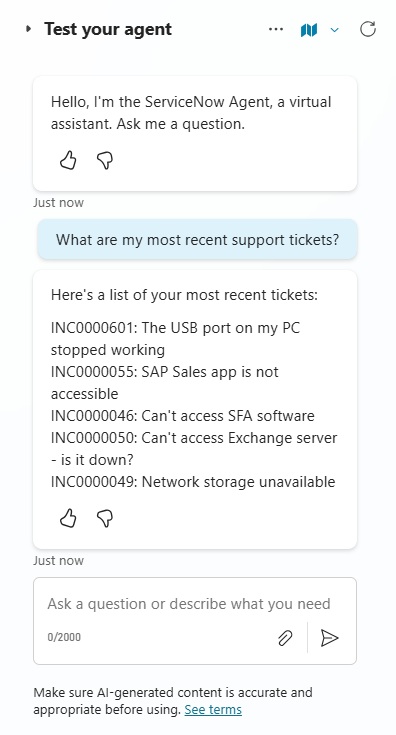
Now that the test User account has a matching email in ServiceNow, save the topic and ask the Agent the question “What are my most recent support tickets?” The Agent responds with a bulleted list of the most recent tickets from newest to oldest.
Video: Copilot Studio: ServiceNow Connect Knowledge Base + Helpdesk Tickets
Watch this video for a full explanation of how to connect Copilot Studio and ServiceNow and allow Agents to use knowledge base and support tickets data.
Did You Enjoy This Article? 😺
Subscribe to get new Copilot Studio articles sent to your inbox each week for FREE
Questions?
If you have any questions or feedback about Copilot Studio: ServiceNow Connect Knowledge Base + Incidents please leave a message in the comments section below. You can post using your email address and are not required to create an account to join the discussion.


Thanks for sharing! Everything you post is amazing!
Mathew i tried this example, but it is not retrieving the tickets that are related to the usr, it justs retrieve the last tickets created
Hi Mathew,
Thanks for sharing, quick question: does the knowledge connector considers the User Criteria in ServiceNow, meaning does it only considers the articles that are not restricted by user criteria for the user?
Hi Matthew,
thanks for the article – helped a lot!
How is it possible to extract the sys_id of an Incident? I want to use the “Update Record” action, but therefore I need the System ID as Input.
BR Fab
Thanks for posting. Not sure if you have tried a configuration yet with a non-copilot user setup. I noticed this works because it’s between a user that is logged into the Copilot Studio vs a user that’s just asking questions in Copilot (via SSO login). We tried this out yesterday without success. It appears with an error 401 (user not authenticated) which I suspect means they need an API role.. it should not be necessary to add all users in an ORG with API roles. Please let me know if I am mistaken about this.
have you found a solution for this? We have the same “user not authenticated”, i’ve added all api role in service now to the user but still same error ??
Hi Mathew, i am using end user credential so it is asking always to create new connection is there any way to bypass. if i use maker credential will the other user using the agent can see my records?